You've got fungus gnats swarming your houseplants, or maybe you're reusing potting soil and wondering if you're about to transplant pests along with it. Baking soil to kill bugs is one of those DIY fixes that sounds simple enough, but there's a lot more to it than just turning on the oven. The truth is a little trickier than most online quick tips suggest.
University extension research confirms that most soil pests die at 180°F (82°C) when the soil reaches that temperature for at least 30 minutes. But here's the catch, the safe window between "bugs die" and "your soil is ruined" is surprisingly narrow. As of 2026, home gardeners still run into the same mistakes that waste time, create a mess, and sometimes even damage their ovens.
Let's walk through what actually works and what doesn't.
Quick Answer
Baking soil kills bugs by exposing them to lethal heat. The target is 180°F for 30 minutes. Never exceed 200°F.
Moisten the soil first. Spread it thin, about two inches deep. Cool it completely before use.
Skip the oven if the soil contains synthetic fertilizer.
Why Baking Soil to Kill Bugs Needs Careful Handling (Not Just a Quick Fix)
This isn't one of those set-it-and-forget-it projects. The difference between success and disaster comes down to a few degrees and the right prep work. People assume you just scoop dirt into a pan and bake it like a casserole.
That's how you end up with a house that smells like a swamp fire and soil that's literally toxic to plants.
The core issue is that soil is full of organic matter. Peat, compost, bark fines, coco coir, these materials burn and smoke when they get too hot. And "too hot" isn't that hot.
Dry peat can ignite at temperatures only slightly above what you need to kill pests. So you have to manage moisture carefully.
There's also the question of what survives the process. High heat doesn't just kill fungus gnat larvae and root aphids. It also kills all the beneficial microbes and fungi your plants need to thrive.
You're essentially creating a blank slate, which is great for starting seeds but not ideal for long-term plant health.
That doesn't mean baking is a bad method. It just means you need to use it intentionally for the right situation. Let's break down when it makes sense and when it's better to pick a different approach.
What Baking Soil Actually Does — and Doesn't Do
Heat treatment is a physical sterilization method. It works by denaturing proteins in pest cells, which kills them outright. For soil pests, heat is extremely effective when applied correctly.
The main targets include:
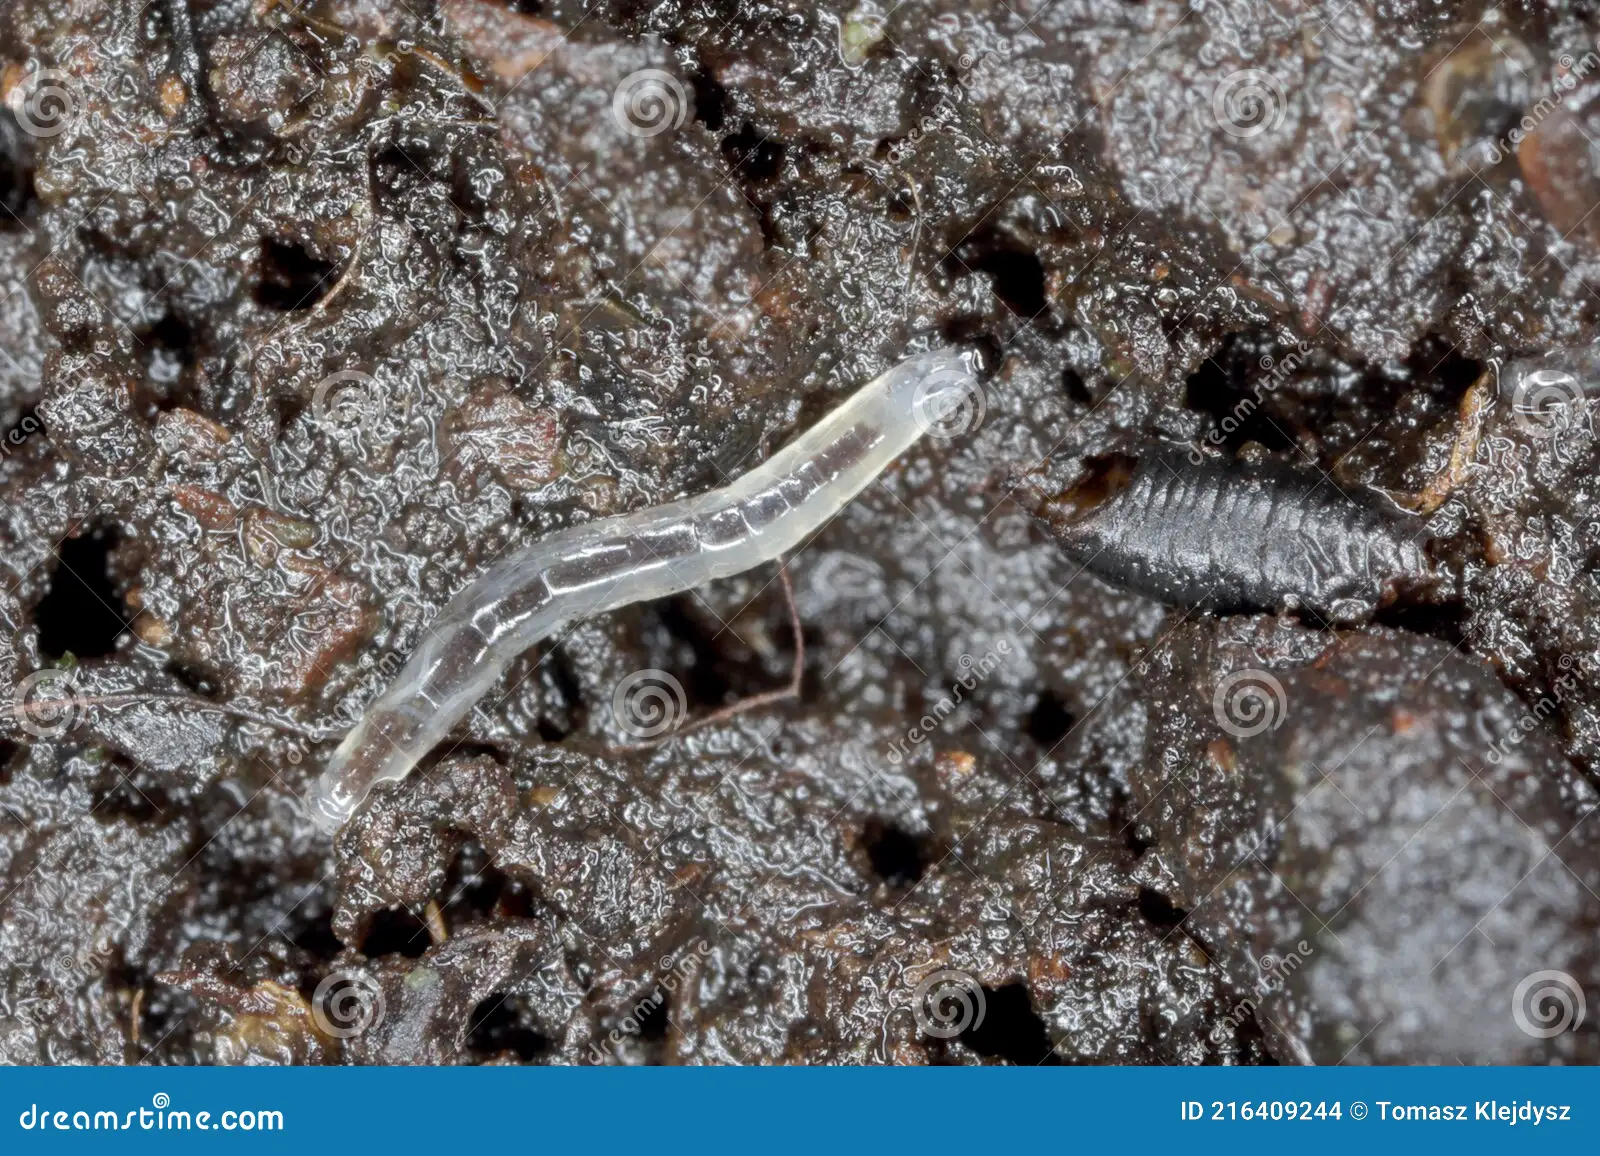
- Fungus gnat larvae and eggs
- Soil mite populations
- Root aphids
- Thrips pupae
- Mealybug eggs hiding in the root zone
- Weed seeds that might have hitched a ride in reused soil
The heat doesn't discriminate. It kills everything biological in the soil, the bad stuff and the good stuff. After baking, your soil is essentially sterile.
There are no bacteria, no fungi, no microbial life at all.
That's fine for certain uses. Starting seeds in a sterile medium actually helps prevent damping off disease. But if you're planning to replant a mature houseplant or move seedlings into larger pots, sterile soil is a poor choice.
Those plants need the microbial community to access nutrients and fight off pathogens.
Baking also changes soil structure. Peat-based mixes can become dusty and lose their water-holding capacity. Compost can turn into fine ash.
You might notice the soil feels different after baking, denser, less fluffy. This matters because compact soil drains poorly and can suffocate roots.
What baking does NOT fix
Baking will not remove chemical contaminants. If your soil has heavy metals, pesticide residues, or salt buildup from over-fertilizing, heat won't help. You can't bake out toxicity.
You also can't bake soil that's been sitting in a soggy pile for months and has developed anaerobic bacteria. The smell will only get worse.
Baking also won't solve an infestation if you just reinfest the soil afterward. The moment you put baked soil back into a contaminated pot or near infected plants, you're back where you started.
The Real Risks: Fire, Fumes, and Destroying Soil Health
This is the section that most quick tutorials gloss over, and it's the reason baking soil qualifies as a high-stakes project. There are three major risks you need to understand before you preheat your oven.
Fire risk
Dry organic matter can catch fire. Peat moss, coco coir, and fine bark are all combustible. When you spread dry soil in a pan and crank the oven to 200°F or higher, you're essentially creating the conditions for smoldering combustion.
The soil won't burst into flames immediately, but it can start to smoke and char, and that char can ignite if oxygen gets to it.
The fix is simple: moisten the soil before baking. Wet soil can't burn. It conducts heat more evenly, and it maintains a ceiling temperature around 212°F because the water has to boil off before the soil can get any hotter.
That's your safety buffer.
Toxic fumes
If your soil contains synthetic slow-release fertilizers, baking them releases ammonia and other volatile compounds. Those fumes can irritate your lungs, trigger allergic reactions, and leave a chemical smell in your oven that transfers to your food. Even some organic amendments like blood meal or bone meal can produce unpleasant odors when heated.
Check the bag. If it says "feeds for months" or lists synthetic nutrients like ammonium nitrate or urea, do not bake it. Compost-based mixes without added fertilizer are usually safe, but read the label carefully.
Destroying soil health
As mentioned earlier, heat kills everything. That includes the beneficial bacteria that help plants absorb nutrients, the fungi that build soil structure, and the microarthropods that break down organic matter. After baking, you're left with a dead medium that needs to be reinoculated before it can support healthy plant growth.
Some sources call this "pasteurization" and claim it preserves more beneficial organisms than full sterilization. But at home, there's no practical way to hit that narrow sweet spot. You'll get full kill or close to it.
Plan accordingly.
Who Should (and Shouldn't) Bake Soil
Baking soil is a targeted solution for a specific problem. It's not a routine maintenance task. Here's how to know if it's right for your situation.
You should bake soil if
- You're starting seeds and want to prevent damping off. A sterile medium is ideal here because seedlings are vulnerable to fungus.
- You're reusing potting soil from a plant that had a confirmed pest infestation. Baking breaks the life cycle.
- You collected soil from your yard or compost bin and want to use it indoors. Outdoor soil often carries weed seeds and soil-dwelling insects.
You should NOT bake soil if
- Your soil contains synthetic fertilizer. The fumes are a real concern.
- You're repotting a mature houseplant. The microbial community matters more than the small risk of pests.
- You only need a small amount of sterile soil. The microwave method is faster and safer for batches under two quarts. Or you can just buy pre-sterilized seed-starting mix from a garden center.
- You're not willing to dedicate a pan and oven mitts exclusively to this use. Once you bake soil, do you really want to use that pan for lasagna? Most people don't.
One more consideration
If you're using a plastic grow tent for indoor gardening, baking might not be your best option. The soil volume in a grow tent setup is usually larger than what you can bake in a home oven. You're better off with alternatives like solarization or steam treatment.
If you're still planning indoor grows, check out our guide to setting up your own grow space, it covers soil prep and pest prevention in more depth than we can here.
Step-by-Step: How to Bake Soil Safely at Home

This process assumes you're using a standard home oven. The same principles work for a toaster oven for smaller batches, but watch the temperature accuracy carefully.
What you'll need
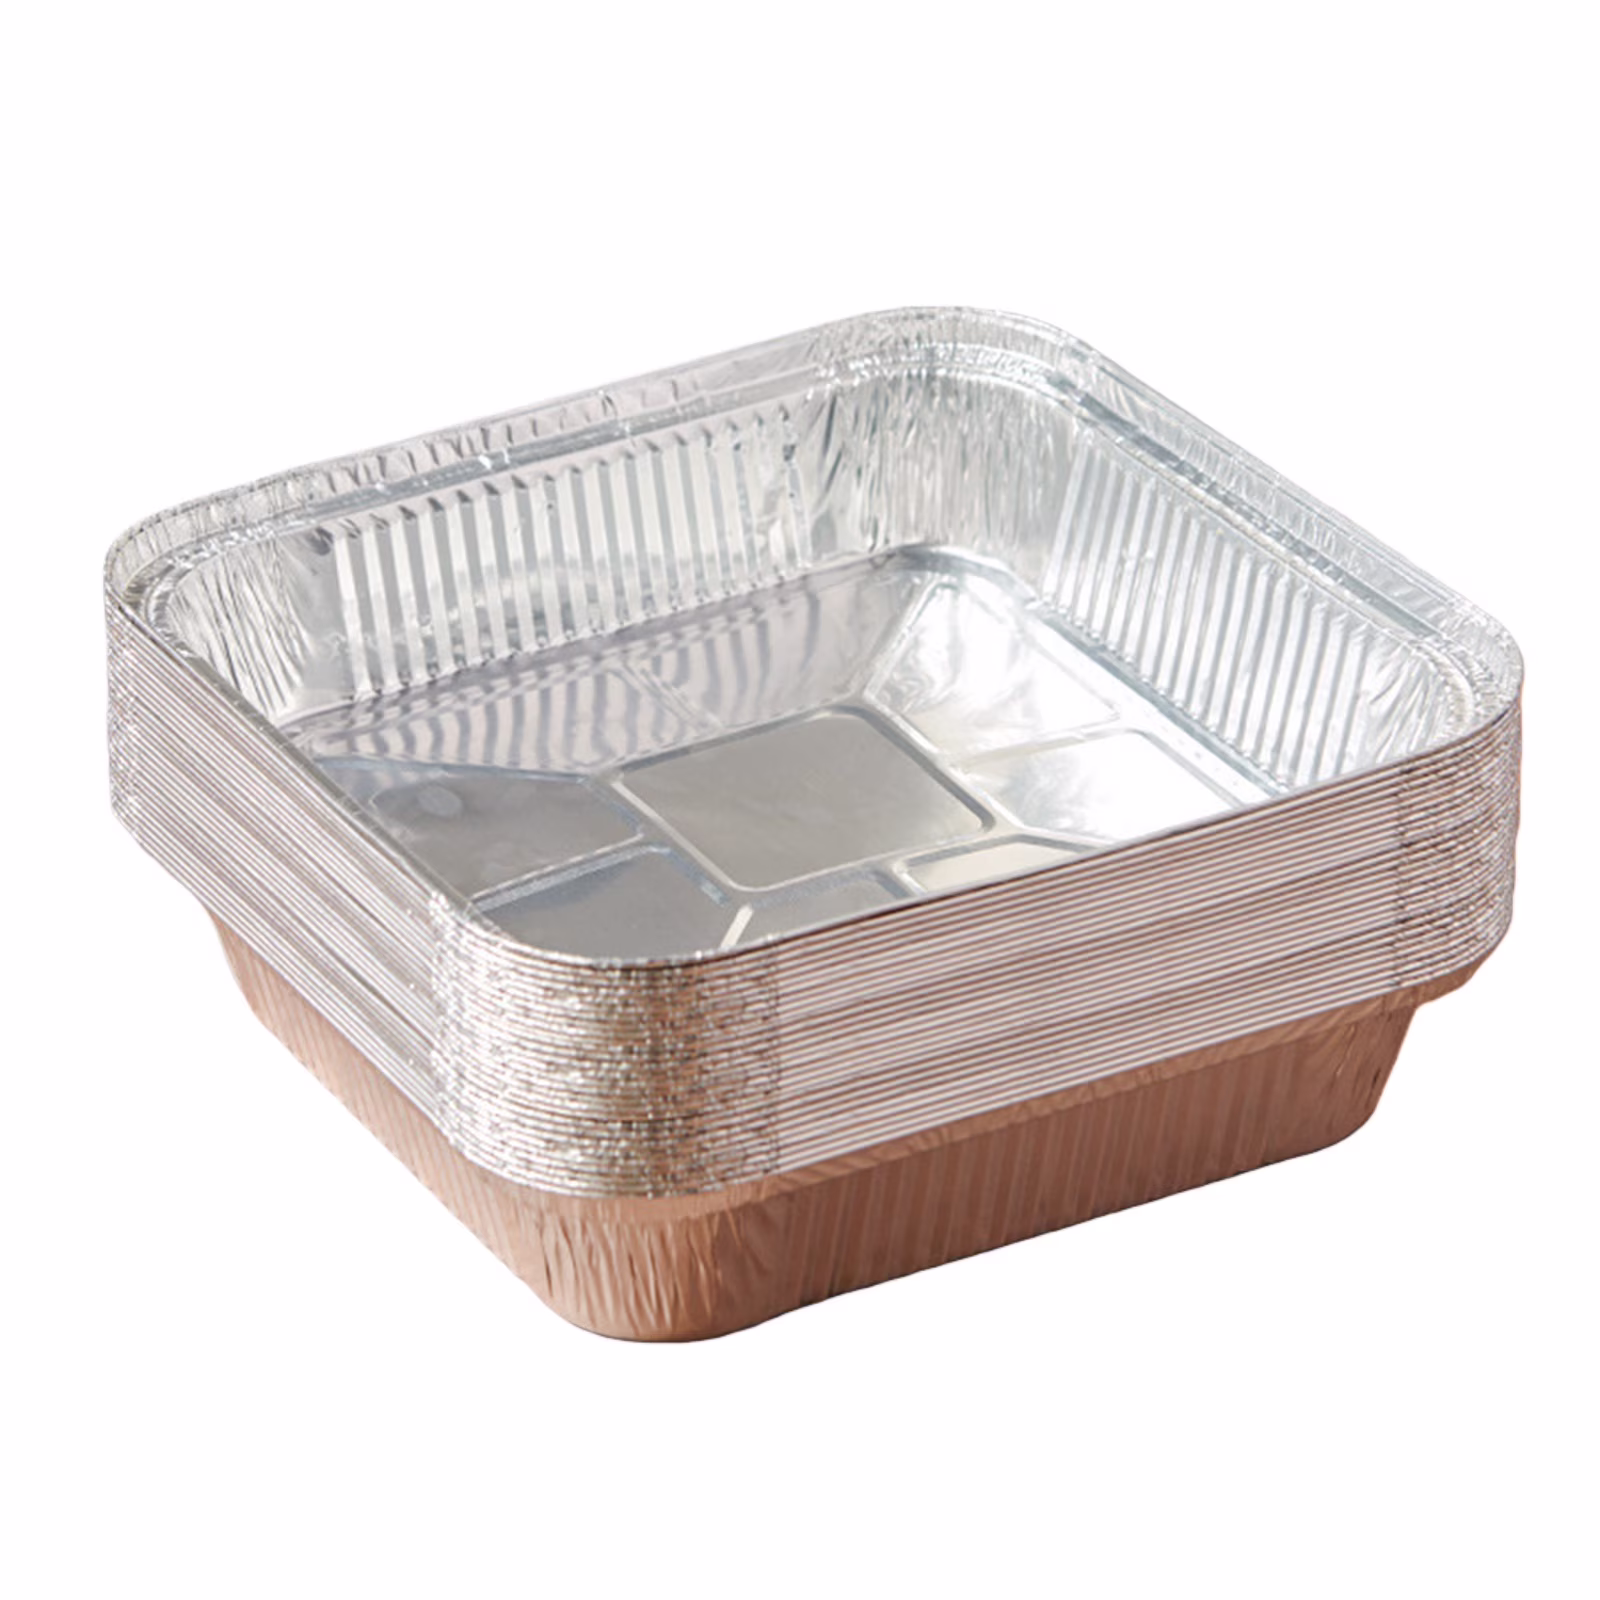
- A metal or ceramic baking pan. Avoid nonstick coatings. Use something you won't use for food again.
- An oven thermometer. Your oven's built-in thermostat is often off by 25 degrees or more. Don't trust it.
- Aluminum foil to cover the pan.
- A spray bottle for moistening the soil.
- Oven mitts. The pan gets very hot.
Prepping the soil
Moisten the soil first. You want it damp but not soggy. Think wrung-out sponge.
If water pools in the pan, you added too much. The moisture conducts heat evenly and prevents burning.
Spread the soil no more than two inches deep. Deeper soil takes too long to heat through, and cold spots can let pests survive. A thin layer ensures every particle reaches the target temperature.
Cover the pan tightly with foil. This traps steam and helps maintain even temperature. It also contains any odors.
Oven setup and temperature control
Preheat the oven to 200°F. Place your oven thermometer on the same rack as the soil pan. This is critical.
Oven thermostats drift, and the rack position affects heat distribution. You need to know the actual temperature at the soil level.
Insert the pan. Set a timer for 30 minutes once the thermometer reads 180°F. If your oven runs cool, you may need to bump the set temperature.
Never go above 200°F at the soil level.
Monitor during the bake. If you see smoke or smell burning, stop immediately. Remove the pan and let it cool.
The soil is too dry or the temperature is too high.
Baking and cooling
After 30 minutes at 180°F, turn off the oven. Leave the pan in place with the oven door closed to cool gradually. This extended heating time helps ensure a complete kill.
When the pan is cool enough to handle, remove it and let the soil cool completely at room temperature. This takes one to two hours depending on volume. Don't rush this step.
Hot soil going into a sealed container creates condensation, which leads to mold.
Once cool, the soil is sterile. Use it immediately or store it in a sealed container to prevent recontamination.
Common Mistakes That Waste Time or Create Danger

Baking dry soil
This is the most common mistake. Dry soil heats unevenly, leaving cold pockets where pests survive. It also smokes and chars before the center reaches a lethal temperature.
Always moisten first.
Trusting the oven dial without verification
Ovens lie. A 200°F setting can produce anything from 170°F to 230°F depending on the oven age, calibration, and rack position. Without an oven thermometer, you're flying blind.
Baking too much at once
A deep pan of soil takes too long to heat through. The top may reach 200°F while the bottom stays at 120°F. Stick to two-inch depth or less.
Bake in multiple batches if needed.
Reusing the soil without cooling
Hot soil traps steam. If you seal it in a bag or container while hot, condensation creates a wet anaerobic environment that grows mold and bacteria. You're undoing your own work.
Cool thoroughly.
Forgetting the foil
Without a foil cover, moisture escapes quickly and the soil dries out mid-bake. That invites burning and smoke. Cover the pan tightly.
The Right Temperature and Time for Killing Pests (Without Ruining the Soil)
The numbers matter here. Let's be precise about what works and why.
| Target Pest | Lethal Temperature | Minimum Time |
|---|---|---|
| Fungus gnat eggs and larvae | 140°F (60°C) | 10 minutes |
| Root aphids | 160°F (71°C) | 15 minutes |
| Thrips pupae | 170°F (77°C) | 20 minutes |
| Weed seeds | 175°F (80°C) | 30 minutes |
| Most soil pathogens | 180°F (82°C) | 30 minutes |
The standard recommendation of 180°F for 30 minutes covers all the common pests and most pathogens. You don't need to hit higher temperatures to kill harder bugs. You need to hit 180°F consistently throughout the entire soil volume.
Soil texture damage starts above 200°F. Organic matter begins to break down chemically, releasing gases and turning the soil into a dusty, water-repellent mess. Staying at 180-200°F is the safe window.
If you're starting seeds and only need to prevent damping off, 160°F for 30 minutes is sufficient. That lower temperature kills fungus spores without destroying as much organic matter. Adjust based on what you're trying to achieve.
Safer Alternatives to Baking: When to Choose a Different Method
Baking isn't the only game in town. Sometimes it's not even the best choice. Here are the common alternatives and when to reach for each one.
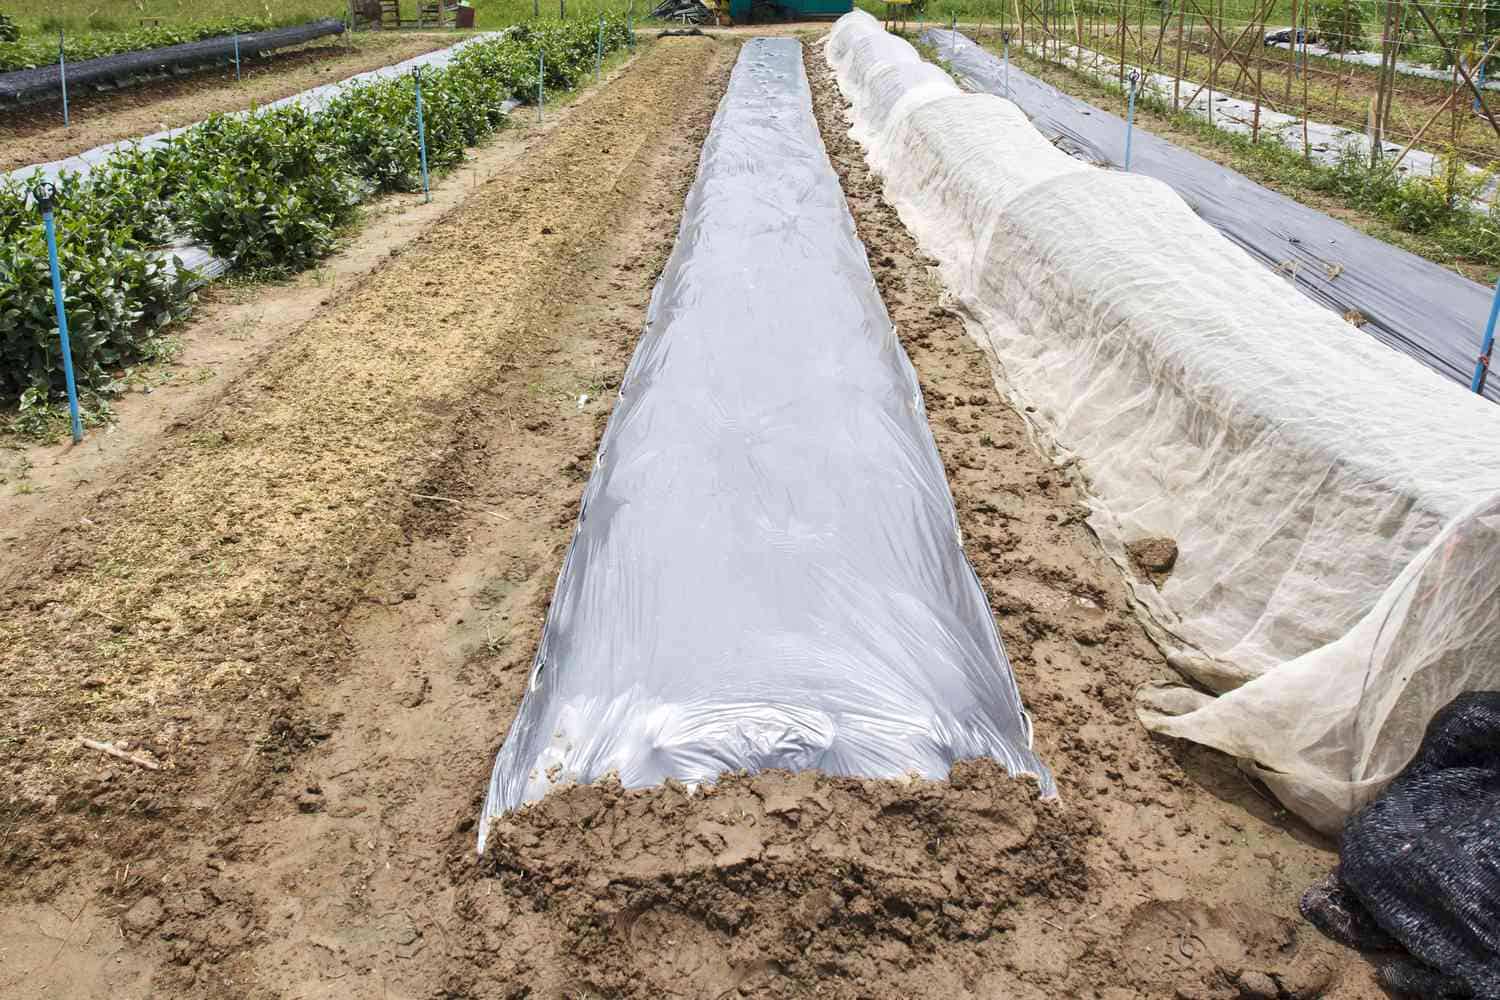
Solarization
This uses the sun's heat to sterilize soil. You wet the soil, cover it with clear plastic, and leave it in full sun for four to six weeks. It works best in hot climates.
The soil temperature under the plastic can reach 140°F, which kills most pests and weed seeds.
Pros: No oven smell. Large batches. Preserves some beneficial organisms.
Cons: Takes weeks. Requires outdoor space. Not effective in cool or cloudy weather.
Steam sterilization
Commercial growers use steam generators to treat soil in bulk. At home, you can achieve a similar effect by pouring boiling water through a container of soil. The water heats the soil as it passes through.
Pros: No burning risk. Even heat distribution. Large batches possible.
Cons: Messy. Uses a lot of water. The soil stays wet and needs drying time.
Microwave method
For small batches under two quarts, a microwave works well. Use a microwave-safe container, cover with plastic wrap, and heat on high for 90 seconds per quart. Let it cool before use.
Pros: Fast. No need to heat the whole house. Cons: Small batches only.
Can create hotspots. No good for larger amounts.
Buying pre-sterilized soil
Sometimes the easiest solution is the best one. Commercial seed-starting mixes are already sterilized. They cost a few dollars.
For small projects, this saves time and avoids the safety risks of baking.
The choice depends on your situation
If you're working with a few pots of reused soil, baking works fine. If you're filling a raised bed, solarization is better. If you just need a handful for starting tomatoes, buy fresh mix.
Match the method to the scale.
How to Store and Reuse Sterilized Soil Without Reinfesting It

Sterile soil doesn't stay sterile forever. The moment you open the container, airborne spores and crawling insects can find their way in. Here's how to keep it pest-free.
Use a sealed container. A plastic storage bin with a tight lid works. A zip-top bag works for small amounts.
The key is an airtight seal. Any gap lets pests in.
Store in a cool, dry place out of direct sunlight. Heat and moisture encourage microbial growth. If you stored the soil in a damp basement, you might find mold on it when you go to use it.
Label the container with the date and the fact that it was heat-treated. You don't want to mix it up with untreated soil months later.
When you're ready to use the soil, you can reinoculate it with beneficial microbes. Mix in a handful of fresh compost or add a commercial mycorrhizal inoculant. This restores some of the biological life that the heat destroyed.
For seed starting, you don't need to do this, sterile is good for seeds. But for potting up seedlings or transplanting, the microbes help the plant settle in.
Frequently Asked Questions
Does baking soil kill all bugs?
Baking at 180°F for 30 minutes kills most common soil pests including fungus gnats, root aphids, thrips pupae, and soil mites. It also kills weed seeds and fungal spores. Some heat-tolerant organisms may survive if the soil doesn't reach the target temperature evenly.
Can I reuse cooked potting soil for vegetables?
Yes, with some caveats. Reheat the soil to kill any pathogens from the previous crop. Then reinoculate it with compost or worm castings to restore beneficial microbes.
Avoid reusing soil that grew tomatoes or peppers more than once due to disease buildup.
How long does baked soil stay sterile?
Sterile soil stays pest-free as long as it's stored in a sealed container. Once opened, airborne spores and crawling insects can recontaminate it within days. Use it immediately or seal it airtight for storage up to a few months.
What happens if I bake soil with fertilizer?
Synthetic fertilizers release toxic fumes when heated. These fumes can irritate your lungs and leave chemical residue in your oven. If the bag lists synthetic nutrients, skip the oven.
Use fresh soil or a chemical-free alternative instead.
Can I use a microwave instead of an oven?
Yes, for small batches. Microwave two quarts or less in a covered microwave-safe container on high for about 90 seconds per quart. Let it cool completely.
The microwave is faster and doesn't heat up your kitchen, but it can create hot spots.
Is baking soil bad for the oven long term?
The main risk is odor transfer. Soil can leave an earthy or smoky smell in the oven that affects food. Dedicate a specific pan to this use and don't reuse it for cooking.
The heat itself won't damage a standard oven.
Final Verdict: Is Baking Soil Worth the Effort for Your Situation?
Baking soil to kill bugs works. The science is straightforward. Heat denatures proteins, pests die, soil comes out clean.
But the effort, risk, and loss of beneficial biology mean it's not always the right answer.
For seed starting, yes, it's worth it. Sterile soil gives seedlings a clean start. For reusing soil from a known pest infestation, yes, baking breaks the cycle.
For routine repotting, no, you're better off with fresh soil and good growing practices.
If you decide to bake, follow the safety steps. Moist soil, foil cover, oven thermometer, 180°F for 30 minutes. Cool completely before use.
Store in a sealed container. And don't bake soil with fertilizer, that's where most safety incidents happen.
Gardening in a controlled indoor environment like a grow tent comes with its own pest management challenges. If you're setting one up, understanding the right soil prep and sterilization approach saves you headaches later. The small effort upfront pays off in healthier plants and fewer pest problems down the line.
Signs You’ve Done It Correctly — and Signs Something Went Wrong
The proof is in the smell and texture. Properly baked soil smells earthy, not acrid or smoky. It should feel damp and crumbly, not dry or powdery.
If the soil is smoking or has a burnt odor, you overheated it. If it’s still cold in the center, the batch was too deep or the oven ran cool.
A visual check helps. The soil should look darker and slightly steam-cooked but not charred. Any white ash or blackened spots mean you pushed past 200°F.
If you see condensation inside the foil and the soil is uniformly warm when you peel it back, that’s a good sign.
Texture matters too. Overbaked soil turns dusty and repels water. Properly baked soil should still hold moisture evenly.
Squeeze a handful. If it clumps without dripping, you nailed it. If it falls apart dry or feels greasy, adjust your process next time.
Safer Alternatives to Baking: When to Choose a Different Method
Solarization works best for outdoor beds in warm climates. Lay clear plastic over moist soil and leave it for four to six weeks. The trapped heat reaches 140°F deep in the ground.
That kills most pests and weed seeds without burning organic matter.
Steam sterilization is ideal for larger indoor batches. Pour boiling water through a five-gallon bucket of soil. Let the water drain and the soil cool.
The steam penetrates evenly and preserves soil structure better than dry heat. It's messier but safer for the oven.
For small batches under two quarts, the microwave wins. Cover the soil in a microwave-safe bowl, vent the lid, and heat on high for two minutes per quart. Let it rest for five minutes before handling.
No oven smell, no fire risk, and it kills pests just as reliably.
How to Store and Reuse Sterilized Soil Without Reinfesting It
After baking, the soil is a blank slate. Recontamination happens fast if you're careless. Use an airtight bin or a heavy-duty zip bag.
Squeeze out excess air before sealing.
Label the container with "Heat Treated" and the date. Three months from now, you won't remember whether that bin is sterile or not. Keep it in a dry, dark spot away from your potting bench.
When you're ready to use it, reinoculate with beneficial microbes. Mix in a handful of fresh worm castings or a scoop of compost. This restores the biology that heat destroyed.
For seed starting, skip the reinoculation. Sterile soil gives seedlings a clean start.
What to Do If the Soil Smells Burnt or Looks Charred
You overheated it. That soil is now hydrophobic and won't hold water. Don't use it for seedlings.
It repels moisture and roots can't drink.
You can salvage it by mixing it with fresh compost at a 1:1 ratio. The compost adds back organic matter and microbes. The burnt soil acts as a mineral filler, but it won't be your best growing medium.
Next time, keep an oven thermometer on the rack and never exceed 200°F.
When to Skip Home Sterilization Entirely
If you only need a few pots of soil, buy a bag of commercial seed-starting mix. It costs a few dollars and is already sterilized. No oven, no smell, no risk.
If you're dealing with a large indoor grow, invest in a proper steam generator or use solarization. Baking multiple batches in a kitchen oven takes hours and heats up the house. The effort isn't worth it for more than a few gallons.
If your soil has synthetic fertilizer, never bake it. The fumes are toxic. Throw that soil away or use it in an outdoor flower bed where pests aren't a concern.
The Bottom Line on Heat Treatment
Baking soil kills bugs reliably when you follow the numbers. 180°F for 30 minutes. Moist soil. Thin layers.
Oven thermometer. Foil cover. Cool completely.
That sequence works every time.
But it's not the only tool in your shed. Match the method to the scale. Small batch, microwave.
Medium batch, oven. Large batch, solarization or steam. And when convenience matters more than cost, buy fresh sterile mix.
Your plants don't care how the soil got clean. They just care that it is.