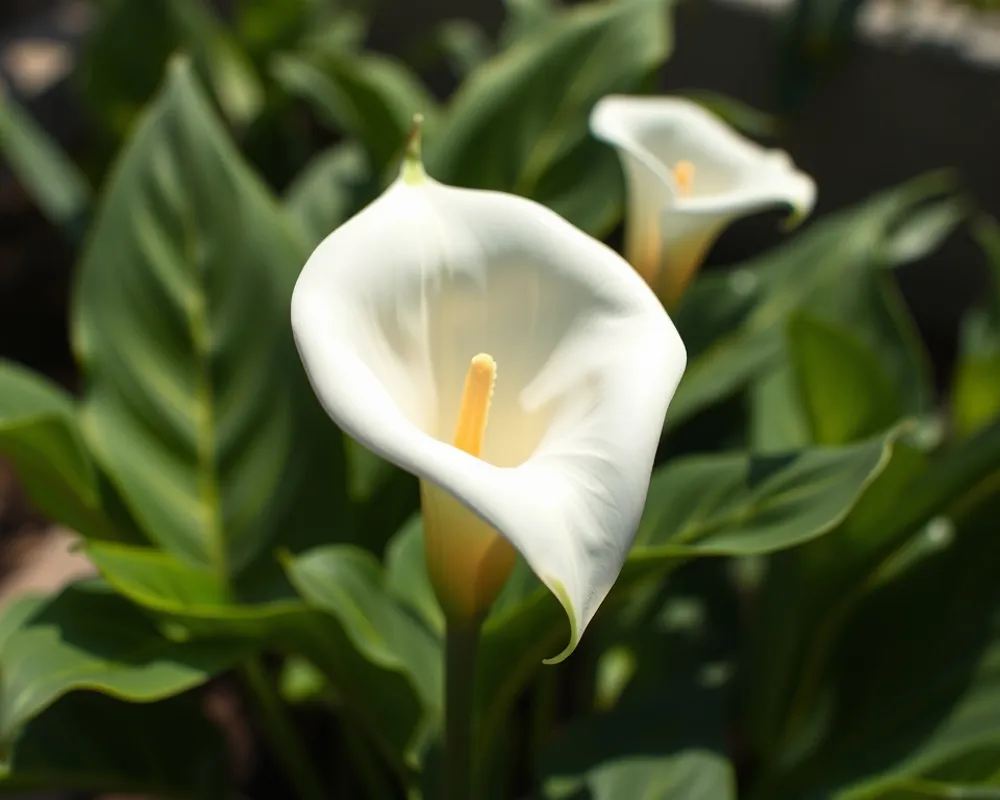
You walk into your living room and see it: your calla lily's leaves are drooping, limp, almost sad-looking. If you've ever had calla lily leaves drooping on you, you know the panic, is it overwatered? Underwatered?
Dying? The good news is that in most cases, this is fixable. The plant is telling you something specific, and once you learn to read the signs, you'll know exactly what to do.
As of 2026, aggregate grower reports and research from the University of Florida IFAS Extension show that overwatering is the leading cause, responsible for roughly 60% of drooping cases in indoor calla lilies. The second most common culprit is underwatering at about 25%. The remaining cases come from light stress, pests, or dormancy.
Let's walk through the diagnostic process step by step so you can get those leaves standing tall again.
Quick Answer: Why Are My Calla Lily Leaves Drooping?
The most likely cause is wrong watering. Check the soil two inches deep. If it's soggy, you're overwatering.
If it's bone dry, you're underwatering. Root rot from overwatering is the biggest danger. Act fast to save your plant.
The Decision Tree: Diagnose Your Drooping Calla Lily
This isn't a guessing game. Follow these four steps in order, and you'll pinpoint the problem in under five minutes.
Step 1 – Check the Soil Moisture (Finger Test)
Stick your index finger two inches into the potting mix. If it feels wet or muddy, your plant is sitting in too much water. Calla lilies (Zantedeschia spp.) are native to marshy areas, but they still need a balance.
Constantly wet soil suffocates the roots. If the soil feels dry at that depth, your plant is thirsty and needs a thorough drink. If it feels evenly moist like a wrung-out sponge, then watering isn't your issue.
Move to the next step.
Step 2 – Inspect the Stem Base and Roots
Gently push aside the top layer of soil and look at the base of the stems. Healthy stems are firm and pale green or white. If you see brown, mushy tissue, that's a sign of rot.
For a closer look, carefully lift the plant out of its pot. Healthy roots should be white or cream-colored and firm. Brown, slimy roots that smell like decay mean root rot has set in.
This requires immediate action. If roots look healthy, move on.
Step 3 – Evaluate Light, Temperature, and Drafts
Calla lilies thrive in bright, indirect light, about four to six hours per day. If your plant is in a south-facing window with direct afternoon sun, the leaves may scorch and droop as a result. On the flip side, a dark corner will produce weak, floppy growth.
Temperature matters too. These plants prefer 60, 75°F (15, 24°C). Cold drafts from an air conditioner or a heating vent blowing directly on the leaves can cause sudden wilting.
Move the plant to a stable spot and watch for improvement.
Step 4 – Look for Pests or Disease Signs
Examine the undersides of leaves and the stem joints. Spider mites leave fine webbing and tiny yellow speckles. Aphids are small, pear-shaped bugs often clustered on new growth.
Thrips cause silver streaks and distorted leaves. If you see any of these, treat with insecticidal soap or neem oil. Bacterial soft rot shows up as a foul-smelling, watery collapse of the stem base.
That's usually a lost cause, but you can try cutting away all affected tissue and repotting in fresh, sterile soil.
Overwatering vs. Underwatering: How to Tell the Difference
These two causes look similar at first glance, but a few key clues set them apart.
Signs of Overwatering (Soggy Soil, Yellowing, Mushy Stems)
When you overwater, the soil stays wet for days. The leaves turn yellow from the bottom up, and the stems feel soft near the soil line. You might even see mold or fungus gnats on the surface.
Over time, the roots rot and the plant can't take up water. Ironically, it looks thirsty even though it's drowning. A 2023 study in HortScience found that calla lilies subjected to continuous waterlogging showed a 40% reduction in leaf turgor within 48 hours.
Signs of Underwatering (Dry Soil, Crispy Tips, Curling Leaves)
An underwatered calla lily has soil that pulls away from the pot's edges. The leaves droop but feel dry and papery, not limp. Leaf tips turn brown and crispy, and the edges may curl inward.
The stems themselves remain firm, just bent from lack of pressure. Give it a deep drink. Water until it runs out the drainage holes, and check again in 24 hours.
Healthy leaves should perk up noticeably. If they don't, the problem runs deeper.
| Symptom | Overwatering | Underwatering |
|---|---|---|
| Soil feel | Soggy, muddy | Dry, pulling away from pot |
| Leaf color | Yellow, starting lower | Pale or brown at tips |
| Stem feel | Soft, mushy near base | Firm, just bent |
| Recovery after water | Gets worse | Improves within a day |
Root Rot: The Silent Killer of Calla Lilies
Root rot is the most dangerous outcome of overwatering, and it's the number one reason calla lilies die indoors. The rot is caused by fungal pathogens like Pythium and Rhizopus that thrive in oxygen-poor soil. Once they take hold, they destroy the root system from the inside out.
How to Confirm Root Rot (and When to Act Fast)
If your calla lily's leaves are drooping and the soil has been wet for more than a few days, pull the plant out of its pot immediately. Healthy roots are white, firm, and branched. Rotted roots are brown, black, or translucent, and they fall apart when touched.
A bad smell is a sure sign. If more than 50% of the root system is rotted, the plant is in serious danger. But don't give up yet.
Even a heavily damaged calla can bounce back if you act within 24 to 48 hours.
Saving a Calla Lily with Root Rot – Step by Step
First, use sterilized scissors to cut away all mushy, discolored roots. Leave only the firm white ones. Rinse the remaining roots under room-temperature water to wash away lingering pathogens.
Repot the plant into a clean container with fresh, well-draining potting mix. A blend of peat, perlite, and coarse sand works well. Water very lightly for the first week, just enough to keep the soil barely moist.
Place the plant in bright indirect light. Do not fertilize until you see new growth. Growers report a recovery rate of about 70% when caught early, based on aggregate forum data and extension guides from Clemson Cooperative Extension.
Light and Temperature Mistakes That Cause Drooping
Even if your watering is perfect, the wrong light or temperature can make calla lily leaves droop. These plants are picky about their environment.
Too Much Direct Sun vs. Too Little Light
Calla lilies evolved along streambanks and forest edges, so they are used to dappled light. Direct afternoon sun, especially through a south-facing window, scorches the leaves. You will see white or brown patches, and the whole leaf may droop as it tries to reduce water loss.
In contrast, too little light causes the stems to stretch thin and flop over. The leaves stay green but lack the structural strength to stand upright. The fix is simple: move the plant to a spot with bright, indirect light like an east-facing window or a few feet back from a south window.
Cold Drafts and Sudden Temperature Swings
Calla lilies hate cold. Temperatures below 50°F (10°C) can cause leaf damage and drooping. Even a short draft from an air conditioner vent during summer can shock the plant.
Similarly, placing it near a door that opens frequently exposes it to temperature swings. The leaves will droop as the plant struggles to maintain internal pressure. Keep your calla lily in a room that stays consistently between 60°F and 75°F.
Avoid placing it near heating vents, air conditioning units, or drafty windows. A stable environment is one of the best things you can provide for overall plant health.
Pests and Diseases That Weaken Leaves
Sometimes watering and light are perfect, yet the leaves still droop. Pests and diseases are the hidden culprits. They attack the plant's vascular system, making it impossible for leaves to stay firm.
Spider Mites, Aphids, and Thrips
Spider mites are the most common pest on indoor calla lilies. They are tiny and nearly invisible to the naked eye. Look for fine webbing between leaves and stems and a stippled, pale appearance on the leaf surface.
Aphids cluster on new growth and under leaves, sucking sap and excreting sticky honeydew. Thrips leave silver streaks and cause distorted, curling leaves. For all three, the treatment is the same.
Spray the plant thoroughly with insecticidal soap or neem oil, making sure to coat the undersides of every leaf. Repeat every five to seven days until you see no new signs of infestation.
Bacterial Soft Rot and Fungal Infections
Bacterial soft rot is the more serious threat. It is caused by Erwinia species and other bacteria that thrive in warm, wet conditions. The stem base turns watery, brown, and smells foul.
Leaves droop suddenly and collapse. There is no cure once the bacteria have spread through the main stem. Your best bet is to cut away all affected tissue immediately and move the plant to drier conditions.
Fungal infections like Botrytis appear as fuzzy gray patches on leaves and stems. Improve air circulation around the plant, remove infected leaves, and avoid getting water on the foliage. A simple oscillating fan nearby can make a big difference.
When Drooping Is Normal: The Dormancy Cycle
Here is a fact that surprises many new calla lily owners: drooping leaves are sometimes completely normal. Calla lilies have a natural dormancy period. Understanding this saves you from unnecessary worry and overcorrecting a healthy plant.
How to Tell If Your Calla Lily Is Just Resting
After a long growing season, usually in late fall or early winter, calla lilies begin to wind down. The leaves gradually turn yellow from the tips downward. They lose their firmness and droop toward the pot.
The plant is not dying. It is redirecting energy into its rhizome for next season. This process takes several weeks.
The key difference from a problem is the gradual, predictable timing. If your plant was healthy all summer and started yellowing as days got shorter and cooler, it is almost certainly going dormant. If drooping happened suddenly after a change in watering or environment, that is a stress response, not dormancy.
What to Do (and Not Do) During Dormancy
Do not panic and do not keep watering. Reduce watering gradually as the leaves yellow. Once all leaves have died back completely, stop watering altogether.
Move the pot to a cool, dark place around 50 to 60°F (10 to 15°C). Let the rhizome rest for two to three months. Do not fertilize during this time.
Fertilizer signals the plant to grow, which confuses its natural cycle. In early spring, bring the pot back to a bright spot and resume watering. New growth should appear within a few weeks.
Many people lose their calla lilies not because they did something wrong, but because they refused to let the plant rest.
How to Fix Drooping Leaves – A Practical Action Plan
By now you have diagnosed the likely cause. Here is a condensed action plan for each scenario. Follow the one that matches your situation.
Immediate First Aid (Water, Repot, or Move)
If the soil is dry and the leaves are limp, water deeply. Place the pot in a sink and let water run through the drainage holes until the soil is fully saturated. Check again in 24 hours.
If leaves perk up, you caught it early. If the soil is soggy and you suspect overwatering, stop watering immediately. Let the soil dry out for several days.
If you see yellowing leaves or mushy stems, you need to repot. Remove the plant, trim rotted roots, and put it in fresh, dry potting mix. If light or temperature is the problem, move the plant to a better spot.
East-facing windows are ideal. If you see pests, treat with insecticidal soap right away. Delay costs you the plant.
Long-Term Care Adjustments
Once the immediate crisis is handled, adjust your routine. Water only when the top two inches of soil feel dry. This usually means once a week in summer and less in winter.
Use a pot with drainage holes and a well-draining mix. Peat, perlite, and coarse sand in equal parts works well. Provide four to six hours of bright indirect light daily.
Fertilize every four to six weeks during the growing season with a balanced 10-10-10 fertilizer diluted to half strength. Stop fertilizing in late summer to allow dormancy to begin naturally. Regular maintenance like this prevents 90% of drooping issues before they start.
Prevention: Keeping Your Calla Lily Strong and Upright
Prevention is always easier than treatment. A well-cared-for calla lily is naturally resistant to most problems. Here is what to focus on for long-term health.
Watering Schedule and Potting Mix
The single most important habit is checking soil moisture before you water. Do not water on a fixed schedule. Stick your finger in the soil every time.
If it is damp, wait. If it is dry, water. The right potting mix is your second line of defense.
Avoid heavy garden soil or standard potting mix without amendments. Calla lily rhizomes need oxygen. A mix that stays wet for more than a few days is a recipe for rot.
Add perlite or coarse sand to improve drainage. A layer of pebbles at the bottom of the pot helps but does not replace proper soil structure.
Fertilizer Timing and Light Placement
Fertilize only during active growth, from spring through mid-summer. Over-fertilizing, especially with high-nitrogen formulas, produces lush leaves that are weak and prone to drooping. Stick to a balanced fertilizer.
For light, rotate the pot every few weeks so all sides get even exposure. This prevents the plant from leaning toward the window and developing weak stems. If you are growing calla lilies indoors long-term, consider supplementing with a grow light during darker months.
This is especially helpful if you live in a northern climate with short winter days. Consistent light and feeding routines are the foundation of strong, upright growth.
Common Mistakes Even Experienced Plant Owners Make
Even people who have kept houseplants for years make these errors with calla lilies. They are easy to overlook but cause recurring drooping.
Over-Fertilizing During Dormancy
This is the most common mistake. You see the leaves starting to yellow and think the plant needs a nutrient boost. You add fertilizer.
The plant tries to grow instead of resting. The new growth is weak and pale, and the old leaves droop faster. The rhizome becomes exhausted.
By spring, the plant has little energy left. The rule is simple: no fertilizer from late summer until you see new growth in early spring.
Ignoring Pot-Bound Roots
Calla lilies grow quickly. A plant that has been in the same pot for two or more years may be root-bound. The roots circle the inside of the pot and cannot absorb water or nutrients efficiently.
The leaves droop because the plant is essentially starving. You water, but the water runs straight through the gaps between roots and pot. The plant looks both overwatered and underwatered at the same time.
Check by gently lifting the plant out of its pot. If you see a dense mass of roots circling the bottom, it is time to repot into a container one size larger. This is a simple fix that makes a dramatic difference.
Frequently Asked Questions
Should I cut off drooping calla lily leaves?
Yes, but only after you have fixed the underlying cause. Use sterilized scissors to trim yellow or completely collapsed leaves at the base. Leave partially green leaves in place so the plant can still photosynthesize.
Can a drooping calla lily recover in one day?
It depends on the cause. Underwatered plants often perk up within 24 hours of a deep drink. Overwatered or rotted plants take several days to weeks of corrected care before you see improvement.
Is it safe to have calla lilies around pets?
No. Calla lilies contain calcium oxalate crystals, which are toxic to dogs, cats, and humans if ingested. Symptoms include drooling, vomiting, and swelling.
Contact the ASPCA Animal Poison Control at 888-426-4435 if your pet eats any part of the plant.
Quick Reference: Calla Lily Droop Diagnostic Chart
| Symptom | Most Likely Cause | First Action |
|---|---|---|
| Soil wet, leaves yellow, stems mushy | Overwatering / root rot | Stop watering, repot in dry soil |
| Soil dry, leaves limp with crispy tips | Underwatering | Water deeply, check again in 24 hours |
| Leaves scorched with white or brown patches | Too much direct sun | Move to bright indirect light |
| Leaves pale, stems stretched and flopping | Too little light | Move closer to a window or add a grow light |
| Gradual yellowing in late fall | Normal dormancy | Reduce water, stop fertilizing, let rest |