
When you look at your fence, you might wonder, "Can I stain my fence with a brush?" It's a practical question when you're trying to tackle a DIY project yourself. While it's certainly possible to apply stain with a brush, the real answer depends on a few key factors.
Manufacturer specifications for exterior wood stains, like those from Cabot or Behr, often recommend specific application tools for optimal results. Aggregate user feedback suggests that while a brush offers control, it can also lead to more labor and potential for visible brush marks if not used correctly. Understanding these nuances helps you make the best choice for your fence.
Is a Brush the Right Tool for Staining Your Fence?

In our research, applying fence stain with a brush is a viable method, especially for certain situations. It gives you direct control over the amount of stain laid down and helps you work the product into the wood grain. However, it’s not always the quickest or easiest option.
This method shines when precision is key or when you're dealing with smaller areas. For a large fence, however, you might find yourself wishing for a faster approach. We’ll explore when a brush is your best friend and when you might want to consider alternatives.
When Using a Brush for Fence Staining Makes Sense
For many homeowners, a brush is the go-to tool because it's accessible and offers fine-tuned control. You likely already have several around the house, making it a cost-effective starting point. Using a brush means you can really direct the stain exactly where you want it to go, ensuring even coverage on textured surfaces.
Staining Small Sections or Details
If your fence has intricate details, tight corners, or decorative elements, a brush is your most capable tool. Think of the posts, railings, or any trim work that requires careful attention. Trying to use a roller or sprayer in these areas would be messy and inefficient. A good quality angled brush, for example, can easily get into these nooks and crannies, preventing missed spots.
For Specific Stain Types or Finishes
Some wood stains are formulated with a thinner consistency that brushes handle well, unlike thicker paints that might load up a brush too quickly. If you're aiming for a rich, penetrating finish where the wood grain is meant to show through prominently, a brush allows you to work the stain deep into the wood fibers. This can create a more natural, less uniform look compared to sprayed or rolled finishes.
The Downsides: Why Brushing Might Not Be Best
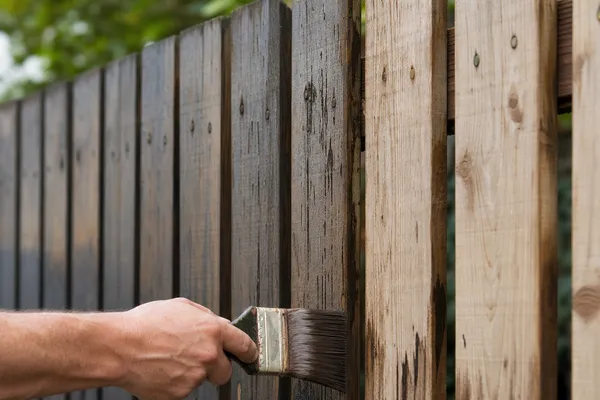
While brushes offer control, they also come with their own set of challenges, particularly on larger projects. The process can be significantly more time-consuming than other methods. You might also find that achieving a perfectly uniform look requires a lot of patience and skill.
Time and Effort: The Labor Factor
Applying stain with a brush is undeniably a labor-intensive task. For a large fence, you’re looking at many hours, potentially days, of repetitive motion. This can lead to fatigue and make the project feel overwhelming. If your fence is lengthy or has many vertical pickets, the sheer number of strokes adds up fast.
Achieving a Smooth, Even Finish
Getting a perfectly smooth and streak-free finish with a brush requires technique. You need to maintain a wet edge to avoid lap marks, where the stain dries unevenly. This means working in manageable sections and constantly overlapping your strokes correctly. Even then, slight brush marks can sometimes be visible, especially on smooth wood surfaces.
Bristle Shedding and Other Annoyances
A common frustration with brushes is bristle shedding. Some lower-quality brushes can leave tiny bristles embedded in the stain, which then dry onto your fence. This means extra cleanup or an imperfect finish. Beyond that, brushes can get heavy and awkward to hold for extended periods, and the cleanup can also be a chore depending on the stain type.
Choosing the Right Brush for Fence Stain
Selecting the right brush makes a world of difference when staining your fence. Not all brushes are created equal, and the type you choose can impact both the application process and the final look. It's worth investing in a good quality brush specifically designed for exterior stains.
Bristle Material Matters
For most exterior wood stains, synthetic bristles are generally recommended. Brands like Purdy or Wooster often offer high-quality synthetic brushes suitable for latex or oil-based stains. Synthetic bristles hold up better against water-based stains and are easier to clean. Natural bristles, while good for oil-based paints and some varnishes, can absorb water and become splayed or lose their shape when used with water-based exterior stains.
Brush Size and Shape for Control
The size of your brush will depend on the scale of your project. For large fence panels, a 3-inch or 4-inch wide flat brush can cover more area efficiently. For more detailed work, like around posts or pickets, a 2-inch or 2.5-inch angled sash brush will offer better maneuverability. The angled bristles help you reach into corners and along edges with greater precision.
Get Your Fence Ready for Stain

Before you even dip a brush into a can of stain, proper preparation of your fence is crucial. Rushing this step is a common mistake that can lead to a poor finish and a less durable result. Think of this as laying the foundation for a great-looking, long-lasting stain job.
Cleaning and Prepping the Wood
Your fence should be clean and free of dirt, grime, mildew, and any old peeling finishes. You can use a dedicated fence cleaner or a mixture of water and a mild detergent. For stubborn mildew, a solution of one part bleach to three parts water can be effective, but always rinse thoroughly afterward. If your fence is already stained or painted, you might need to pressure wash it, but be cautious not to use too much force, as this can damage the wood.
Ensure the wood is completely dry before applying any stain; this can take 24, 48 hours, depending on the weather.
Sanding for a Better Finish
For a truly smooth and professional look, light sanding after cleaning can make a big difference. This step helps to open up the wood’s pores, allowing the stain to penetrate more evenly. It also smooths out any rough areas or splinters left from cleaning or the original wood. Use a medium-grit sandpaper (around 80-120 grit) for this task.
If your fence has a rough-sawn texture, sanding might be optional, but for smoother wood, it’s highly recommended. Always brush away all sanding dust afterward.
How to Stain Your Fence With a Brush (Step-by-Step)
Applying stain with a brush requires a systematic approach to ensure a uniform and attractive finish. It’s not just about spreading the color; it’s about working with the wood and the stain to achieve the best possible outcome. Follow these steps for a successful application.
Application Technique: Strokes and Overlap
Start by stirring the stain thoroughly, but avoid vigorous shaking, which can create excess bubbles. Apply the stain in long, even strokes, following the direction of the wood grain. Work in manageable sections, typically a few pickets or a short panel at a time, to maintain a wet edge. This means the area you just stained should overlap slightly with the area you are about to stain.
This prevents lines where the stain dries.
Applying Multiple Coats
Most exterior wood stains are designed to be applied in one coat. However, if you’re building up a darker color or using a very thin stain, a second coat might be necessary or desired. If you do apply a second coat, wait for the first coat to dry completely according to the manufacturer’s instructions, generally at least 4, 12 hours, but check the product label. Over-application can lead to a sticky or peeling finish, so it's best to apply a thin, even coat and let it soak in.
When to Reach for a Roller or Sprayer Instead

While your trusty brush is great for detail, it’s not always the best tool for the job, especially for larger fences or when time is a factor. Other application methods exist, each with its own strengths and weaknesses. Understanding these alternatives can help you decide if a brush is truly the right fit for your entire project.
Many homeowners consider painting rollers or sprayers for larger fence sections to speed up the process. A roller can cover more surface area quickly, and sprayers offer the fastest application. However, these tools might require more prep work and can sometimes be less precise than a brush.
Pros and Cons: Brush vs. Roller vs. Sprayer
Let's break down how a brush stacks up against its common alternatives for staining fences. This comparison should help you weigh the benefits and drawbacks for your specific needs.
| Feature | Paint Brush | Paint Roller | Paint Sprayer (Airless/HVLP) |
|---|---|---|---|
| Coverage Speed | Slow | Medium | Fast |
| Detail Work | Excellent | Poor | Fair (can be difficult to control) |
| Finish Quality | Can be smooth with practice; prone to marks | Generally smooth; can show roller texture | Very smooth; can be uneven if not dialed in |
| Stain Waste | Low | Medium | High (overspray) |
| Prep Work | Minimal | Medium (masking) | High (masking, drop cloths) |
| Cleanup | Easy (solvent/water) | Medium (roller cover disposal/cleaning) | Difficult (extensive cleaning required) |
| Initial Cost | Low | Medium (roller, tray, extension pole) | High (sprayer unit, accessories) |
| Best For | Small areas, intricate details, touch-ups | Large, flat surfaces, medium-sized fences | Very large fences, new construction |
Aggregate reviews from hardware store customers often point to rollers as a good compromise for larger fences when you want to avoid the labor of brushing but don’t want the complexity of a sprayer.
Essential Safety Gear for Staining
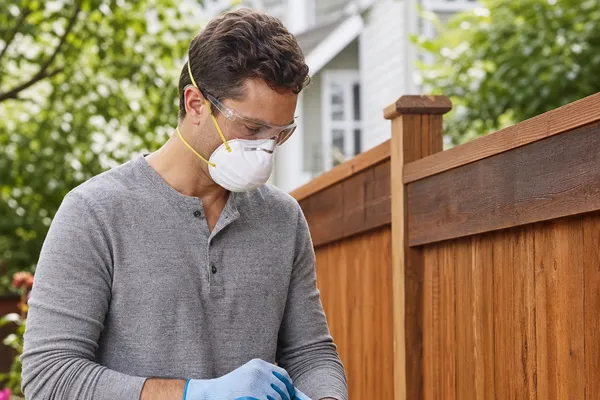
Working with stains, even water-based ones, means you should take precautions to protect yourself. Ventilation is key, and so is guarding your skin and eyes. Safety should always be a priority when you're out tending to your fence.
- Gloves: Opt for chemical-resistant gloves, especially if using oil-based stains. Nitrile or butyl rubber gloves are good choices. They protect your skin from drying out and from any harsh chemicals.
- Eye Protection: Safety glasses or goggles are a must to prevent stains from splashing into your eyes. A good pair will fit snugly and offer side protection.
- Respirator (if needed): If you're using a stain with strong VOCs (Volatile Organic Compounds) or you're working in a poorly ventilated area, consider a respirator mask. Check the stain's Safety Data Sheet (SDS), often available on the manufacturer's website, for specific recommendations.
- Protective Clothing: Wear old clothes that you don’t mind getting stained. Long sleeves and pants will protect your skin from drips and splatters.
Keeping Your Brush Clean and Ready for Next Time
Proper cleaning of your brush immediately after use is critical for its longevity and for ensuring it performs well on your next project. A well-maintained brush can last for years, saving you money and frustration. Neglecting cleanup can render a good brush stiff and useless.
- For Water-Based Stains: Scrape off as much excess stain as possible back into the can. Then, wash the brush thoroughly with soap and warm water until the water runs clear. Work the suds through the bristles with your fingers, rinsing repeatedly.
- For Oil-Based Stains: You'll need a mineral spirit or paint thinner. Scrape off excess stain, then soak the brush in the solvent. Work it through the bristles, then rinse and repeat with clean solvent until no more stain comes out. Follow up with soap and water to remove any solvent residue.
Once cleaned, reshape the bristles to their original form and let the brush dry completely, usually by hanging it with the bristles down or laying it flat. Storing brushes properly helps maintain their shape and prevents bristle damage.