
So you're standing in your kitchen with a handful of dill stems wondering if you can skip the seed packet and just grow more from what you've got. The short answer is yes, you can grow dill from cuttings, but it comes with a few important caveats. Dill is not like basil or mint.
It's a taprooted annual with a built-in expiration date, and that changes how successful propagation really works.
According to university extension research, dill (Anethum graveolens) has a taproot that can reach 12 to 18 inches deep in ideal soil. That single thick root is what powers the whole plant. A cutting can't grow a true taproot, which means the plant you get will be smaller and shorter-lived than one grown from seed.
As of 2026, the most reliable method remains starting from seed, but cuttings can work in the right conditions. For more hands-on gardening advice, check out our blog for related growing guides.

Quick Answer: Yes, But It's a Gamble
Yes, you can grow dill from cuttings. The success rate is around 40 to 70 percent. You need a stem with at least two nodes.
Rooting takes 7 to 14 days in water. The plant will be weaker than one from seed.
The Real Problem with Dill Cuttings (Why It's Different from Basil or Mint)
Most herbs you've tried to propagate have been easy. Basil roots in a glass of water on your counter. Mint practically grows from a leaf left on the soil.
Dill is a different story.
The reason comes down to the root system. Dill is a taprooted annual. That means it grows one long, thick central root that drives deep into the soil.
Basil and mint have fibrous root systems, a network of thin roots that branch out. Fibrous roots are easy to regrow from a cutting. A taproot is not.
When you cut a dill stem and put it in water, the roots that emerge are adventitious roots. They're emergency roots, not the real thing. They can keep the plant alive for a while, but they won't develop into a proper taproot.
The result is a smaller plant that runs out of steam faster.
This matters because dill is already a short-lived plant. From seed, it takes about 60 to 70 days to go from germination to flower. A cutting gives you even less time.
Some gardeners report getting only 3 to 4 weeks of harvest from a cutting before it bolts. If you're planning your indoor growing space, you might want to consider starting from seed instead for a longer harvest window.
Decision Tree: Should You Try Propagating Dill from Cuttings?
Not every dill stem is worth trying. Here's how to decide if yours is a good candidate.
Branch 1: You Have a Fresh, Healthy Stem with Nodes
Look at the stem. If it's green, firm, and has at least two visible nodes (the bumps where leaves grow), you have a decent chance. Fresh stems from a garden plant work best.
Stems from the grocery store can work, but the odds drop.
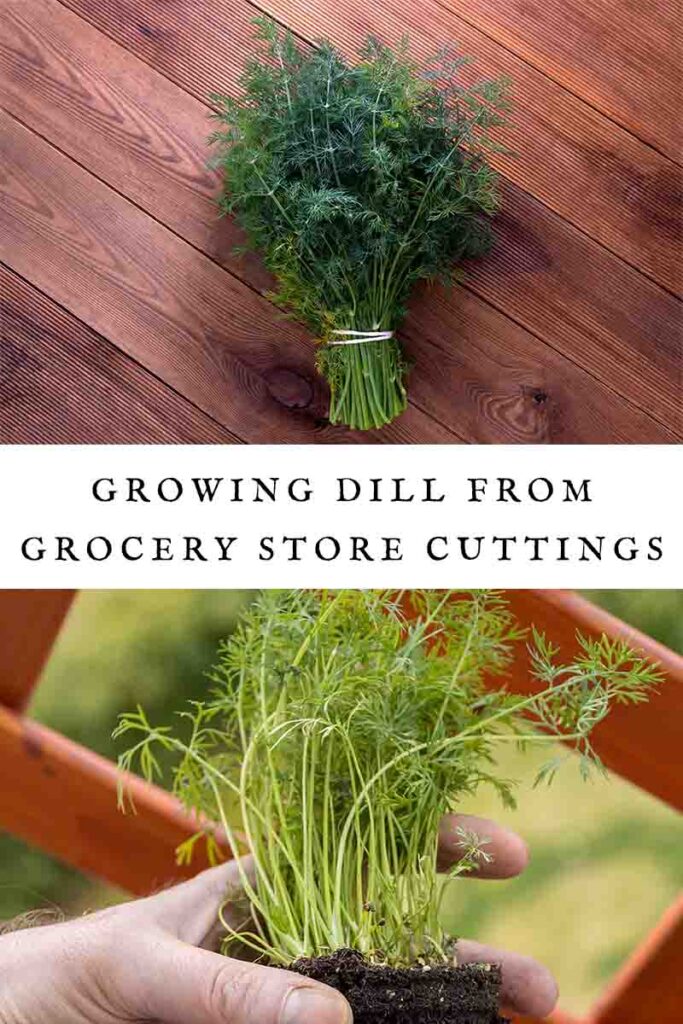
Branch 2: You Only Have Grocery Store Dill
Grocery store dill is often older and may have been refrigerated for days. The stems can be dry or damaged. If you want to try, pick the freshest bunch you can find.
Look for stems that are still crisp, not wilted. Cut the bottom at an angle and remove the lower leaves. Your success rate here is closer to 30 to 40 percent.
Branch 3: You Have a Bolting or Flowering Plant
If your dill has started to flower, the plant is in its final stage. It's putting energy into seeds, not roots. Cuttings from a bolting plant rarely root.
Skip it.
Branch 4: You're Trying to Save a Dying Plant
If the plant is wilting or yellowing from lack of water, a cutting might work. Cut the healthiest stem you can find and put it in water right away. This is more of a rescue attempt than a propagation method, but it can succeed.
Water vs. Soil: Which Works Better for Dill Cuttings?
You have two options for rooting your cutting. Each has trade-offs.
Water Method (Visible Roots, Higher Rot Risk)
Water rooting is the most common approach. You can see what's happening, which is satisfying. The downside is that water roots are fragile.
They're adapted to living in water, not soil. When you transplant, many of them die off, and the plant has to grow new soil roots. This transition period is where many cuttings fail.
Soil Method (Less Transplant Shock, Slower Rooting)
Rooting directly in soil avoids the transplant shock problem. The roots that grow are already adapted to soil. The downside is you can't see them.
You have to wait and gently tug on the stem to feel for resistance. If you're patient, soil rooting often gives you a stronger plant. Building healthy soil from the start makes a big difference here.
Which Should You Choose?
| Method | Rooting Time | Transplant Shock | Success Rate |
|---|---|---|---|
| Water | 7 to 14 days | Higher | 40 to 60 percent |
| Soil | 10 to 21 days | Lower | 50 to 70 percent |
If you want to watch the roots grow, use water. If you want a stronger plant, use soil.
Step-by-Step: How to Root Dill from a Cutting (The Right Way)
Here's the process that gives you the best chance of success.
1. Select the Right Stem
Choose a stem that is green, firm, and at least 4 to 6 inches long. Make sure it has at least two nodes. The nodes are where the roots will emerge.
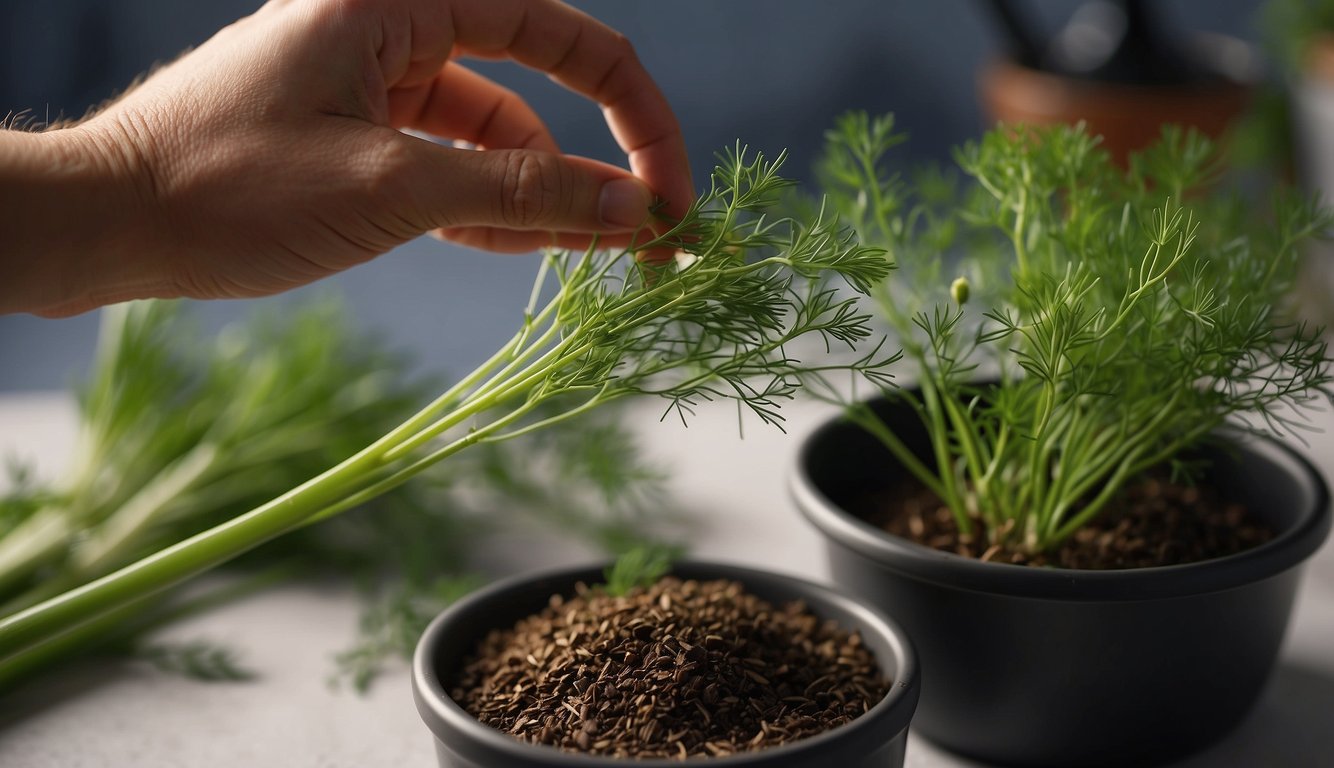
2. Cut Below a Node
Use clean scissors or a knife. Cut at a 45-degree angle about half an inch below a node. The angle increases the surface area for water absorption.
3. Remove the Lower Leaves
Strip off any leaves that would sit below the water line. Leaves in water rot quickly. Rot spreads to the stem and kills the cutting.
4. Prepare the Container
If using water, fill a clean glass jar with room temperature water. Tap water works fine. Let it sit for an hour to let chlorine evaporate if you want to be cautious.
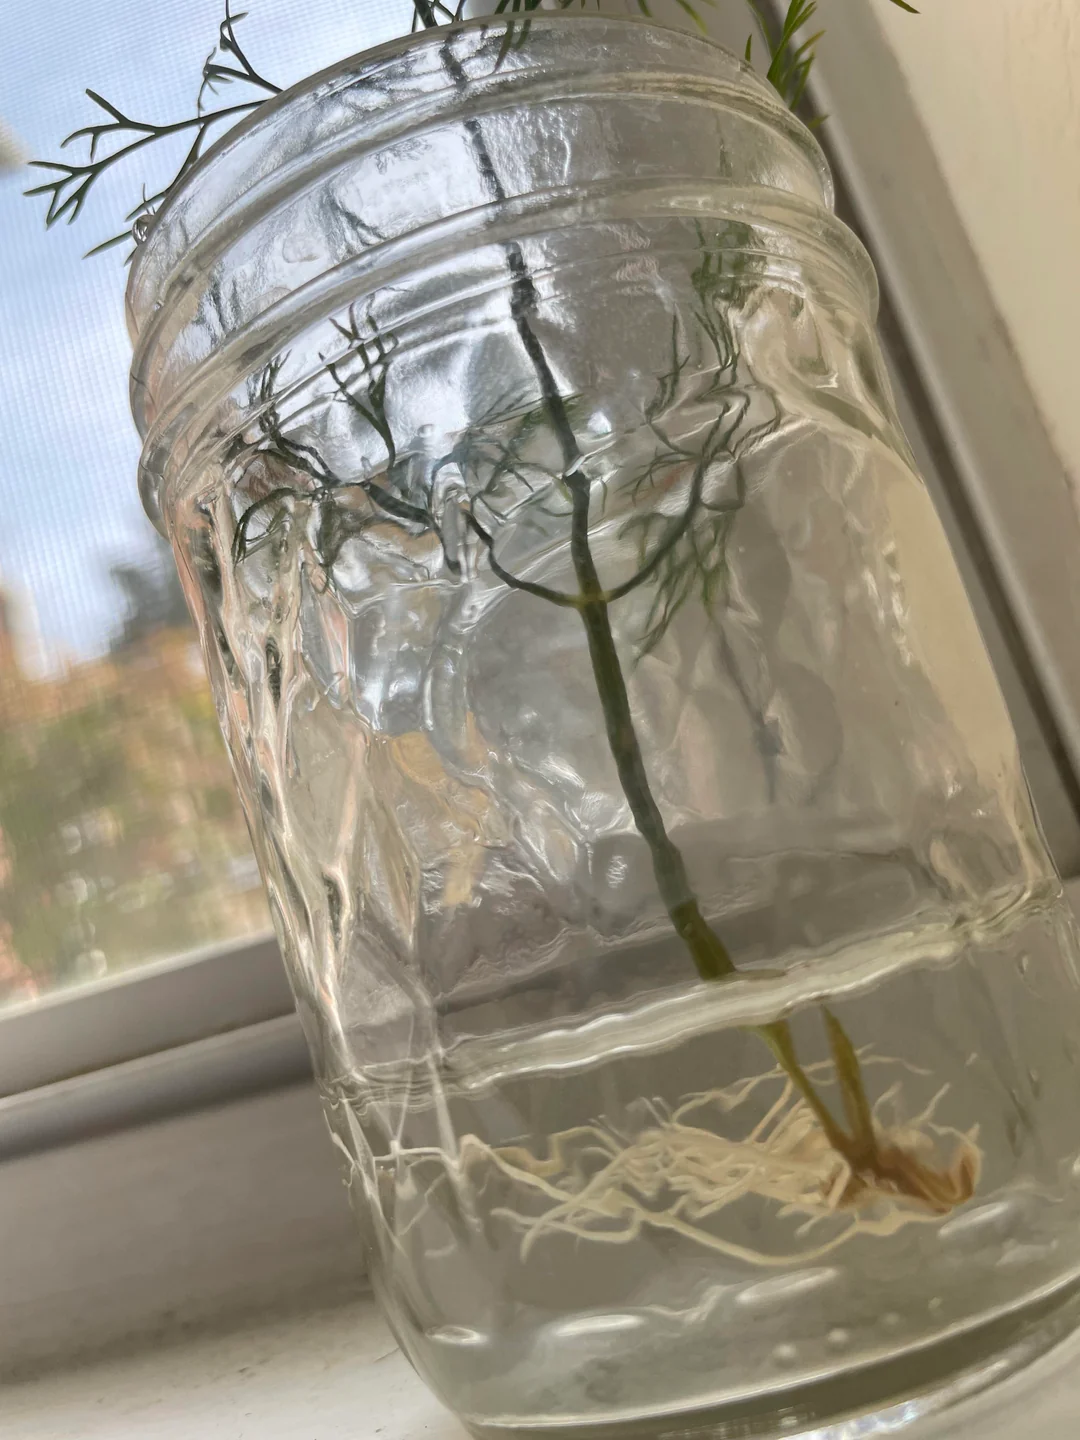
5. Place the Cutting in Water
Submerge the nodes. Keep all leaves above the water line. Place the jar in a spot with bright indirect light.
A kitchen windowsill is perfect.
6. Change the Water Every 2 to 3 Days
Stagnant water grows bacteria. Fresh water keeps the cutting healthy. Each time you change the water, check for signs of rot.
7. Wait for Roots
You should see small white bumps at the nodes within 7 days. Roots will grow to about 1 to 2 inches within 14 days. Once they reach that length, it's time to transplant.
8. Transplant Carefully
If you rooted in water, be gentle with the new roots. Plant the cutting in a small pot with well-draining potting mix. Water it in and keep the soil moist for the first week.
Don't move it to full sun right away. Give it a few days of indirect light to adjust. Giving your plants the right nutrients after transplanting helps them recover faster.
Mistakes That Kill Dill Cuttings (Common Errors)
Most failures with dill cuttings come down to a handful of repeatable mistakes. Here are the four that trip people up most often.
Cutting Without a Node
The node is where root cells are concentrated. Cut between nodes, and the stem has no way to grow roots. It will sit in water for two weeks, slowly turn brown, and die.
Always cut half an inch below a visible node.
Letting Leaves Sit in Water
Leaves submerged in water rot within a few days. That rot spreads to the stem and kills the whole cutting. Strip off every leaf that would fall below the water line.
Only the bare stem and nodes should be under water.
Using Stems from a Bolting Plant
When dill starts to flower, it shifts its energy to seed production. Rooting hormones drop. The stem tissue becomes woody and less receptive.
Cuttings from a bolting plant have a success rate below 10 percent. Save your time and start fresh from seed instead.
Moving to Full Sun Too Fast
A cutting has no root system to support water uptake. Full sun causes rapid transpiration, and the leaves wilt before the roots can catch up. Keep the cutting in bright indirect light for the first week after transplanting.
Then gradually introduce more direct sun over a few days.
When It Doesn't Work: What to Do Instead
Sometimes cuttings just fail. The stem rots, roots never appear, or the plant dies after transplanting. You have three solid backup options.
Option A: Start Fresh from Seed (Easier, More Reliable)
Dill seeds germinate in 7 to 14 days with minimal effort. You can sow them directly in a pot or garden bed. The resulting plant will have a proper taproot, live longer, and produce more foliage.
For indoor growing, you can use a dedicated space with controlled conditions. A well-planned grow tent setup makes it easy to manage light and temperature for seedlings.
Option B: Buy a Young Plant from a Nursery
A nursery transplant skips the entire propagation phase. You get a plant with an established root system that is ready to grow. It costs a few dollars and saves you two to three weeks of waiting.
If you only need one or two plants, this is the most reliable path.
Option C: Let the Cutting Keep Growing in Water (Low-Maintenance Hedge)
Some gardeners keep dill cuttings in water indefinitely. The plant stays small and can produce a few leaves for weeks. It won't thrive, but it can provide a modest harvest.
Change the water weekly and add a drop of liquid fertilizer every two weeks. This works best if you just want a few sprigs for garnish.
Maintenance After Rooting: Keeping Your New Dill Plant Alive
Once your cutting has rooted and you have transplanted it, the care routine changes. Dill is not a high-maintenance plant, but it has specific needs.
Water consistently. Keep the soil moist but not waterlogged. Dill's shallow roots dry out fast, so check the soil every day.
In hot weather, you may need to water every morning.
Provide enough light. Dill needs at least 6 hours of direct sunlight per day. Indoors, a south-facing window or a grow light works well.
If you are using a controlled environment, proper ventilation helps prevent mold and keeps the air moving.
Feed sparingly. Dill grown in good potting soil does not need much fertilizer. A half-strength balanced liquid fertilizer once a month is plenty.
Too much nitrogen makes the leaves less flavorful. Pairing it with the right soil amendments can improve growth without overfeeding.
Harvest regularly. Picking the outer leaves encourages the plant to produce more. Do not take more than one third of the plant at once.
Leave the central growing point intact.
Watch for bolting. Dill bolts when temperatures rise above 85°F or when day length exceeds 14 hours. If you see a flower stalk forming, harvest what you can.
The leaves will turn bitter soon after.
Frequently Asked Questions
Can you root dill in water forever?
You can keep dill alive in water for several weeks, but not forever. The roots that grow in water are fragile and cannot support long-term growth. The plant will eventually run out of nutrients and decline.
For a lasting plant, transplant to soil within two weeks of roots appearing.
Should I use rooting hormone?
Rooting hormone is helpful but not required. Dip the cut end in a powder or gel hormone before placing it in water. Studies show it can increase rooting success by 15 to 25 percent.
It is most useful for older stems or grocery store cuttings that are less vigorous.
How long does it take to see roots?
Roots typically appear within 7 to 14 days. You will see small white bumps at the nodes first. These develop into thin roots over the next week.
If you see no change after 21 days, the cutting has likely failed.
Can you grow dill from cuttings in winter?
Yes, but it is harder. Winter light levels are lower, and indoor heating dries the air. Use a grow light set to 14 hours per day.
Keep the cutting away from drafty windows. Expect slower rooting, possibly 14 to 21 days instead of 7 to 14.
Final Decision Guide: What's Worth Your Time?
Here is the honest breakdown. If you have a fresh, healthy dill stem with at least two nodes, go ahead and try rooting it. The process is simple and costs nothing.
You have a decent chance of success.
If you are buying dill from the grocery store just to propagate it, your odds are lower. You might get lucky, but you are better off spending a few dollars on a nursery plant or a seed packet.
If you want a productive dill plant that will provide a steady harvest for two months, start from seed. It takes a little longer up front, but the plant will be stronger and more productive. The same applies if you are planning a larger indoor garden.
Choosing the right growing setup for your space makes a big difference.
Propagating dill from cuttings is a fun experiment. It is not the most reliable method, but it works often enough to be worth trying. Just keep your expectations realistic and have a backup plan ready.