
A flat tire on your wheelbarrow can bring yard work to an immediate halt, leaving you stranded with a heavy load or an unmovable machine. Figuring out how to change a tubeless wheelbarrow tire might seem daunting, but it’s a manageable DIY task with the right approach. Many wheelbarrows use durable tubeless tires designed to resist punctures and hold air better than traditional tubed options.
Aggregate user reviews and manufacturer specifications from brands like garden cart producers confirm that tubeless setups offer extended service life and fewer disruptions. Addressing a flat quickly means less downtime and more productivity for your gardening or construction projects. This guide breaks down the process step-by-step, making it clear and straightforward.
Flat Tire on Your Wheelbarrow? How to Change That Tubeless Tire
Why You're Dealing With a Flat Tubeless Wheelbarrow Tire
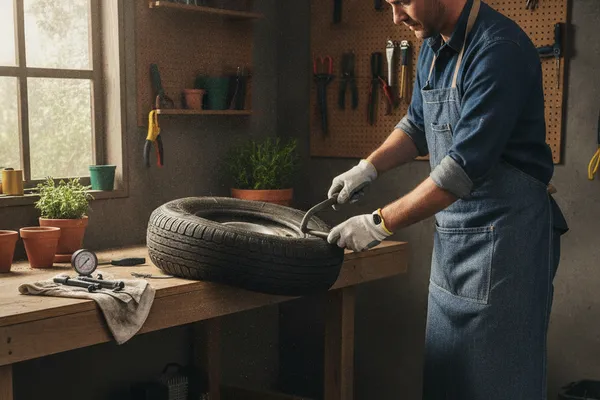
You're probably here because your wheelbarrow tire has lost its air. This can happen for a few reasons, even with tubeless designs. A sharp object, like a nail, piece of glass, or even a thorny branch, can cause a puncture. Sometimes, the tire bead can slowly leak if it’s not sealing perfectly against the rim, especially if it’s gotten dry or dirty over time.
In other cases, the valve stem itself might be the culprit, developing a slow leak. Understanding the cause can sometimes hint at the best solution, but often, a full tire change is the most reliable fix for a persistent flat.
What You Need to Change a Tubeless Wheelbarrow Tire (Tools & Supplies)
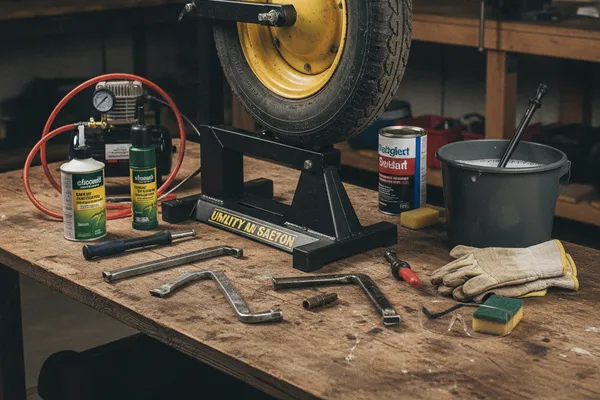
Getting ready for a tire change means gathering a few key items. You’ll need a compatible tubeless wheelbarrow tire, make sure you know your wheelbarrow's tire size. A good set of tire levers, often found in bicycle repair kits, are essential for prying the tire off the rim. You’ll also want a tubeless tire sealant to help create and maintain the air seal and a valve core removal tool (usually part of a tire lever set or sold separately).
A tire pump that can handle higher pressures is crucial, and safety glasses and gloves are always a good idea when working with tools and potentially sharp tire edges.
Step-by-Step: Breaking Down the Old Tubeless Wheelbarrow Tire
First, you need to get the old tire off the wheel. It's often easiest to remove the wheel assembly from the wheelbarrow itself. Loosen any nuts or bolts holding the wheel to the frame, being careful if there are washers or specific orientations. Once the wheel is free, you’ll need to break the tire bead, which is the edge of the tire that seals against the rim.
### Getting the Tire Bead Off the Rim
To break the bead, you’ll likely need to apply firm pressure. Sometimes, placing the wheel on the ground and firmly pressing down around the tire's edge with your hands or feet can do it. If it’s stubborn, you might need to use your tire levers or even a C-clamp very carefully to press the bead inward and away from the rim. Once the bead is broken all the way around on one side, you can start prying the tire off the rim with your tire levers, working your way around to free one side of the tire.
Then, repeat for the other side.
Step-by-Step: Installing the New Tubeless Wheelbarrow Tire
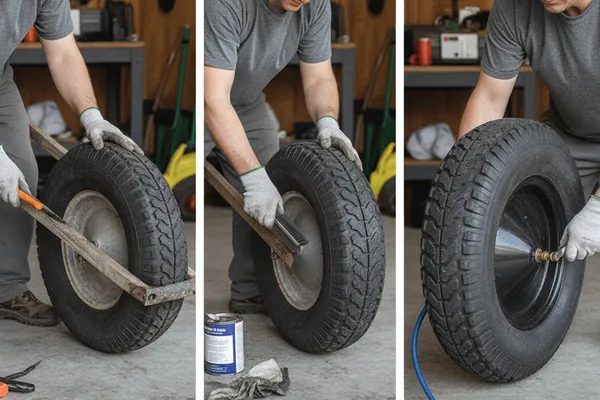
With the old tire off, clean any debris from the rim. Now, take your new tire and line it up with the rim. It’s often easiest to start by fitting one edge of the tire bead onto the rim by hand, working your way around. Then, you’ll push the second bead onto the rim.
### Lubricating and Seating the New Tire Bead
Getting the second bead over the rim can be tricky. A bit of water or a mix of soap and water on the tire bead can act as a lubricant, helping it slide into place. Start by hand, and use your tire levers to gently pry the last section of the bead over the rim if needed. Be careful not to pinch the tire or damage the rim.
You want the bead to sit evenly all the way around.
The Trick to Inflating and Sealing Your New Tire
Now comes the critical part: seating the bead and sealing the tire. Attach your pump to the valve stem. You might need to inflate it rapidly to seat the bead, which often produces a loud popping sound as the tire locks into place on the rim. If it’s not seating, check that the valve stem is clear and that no part of the bead is caught.
Once the bead is seated, let out some air, remove the pump, and use your valve core removal tool to unscrew the valve core. Add the manufacturer-recommended amount of tubeless tire sealant through the valve stem. Reinstall the valve core, tighten it, and then re-inflate the tire to the pressure specified on the tire sidewall or in your wheelbarrow's manual. Spin the wheel vigorously for a minute or two to distribute the sealant inside, then check for leaks by listening and looking for escaping air.
Common Problems and How to Fix Them (Leaky Beads, Stubborn Tires)
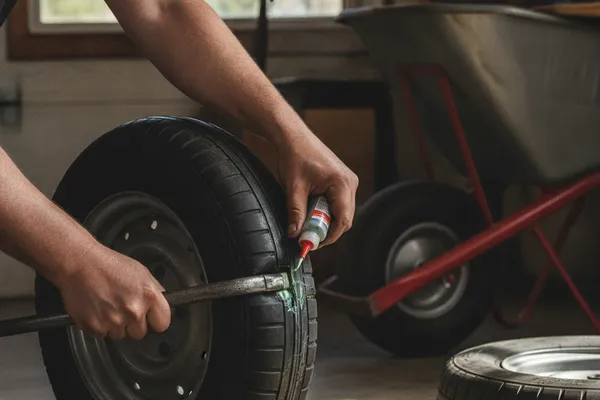
Even after a successful tire change, you might run into a few snags. A common issue is a leaky bead. This happens when the tire’s edge doesn't create a perfect seal with the rim. Sometimes, a little more sealant and vigorous spinning might fix it, as the sealant can work its way into tiny gaps.
If the bead is truly stubborn, you might need to deflate the tire, try to reseat the bead by pushing it further onto the rim, and then re-inflate.
Another frequent frustration is getting the new tire bead over the rim without pinching or damaging it. This is where patience and proper lubrication are key. If you're struggling, it might signal that the rim is bent or the tire simply isn't meant for that specific rim. For very stiff tires, some experienced users resort to using a strap or even a dedicated bead-blaster tool for motorcycles, though this is usually overkill for a wheelbarrow.
Always check that the valve stem is straight and not obstructed.
Tubeless vs. Tubed Wheelbarrow Tires: Is It Worth the Upgrade?
If your current wheelbarrow has a tubed tire, you might wonder if switching to tubeless is worth the effort. Tubed tires use an inner tube to hold air, which is prone to punctures and pinch flats. A pinhole in the tube can cause a rapid deflation, leaving you with a flat. Tubeless tires, on the other hand, rely on the tire bead creating an airtight seal directly with the rim, often aided by tire sealant inside the tire cavity.
The main advantage of tubeless is significantly reduced risk of flats from small punctures because the sealant can automatically plug small holes. This means less downtime, fewer flat repairs, and a more consistent tire pressure for easier pushing. While initial setup might seem more complex than replacing a tube, the long-term benefits in durability and convenience often make it a worthwhile upgrade for frequent wheelbarrow users.
When to Call a Professional (Or Just Buy a New Wheelbarrow)

While changing a tubeless wheelbarrow tire is a do-able DIY project, there are times when it's best to seek help or consider replacement. If the rim itself is significantly bent, dented, or corroded, it may not hold a seal properly, and trying to force a new tire onto a damaged rim could cause further issues. In these cases, replacing the entire wheel assembly or even the wheelbarrow might be more cost-effective than trying to repair a compromised rim.
Another sign to consider bringing in help is if you’ve tried multiple times to get the tire to seat and seal without success. You could risk damaging the new tire or the rim through excessive force. For most hobbyist gardeners, this is an occasional fix. However, if you're a professional landscaper or contractor who relies on your wheelbarrow daily and it’s experiencing frequent tire issues, it might be time to invest in a heavy-duty model or have a dedicated repair service on hand.
Keeping Your Wheelbarrow Tire in Great Shape: Maintenance Tips
Preventative care can extend the life of your tubeless wheelbarrow tire and keep it performing optimally. Regularly check your tire pressure. A tire that's consistently underinflated can be more susceptible to bead leaks and rim damage, while overinflation can lead to a rougher ride and increased wear. Aim for the pressure recommended by the wheelbarrow manufacturer, usually found on a sticker on the frame or in the owner's manual.
Keep the tire and rim clean. Dirt, debris, and dried mud can prevent the bead from sealing properly over time. After heavy use, especially in muddy or sandy conditions, a quick rinse can make a big difference. Periodically inspect the tire tread for excessive wear or embedded objects, and check the valve stem for any signs of damage or cracking.
A little attention can prevent many common problems.