A flat tire on your wheelbarrow might seem like a projectstopper, but knowing precisely how to change a wheelbarrow tire tube can save you time and money. It’s a common issue for anyone using a wheelbarrow for gardening, construction, or hauling, and thankfully, it's a repair that most people can tackle themselves with a few basic tools.
Aggregate user reviews on popular gardening forums show that a punctured tube is one of the most frequent complaints, often leading to frustration and a temporarily useless tool. Fortunately, manufacturers like Ames Companies and Rubbermaid, which produce many common wheelbarrows, design their wheels with user-replaceable parts. Understanding the process means you can get your wheelbarrow back to work quickly.
Flat Tire Woes? How to Change a Wheelbarrow Tire Tube Like a Pro

When It's Time for a New Tube: Recognizing the Signs
My Wheelbarrow Won't Hold Air Anymore
This is the most obvious clue: you inflate your wheelbarrow tire, and within a few hours or days, it's noticeably saggy or completely flat. Even if you don't see an obvious puncture, a tire that perpetually loses air needs attention. It could be a slow leak from a tiny hole, a damaged valve stem, or a faulty seal.
Cracks and Tears: What to Look For on Your Old Tube
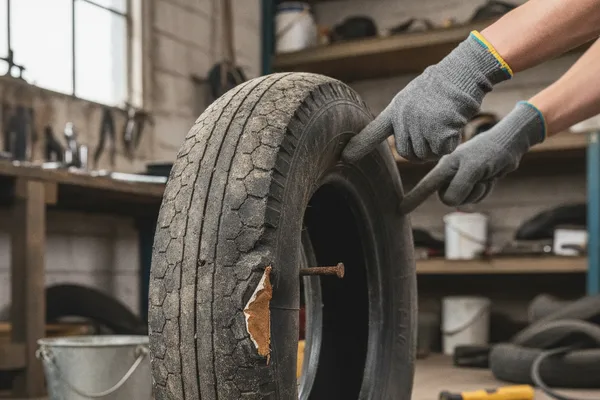
Before you start, it’s wise to inspect the old tube. Look for obvious cuts, punctures, or sections where the rubber has degraded or cracked. A torn valve stem where it meets the tube is also a common failure point. Don't forget to check the inside of the tire itself for any sharp objects like thorns or glass shards that might have caused the puncture.
What You'll Need: Essential Tools for the Job
The Must-Have Tools for Tire Tube Swaps
To successfully change a wheelbarrow tire tube, you'll need a few essential items. This typically includes a tire iron or two (sturdy flat pry bars work too), a pair of work gloves for grip and protection, and possibly a wrench or socket set if your wheel has nuts holding it on. Make sure you have a small dish or container for any nuts or washers you remove.
Sizing Up Your Replacement Tube and Tire
Getting the correct size replacement tube is crucial. Look on the sidewall of your existing tire for a size marking, usually something like "13×4.00-6" or "16×4.00-8." This notation tells you the tire's diameter, width, and the rim diameter it fits. You can also often find this information in your wheelbarrow's manual.
Getting Started: Removing the Wheelbarrow Wheel

Safely Detaching the Wheel from the Frame
First, position your wheelbarrow on a stable, flat surface. If your wheelbarrow has one, place a sturdy block or piece of wood under the frame to keep it from tipping. You'll usually find a bolt or axle going through the center of the wheel. Loosen and remove any nuts or cotter pins securing the axle.
Dealing with Stubborn Lug Nuts or Axles
Sometimes, the axle or lug nuts can be rusted or seized. A little penetrating oil, like WD-40, can work wonders here. Let it sit for a few minutes before trying again. Be patient; forcing it too hard can strip threads or damage components.
Once free, carefully slide the wheel off the axle.
The Big Swap: Your Step-by-Step Guide to Changing the Tube

Step 1: Fully Deflate the Old Tube
Even if the tire is already flat, ensure all the air is out of the old tube. You can do this by pressing down on the valve stem's core. If it's a Schrader valve, you might need a small tool or even your fingernail to depress the pin. This makes it much easier to break the tire bead away from the rim.
Step 2: Breaking the Tire Bead from the Rim
This is often the trickiest part. The tire bead is the edge of the tire that seals against the rim. You need to push the tire bead inward, away from the rim’s edge, all the way around on both sides. You can do this by stepping on the sidewall of the tire near the rim, or by using a C-clamp if you have one.
Step 3: Prying Off One Side of the Tire
Once the bead is broken all around, you need to get one side of the tire completely off the rim. Start by inserting a tire iron between the tire and the rim, opposite the valve stem. Pry the tire bead up and over the rim. Insert a second tire iron a few inches away and repeat.
Keep working your way around, levering sections of the tire bead over the rim until one side is fully detached.
Step 4: Removing the Old Inner Tube
With one side of the tire off the rim, you can now easily reach the inner tube. Gently pull the old tube out from between the tire and the rim. Pay attention to how the valve stem was positioned. You might find some debris or sharp objects lodged in the tire; carefully remove anything you find to prevent it from puncturing your new tube.
Step 5: Preparing and Inserting the New Tube
Take your new inner tube and inflate it just enough to give it some shape. This makes it easier to handle and helps prevent it from getting pinched. Carefully position the slightly inflated tube inside the tire, making sure the valve stem lines up with the hole in the rim. Feed the valve stem through the rim hole.
Step 6: Reseating the Tire Bead onto the Rim
This is the reverse of Step 3. Start by pushing the tire bead back over the rim with your hands, working your way around. For the last section, you may need to use your tire irons again. Be careful not to pinch the new inner tube between the tire bead and the rim as you lever it back into place.
Step 7: Reattaching the Wheel to the Wheelbarrow
Slide the wheel back onto the axle or mounting bracket on your wheelbarrow. If your wheel had nuts or a cotter pin, reinsert and tighten them securely. Make sure the wheel spins freely without wobbling excessively. Some wheelbarrows use retaining clips or pins; ensure these are properly engaged.
Common Hurdles and How to Overcome Them
Why Your Tire Won't Come Off the Rim (And What to Do)
Sometimes, the tire bead can be really stubborn, especially on older tires. If your tire irons aren't making progress, try using a third one to help lift the bead. You can also try lubricating the tire bead with a bit of soapy water. This helps it slide more easily over the rim.
Avoiding the Dreaded Tube Pinch During Installation
Pinching the new tube between the tire bead and the rim is a common mistake that leads to immediate flats. As you reseat the tire, constantly check that the tube is tucked neatly inside and isn't caught under the bead. Slightly overinflating the tube initially (but not too much!) can sometimes help keep it out of the way.
Inflating for Success: Getting the Pressure Just Right

How Much Air Does Your Wheelbarrow Tire Need?
Most wheelbarrow tires are rated for a specific maximum pressure, often found printed on the tire sidewall. For typical home use, you'll want to inflate the tire to around 25-30 PSI (pounds per square inch). For very heavy loads or rough terrain, you might go slightly higher, but never exceed the tire's maximum rating.
Checking for Leaks After the Change
After inflating the tire, give it a good spin and listen for any hissing sounds. You can also use a spray bottle filled with soapy water and apply it to the tire bead and valve stem. If you see tiny bubbles forming, you've found a leak. You may need to reseat the bead or even recheck the tube insertion.
When to Consider Alternatives: Solid vs. Pneumatic Tires
Solid Tires: The Puncture-Proof Upside And Downside
If you're tired of dealing with flats, a solid rubber tire is a great alternative. They are completely puncture-proof and require zero maintenance beyond occasional cleaning. However, solid tires don't offer the same shock absorption as pneumatic (air-filled) tires, which can make navigating bumpy terrain a bit rougher on the wheelbarrow and its load.
Pneumatic Tires: The Cushioning Benefit
Pneumatic tires provide a much smoother ride, absorbing bumps and vibrations that would otherwise jolt the wheelbarrow and its contents. This is especially beneficial when moving fragile materials or traversing uneven ground like gravel paths or garden beds. The trade-off, of course, is the risk of punctures and the need for proper inflation.