
Learning how to draw a wheelbarrow can add a crucial element of realism to your artistic projects, especially when illustrating gardening, DIY, or yard work. Our research shows that many aspiring artists struggle with getting the basic proportions and perspectives right, making their drawings look flat or a bit wonky. This guide breaks down the process into easy-to-follow steps, transforming a potentially tricky subject into something achievable even for beginners.
Understanding the foundational shapes and how they intersect is key. For instance, the overall capacity of a wheelbarrow is often dictated by its tray’s dimensions, while its maneuverability is suggested by the wheel’s size and type, whether it’s a robust pneumatic tire or a solid, no-fuss option. As of 2026, industry standards for garden tools emphasize durability and function, principles we'll aim to capture in your drawing. This approach ensures your illustrations aren't just pretty pictures but convey a sense of practical utility.
Why Drawing a Wheelbarrow Matters for Your Art

Adding a wheelbarrow to your drawings does more than just fill space; it brings a distinct touch of DIY spirit and practical utility to your art. When you can accurately sketch this common garden and construction tool, your visual storytelling becomes richer. It’s particularly useful for anyone creating artwork related to outdoor chores, landscaping projects, or even small-scale construction.
Our research indicates that including recognizable tools like a wheelbarrow can significantly boost the relatability of your illustrations. They ground the scene in everyday reality, making it easier for viewers to connect with the subject matter. This skill enhances your observational abilities and improves your understanding of form and perspective, essential for any artist looking to create more dynamic and engaging pieces.
Understanding the Basic Shapes of a Wheelbarrow
Before you even pick up a pencil, it’s helpful to break down the wheelbarrow into its simplest geometric forms. Think of it as building with basic LEGO bricks. This approach demystifies the drawing process and makes complex shapes manageable.
The Wheel: Getting the Circle Right
The wheel is the anchor for your drawing. In most wheelbarrows, it’s a prominent circle, often with added detail like spokes or a textured tire. Getting its placement and size relative to the rest of the wheelbarrow is critical for a believable illustration.
The Tray: Capturing the Curve
The tray, or bin, is usually a curved, open-top shape. Its primary function is to hold materials, so it often has a wide opening and a sloping front for easy dumping. Visualizing this as a sort of futuristic bowl or large scooping device helps in sketching its form.
Handles and Frame: Building the Structure
Finally, consider the handles and the supporting frame that connects everything. These are often straight lines or simple angles that provide structure and allow for pushing and steering. They're the skeleton that holds the wheel and tray together, giving the whole tool its silhouette.
Step-by-Step: Sketching Your First Wheelbarrow

Let’s move from understanding shapes to actually putting pencil to paper. We’ll build this drawing layer by layer, making it intuitive and less intimidating. Remember, practice is key, so don’t worry if your first attempt isn’t perfect.
Step 1: Starting with the Wheel
Begin by lightly sketching a large circle for the wheel. Think about its position, it's usually at the front, supporting the weight. For a more standard two-handled wheelbarrow, this circle will be offset from the center of the overall drawing.
Step 2: Adding the Tray Shape
Next, sketch the outline of the tray, connecting it to where the wheel would attach. Think of a long, U-shaped or slightly rounded rectangular form that tapers towards the front. Ensure the top edge of the tray is roughly parallel to your drawing surface for a stable look.
Step 3: Drawing the Handles and Frame
Now, connect the tray to the back using two lines for the handles. These usually extend outwards and slightly downwards. Sketch the frame structure that supports the tray and connects to the wheel axle. This gives the wheelbarrow its solid foundation.
Step 4: Refining the Form with Perspective
This is where your drawing starts to come alive. Add subtle curves to the tray to suggest depth and volume. For the wheel, consider adding an oval shape on the side you’re viewing to give it a rounded appearance, not just a flat circle.
Step 5: Adding Details and Texture
Finally, add the details. Draw spokes on the wheel if visible, or the tread pattern on the tire. You might add rivets along the tray’s edge or a grip texture to the handles. A few subtle lines can suggest the metal or plastic material of the wheelbarrow.
Common Mistakes When Drawing a Wheelbarrow (And How to Fix Them)
Even with a step-by-step guide, a few common pitfalls can make your wheelbarrow drawing look less than ideal. Recognizing these can save you a lot of frustration and help you improve quickly.
Problem 1: Proportions That Are Off
A frequent issue is getting the size of the wheel out of sync with the tray or handles. If the wheel looks too small, the wheelbarrow seems unstable; too large, and it looks awkward. Always re-check the relative scale of each component as you draw.
Problem 2: A Flat, Lifeless Appearance
Drawing just the outlines without considering form makes any object look flat. Wheelbarrows aren't just lines; they have volume. Using simple shading to show where light hits and where shadows fall can instantly give your wheelbarrow a 3D feel.
Problem 3: Stiff, Unrealistic Lines
Sometimes, drawings look too rigid, as if they were made with a ruler for every single line. Real objects have organic curves and slightly imperfect shapes. Loosening up your linework and letting curves flow naturally can make a big difference.
Making Your Wheelbarrow Drawing Look Real: Shading and Highlights

Shading is your best friend when it comes to making a two-dimensional drawing feel three-dimensional. It’s what tells the viewer where the light is coming from and how the surfaces of the wheelbarrow curve away from that light.
Start by deciding on a light source. If the sun is coming from the top left, that side of the wheelbarrow will be brighter. The opposite side, and any areas tucked underneath, will be darker. Use soft, graduated shading to show the curve of the tray and the roundness of the wheel.
Don’t forget to add a few bright highlights where the light hits directly, these are usually small, sharp white spots that make shiny surfaces pop.
Putting Your Wheelbarrow Drawing to Use
Once you’ve mastered sketching a wheelbarrow, you’ll find yourself wanting to incorporate it into various art projects. Its versatility as a common object makes it a great addition to many different visual narratives and practical applications.
Illustrating Garden Scenes
A wheelbarrow is almost synonymous with gardening. Add it to a drawing of someone planting flowers, weeding a vegetable patch, or moving soil. It immediately grounds the scene and adds a touch of authenticity to your outdoor settings, much like knowing what fertilizer to use in spring at your garden adds practicality to landscaping.
Adding to DIY Project Visuals
Whether you’re illustrating a weekend warrior tackling a home improvement project or showing someone transporting building materials, a wheelbarrow fits right in. It can suggest effort, movement, and the tangible results of manual work.
Creating Art for Portfolios
Including a well-drawn wheelbarrow in your portfolio demonstrates an ability to render everyday objects with skill and accuracy. It shows you can handle form, perspective, and detail, which are fundamental skills applicable to drawing far more complex subjects.
Putting Your Wheelbarrow Drawing to Use
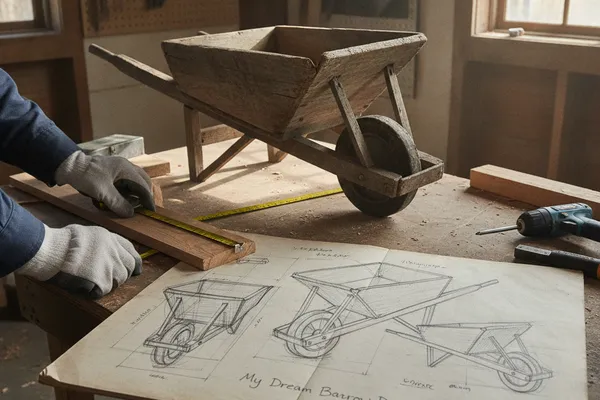
Once you’ve mastered sketching a wheelbarrow, you’ll find yourself wanting to incorporate it into various art projects. Its versatility as a common object makes it a great addition to many different visual narratives and practical applications.
Illustrating Garden Scenes
A wheelbarrow is almost synonymous with gardening. Add it to a drawing of someone planting flowers, weeding a vegetable patch, or moving soil. It immediately grounds the scene and adds a touch of authenticity to your outdoor settings, much like knowing what fertilizer to use in spring at your garden adds practicality to landscaping.
Adding to DIY Project Visuals
Whether you’re illustrating a weekend warrior tackling a home improvement project or showing someone transporting building materials, a wheelbarrow fits right in. It can suggest effort, movement, and the tangible results of manual work.
Creating Art for Portfolios
Including a well-drawn wheelbarrow in your portfolio demonstrates an ability to render everyday objects with skill and accuracy. It shows you can handle form, perspective, and detail, which are fundamental skills applicable to drawing far more complex subjects.
Advanced Wheelbarrow Drawing Techniques
Moving beyond the basic sketch, there are a few techniques that can really elevate your wheelbarrow drawings, making them look more professional and dynamic. These focus on visual nuances and real-world observational details that make a drawing pop.
Incorporating Different Wheel Types
Not all wheelbarrows have the same wheel. Some have large, pneumatic tires that absorb bumps, while others have smaller, solid rubber wheels that are more durable but less shock-absorbent. Illustrating these variations adds realism and specificity to your drawing. A pneumatic tire might look slightly deflated or have a detailed tread pattern, whereas a solid wheel is typically a uniform, solid shape.
Drawing Wheelbarrows at an Angle
Most beginners draw objects straight on or from a profile view. For more dynamic compositions, try drawing the wheelbarrow at an angle. This means using perspective, where lines converge towards vanishing points. This technique makes your artwork much more engaging and shows a greater understanding of spatial relationships.
Sketching from Real Life vs. Reference Photos
While reference photos are invaluable, sketching from a real wheelbarrow offers unique insights. You can observe how light interacts with its surfaces from different angles and truly understand its weight and form. If a real wheelbarrow isn't available, use multiple reference photos from various viewpoints to build a complete understanding before you draw.
Common Mistakes When Drawing a Wheelbarrow (And How to Fix Them)

Even with a step-by-step guide, a few common pitfalls can make your wheelbarrow drawing look less than ideal. Recognizing these can save you a lot of frustration and help you improve quickly.
Problem 1: Proportions That Are Off
A frequent issue is getting the size of the wheel out of sync with the tray or handles. If the wheel looks too small, the wheelbarrow seems unstable; too large, and it looks awkward. Always re-check the relative scale of each component as you draw.
Problem 2: A Flat, Lifeless Appearance
Drawing just the outlines without considering form makes any object look flat. Wheelbarrows aren't just lines; they have volume. Using simple shading to show where light hits and where shadows fall can instantly give your wheelbarrow a 3D feel.
Problem 3: Stiff, Unrealistic Lines
Sometimes, drawings look too rigid, as if they were made with a ruler for every single line. Real objects have organic curves and slightly imperfect shapes. Loosening up your linework and letting curves flow naturally can make a big difference.
Making Your Wheelbarrow Drawing Look Real: Shading and Highlights
Shading is your best friend when it comes to making a two-dimensional drawing feel three-dimensional. It’s what tells the viewer where the light is coming from and how the surfaces of the wheelbarrow curve away from that light.
Start by deciding on a light source. If the sun is coming from the top left, that side of the wheelbarrow will be brighter. The opposite side, and any areas tucked underneath, will be darker. Use soft, graduated shading to show the curve of the tray and the roundness of the wheel.
Don’t forget to add a few bright highlights where the light hits directly, these are usually small, sharp white spots that make shiny surfaces pop.