
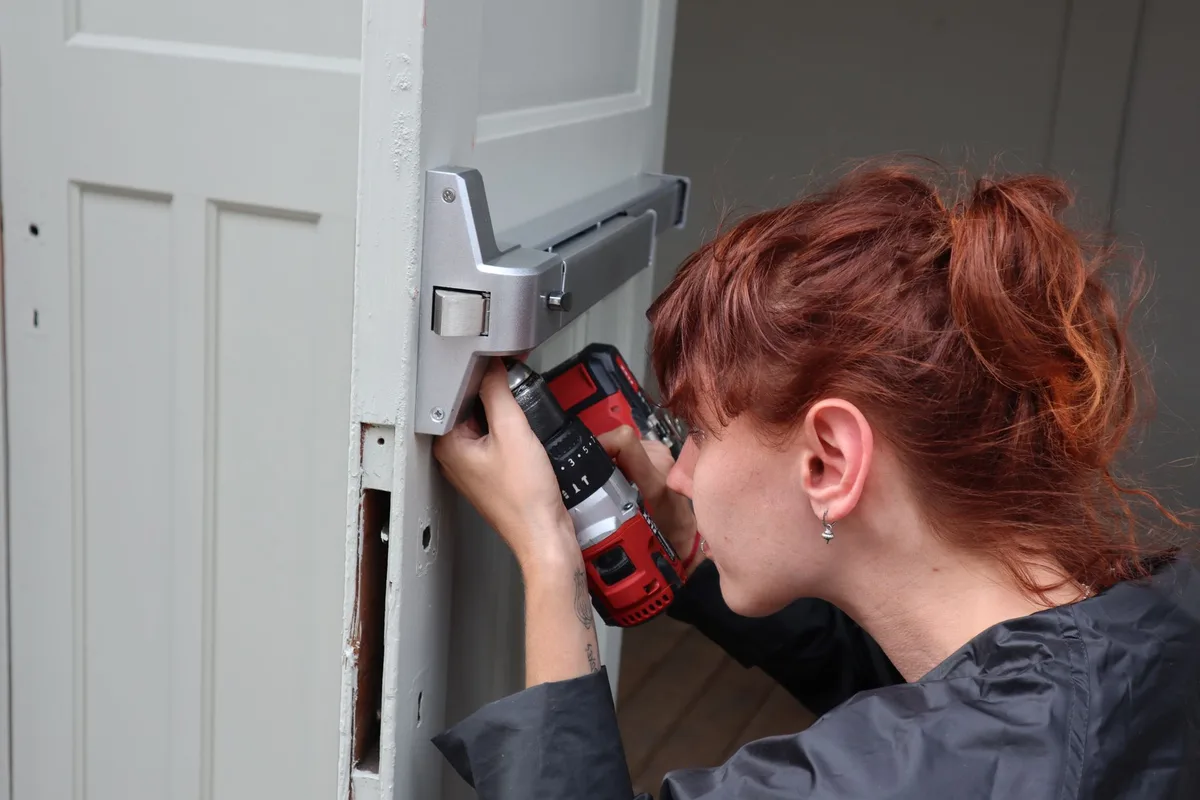
Being locked out of your home is stressful, and waiting on a locksmith isn't always practical. Knowing how to drill open a deadbolt lock gives you a real, controlled option when you need access fast. Most residential deadbolts can be opened this way in under fifteen minutes with the right tools, and the door frame stays intact throughout.
As of 2026, residential deadbolts in the US fall under the ANSI/BHMA A156.30 grading standard. The scale runs from Grade 1 (highest security) down to Grade 3 (basic hardware). That grade directly affects how long the job takes and which drill bit material you'll need.
Here's a complete breakdown of everything involved.
Quick Answer
To drill open a deadbolt lock, target the shear line just above the keyway. Start with a 1/8" pilot hole at that point. Step up to a 3/8" bit to destroy the pin stack.
Turn the freed cylinder with a flathead screwdriver. The bolt retracts and the door opens. This works on most residential pin tumbler deadbolts.
Can You Actually Drill Open a Deadbolt Yourself?
Yes, drilling a deadbolt yourself is realistic for most residential locks. The pin tumbler mechanism inside the cylinder is vulnerable at one precise point. Once you drill through the pin stack there, the plug releases.
The biggest variable is the lock's ANSI grade. Grade 2 deadbolts are the most common residential type and are straightforward with a cobalt bit and a standard cordless drill. Grade 1 locks include hardened steel anti-drill pins that deflect weaker bits and add significant time and effort.
If you have a decent drill, the right bit, and a center punch, this is a manageable DIY task. You're not trying to destroy the door. You're targeting a specific point inside the cylinder to release the plug.
Before You Start: Legal Rights and Safety Checks
Drilling a lock counts as destructive entry, which makes the legal side non-negotiable before you pick up a drill.
If you own the property, you have every right to drill your own lock. If you're a landlord, property manager, or tenant, the situation gets more nuanced. The Associated Locksmiths of America notes that professional locksmiths are trained to verify ownership or authorization before performing destructive entry.
Hold yourself to the same standard.
Legal requirements before drilling:
- You must own the property or have documented, authorized access to it
- Landlords cannot drill a tenant's lock without proper legal process (such as a court-ordered eviction)
- Police may request proof of residency before you proceed with forced entry
Safety requirements:
Metal shavings from drilling are sharp, fine, and fast-moving. Eye injuries from unprotected drilling are a genuine risk.
- Safety glasses (non-negotiable at every step)
- Work gloves to protect against metal fragments
- Hearing protection for extended drilling sessions
Keep the drill perpendicular to the lock face throughout the job. A bit that walks off-target can gouge the door finish or send fragments outward. Work at a controlled pace, not a frantic one.
What's Inside a Deadbolt: Why the Anatomy Matters
You can't drill accurately without knowing what you're targeting. The anatomy of a pin tumbler deadbolt is straightforward, and understanding it tells you exactly where to put the bit.
The Pin Stack, Key Pins, and Driver Pins Explained
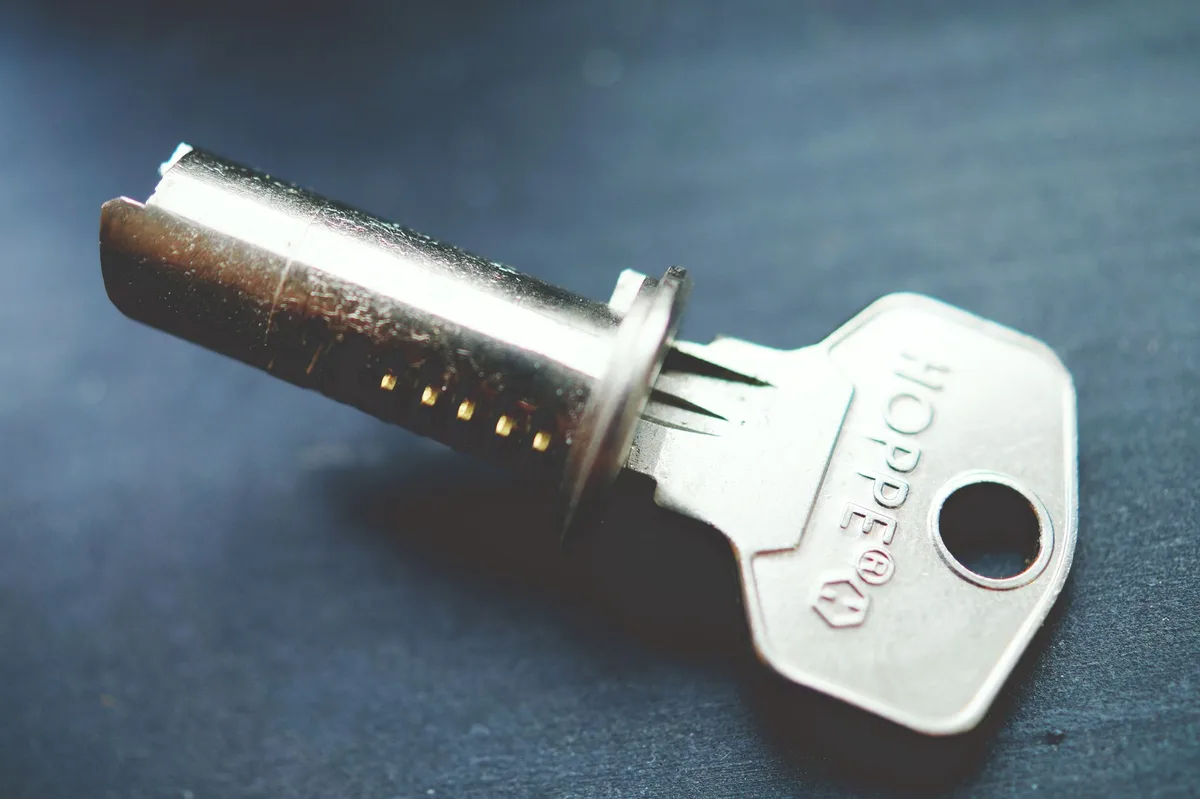
A residential deadbolt contains a cylindrical plug that rotates inside a fixed housing. Inside the plug are five or six vertical channels. Each channel holds two pins stacked on top of each other.
The bottom pin is the key pin. Its length varies per channel, matched to the corresponding cut on the correct key. The top pin is the driver pin.
A spring above the driver pin pushes both pins downward.
When no key is present, the driver pins cross the boundary between the plug and the housing. That crossing point is what physically locks the cylinder from rotating.
Where the Shear Line Sits on the Lock Face
The shear line is the boundary between the plug and the housing. When the correct key is inserted, all the key-to-driver pin gaps align precisely at the shear line. That alignment frees the plug to rotate, which retracts the bolt.
On the face of the lock, the shear line runs roughly in line with the top of the keyway. That's your drill target. Aim too low and you miss the pin stack entirely.
Aim too high and you're drilling into the housing, wasting time and destroying your bit on solid steel.
How Drilling Destroys the Pin Stack to Free the Cylinder
Drilling at the shear line destroys or displaces the driver pins. Once the driver pins are gone, nothing prevents the plug from rotating freely.
The key pins may stay in the channels or get pushed out with the debris. Either way, you can insert a flathead screwdriver into the keyway and rotate the plug exactly as a key would. The bolt retracts.
The door opens.
Tools and Materials You Need Before You Start
Having everything laid out before you begin matters more here than in most DIY tasks. Once you start drilling, stopping to find a missing tool wastes time and risks letting the bit overheat and bind in the hole.
| Tool / Material | Purpose |
|---|---|
| Cordless or corded drill | Main boring tool (at least 600 RPM) |
| Center punch and hammer | Prevents bit from walking on the smooth lock face |
| 1/8" cobalt drill bit | Pilot hole at the shear line |
| 3/16" and 1/4" cobalt drill bits | Progressive hole stepping before final pass |
| 3/8" cobalt or carbide-tipped bit | Final removal of the full pin stack |
| Medium flathead screwdriver | Turns the freed cylinder to retract the bolt |
| Safety glasses | Eye protection against metal shavings |
| Work gloves | Hand protection against sharp fragments |
| Cutting oil or WD-40 | Reduces heat and friction on the bit (strongly recommended) |
| Masking tape | Protects door finish around the lock (optional) |
One note worth flagging: if you're working on a Grade 1 deadbolt with anti-drill protection, standard HSS bits from a basic home kit will struggle badly. You'll need cobalt or carbide-tipped bits for those locks. The next section covers exactly how to choose.
Choosing the Right Drill Bit for a Deadbolt Lock
The drill bit is the most critical variable in this job. Use the wrong material and the bit either deflects off hardened steel inserts or overheats and dulls before it makes any meaningful progress.

HSS vs. Cobalt vs. Carbide-Tipped: Which Actually Works
High-Speed Steel (HSS): Works on Grade 2 and Grade 3 deadbolts with brass or zinc alloy cylinders and no hardened steel components. For a basic residential lock from a hardware store, HSS handles the job cleanly. It won't survive contact with the hardened steel anti-drill inserts found in Grade 1 locks.
Cobalt drill bits (M35 or M42 grade): The best general-purpose choice for deadbolt drilling. Cobalt bits tolerate far more heat than HSS and cut through the mild hardened components in most residential Grade 1 locks. If you're unsure of your lock's grade, cobalt is the safe default.
Carbide-tipped bits: Reserved for high-security Grade 1 locks with serious anti-drill protection, such as the Schlage B60N or equivalent. Carbide is harder and more brittle than cobalt. It requires steady, controlled drill pressure throughout.
It's overkill on a standard residential deadbolt, but necessary on a genuinely hardened cylinder.
| Bit Type | Works On | Key Limitation |
|---|---|---|
| HSS | Grade 2 and Grade 3 residential locks | Fails against hardened steel anti-drill inserts |
| Cobalt (M35/M42) | Grade 1 and Grade 2 locks | Slower on extreme hardened steel components |
| Carbide-tipped | High-security Grade 1 locks | Brittle; requires steady, controlled pressure |
Why Starting with a 1/8" Pilot Hole Matters
Starting with a full-size 3/8" bit on a smooth lock face is a common mistake. The bit has nothing to grip on the curved metal surface and walks away from the target point immediately, scratching the door and ruining your alignment.
A 1/8" pilot hole drilled precisely at the shear line gives every subsequent larger bit a clean starting channel. It also confirms your aim before you commit to bigger holes.
Use the center punch before anything else. Place the punch tip just above the top of the keyway and tap it once with a hammer. That small indent stops the bit from drifting on first contact.
Then step up through 3/16" and 1/4" before finishing with the 3/8" bit to clear the full pin stack.
How to Drill Open a Deadbolt Lock: Step-by-Step
With your tools ready and your target understood, here's the full process. Work at a controlled pace throughout.
Step 1: Clear or Work Around the Escutcheon Plate
The escutcheon plate is the decorative face cover around the lock cylinder. Some are removable with two small screws. Take it off if you can.
If the plate is integrated into the lock body, drill straight through it. Just confirm your pilot hole still lands at the shear line, not at the decorative center of the plate.
Step 2: Center Punch the Target Point Above the Keyway
Place the center punch tip just above the top of the keyway. That upper edge marks roughly where the shear line sits on the lock face. Tap the punch once firmly with a hammer.
That small indent is what stops the bit from skating across the polished metal surface. Don't skip this step.
Step 3: Drill the Pilot Hole at the Shear Line
Set your drill to 600 to 800 RPM and seat the 1/8" bit tip in the punch indent. Apply firm, steady forward pressure. Keep the drill perpendicular to the lock face throughout.
Drill to a depth of roughly 3/4" to 1", which covers the full pin stack on most residential deadbolts. Apply a few drops of cutting oil every 20 to 30 seconds to manage heat buildup.
Step 4: Step Up Bit Sizes and Destroy the Pin Stack
Switch to the 3/16" bit and drill through the same channel. Then move to the 1/4" bit. Each pass widens the hole and clears more of the pin material.
Finish with the 3/8" bit. This is the pass that fully destroys the pin stack across the shear line. Keep applying cutting oil.
Don't push harder to speed things up; let the RPM and bit hardness do the cutting.
Step 5: Test the Cylinder and Retract the Bolt
Insert a medium flathead screwdriver into the keyway. Apply rotational pressure in the direction a key would turn. With the pin stack cleared, the plug should rotate freely.
If it does, the bolt retracts and the door opens. If there's still resistance, run the 3/8" bit through once more before testing again.
What to Do When the Cylinder Still Won't Turn After Drilling
The most common cause is incomplete pin removal. A fragment of a driver pin is still bridging the shear line and blocking rotation.
Run the 3/8" bit through one more time with light forward pressure, then test the screwdriver again. If the hole is shallow (under 3/4" deep), you've likely missed the rear pin channels. Drill deeper before retesting.
On older or corroded locks, the plug can bind independently of the pins. A short spray of penetrating oil into the keyway and a 30-second wait often frees it.
Drilling a Grade 1 vs. Grade 2 Deadbolt: What Actually Changes
Grade 2 deadbolts use brass or zinc alloy cylinders with no hardened components. Aggregate installer feedback indicates these drill out in 5 to 10 minutes with a cobalt bit and minimal resistance.
Grade 1 locks are built differently. Many include hardened steel anti-drill pins placed deliberately in the drill path. Manufacturer documentation for locks like the Schlage B60N lists anti-drill pins and a reinforced face plate as standard protective features.
A cobalt bit will deflect or stall when it hits those inserts.
When that happens, switch to a carbide-tipped bit for that specific pass, then return to cobalt once through the hardened section. Budget 15 to 25 minutes for a Grade 1 lock rather than the usual 5 to 10.
Common Mistakes That Break Bits, Damage the Door, or Fail the Entry
Skipping the center punch. Without a punch indent, the bit walks across the smooth lock face immediately. You scratch the door and make no progress.
Too much forward pressure. Forcing the drill overheats the bit and dulls it fast. Light, steady pressure with consistent RPM outperforms aggressive pushing every time.
Drilling too shallow. Stopping at 1/2" depth leaves the rear pin channels intact. The plug won't rotate. Most residential locks need 3/4" to 1" of depth to fully clear the pin stack.
Jumping straight to the 3/8" bit. Skipping the progressive size steps misaligns the hole and puts excessive stress on the larger bit. Breakage mid-bore is a real risk.
Neglecting heat management. A dry bit on steel gets hot fast and loses hardness. Use cutting oil on every size step, not just the final pass.
Drilling vs. Other Entry Methods: When Each One Makes Sense
Drilling destroys the lock, so it's worth knowing what alternatives exist before committing.
Lock picking is non-destructive and leaves the cylinder functional. It requires skill. A trained locksmith can pick many Grade 2 residential deadbolts in under two minutes.
Without that experience, picking typically takes longer than drilling.
Bump keys work on many standard pin tumbler locks and require less skill than picking. They don't work on high-security locks with spool pins or anti-bump features, and you need a matching key blank for the specific lock profile.
Calling a locksmith is the cleanest option when you lack the tools, the confidence, or the time. A licensed professional can open the lock without damaging the door and install a replacement in the same visit.
| Method | Time | Skill Level | Lock Survives? |
|---|---|---|---|
| Drilling | 5 to 25 minutes | Low to moderate | No |
| Lock picking | 2 to 30+ minutes | Moderate to high | Yes |
| Bump key | 1 to 5 minutes | Low to moderate | Usually yes |
| Locksmith (with travel) | 15 to 45 minutes | Professional | Yes |
Drilling makes the most sense when speed matters and no other option is available. Plan to replace the lock immediately after.
Replacing the Deadbolt After Drilling
Once you're inside, replace the lock immediately. A deadbolt with a destroyed pin stack provides zero security.
Pick up a replacement in the same backset size as the original, either 2-3/8" or 2-3/4". Most residential deadbolts share the same 2-1/8" bore hole diameter, so the new lock drops straight in. The swap takes about 15 minutes with a screwdriver.
How Much Does It Cost to Drill It Yourself vs. Call a Locksmith?
| Option | Typical Cost |
|---|---|
| DIY (tools already owned) | $0 to $15 for bits + $20 to $80 for new lock |
| DIY (buying a drill too) | $50 to $150 for drill and bits + new lock |
| Locksmith (standard hours) | $75 to $150 including entry and replacement |
| Locksmith (after-hours emergency) | $150 to $300+ |
If you already own a drill and cobalt bits, your only real cost is the replacement deadbolt. The math shifts if you're buying a drill specifically for this job, in which case a locksmith often works out cheaper.
When You Should Call a Locksmith Instead of Drilling
Call a professional if you're facing a Grade 1 lock with serious anti-drill protection and you don't have carbide-tipped bits. Drilling a hardened cylinder with the wrong bit can damage the lock face without opening it, leaving you worse off than before.
Also call a locksmith if there's any question about legal authorization, if the property is under a rental agreement, or if you're not confident replacing the lock afterward. A licensed locksmith carries insurance and can document the entry if required.
Frequently Asked Questions
Does drilling open a deadbolt damage the door frame?
No. Drilling targets only the lock cylinder itself. When done correctly, the door frame, door edge, and surrounding finish stay completely intact.
The only thing destroyed is the pin stack inside the cylinder plug.
What drill bit size works best for a standard residential deadbolt?
Start with a 1/8" pilot bit and finish with a 3/8" bit. For Grade 2 locks, cobalt M35 or M42 bits handle the job cleanly. For Grade 1 locks with hardened inserts, switch to a carbide-tipped bit for that specific pass, then return to cobalt.
How long does it take to drill open a deadbolt?
A Grade 2 deadbolt typically takes 5 to 10 minutes with the right technique and bit. A Grade 1 lock with anti-drill protection can take 15 to 25 minutes. The biggest variable is whether you hit hardened steel inserts and whether you've sized up your bits correctly.
Can you drill a double-cylinder deadbolt the same way?
Yes. A double-cylinder deadbolt uses the same pin tumbler mechanism as a single-cylinder model, so the drilling process is identical. Once the cylinder is freed, use a screwdriver to retract the bolt from the interior side the same way you would from the exterior.