
Making a wheelbarrow with a box from scratch can be a rewarding project, especially when you need a custom size or specific capacity for your garden or property tasks. This guide breaks down the process with a visual approach, focusing on how components fit together to create a functional tool.
When you imagine building, think about the materials you'll use and how they'll stand up to tough use. Manufacturer specifications for wood screws, for instance, often recommend specific gauge sizes based on the wood thickness, like using #8 gauge screws for 3/4-inch plywood for robust joinery. Our research covers both common approaches and potential pitfalls.
Why Visuals Are Your Best Friend for This Project

Building anything, especially something with moving parts and structural demands like a wheelbarrow, is so much easier when you can see how things connect. Text descriptions can only go so far in explaining angles, alignments, and how different pieces form a stable whole. That's why this guide leans heavily on describing what you'd see in diagrams or photos.
Think about how a carpenter approaches a framing job; they're constantly visualizing the 3D structure. Understanding how the wheel axle needs to be centered relative to the box and frame helps distribute weight evenly. Similarly, seeing how handle supports brace against the frame provides confidence in maneuverability.
We’ll walk you through these visual cues to build a reliable tool.
Choosing Your Box Style: Wood, Metal, or Plywood?

The heart of your wheelbarrow is its box, and what you make it from will significantly impact its durability, weight, and how easy it is to build. Each material offers distinct advantages and challenges, so it’s worth thinking about what tasks you’ll use your wheelbarrow for most often. If you’re primarily moving garden soil or mulch, one material might suit you better than if you're hauling heavy gravel.
Pros and Cons of Each Box Material
Here’s a quick look at what each popular material brings to the table for your custom wheelbarrow box.
- Wood
- Pros: Easy to cut and shape, readily available, can be very strong if thick enough and well-joined, offers a classic look.
- Cons: Susceptible to rot and water damage unless treated, can be heavy, may splinter over time.
- Metal
- Pros: Extremely durable, weather-resistant, can withstand heavy loads, relatively lightweight for its strength.
- Cons: Requires specialized tools and skills to cut and weld, can be expensive, prone to rust if not properly finished.
- Plywood
- Pros: Stable and strong, comes in large sheets for quicker assembly, relatively affordable, good balance of weight and durability, easier to work with than solid metal.
- Cons: Edges can be vulnerable to moisture if not sealed, may delaminate under extreme stress or prolonged moisture exposure.
Planning Your Wheelbarrow: Design and Dimensions
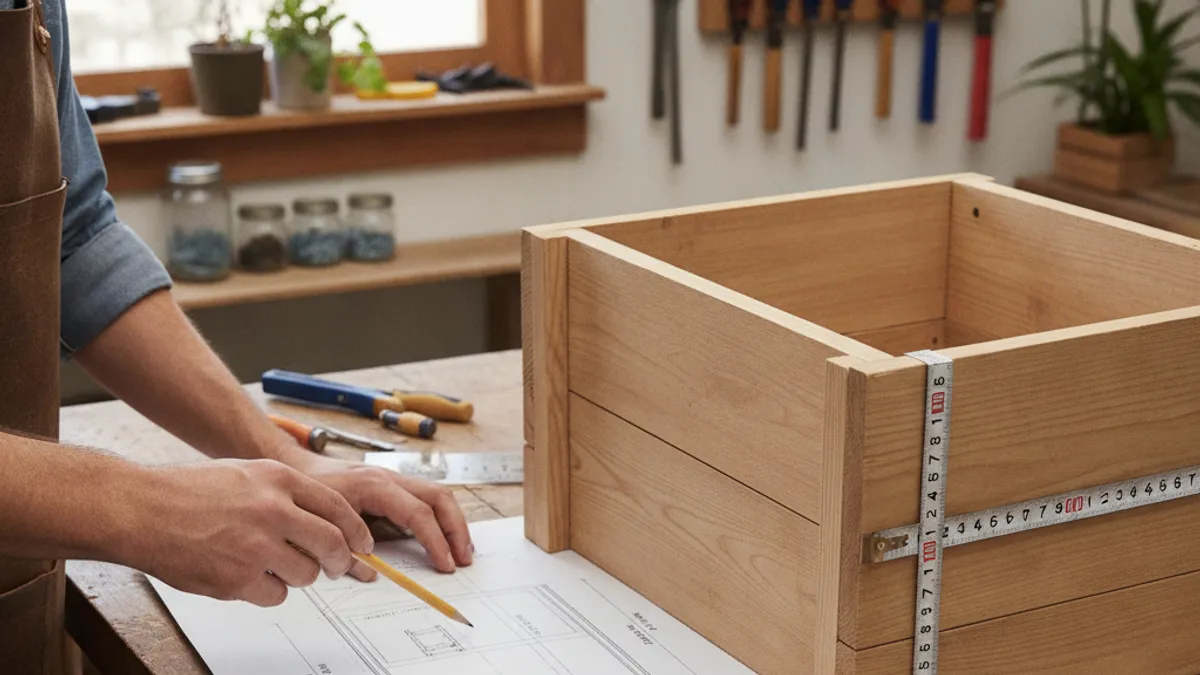
Before you even pick up a saw, it's crucial to sketch out your design. This planning phase is where you determine how big your wheelbarrow’s box will be, the desired load capacity, and how the whole thing will balance. A well-planned design prevents frustration during the build and ensures a functional wheelbarrow later.
Think about the primary uses. If you're hauling large loads of leaves, you might want a wider, shallower box. For moving heavy rocks, a smaller, sturdier, reinforced box might be better.
Manufacturer specs for wheelbarrow frames often suggest proportions that aim for a load-bearing angle close to 45 degrees when the handles are on the ground. As of 2026, many DIY plans aim for a balance that allows a person of average strength to lift loads effectively.
Key Measurements for a Balanced Build
Getting the proportions right is key for a wheelbarrow that’s easy to steer and won't want to tip. This involves looking at the relationship between the box, the frame, and the wheel’s placement.
- Box Size: Decide on the length, width, and depth. A common starting point for a garden wheelbarrow is around 3 cubic feet capacity. You’ll want to visualize how much soil, mulch, or gravel that actually is.
- Wheel Placement: The wheel should be positioned so that the bulk of the load sits directly over it. Too far forward, and it will be hard to lift; too far back, and it will be unstable. Aim for the center of the box’s primary volume to be directly above the wheel’s axle.
- Handle Length and Angle: Handles should be long enough to give you good leverage and allow for comfortable push angles. The angle where the handles meet the frame is also important for stability and lift. A slight upward angle as they extend away from the frame is typical.
Load Capacity Goals
Consider what you'll be hauling. A wheelbarrow designed for moving lightweight garden debris will have different requirements than one intended for heavy landscaping materials.
- Light Loads (e.g., leaves, clippings): Focus on ease of maneuverability and a good volume.
- Medium Loads (e.g., soil, mulch, compost): Strength and balance become more critical.
- Heavy Loads (e.g., gravel, sand, small rocks): Durability and a robust frame are paramount. You might even consider a two-wheeled design for better stability with very heavy materials.
Essential Tools and Materials for the Job

To build your own wheelbarrow, you’ll need a good set of tools and the right materials. Having everything on hand before you start cutting will make the process much smoother and safer. Some of these might already be in your workshop, while others you may need to acquire.
When selecting materials, think about durability and weather resistance, especially for outdoor use. For example, exterior-grade plywood, often available in 3/4-inch thickness, is a solid choice for the box, offering good structural integrity. Manufacturer specifications for fasteners, like exterior-grade wood screws, will dictate lengths depending on how deeply they need to penetrate for a secure hold, for 3/4-inch plywood, 1.5-inch to 2-inch screws are common.
Here’s a breakdown of what you’ll likely need:
- For the Box:
- Plywood (exterior grade, 3/4-inch recommended) or lumber (e.g., 1×6, 2×4)
- Wood screws (exterior grade, various lengths)
- Wood glue (waterproof/exterior grade)
- For the Frame & Handles:
- Lumber (e.g., 2x4s, 2x6s) or metal tubing/angle iron
- Bolts, nuts, and washers
- Metal brackets or gussets (if using wood frame)
- The Wheel Assembly:
- Wheel (pneumatic or solid, size depends on desired performance, 10-inch to 16-inch is common)
- Wheel axle (usually a threaded rod or smooth bolt)
- Bearings (if the wheel doesn't have them integrated)
- Nuts and washers for the axle
- Tools:
- Measuring tape and pencil
- Saw (circular saw, miter saw, or handsaw)
- Drill with various drill bits and driver bits
- Screwdriver or impact driver
- Clamps
- Safety glasses and work gloves
- Sandpaper or sanding block
- Optional: Jigsaw for curved cuts, wood file, metal cutting tools (if using metal frame)
- Finishing:
- Exterior paint, stain, or sealant
Step-by-Step Visual Build: Assembling the Box

The box is where you’ll load up your materials, so building it strong and to the right dimensions is paramount. We'll focus on a plywood box here, as it's a common and manageable material for DIYers. Imagine you’re looking at a set of clear blueprints or a detailed woodworking video as we go.
First, you'll cut your plywood panels according to your design. For a basic rectangular box, this means cutting two side panels, a front panel, and a back panel to your planned dimensions. Ensure your cuts are as straight and square as possible; this makes assembly much easier and results in a more robust box structure.
Cutting and Joining Plywood/Wood Panels
Lay out your plywood sheets on a stable work surface. Measure and mark your cuts carefully. Remember, measure twice, cut once!
Use a straight edge or guide with your circular saw to ensure straight edges and precise angles.
Once you have your panels cut, it's time to join them. Apply a generous bead of waterproof wood glue along the edges that will meet. Then, carefully position the panels together.
For a standard box shape, you'll attach the front and back panels to the edges of the side panels. It’s helpful to clamp the pieces together while the glue sets.
Reinforcing the Box Structure
Simply gluing and screwing might not be enough for a wheelbarrow that’s going to be loaded up and knocked around. Reinforcing the corners makes a huge difference in longevity. You can achieve this in a few ways:
- Corner Blocks: Cut small triangular or rectangular blocks of scrap wood and glue and screw them into the inside corners of the box. This adds significant shear strength.
- Metal Brackets: Small L-shaped metal brackets can be screwed into the inside corners for maximum reinforcement. Ensure you use screws that are long enough to grip both panels firmly.
- Overlapping Joints: Instead of butt joints, you can design your box so the front and back panels overlap the edges of the side panels, or vice versa. This creates a stronger connection.
Make sure any screws you use are exterior grade to prevent rust. These screws should penetrate deeply enough to get a good grip on both pieces of wood, a common recommendation is to use screws that are at least twice the thickness of the wood they are primarily going into. This visual reinforcement adds confidence that your box can handle the load.
Step-by-Step Visual Build: Creating the Frame and Handles

The frame is the backbone of your wheelbarrow, providing the structure that holds the box and connects to the wheel and handles. How you build this frame will determine how sturdy and well-balanced your finished product is. Materials like sturdy lumber (2x4s are a common choice) or metal tubing offer different construction methods and durability.
Choosing Your Frame Material (Wood vs. Metal)
If you're sticking with a primarily wooden build, lumber provides a cohesive aesthetic and is generally easier for most DIYers to work with. Metal frames, on the other hand, offer superior strength and longevity, especially if you plan on hauling very heavy materials. Our research indicates that many DIY wheelbarrow plans opt for wood for simplicity, but metal fabrication offers a more industrial-grade solution if you have welding equipment or access to it.
Constructing the Frame
For a wooden frame, you'll typically build two long beams that will run from near the wheel all the way back to form the handle supports. These are often made from 2x4s or even 2x6s for extra strength. You'll then add cross braces between these beams to create a rigid structure.
Think of it like building a small, long bench that has a place to attach a wheel at one end and becomes handles at the other.
Visualize measuring and cutting your lumber to length. The front end of these beams will need to accommodate the axle and wheel, often featuring a wider spread or specific notches. The rear end will taper or extend to form the handles.
Secure all joints with strong wood glue and exterior-grade screws or bolts. Using metal L-brackets at critical connection points can add substantial reinforcement, preventing racking or loosening over time.
Attaching the Handles for Comfort and Control
The handles are your primary interface with the wheelbarrow, so their length, angle, and attachment need to feel right. They should extend from the rear of the frame. Many designs attach them as a continuation of the main frame beams, or as separate pieces bolted securely to the frame's end.
Ensure the handles are long enough to provide good leverage without making the tool unwieldy. A typical handle length might extend 4 to 5 feet from the wheel. The grip area should be comfortable; some people wrap them with padding or use ergonomically shaped wood.
The angle at which the handles extend upwards from the frame is also critical for balance; aim for a natural push height when the wheelbarrow is loaded.
Connecting Box to Frame: Stability is Key
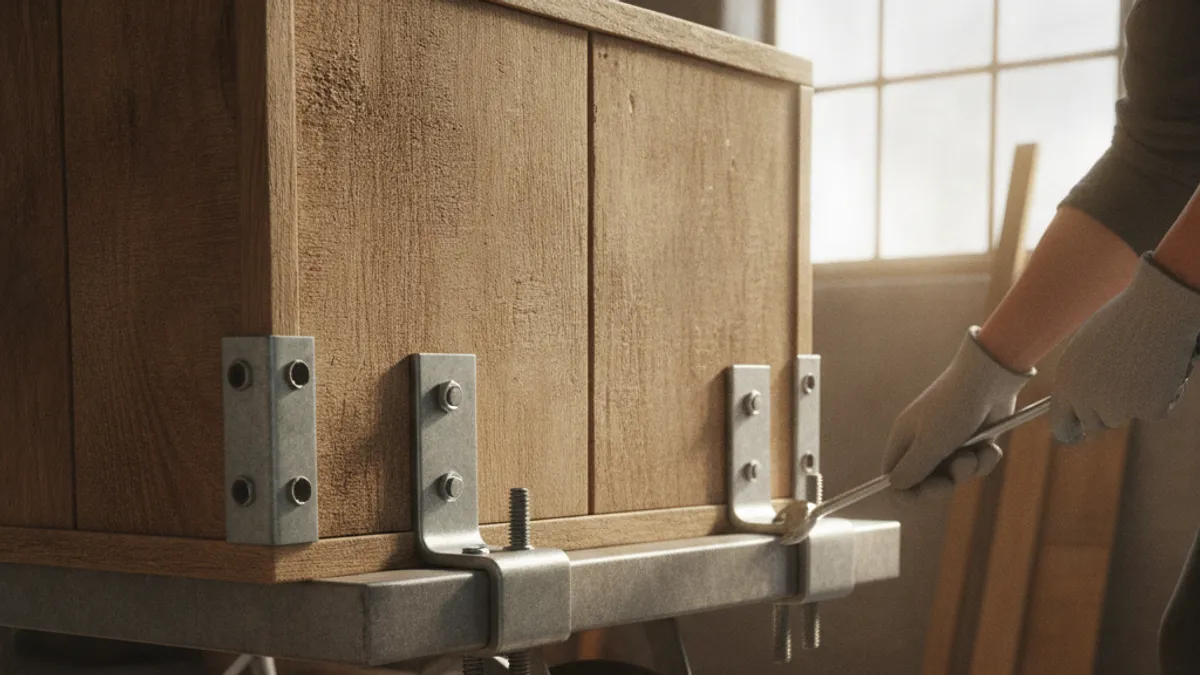
With your box and frame built, the next crucial step is to join them. This is where the wheelbarrow really starts to take shape. The connection needs to be exceptionally strong because the box will bear the load, and the frame will transfer that load to the wheel and your hands.
Visualizing this connection involves seeing how the base of the box sits flush and securely on the frame's top.
You'll want to center the box precisely on the frame. If the box is too far forward, the wheelbarrow will be nose-heavy; if too far back, it will be tail-heavy. Use your measuring tape to center the box both lengthwise and widthwise on the frame.
Once centered, you can begin attaching it.
- Screws: The most common method is to drive exterior-grade wood screws up through the frame members and into the bottom of the box. Use plenty of them, spaced every 6 to 8 inches for a secure hold.
- Bolts: For very heavy loads or if you're using metal framing, through-bolting the box to the frame provides the ultimate strength. This involves drilling holes all the way through both the frame and the box bottom and securing them with bolts, nuts, and large washers to distribute the pressure.
- Brackets: Metal angle brackets can be used on the inside or outside for added reinforcement, attaching to both the box and the frame.
Ensure that the fasteners you use are long enough to provide a solid grip on both components without poking through where they shouldn't. For instance, if screwing up into a 3/4-inch plywood box bottom from a 2×4 frame, screws around 1.5 to 2 inches long are generally suitable. This solid connection is visual proof of a well-built wheelbarrow.
Finishing Touches: Protecting Your Build and Improving Performance

Once the structural components are assembled, it’s time to protect your work and fine-tune its performance. This stage includes sealing any wood to prevent water damage and ensuring all parts move freely. These finishing touches not only make your wheelbarrow look good but also extend its lifespan and make it more enjoyable to use.
If you used lumber or plywood, applying an exterior-grade sealant, stain, or paint is essential. This acts as a barrier against moisture, UV rays, and general wear and tear. Think of painting a fence: the right product seals the wood and prevents rot.
Two coats are typically recommended for good coverage and protection. Allow adequate drying time between coats, following the manufacturer’s instructions precisely. I'd recommend checking gardenten.com/spray-or-brush-paint-which-one-is-better-for-fence for insights into application methods, even though it's about fences, the principles of wood finishing apply here.
Sealing Wood Components
- Preparation: Lightly sand all wood surfaces to create a smooth finish and ensure better adhesion for sealants.
- Application: Use a brush, roller, or sprayer. For intricate areas or corners, a brush works best. Ensure you cover all exposed wood, especially end grains, which absorb moisture most readily.
- Drying Time: Adhere strictly to the product’s recommended drying and curing times before using the wheelbarrow. Improperly cured finishes can peel or chip.
Checking Wheel and Axle Movement
Ensure your wheel spins freely on its axle. If it seems stiff or tight, a bit of lubricant like grease or even WD-40 might help. Check that the nuts securing the axle are tight enough to prevent wobble but not so tight that they bind the wheel.
A free-spinning wheel makes pushing much easier and reduces strain. If you're using a pneumatic tire, inflate it to the recommended pressure, typically indicated on the tire's sidewall.
Testing Your Homemade Wheelbarrow: Balance, Strength, and Steering

Before you start hauling heavy loads across your property, it's vital to test your new creation. This isn't just about seeing if it holds together; it's about assessing its balance, how it handles, and if it feels stable under load. Visual checks are just as important as functional ones at this stage.
Start with a light test load. Place some soft garden debris, like leaves or grass clippings, into the box. Then, try to lift the handles.
Notice how much effort it takes. Does the wheelbarrow feel like it's going to tip forward or backward easily? If it feels too heavy to lift, the load might be too far forward relative to the wheel.
If it feels like it wants to lift its front wheel off the ground too readily, the load might be too far back.
Assessing Balance
- Lifting Test: With a light load, lift the handles. The front of the box should be at a comfortable angle, not too high or too low.
- Weight Distribution: Try to visualize the center of the load directly above the wheel when it's being pushed. This is crucial for efficient transport. If the load isn't balanced, you might need to adjust how you load it or, in more extreme cases, modify the frame or box placement (though this is rare if planned well).
Checking Steering and Stability
Push the wheelbarrow around on a level surface. Does it steer easily, or do you have to fight it? Wobbly handles or a frame that flexes too much can make steering difficult.
Ensure all bolts and screws are fully tightened. If you're planning on using it for tasks you'd typically use a lawn roller for, gardenten.com/use-a-lawn-roller-for-your-garden might give you some ideas on how weight distribution and stability impact ground-level work, though a wheelbarrow is a different beast.
- Maneuverability: Turn corners. Does the wheelbarrow track in a predictable path, or does it want to veer off?
- Frame Flex: Does the frame bend or twist significantly when you push or turn? Excessive flex can indicate weak points that need reinforcement.
By carefully testing, you can identify any issues before they become major problems, like a broken component or an unbalanced load that’s hard to control.
Common Building Mistakes and How to Avoid Them

Even with careful planning, it's easy to make a few missteps when building your own wheelbarrow. Recognizing these common pitfalls beforehand can save you time and headaches down the line. Many issues stem from either oversimplifying a structural element or not adequately preparing the materials.
One frequent mistake is using undersized fasteners. For example, using short screws that don't penetrate deep enough into the wood for frame or box connections. This leads to wobbly joints that can fail under load.
Always check manufacturer specifications for screw length based on material thickness. Another common error is not reinforcing critical stress points, particularly where the box meets the frame, and where the handles connect to the frame. These areas bear the most weight and strain.
Alternative Approaches: Two Wheels vs. One Wheel

While we've focused on a single-wheel design, it's worth considering if a two-wheeled approach might better suit your needs. The choice between one and two wheels significantly impacts stability, maneuverability, and load capacity. It’s a fundamental design decision that affects the entire build.
A single-wheel design is generally more maneuverable, making it easier to navigate tight corners and uneven terrain. This is because the single wheel can pivot more freely. However, it requires more constant balance from the operator and can be trickier to handle with very heavy or unbalanced loads.
Two-wheeled wheelbarrows offer superior stability and can handle heavier loads more easily because the weight is distributed. They tend to track in a straighter line but can be less agile in confined spaces.
Who Needs a Custom Wheelbarrow? (Use Cases)

You might be wondering if building your own is really worth the effort. A custom-built wheelbarrow is ideal for anyone with specific needs that standard models don't quite meet. It's about tailoring the tool to your exact work.
Gardeners dealing with unusually shaped beds or specific planting heights might need a box of a particular dimension. Landscapers focusing on specialized tasks like moving heavy pavers or large quantities of mulch might require a higher load capacity or a lighter, more maneuverable design. Homeowners tackling unique projects, such as moving large bags of concrete or clearing significant garden waste, can benefit from a wheelbarrow built precisely for those jobs.
It's about having the right tool for the job, without compromise.
Expert Tips for Long-Lasting Durability

To ensure your homemade wheelbarrow stands the test of time, a few extra steps can make a world of difference. Think of these as the pro tips that separate a good build from a great one. Proper maintenance is key, much like keeping your mower in top condition.
You can find some general maintenance tips at gardenten.com/how-to-repair-a-lawn-mower-without-a-technician, which, while for mowers, highlights the importance of regular upkeep.
- Sealing is Crucial: Don't skimp on sealant for wooden parts. Pay extra attention to end grains and joints where moisture can easily seep in and cause rot.
- Regular Inspections: Periodically check all fasteners for tightness. Screws and bolts can loosen with vibration and use.
- Wheel Care: Keep the wheel clean and free of debris. A clogged wheel bearing or a damaged tire will reduce efficiency and strain the frame. If you have a pneumatic tire, check its pressure regularly, similar to checking tire pressure on a gardenten.com/how-do-i-know-what-size-trimmer-line-i-need for your string trimmer, it’s about optimal performance.
Safety First: Workshop and Usage Precautions

Building and using any tool carries inherent risks. Prioritizing safety at every step ensures you complete the project without injury and can use your new wheelbarrow with confidence. Always wear appropriate personal protective equipment (PPE).
When cutting materials, wear safety glasses to protect your eyes from flying debris. Gloves are advisable when handling lumber or metal to prevent splinters and cuts. While operating power tools, be mindful of your surroundings and ensure your work area is clear.
When using the wheelbarrow, always lift with your legs, not your back, and be aware of the load's weight and balance before attempting to lift or move it. Overloading can lead to instability and potential injury.
Quick Answer
You can make a wheelbarrow with a box by building a sturdy frame, attaching a reinforced box, and mounting a wheel. Key steps include cutting and joining materials for the box and frame, then securely connecting them. Consider your desired load capacity and the terrain when choosing materials and dimensions for durability.
Why Visuals Are Your Best Friend for This Project

Building anything, especially something with moving parts and structural demands like a wheelbarrow, is so much easier when you can see how things connect. Text descriptions can only go so far in explaining angles, alignments, and how different pieces form a stable whole. That's why this guide leans heavily on describing what you'd see in diagrams or photos.
Think about how a carpenter approaches a framing job; they're constantly visualizing the 3D structure. Understanding how the wheel axle needs to be centered relative to the box and frame helps distribute weight evenly. Similarly, seeing how handle supports brace against the frame provides confidence in maneuverability.
We’ll walk you through these visual cues to build a reliable tool.
Choosing Your Box Style: Wood, Metal, or Plywood?
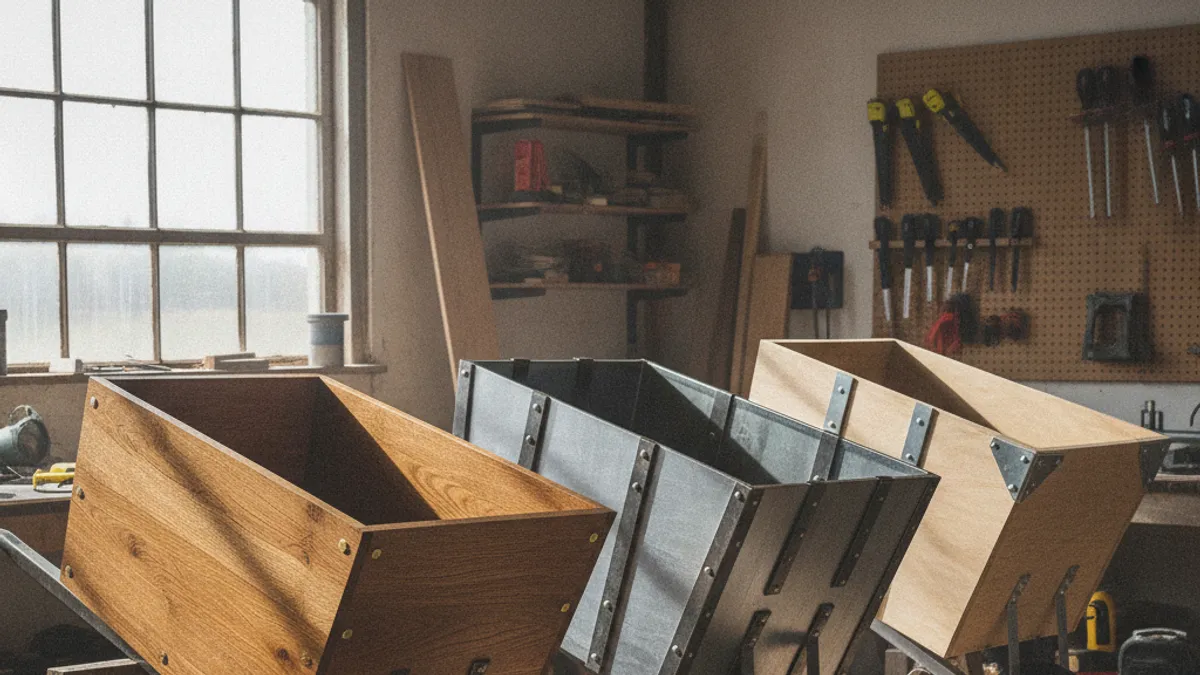
The heart of your wheelbarrow is its box, and what you make it from will significantly impact its durability, weight, and how easy it is to build. Each material offers distinct advantages and challenges, so it’s worth thinking about what tasks you’ll use your wheelbarrow for most often. If you’re primarily moving garden soil or mulch, one material might suit you better than if you're hauling heavy gravel.
Pros and Cons of Each Box Material
Here’s a quick look at what each popular material brings to the table for your custom wheelbarrow box.
- Wood
- Pros: Easy to cut and shape, readily available, can be very strong if thick enough and well-joined, offers a classic look.
- Cons: Susceptible to rot and water damage unless treated, can be heavy, may splinter over time.
- Metal
- Pros: Extremely durable, weather-resistant, can withstand heavy loads, relatively lightweight for its strength.
- Cons: Requires specialized tools and skills to cut and weld, can be expensive, prone to rust if not properly finished.
- Plywood
- Pros: Stable and strong, comes in large sheets for quicker assembly, relatively affordable, good balance of weight and durability, easier to work with than solid metal.
- Cons: Edges can be vulnerable to moisture if not sealed, may delaminate under extreme stress or prolonged moisture exposure.
Planning Your Wheelbarrow: Design and Dimensions

Before you even pick up a saw, it's crucial to sketch out your design. This planning phase is where you determine how big your wheelbarrow’s box will be, the desired load capacity, and how the whole thing will balance. A well-planned design prevents frustration during the build and ensures a functional wheelbarrow later.
Think about the primary uses. If you're hauling large loads of leaves, you might want a wider, shallower box. For moving heavy rocks, a smaller, sturdier, reinforced box might be better.
Manufacturer specs for wheelbarrow frames often suggest proportions that aim for a load-bearing angle close to 45 degrees when the handles are on the ground. As of 2026, many DIY plans aim for a balance that allows a person of average strength to lift loads effectively.
Key Measurements for a Balanced Build
Getting the proportions right is key for a wheelbarrow that’s easy to steer and won't want to tip. This involves looking at the relationship between the box, the frame, and the wheel’s placement.
- Box Size: Decide on the length, width, and depth. A common starting point for a garden wheelbarrow is around 3 cubic feet capacity. You’ll want to visualize how much soil, mulch, or gravel that actually is.
- Wheel Placement: The wheel should be positioned so that the bulk of the load sits directly over it. Too far forward, and it will be hard to lift; too far back, and it will be unstable. Aim for the center of the box’s primary volume to be directly above the wheel’s axle.
- Handle Length and Angle: Handles should be long enough to give you good leverage and allow for comfortable push angles. The angle where the handles meet the frame is also important for stability and lift. A slight upward angle as they extend away from the frame is typical.
Load Capacity Goals
Consider what you'll be hauling. A wheelbarrow designed for moving lightweight garden debris will have different requirements than one intended for heavy landscaping materials.
- Light Loads (e.g., leaves, clippings): Focus on ease of maneuverability and a good volume.
- Medium Loads (e.g., soil, mulch, compost): Strength and balance become more critical.
- Heavy Loads (e.g., gravel, sand, small rocks): Durability and a robust frame are paramount. You might even consider a two-wheeled design for better stability with very heavy materials.
Essential Tools and Materials for the Job
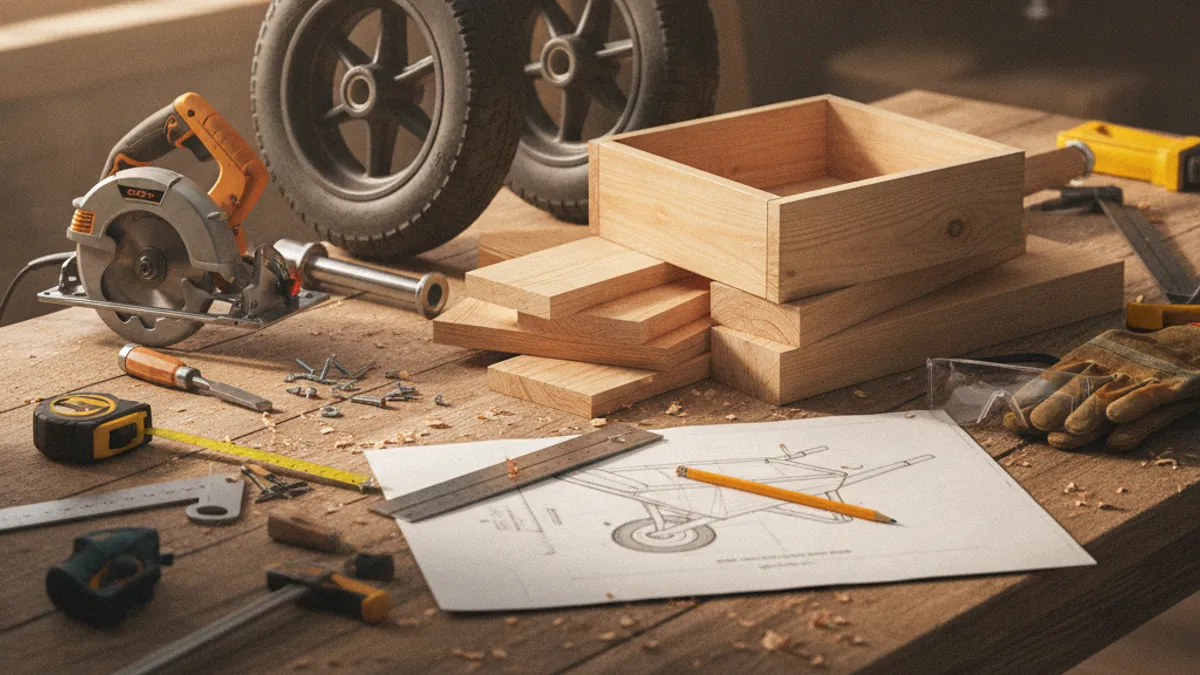
To build your own wheelbarrow, you’ll need a good set of tools and the right materials. Having everything on hand before you start cutting will make the process much smoother and safer. Some of these might already be in your workshop, while others you may need to acquire.
When selecting materials, think about durability and weather resistance, especially for outdoor use. For example, exterior-grade plywood, often available in 3/4-inch thickness, is a solid choice for the box, offering good structural integrity. Manufacturer specifications for fasteners, like exterior-grade wood screws, will dictate lengths depending on how deeply they need to penetrate for a secure hold, for 3/4-inch plywood, 1.5-inch to 2-inch screws are common.
Here’s a breakdown of what you’ll likely need:
- For the Box:
- Plywood (exterior grade, 3/4-inch recommended) or lumber (e.g., 1×6, 2×4)
- Wood screws (exterior grade, various lengths)
- Wood glue (waterproof/exterior grade)
- For the Frame & Handles:
- Lumber (e.g., 2x4s, 2x6s) or metal tubing/angle iron
- Bolts, nuts, and washers
- Metal brackets or gussets (if using wood frame)
- The Wheel Assembly:
- Wheel (pneumatic or solid, size depends on desired performance, 10-inch to 16-inch is common)
- Wheel axle (usually a threaded rod or smooth bolt)
- Bearings (if the wheel doesn't have them integrated)
- Nuts and washers for the axle
- Tools:
- Measuring tape and pencil
- Saw (circular saw, miter saw, or handsaw)
- Drill with various drill bits and driver bits
- Screwdriver or impact driver
- Clamps
- Safety glasses and work gloves
- Optional: Jigsaw for curved cuts, wood file, metal cutting tools (if using metal frame)
- Finishing:
- Exterior paint, stain, or sealant
Step-by-Step Visual Build: Assembling the Box
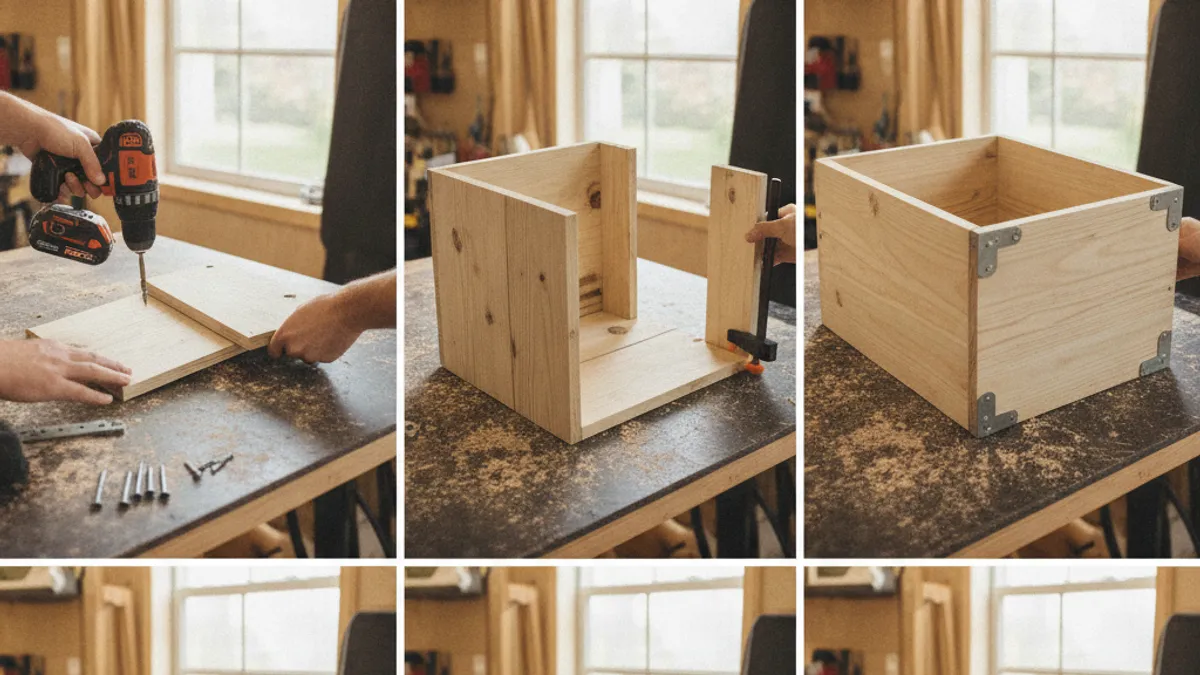
The box is where you’ll load up your materials, so building it strong and to the right dimensions is paramount. We'll focus on a plywood box here, as it's a common and manageable material for DIYers. Imagine you’re looking at a set of clear blueprints or a detailed woodworking video as we go.
First, you'll cut your plywood panels according to your design. For a basic rectangular box, this means cutting two side panels, a front panel, and a back panel to your planned dimensions. Ensure your cuts are as straight and square as possible; this makes assembly much easier and results in a more robust box structure.
Cutting and Joining Plywood/Wood Panels
Lay out your plywood sheets on a stable work surface. Measure and mark your cuts carefully. Remember, measure twice, cut once!
Use a straight edge or guide with your circular saw to ensure straight edges and precise angles.
Once you have your panels cut, it's time to join them. Apply a generous bead of waterproof wood glue along the edges that will meet. Then, carefully position the panels together.
For a basic box shape, you'll attach the front and back panels to the edges of the side panels. It’s helpful to clamp the pieces together while the glue sets.
Reinforcing the Box Structure
Simply gluing and screwing might not be enough for a wheelbarrow that’s going to be loaded up and knocked around. Reinforcing the corners makes a huge difference in longevity. You can achieve this in a few ways:
- Corner Blocks: Cut small triangular or rectangular blocks of scrap wood and glue and screw them into the inside corners of the box. This adds significant shear strength.
- Metal Brackets: Small L-shaped metal brackets can be screwed into the inside corners for maximum reinforcement. Ensure you use screws that are long enough to grip both panels firmly.
- Overlapping Joints: Instead of butt joints, you can design your box so the front and back panels overlap the edges of the side panels, or vice versa. This creates a stronger connection.
Make sure any screws you use are exterior grade to prevent rust. These screws should penetrate deeply enough to get a good grip on both pieces of wood, a common recommendation is to use screws that are at least twice the thickness of the wood they are primarily going into. This visual reinforcement adds confidence that your box can handle the load.
Step-by-Step Visual Build: Creating the Frame and Handles

The frame is the backbone of your wheelbarrow, providing the structure that holds the box and connects to the wheel and handles. How you build this frame will determine how sturdy and well-balanced your finished product is. Materials like sturdy lumber (2x4s are a common choice) or metal tubing offer different construction methods and durability.
Choosing Your Frame Material (Wood vs. Metal)
If you're sticking with a primarily wooden build, lumber provides a cohesive aesthetic and is generally easier for most DIYers to work with. Metal frames, on the other hand, offer superior strength and longevity, especially if you plan on hauling very heavy materials. Our research indicates that many DIY wheelbarrow plans opt for wood for simplicity, but metal fabrication offers a more industrial-grade solution if you have welding equipment or access to it.
Constructing the Frame
For a wooden frame, you'll typically build two long beams that will run from near the wheel all the way back to form the handle supports. These are often made from 2x4s or even 2x6s for extra strength. You'll then add cross braces between these beams to create a rigid structure.
Think of it like building a small, long bench that has a place to attach a wheel at one end and becomes handles at the other.
Visualize measuring and cutting your lumber to length. The front end of these beams will need to accommodate the axle and wheel, often featuring a wider spread or specific notches. The rear end will taper or extend to form the handles.
Secure all joints with strong wood glue and exterior-grade screws or bolts. Using metal L-brackets at critical connection points can add substantial reinforcement, preventing racking or loosening over time.
Attaching the Handles for Comfort and Control
The handles are your primary interface with the wheelbarrow, so their length, angle, and attachment need to feel right. They should extend from the rear of the frame. Many designs attach them as a continuation of the main frame beams, or as separate pieces bolted securely to the frame's end.
Ensure the handles are long enough to provide good leverage without making the tool unwieldy. A typical handle length might extend 4 to 5 feet from the wheel. The grip area should be comfortable; some people wrap them with padding or use ergonomically shaped wood.
The angle at which the handles extend upwards from the frame is also critical for balance; aim for a natural push height when the wheelbarrow is loaded.
Connecting Box to Frame: Stability is Key

With your box and frame built, the next crucial step is to join them. This is where the wheelbarrow really starts to take shape. The connection needs to be exceptionally strong because the box will bear the load, and the frame will transfer that load to the wheel and your hands.
Visualizing this connection involves seeing how the base of the box sits flush and securely on the frame's top.
You'll want to center the box precisely on the frame. If the box is too far forward, the wheelbarrow will be nose-heavy; if too far back, it will be tail-heavy. Use your measuring tape to center the box both lengthwise and widthwise on the frame.
Once centered, you can begin attaching it.
- Screws: The most common method is to drive exterior-grade wood screws up through the frame members and into the bottom of the box. Use plenty of them, spaced every 6 to 8 inches for a secure hold.
- Bolts: For very heavy loads or if you're using metal framing, through-bolting the box to the frame provides the ultimate strength. This involves drilling holes all the way through both the frame and the box bottom and securing them with bolts, nuts, and large washers to distribute the pressure.
- Brackets: Metal angle brackets can be used on the inside or outside for added reinforcement, attaching to both the box and the frame.
Ensure that the fasteners you use are long enough to provide a solid grip on both components without poking through where they shouldn't. For instance, if screwing up into a 3/4-inch plywood box bottom from a 2×4 frame, screws around 1.5 to 2 inches long are generally suitable. This solid connection is visual proof of a well-built wheelbarrow.
Finishing Touches: Protecting Your Build and Improving Performance
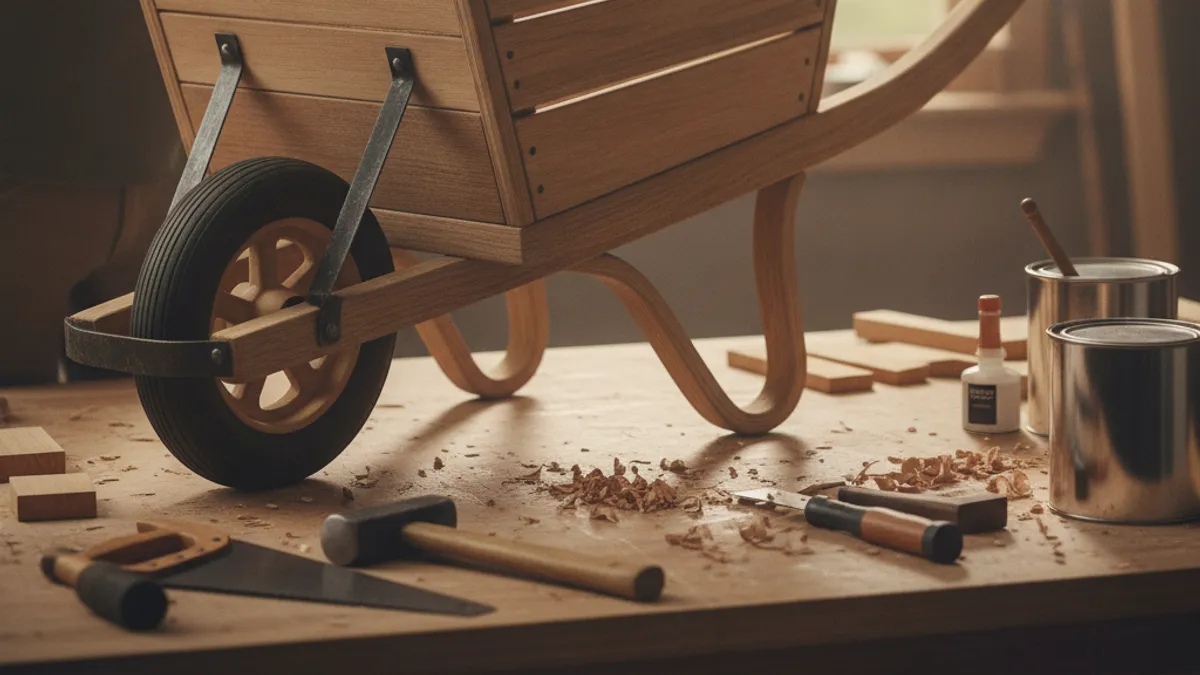
Once the structural components are assembled, it’s time to protect your work and fine-tune its performance. This stage includes sealing any wood to prevent water damage and ensuring all parts move freely. These finishing touches not only make your wheelbarrow look good but also extend its lifespan and make it more enjoyable to use.
If you used lumber or plywood, applying an exterior-grade sealant, stain, or paint is essential. This acts as a barrier against moisture, UV rays, and general wear and tear. Think of painting a fence: the right product seals the wood and prevents rot.
Two coats are typically recommended for good coverage and protection. Allow adequate drying time between coats, following the manufacturer’s instructions precisely. I'd recommend checking gardenten.com/spray-or-brush-paint-which-one-is-better-for-fence for insights into application methods, even though it's about fences, the principles of wood finishing apply here.
Sealing Wood Components
- Preparation: Lightly sand all wood surfaces to create a smooth finish and ensure better adhesion for sealants.
- Application: Use a brush, roller, or sprayer. For intricate areas or corners, a brush works best. Ensure you cover all exposed wood, especially end grains, which absorb moisture most readily.
- Drying Time: Adhere strictly to the product’s recommended drying and curing times before using the wheelbarrow. Improperly cured finishes can peel or chip.
Checking Wheel and Axle Movement
Ensure your wheel spins freely on its axle. If it seems stiff or tight, a bit of lubricant like grease or even WD-40 might help. Check that the nuts securing the axle are tight enough to prevent wobble but not so tight that they bind the wheel.
A free-spinning wheel makes pushing much easier and reduces strain. If you're using a pneumatic tire, inflate it to the recommended pressure, typically indicated on the tire's sidewall.
Testing Your Homemade Wheelbarrow: Balance, Strength, and Steering

Before you start hauling heavy loads across your property, it's vital to test your new creation. This isn't just about seeing if it holds together; it's about assessing its balance, how it handles, and if it feels stable under load. Visual checks are just as important as functional ones at this stage.
Start with a light test load. Place some soft garden debris, like leaves or grass clippings, into the box. Then, try to lift the handles.
Notice how much effort it takes. Does the wheelbarrow feel like it's going to tip forward or backward easily? If it feels too heavy to lift, the load might be too far forward relative to the wheel.
If it feels like it wants to lift its front wheel off the ground too readily, the load might be too far back.
Assessing Balance
- Lifting Test: With a light load, lift the handles. The front of the box should be at a comfortable angle, not too high or too low.
- Weight Distribution: Try to visualize the center of the load directly above the wheel when it's being pushed. This is crucial for efficient transport. If the load isn't balanced, you might need to adjust how you load it or, in more extreme cases, modify the frame or box placement (though this is rare if planned well).
Checking Steering and Stability
Push the wheelbarrow around on a level surface. Does it steer easily, or do you have to fight it? Wobbly handles or a frame that flexes too much can make steering difficult.
Ensure all bolts and screws are fully tightened. If you're planning on using it for tasks you'd typically use a lawn roller for, gardenten.com/use-a-lawn-roller-for-your-garden might give you some ideas on how weight distribution and stability impact ground-level work, though a wheelbarrow is a different beast.
- Maneuverability: Turn corners. Does the wheelbarrow track in a predictable path, or does it want to veer off?
- Frame Flex: Does the frame bend or twist significantly when you push or turn? Excessive flex can indicate weak points that need reinforcement.
By carefully testing, you can identify any issues before they become major problems, like a broken component or an unbalanced load that’s hard to control.
Common Building Mistakes and How to Avoid Them
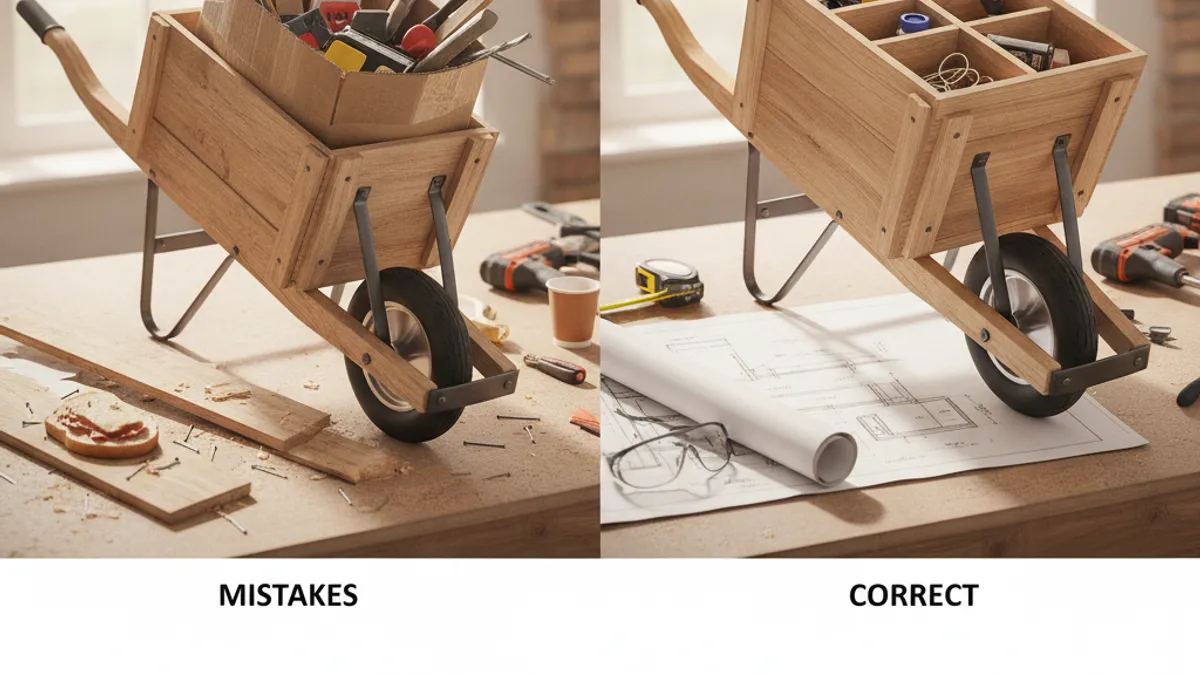
Even with careful planning, it's easy to make a few missteps when building your own wheelbarrow. Recognizing these common pitfalls beforehand can save you time and headaches down the line. Many issues stem from either oversimplifying a structural element or not adequately preparing the materials.
One frequent mistake is using undersized fasteners. For example, using short screws that don't penetrate deep enough into the wood for frame or box connections. This leads to wobbly joints that can fail under load.
Always check manufacturer specifications for screw length based on material thickness. Another common error is not reinforcing critical stress points, particularly where the box meets the frame, and where the handles connect to the frame. These areas bear the most weight and strain.
Alternative Approaches: Two Wheels vs. One Wheel
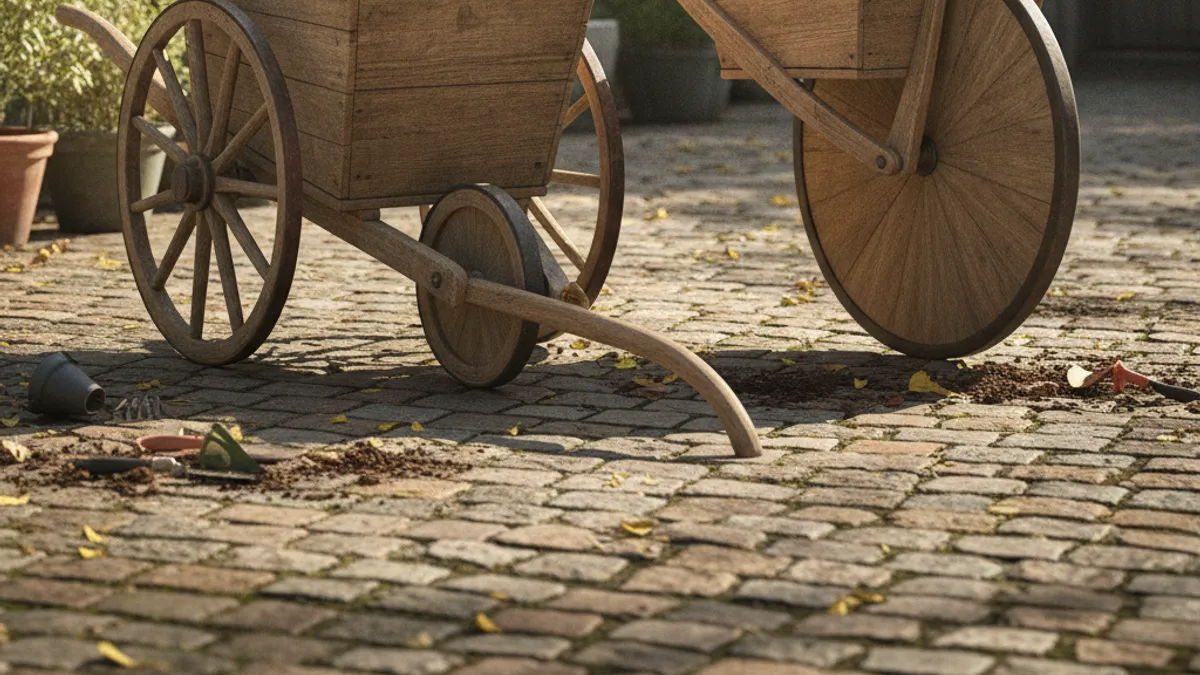
While we've focused on a single-wheel design, it's worth considering if a two-wheeled approach might better suit your needs. The choice between one and two wheels significantly impacts stability, maneuverability, and load capacity. It’s a fundamental design decision that affects the entire build.
A single-wheel design is generally more maneuverable, making it easier to navigate tight corners and uneven terrain. This is because the single wheel can pivot more freely. However, it requires more constant balance from the operator and can be trickier to handle with very heavy or unbalanced loads.
Two-wheeled wheelbarrows offer superior stability and can handle heavier loads more easily because the weight is distributed. They tend to track in a straighter line but can be less agile in confined spaces.
Who Needs a Custom Wheelbarrow? (Use Cases)

You might be wondering if building your own is really worth the effort. A custom-built wheelbarrow is ideal for anyone with specific needs that standard models don't quite meet. It's about tailoring the tool to your exact work.
Gardeners dealing with unusually shaped beds or specific planting heights might need a box of a particular dimension. Landscapers focusing on specialized tasks like moving heavy pavers or large quantities of mulch might require a higher load capacity or a lighter, more maneuverable design. Homeowners tackling unique projects, such as moving large bags of concrete or clearing significant garden waste, can benefit from a wheelbarrow built precisely for those jobs.
It's about having the right tool for the job, without compromise.
Expert Tips for Long-Lasting Durability

To ensure your homemade wheelbarrow stands the test of time, a few extra steps can make a world of difference. Think of these as the pro tips that separate a good build from a great one. Proper maintenance is key, much like keeping your mower in top condition.
You can find some general maintenance tips at gardenten.com/how-to-repair-a-lawn-mower-without-a-technician, which, while for mowers, highlights the importance of regular upkeep.
- Sealing is Crucial: Don't skimp on sealant for wooden parts. Pay extra attention to end grains and joints where moisture can easily seep in and cause rot.
- Regular Inspections: Periodically check all fasteners for tightness. Screws and bolts can loosen with vibration and use.
- Wheel Care: Keep the wheel clean and free of debris. A clogged wheel bearing or a damaged tire will reduce efficiency and strain the frame. If you're using a pneumatic tire, check its pressure regularly, similar to checking tire pressure on a gardenten.com/how-do-i-know-what-size-trimmer-line-i-need for your string trimmer, it’s about optimal performance.
Safety First: Workshop and Usage Precautions

Building and using any tool carries inherent risks. Prioritizing safety at every step ensures you complete the project without injury and can use your new wheelbarrow with confidence. Always wear appropriate personal protective equipment (PPE).
When cutting materials, wear safety glasses to protect your eyes from flying debris. Gloves are advisable when handling lumber or metal to prevent splinters and cuts. While operating power tools, be mindful of your surroundings and ensure your work area is clear.
When using the wheelbarrow, always lift with your legs, not your back, and be aware of the load's weight and balance before attempting to lift or move it. Overloading can lead to instability and potential injury.