You want a spring display that stops traffic. Maybe you ordered 200 bulbs instead of the usual two dozen. Or you’re tackling a hillside that could use a serious dose of yellow.
Knowing how to plant a large amount of daffodil bulbs the right way is the difference between a weekend project and a month-long workout.
The method you choose changes based on one thing: how many bulbs you’re actually planting. For 100 bulbs the trench method takes about an hour. For 500 you’ll want a drill auger.
For 1,000 or more you start looking at mechanical planters. Let’s walk through the options and find the right fit for your project.
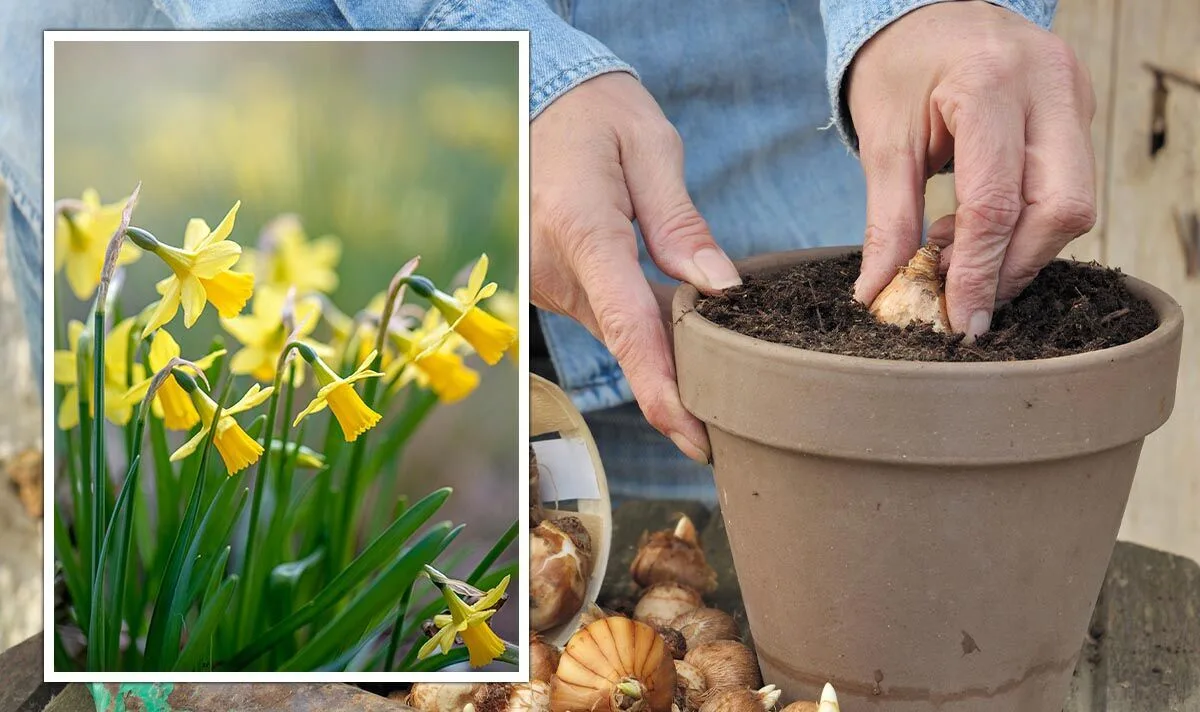
Image source: Bing (Web (fair-use with source credit))
Quick Answer
Plant bulbs at three times their height. Space them 4 to 6 inches apart. Choose your method by bulb count.
Trench planting works for rows and beds. A drill auger is best for naturalizing in lawns. Water once after planting.
Skip fertilizer in the planting hole.
First, Figure Out Your “Large”: Scale and Your Situation
The word “large” means different things to different gardeners. For some it’s 50 bulbs for a new border. For others it’s 500 bulbs to naturalize a meadow.
The method changes as the number climbs.
Here’s a quick breakdown of scale:
| Bulb Count | Best Method | Time Estimate |
|---|---|---|
| 30–100 | Trench or hand auger | 1–2 hours |
| 100–500 | Cordless drill auger | 2–4 hours |
| 500–1,000 | Drill auger or mechanical planter | 4–8 hours |
| 1,000+ | Mechanical planter | 2–4 hours with machine |
Your soil type also matters. Heavy clay drains slowly and takes more effort to dig. Sandy loam is fast and forgiving.
Rocky soil may need a pickaxe or a power auger no matter how few bulbs you have.
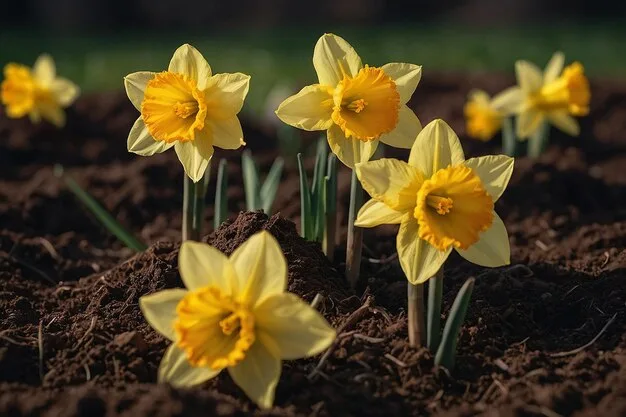
Image source: Bing (Web (fair-use with source credit))
Don’t forget the physical side. Kneeling and standing for hours strains your back. If you have limited mobility, a drill auger saves your joints.
Planning ahead stops you from quitting halfway.
Quick Decision Tree: Which Planting Method Fits You Best?
You have three main options for planting a lot of daffodil bulbs. Your situation decides which one wins.
Trench Method
Best for: Long rows, formal beds, or large drifts where you can dig a continuous furrow.
Why: You dig once, place bulbs, and backfill. No repeated individual holes.
Limitation: Only works in open soil without grass or turf.
Drill Auger
Best for: Naturalizing in lawns or meadows. You want bulbs scattered randomly.
Why: Fast, precise, and easy on your back. You can do 50 holes in 15 minutes.
Limitation: Requires a powerful cordless drill (18V or higher) and a 2- to 3-inch auger bit.
Mechanical Planter
Best for: 500+ bulbs on open ground, large-scale landscaping projects.
Why: Machine does the digging and placing. One pass plants a row.
Limitation: Cost to rent or buy. Not practical for small yards or tight corners.

Image source: Bing (Web (fair-use with source credit))
If you’re still unsure, start with the trench method for any area you can dig freely. Switch to an auger if you’re planting into an established lawn.
Method 1: The Trench Method for Long Rows and Beds
Trench planting is the oldest trick in the book for a reason. It’s fast, simple, and gives you straight, even rows.
Step 1: Mark your line. Use a garden hose, string, or spray paint to mark where you want bulbs. For a naturalized look, mark curved drifts.
Step 2: Dig the trench. Use a sharp spade or an edging tool. Dig a trench 6 to 8 inches deep. The exact depth depends on bulb size.
Step 3: Place the bulbs. Space them 4 to 6 inches apart. Point the tip up. For a full look, stagger the bulbs in two rows inside the same trench.
Step 4: Backfill and water. Push the soil back over the bulbs. Tamp it gently with the back of a rake. Water once to settle the soil.
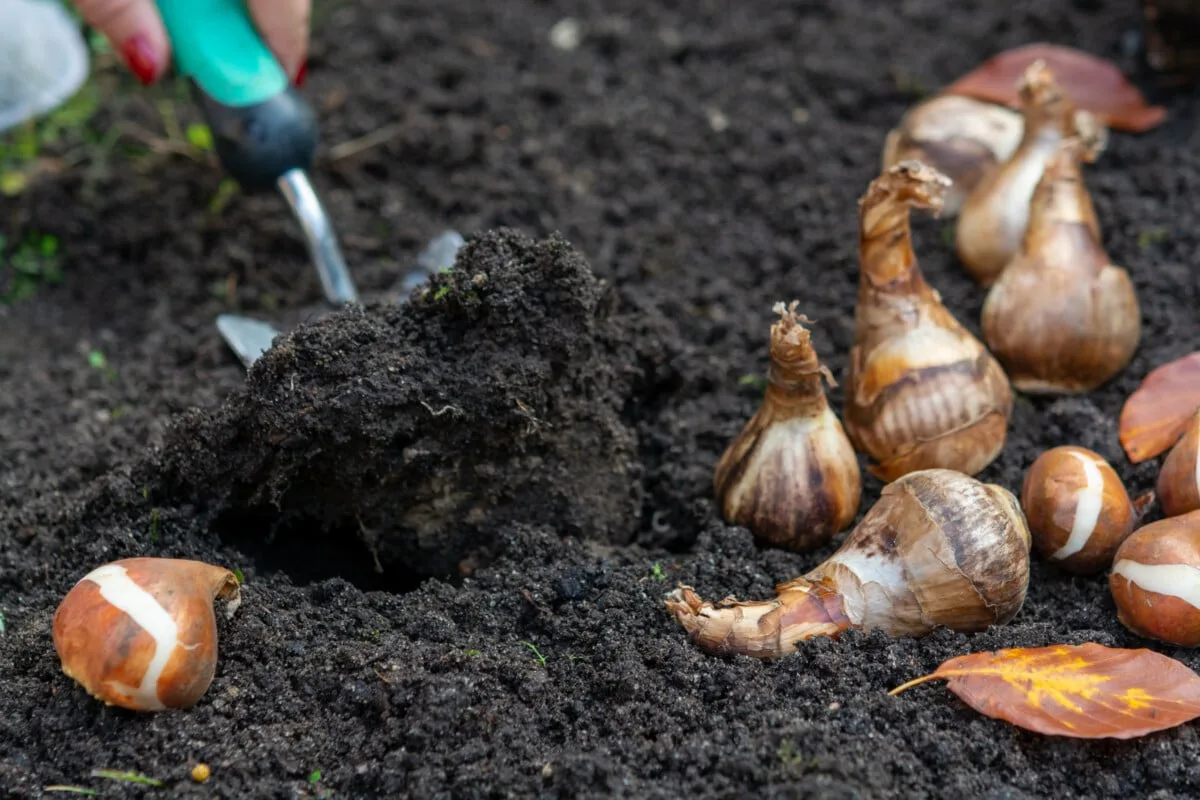
Image source: Bing (Web (fair-use with source credit))
The biggest advantage of trench planting is speed. A single 20-foot trench holds 40 to 60 bulbs. You can plant 200 bulbs in under two hours with practice.
One tip from aggregate user feedback: add a thin layer of grit or sand at the bottom of the trench in clay soil. It improves drainage and reduces rot risk. For more soil prep advice, check our guide on building a proper growing space.
Method 2: Using a Drill Auger for Naturalizing in Lawns or Meadows
This method is the current favorite among gardeners planting 100 to 500 bulbs. The tool is a 2- or 3-inch earth auger bit attached to a cordless drill.
Choosing the right auger. Look for a bit made for bulb planting. The ProPlugger and Power Planter brands are common. A 2-inch bit works for most daffodil bulbs.
A 3-inch bit is better for large bulbs.
Drill requirements. Use an 18V or higher cordless drill with a side handle. The torque needed can twist a smaller drill. Per manufacturer specs, a brushless motor handles the load better.
Technique. Mark your spots with spray paint or by tossing bulbs and planting where they land. Drill the hole to the correct depth. Drop the bulb in.
The auger removes a plug of soil. No need to refill. The soil settles naturally.
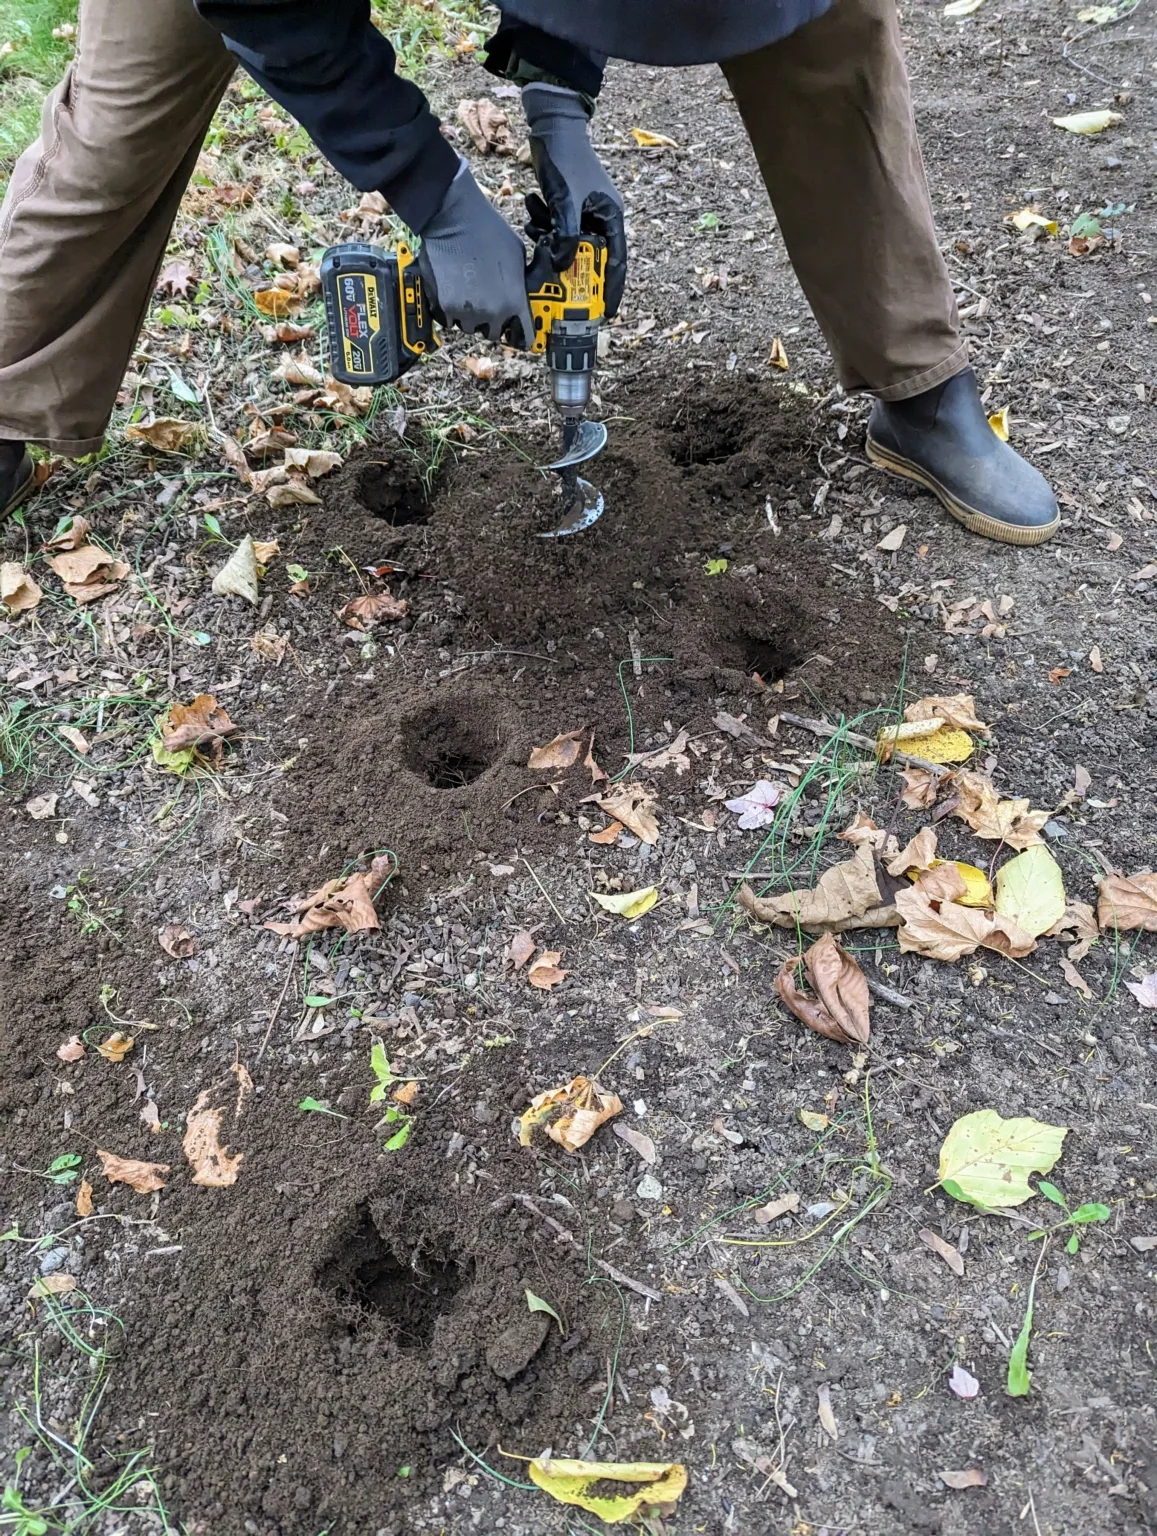
Image source: Bing (Web (fair-use with source credit))
User reviews on gardening forums report 50 holes in 15 minutes with a good drill. That’s about 250 to 300 bulbs per hour. Battery life is the main limit.
Expect to swap batteries every 100 to 150 holes.
Pros: Fast, gentle on the lawn, easy to space randomly.
Cons: Not great for rocky soil. Auger bits can snap on rocks. You also need to clear grass clippings from the bit occasionally.
For anyone planting into an existing lawn, this is the best method. It disturbs the turf minimally. You can mow the lawn as usual a few days later.
Method 3: Mechanical Planters for Landscapers or Mega Plantings
When you cross the 500-bulb mark, a mechanical planter starts making sense. These are walk-behind machines that dig a hole, drop a bulb, and cover it in one pass.
Types of mechanical planters. The most common is a one-person walk-behind plug planter. It looks like a heavy wheel with a chute. You push it, and it punches a hole and releases a bulb at a set depth.
Rental availability. Many large equipment rental shops carry them. Expect to pay $50 to $100 per day. Some garden centers also rent them.
Best use case. Open fields, meadows, or large beds with no rocks or roots. The machine needs smooth ground to work well. Rocky ground can damage the planting mechanism.
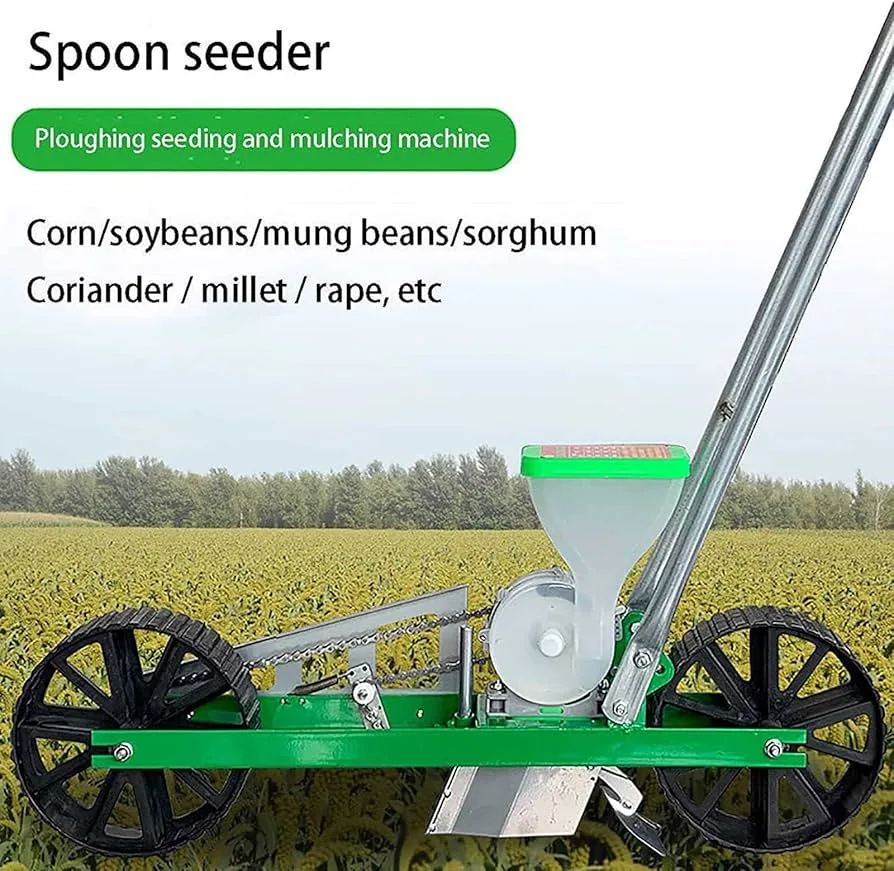
Image source: Bing (Web (fair-use with source credit))
Setting the depth and spacing. Most planters have adjustable settings. For daffodils, set depth to 6 inches and spacing to 5 inches. Test on a small patch first to verify.
Who should use this. Landscapers planting 1,000+ bulbs for a client. Homeowners with an acre of open ground who want a meadow. For smaller jobs, the cost and hassle of renting a machine isn’t worth it.
If you’re considering a mechanical planter, check with your local extension office. Some offer rental programs or can recommend a contractor.
Step-by-Step Soil Prep Before You Plant
Good soil prep makes or breaks a large daffodil planting. Skip it and you’ll fight drainage issues, weeds, and poor growth for years.
Test drainage first. Dig a hole 12 inches deep and fill it with water. If it drains within 4 to 6 hours, you’re good. If water sits overnight, you need to amend the soil.
Amend clay soil. Mix in 2 to 3 inches of compost or well-rotted leaf mold. Add coarse sand or grit to improve drainage. Per the Royal Horticultural Society, heavy clay is the most common reason for bulb rot in daffodils.
Clear the area. Remove grass, weeds, and large rocks. For a lawn area, strip the sod with a sharp spade. For a meadow, mow as low as possible and rake away debris.
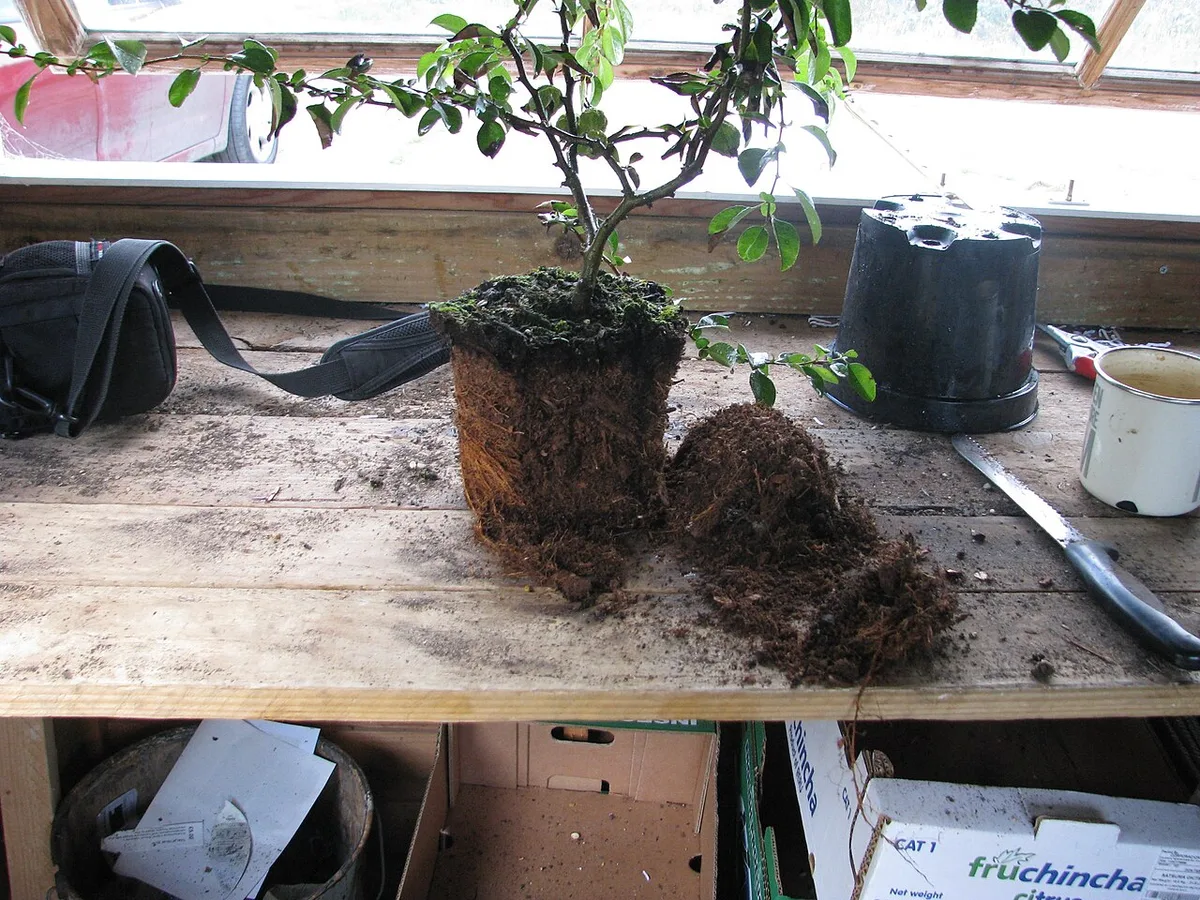
Image source: Wikimedia Commons / peganum from Henfield, England (CC BY-SA)
Add fertilizer sparingly. Daffodils don’t need much at planting time. A light sprinkle of low-nitrogen bulb food works. Bone meal is a traditional choice, though research shows it breaks down slowly in cold soil.
If you’re also prepping lawn areas, our guide on the right fertilizer for grass covers timing and product choices.
Depth, Spacing, and Layout Tips for High-Volume Planting
Getting depth and spacing right matters more with large plantings. You won’t have time to fix mistakes later.
Depth rule. Plant bulbs three times as deep as the bulb is tall. A 2-inch bulb goes 6 inches deep. Measure from the base of the bulb to the soil surface.
In sandy soil, go slightly deeper. In clay, go slightly shallower.
Spacing for naturalized look. Space bulbs 4 to 6 inches apart. Tighter spacing gives a fuller display sooner but means you’ll need to divide the clumps earlier. Wider spacing looks more natural but takes two seasons to fill in.
Calculating how many bulbs you need. A square foot holds 5 to 7 bulbs at naturalized spacing. A 10-by-10-foot area needs 500 to 700 bulbs. Use this formula: length in feet times width in feet times desired bulbs per square foot.
Layout patterns. For formal beds, plant in staggered rows. For naturalizing, scatter bulbs by hand and plant where they fall. For drifts under trees, plant in sweeping curves rather than straight lines.
Common Mistakes That Wreck a Big Daffodil Planting
Large plantings amplify small mistakes. Here’s what to avoid.
Planting too shallow. This is the most common error. Shallow planting leads to frost heave, smaller blooms, and fewer flowers. Always measure depth from the bulb base, not the tip.
Overcrowding to save time. It’s tempting to cram bulbs together. But overcrowding reduces bloom size and forces early division. Stick to the spacing guidelines.
Skipping the water. A single deep watering after planting settles the soil and eliminates air pockets. Bulbs need soil contact to root properly.
Planting in waterlogged spots. Daffodils rot quickly in standing water. If your site has poor drainage, plant in raised beds or choose a different location.
Forgetting critters. Squirrels and voles dig up bulbs. A layer of chicken wire over the planting area stops them. Remove the wire in early spring before shoots emerge.
After Planting: Water, Mulch, and Critter Protection
The work doesn’t end when the last bulb goes in the ground. A few steps after planting ensure strong growth.
Water once. Give the area a thorough soaking. Don’t water again until spring unless the winter is unusually dry. Dormant bulbs don’t need moisture.
Mulch the area. Spread 2 to 3 inches of shredded bark, straw, or leaf mold over the planting. Mulch moderates soil temperature, retains moisture, and suppresses winter weeds.
Protect from animals. Squirrels love fresh planting areas. Cover the soil with a layer of gravel or chicken wire. Some gardeners report success with blood meal dusted over the surface.
For more tips on keeping garden pests under control, our article on using the right garden tools covers weed and pest management strategies.
Long-Term Maintenance for Years of Blooms
Daffodils are low-maintenance perennials. But they reward a little attention with decades of bloom.
Fertilize in early spring. Apply a low-nitrogen bulb fertilizer when shoots first emerge. The Royal Horticultural Society recommends a 5-10-10 formula. Avoid high-nitrogen fertilizers that encourage leaves at the expense of flowers.
Let foliage die back naturally. Do not cut, braid, or tie daffodil leaves. The leaves photosynthesize for 6 to 8 weeks after bloom. Cutting them early weakens the bulb and reduces next year’s flowers.
Divide clumps every 5 to 7 years. When blooms get smaller or fewer, it’s time to dig and divide. Lift the clump after the foliage has yellowed. Separate the bulbs and replant at proper spacing.
If you’re timing your garden tasks, our lawn fertilizing schedule can help you coordinate spring feeding across your whole yard.
Frequently Asked Questions
How late in the season can I plant daffodil bulbs?
In USDA zones 3 to 7, plant from September through November. In warmer zones 8 and 9, plant as late as December. Bulbs need 10 to 14 weeks of cold soil to root properly.
Planting too late in spring won’t produce flowers.
Can I plant daffodil bulbs in the lawn and still mow?
Yes. The key is waiting until the foliage yellows completely before mowing. That’s usually 6 to 8 weeks after bloom.
Mowing too early starves the bulbs and reduces next year’s flowers.
Do I need to chill daffodil bulbs in warm climates?
Gardeners in USDA zones 8 and above should buy pre-chilled bulbs or refrigerate them for 10 to 14 weeks before planting. Store bulbs in a paper bag in the crisper drawer. Keep them away from fruits that emit ethylene gas.
What should I do if I can’t plant bulbs right away?
Store bulbs in a cool, dry, dark place. Ideal temperature is 50 to 60°F. Keep them in their original mesh bag or a paper bag.
Do not store in plastic, which traps moisture and causes rot.
How deep is too deep for daffodil bulbs?
Anything deeper than 8 inches for standard bulbs. Going too deep delays emergence and can prevent flowering. Stick to the three-times-height rule.
For large bulbs that’s 6 to 7 inches. For smaller bulbs, 4 to 5 inches.
Do daffodils multiply on their own?
Yes. A single bulb slowly produces offsets over the years. A healthy clump doubles in about 5 years.
For faster multiplication, dig and divide the clumps every 3 to 4 years.
Final Takeaway: Pick Your Method, Then Get Planting
The best method for planting a large amount of daffodil bulbs comes down to your specific situation. For under 100 bulbs, grab a spade and dig a trench. For 100 to 500, rent or buy a drill auger.
For 500 or more, look into a mechanical planter.
Prep the soil well. Plant at the right depth. Water once.
Protect from critters. Then wait for spring.
A well-planted daffodil display keeps coming back for years. The work you put in this fall pays off every March and April. Pick your method, gather your tools, and get those bulbs in the ground.