
Spray paint on your vinyl fence can be a real eyesore, turning a pristine white or neutral fence into an unwanted canvas. Learning how to remove spray paint from a vinyl fence effectively means restoring your property's curb appeal without resorting to costly replacements or damaging the material. Many homeowners have faced this frustrating situation, unsure of the best approach to tackle unsightly graffiti or accidental overspray.
Our research confirms that with the right techniques and products, it's entirely possible to make that spray paint disappear. For instance, manufacturer guidelines for vinyl fence care often stress avoiding abrasive materials that can permanently scratch the surface. That's why choosing the correct cleaning solution and method is key to a successful outcome.
Is Spray Paint Ruining Your Vinyl Fence?
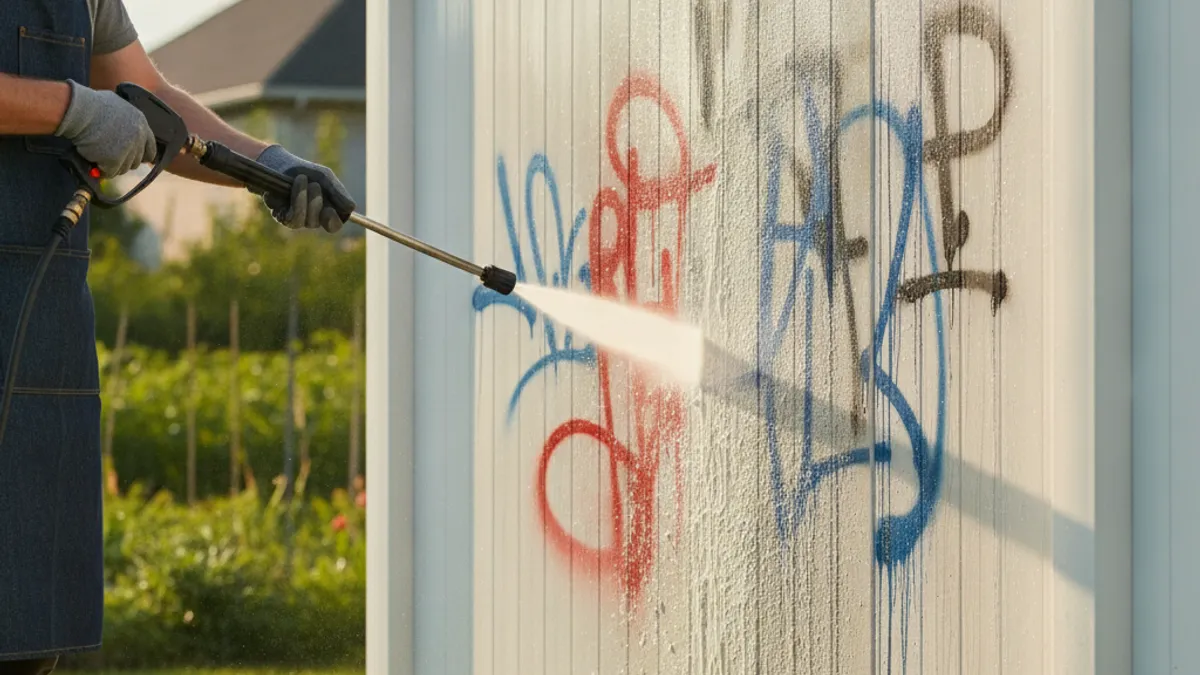
When spray paint lands on your vinyl fence, it's natural to panic a little. You might see a bright splash of color that just doesn't belong, or perhaps an entire section has been vandalized. This isn't just a cosmetic problem; if left untreated, some paints can start to bond with the vinyl surface, making removal much harder later on. Understanding the urgency can help you tackle the issue before it becomes a permanent blemish.
Before You Start: What You'll Need to Gather
Before you dive into the actual cleaning, getting your supplies ready is crucial for a smooth process. This isn't just about grabbing anything from the garage; having the right tools and cleaning agents on hand means you won't have to stop halfway through. You'll want to protect yourself and your surroundings, too.
Here's a quick rundown of what to have ready:
- Safety Gear: Rubber gloves and eye protection are essential, especially if you're using stronger cleaning solutions.
- Soft Cloths & Sponges: Microfiber cloths or non-abrasive sponges work best. Avoid steel wool or stiff brushes.
- Bucket: For mixing cleaning solutions and rinsing.
- Water: Plenty of it for rinsing.
- Cleaning Agents: Depending on the paint type, you might need dish soap, rubbing alcohol, mineral spirits, or a commercial graffiti remover.
- Plastic Scraper: Only for very stubborn, dried-on paint and as a last resort.
The First Line of Defense: Simple Soap and Water Method
Often, the simplest solutions are the most effective, especially for fresh spray paint. If you catch the paint soon after it hits your vinyl fence, a good old-fashioned wash might be all you need. This method is gentle, safe for most vinyl formulations, and readily available in most households.
Start by mixing a few drops of mild dish soap or laundry detergent with warm water in a bucket. Dampen a soft cloth or sponge with this solution and gently rub the painted area. You're looking to lift the paint, not scrub it into the vinyl. For lighter marks, this might be enough to see a significant improvement.
Always rinse the area thoroughly with clean water afterward to remove any soap residue.
Moving Up: When Mild Soaps Don't Cut It
Sometimes, spray paint is a bit more stubborn, or it's been sitting on your vinyl fence for a while. When the basic soap-and-water wash doesn't quite get the job done, it's time to step up your cleaning game with slightly stronger, yet still relatively gentle, solutions. These options are still designed to be kind to your vinyl while tackling tougher paint adhesion.
Using Rubbing Alcohol for Stubborn Spots
Rubbing alcohol, also known as isopropyl alcohol, is a common household item that acts as a mild solvent. It can effectively break down the binders in many types of spray paint without typically harming vinyl. You'll want to apply it to a cloth, not directly to the fence, especially if you're concerned about overspray.
Dab the alcohol-soaked cloth onto the painted area and let it sit for a minute or two. This gives the alcohol time to start softening the paint. Then, gently wipe or blot the paint away. You may need to repeat this process a few times for complete removal.
After you've lifted the paint, rinse the area thoroughly with clean water.
Trying Biodegradable Degreasers or Citrus Cleaners
If rubbing alcohol isn't doing the trick, or if you prefer more eco-friendly options, biodegradable degreasers or citrus-based cleaners are excellent next steps. These products are formulated to cut through grease and grime, and they often have the power to dissolve paint without harsh chemicals. They are generally safer for the environment and less likely to cause damage to your vinyl fence compared to industrial-strength removers.
When using these, always follow the product's instructions carefully. Apply the cleaner to a cloth or sponge and work it into the painted area. Allow it to dwell for the recommended time, usually a few minutes, to let it break down the paint. Gently scrub or wipe the paint away, and then rinse the vinyl fence thoroughly with water to remove all traces of the cleaner and loosened paint.
For Tougher Jobs: Stronger (But Still Safe-ish) Solvents
When milder methods have failed, it's time to consider stronger solvents, but with caution. These are for those really tough paint spots that just won't budge. It’s crucial to remember that even these stronger agents should be used thoughtfully to avoid any unintended damage to your vinyl fence. Always test in an inconspicuous spot first.
Mineral Spirits: Your Go-To Paint Thinner
Mineral spirits, also known as paint thinner or white spirit, is a petroleum-based solvent that’s effective at dissolving oil-based paints and many enamels. It's a more powerful option than rubbing alcohol and can tackle quite stubborn spray paint marks. Proper ventilation is key when using mineral spirits, so ensure the area is well-aired.
Apply a small amount of mineral spirits to a clean cloth. Gently rub the painted area, working from the outside of the paint mark inwards to avoid spreading it. You may need to press a bit harder than with milder cleaners. As the paint begins to lift, wipe it onto a clean part of the cloth.
Once the paint is removed, wash the entire area with soap and water and rinse thoroughly to strip away any residual solvent.
Commercial Fence & Graffiti Removers (Goof Off, Krud Kutter)
If you've tried the above methods and the spray paint is still stubbornly clinging to your vinyl fence, specialized commercial cleaners designed for graffiti removal are your next best bet. Products like Goof Off or Krud Kutter are formulated to tackle tough jobs on various surfaces, including vinyl. These are often gel or liquid formulas that are designed to cling to vertical surfaces and break down paint effectively.
Always read and follow the manufacturer's instructions precisely, as these products can be quite potent. Wear your gloves and eye protection. Apply the cleaner to a cloth or directly to the painted area as directed. Let it sit for the recommended time to allow it to work.
Gently scrub and wipe away the loosened paint. Rinse the area thoroughly with water, and then wash with mild soap and water to ensure all chemical residue is gone.
Crucial Step: Rinsing and Drying Your Fence
No matter which cleaning method you choose, a thorough rinse and proper drying are non-negotiable steps for a successful outcome. Skipping this can leave behind residue that might attract dirt later, or worse, damage the vinyl itself over time. Think of it like washing a car, you wouldn't stop after just soap and water, right?
After you've scrubbed away the spray paint, grab a clean hose or bucket of fresh water. You want to rinse the area completely, ensuring no traces of soap, solvent, or loosened paint remain. Follow this by drying the fence with soft, clean cloths. Allowing the vinyl to air dry completely prevents water spots and ensures a clean, finished look.
What NOT to Do: Common Mistakes That Damage Vinyl
When you're trying to get rid of spray paint, enthusiasm can sometimes lead to mistakes that end up causing more harm than good to your vinyl fence. The goal is removal, not replacement, so knowing what to avoid is just as important as knowing what to do. Some common pitfalls can leave permanent scratches or dull spots on the vinyl.
Here are a few things to steer clear of:
- Abrasive Scrubbers: Anything like steel wool, stiff wire brushes, or even aggressive scouring pads will scratch the surface of your vinyl. This damage is irreversible.
- Harsh Chemicals Without Testing: Don't just spray any strong chemical onto the fence. Always test in a small, hidden area first to ensure it doesn't discolor or degrade the vinyl.
- Pressure Washing at High PSI: While a gentle spray from a hose is fine, high-pressure washing can force water under seams, damage the vinyl, or embed paint further into any microscopic surface imperfections.
- Leaving Solvents to Dry: Letting strong solvents like mineral spirits or commercial removers dry on the vinyl can cause discoloration or etching. Always rinse them off promptly.
Expert Tips for a Spotless Vinyl Fence Finish
Our research, which includes reviewing manufacturer care guides and aggregated user feedback, reveals some simple yet effective strategies to get that spray paint off without a trace. These aren't complicated tricks, but rather common-sense approaches that seasoned homeowners swear by. They focus on efficiency and protecting the fence material.
One key piece of advice is to act fast. The fresher the spray paint, the easier it will be to remove. If you notice paint on your fence, try to tackle it within a few hours or at most, a day. For older, dried-on paint, gently scraping with a plastic scraper after applying a solvent can help lift the initial layer before you resort to scrubbing.
Safety First: Protecting Yourself and Your Property
Dealing with cleaning solutions, especially stronger ones, means prioritizing safety for yourself and your surroundings. Even with seemingly mild products, it's wise to take precautions. Vinyl is generally durable, but your skin and eyes are more sensitive.
Always ensure you're working in a well-ventilated area, especially when using mineral spirits or commercial graffiti removers. Wear chemical-resistant gloves to protect your skin from drying out or irritation. Safety glasses are a must to prevent any splashes from getting into your eyes. Also, be mindful of plants or other surfaces near the fence that could be affected by runoff from your cleaning efforts.
When to Call in the Professionals
Sometimes, despite your best efforts and the right tools, the spray paint is too extensive, too old, or too deeply bonded to remove safely yourself. In these situations, it’s okay to admit that it's time for professional help. Trying to force removal can lead to expensive damage that costs far more than hiring experts.
If your fence has been significantly vandalized, or if you've tried multiple methods without success, consider looking for a professional cleaning service. Many companies specialize in graffiti removal and have access to industrial-grade, yet fence-safe, solutions and equipment. They can often restore your fence to its original condition without damaging the vinyl.
Addressing Different Paint Types and Their Removal
Not all spray paints are created equal, and understanding the type of paint you're dealing with can significantly impact your removal strategy. The binder, pigments, and solvents used in different paint formulations will respond differently to various cleaning agents. This is why a method that works for water-based latex might not touch an oil-based enamel.
Oil-based paints and enamels typically require stronger solvents like mineral spirits because their chemical makeup is more robust. Water-based or latex paints, on the other hand, are often easier to remove, sometimes even with just soap and water, especially if they're still fresh. Knowing if you're dealing with latex, enamel, or even a specialized graffiti paint helps you choose the right product from the start, saving you time and effort.
How Long Has the Paint Been on the Fence?
The age of the spray paint is a critical factor in how difficult it will be to remove from your vinyl fence. Fresh paint is generally pliable and hasn't fully bonded with the surface. As paint cures, its chemical structure changes, becoming harder and more resistant to solvents.
Our research indicates that tackling spray paint within 24, 48 hours dramatically increases your chances of success with milder methods. Paint that has been exposed to sunlight and weather for weeks or months will likely have created a stronger bond. This means you might need to move straight to stronger solvents or be prepared for more intensive scrubbing, always with caution to protect the vinyl.
What Kind of Vinyl Fence Do You Have?
While most vinyl fences are made from polyvinyl chloride (PVC), subtle differences in their formulations and finishes can affect how they react to cleaning agents. Some newer vinyl products might have UV protectors or a more robust, less porous surface. Older vinyl might be more susceptible to etching or discoloration from certain chemicals.
Manufacturer specifications for some vinyl fence brands, like those from Azek (a company specializing in trim and decking materials, often used similarly to fencing), note that their products are designed for durability and resistance. However, even these can be affected by aggressive chemicals. Always consult your fence manufacturer's cleaning guidelines if available, and when in doubt, test any cleaning solution on a hidden area first. This helps confirm it won't cause fading or surface damage.
Common Scenarios of Spray Paint on Vinyl
Let's look at a couple of real-world situations to illustrate how different scenarios might play out. Imagine a homeowner who accidentally gets overspray from a DIY project on their white vinyl fence. This is usually a few hours old and relatively light coverage. In this case, warm water and dish soap might be enough.
On the other hand, picture a fence in a public area that has been hit with graffiti. This paint is often designed for durability and can dry overnight. Removing this will likely require moving through the steps from milder cleaners to stronger solvents or specialized graffiti removers. The sheer volume of paint also plays a role, potentially requiring more product and patience.
When to Consider and How to Use a Plastic Scraper
A plastic scraper is your best friend when dealing with dried-on, stubborn spray paint that solvents alone can't fully lift