
Staining your cedar fence yourself using a sprayer can save time and effort, but getting it right requires a bit more than just pointing and shooting. Achieving that beautiful, uniform finish, protecting your wood, and avoiding costly mistakes all hinge on following the correct process. This guide lays out precisely how to stain a cedar fence with a sprayer, from preparation to the final coat.
Understanding the nuances of wood care and stain application is crucial, especially with cedar's unique properties. For instance, the United States Department of Agriculture (USDA) Forest Products Laboratory notes cedar's natural resistance to decay, but proper sealing still extends its life significantly. Getting the application technique down ensures you achieve both protection and aesthetics, making your fence look great for years to come.
Why Spraying Cedar Fence Stain Makes Sense
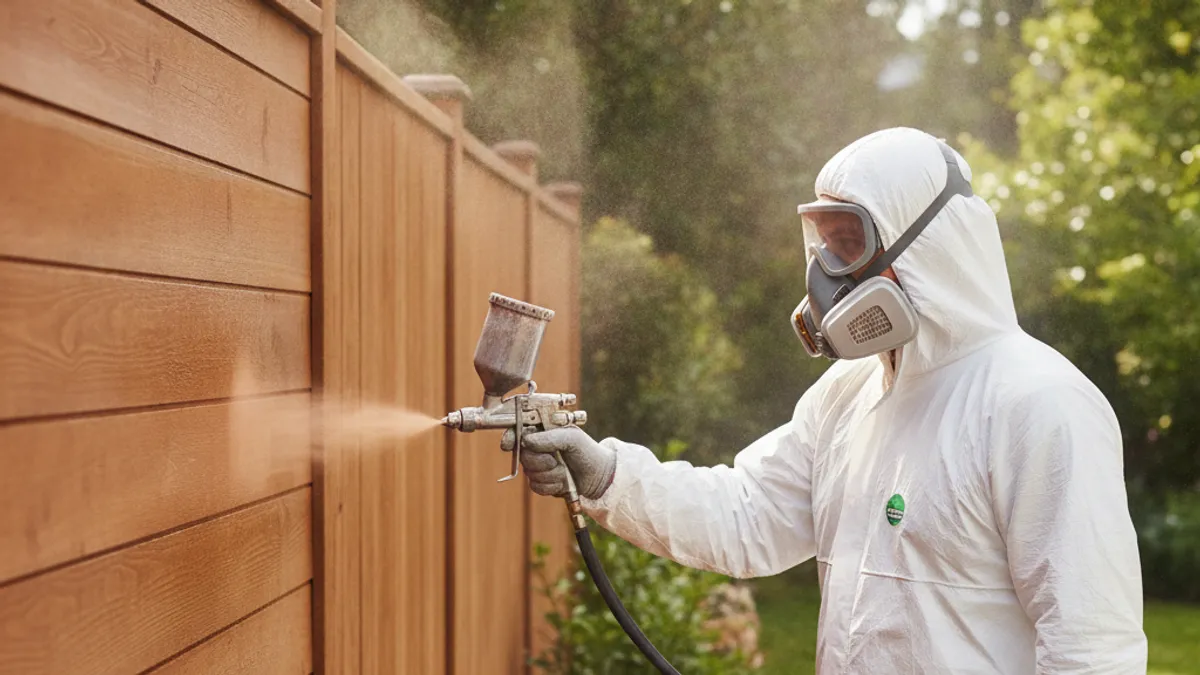
Spraying stain onto a cedar fence offers several distinct advantages, especially for large surface areas. It's often faster than applying stain with a brush or roller, cutting down significantly on project time. The process can also provide a more consistent and uniform finish across the entire fence, eliminating visible brush strokes or roller marks that can detract from the natural beauty of cedar.
Our research into DIY fence staining projects indicates that spray application significantly reduces physical strain, particularly on large, vertical surfaces. While it demands careful masking and preparation to avoid overspray, the overall efficiency and the quality of the final appearance make it a popular choice for homeowners as of 2026.
Before You Grab the Sprayer: Essential Prep Steps
Proper preparation is perhaps the most critical stage when staining a cedar fence with a sprayer. Skipping these steps is the quickest way to a blotchy, uneven finish or a stain that peels prematurely. Think of it as building a solid foundation; without it, everything else is likely to fall apart.
Cleaning Your Cedar Fence
Before any stain touches your cedar, the fence needs a thorough cleaning. This removes dirt, mildew, algae, and any existing failing finishes that could prevent the new stain from adhering properly. You can use a commercial deck cleaner or a solution of one part bleach to three parts water, applying it with a garden sprayer and then scrubbing with a stiff brush.
Pressure washing is an option, but it needs to be done carefully. A pressure too high can damage the soft cedar wood, causing fuzzing or splintering. Always test the pressure on an inconspicuous area first, and aim for a low-pressure wash, keeping the nozzle at least 12, 18 inches away from the wood surface.
Letting Your Fence Dry
Cedar needs to be completely dry before you apply stain. This is non-negotiable. Moisture trapped within the wood can prevent the stain from penetrating and bonding correctly, leading to premature failure, peeling, and an uneven appearance.
Generally, allow at least 24 to 48 hours of dry weather after cleaning before you start staining. Factors like humidity and temperature play a big role; on a humid day, it may take longer. You can check if the wood is dry by sprinkling a little water on it. If the water beads up, it's still too wet.
If it soaks in quickly, the wood is ready.
Protecting Your Property from Overspray
When using a sprayer, overspray is a significant concern. Stain can easily drift onto surrounding surfaces like your house siding, windows, doors, landscaping, patios, and even parked cars. You need to physically block these areas to prevent an unwanted stain coating.
Use plastic sheeting, tarps, or heavy-duty painter's tape to cover anything adjacent to the fence that you don't want stained. Pay close attention to delicate plants, flowers, or ornamental grasses; a light mist of stain can damage or kill them. Cover the ground directly beneath the fence, especially if it's a permeable surface like mulch or gravel.
Choosing the Right Stain for Your Cedar Fence
Selecting the correct type of stain for your cedar fence is vital for both protection and aesthetics. Cedar is a beautiful wood, and the right stain will enhance its natural grain while providing a robust shield against the elements. Different stains offer varying levels of protection and transparency.
Understanding Stain Types (Water-Based vs. Oil-Based)
Most exterior wood stains come in either water-based or oil-based formulations. Water-based stains are generally easier to clean up with soap and water and tend to have lower volatile organic compounds (VOCs), making them a more environmentally friendly option with less odor. They often dry faster than oil-based stains.
Oil-based stains, on the other hand, tend to penetrate the wood more deeply, offering excellent protection and durability. They can be more forgiving with application on less-than-perfectly dry wood and often provide a richer, more traditional look. However, they require mineral spirits or a similar solvent for cleanup and typically have a stronger odor.
Semi-Transparent vs. Solid: What Look Do You Want?
The choice between semi-transparent and solid stains depends on how much of the natural cedar grain you want to see. Semi-transparent stains contain more pigment than clear sealers but still allow the wood's natural color and grain to show through. They offer good UV protection and help enhance the wood's appearance while letting its character shine.
Solid stains, also known as opaque stains, act more like a paint. They completely cover the wood grain and color, offering maximum UV protection and a uniform, painted look. This is a good option if your cedar has some imperfections you wish to hide or if you prefer a bold, consistent color. They can also protect the wood longer than semi-transparent options.
Selecting and Setting Up Your Fence Stain Sprayer
The type of sprayer you use can significantly impact the ease of application and the final result. For fence staining, common choices are pump sprayers and electric sprayers, each with its own pros and cons. Understanding their capabilities helps you choose the right tool for your project.
Pump Sprayer vs. Electric Sprayer: Which is Best?
A basic garden pump sprayer is an economical choice for smaller fence sections or if you're on a tight budget. It requires manual pumping to build pressure. While simple, it can lead to inconsistent spray patterns and requires frequent re-pumping, which can interrupt your workflow.
Electric sprayers, such as High Volume Low Pressure (HVLP) models, offer a more powerful and consistent spray. They maintain steady pressure automatically, reducing user fatigue and providing a finer finish. These are generally more expensive but deliver superior results for larger fencing projects and can handle a wider range of stain viscosities.
Getting the Spray Pattern Just Right
Achieving an even coat with a sprayer means adjusting the nozzle to the correct pattern and pressure for your specific stain. Stains vary in thickness (viscosity), and you'll need to experiment. Most sprayers come with different nozzle tips or adjustable settings to control the spray width and volume.
For fences, a fan-shaped spray pattern is usually ideal, covering a wider area with each pass. You'll want to set the pressure low enough to avoid excessive misting and overspray, but high enough to atomize the stain effectively. Always test the spray pattern on a piece of cardboard or scrap wood before applying it to your fence.
The Step-by-Step Process: Spraying Your Cedar Fence
With your prep work done, stain chosen, and sprayer ready, it's time to apply the color. This stage requires attention to detail and a methodical approach to ensure a beautiful and protective finish that lasts. Working smart here prevents rework later.
Mixing Your Stain for Even Color
Before you even load your sprayer, thoroughly stir the stain. Pigments in stains can settle to the bottom, and if not mixed properly, you'll end up with uneven color distribution on your fence. Stirring ensures that the color is consistent throughout the can.
If you're using more than one can of stain, it’s a good practice to mix them all together in a larger bucket. This prevents slight color variations between cans from showing up on your fence. A paint stirring stick works well for this.
The Art of the Spray: Technique Matters
Hold the sprayer about 12, 18 inches away from the fence surface, keeping the spray nozzle perpendicular to the wood. Move the sprayer in slow, steady, horizontal or vertical strokes. Overlap each pass by about 50% to ensure complete coverage and avoid light spots or stripes.
Work in manageable sections, perhaps 3, 5 feet at a time. This allows you to maintain a wet edge, meaning you overlap the fresh stain with the previously sprayed area while it's still wet. This technique is crucial for avoiding lap marks, which are dark lines that appear where one section of stain has dried before the next is applied.
Working in Small Sections
Focusing on small, manageable sections is key to a professional-looking spray job. Trying to spray the entire fence at once can lead to uneven application as parts of the fence start to dry before you finish. Work from one end of the fence to the other, or from top to bottom of a panel.
This methodical approach helps maintain that crucial "wet edge." As you finish one section, immediately move to the next, overlapping the fresh spray into the wet edge of the previous section. This blending is what creates a seamless, uniform finish across the entire fence.
Avoiding Drips and Streaks
Drips and streaks are the bane of sprayer users. They often occur when you stop moving the sprayer mid-pass, hold the nozzle too close, or apply too much stain in one spot. To avoid them, keep the sprayer moving continuously while spraying.
If you see a drip forming, try to catch it immediately with a brush before it dries. Also, be careful not to oversaturate the wood. Applying multiple thin coats is almost always better than one thick coat when dealing with sprayers.
When to Back-Brush
Back-brushing is an optional but highly recommended step when spraying exterior stain. It involves using a quality brush to quickly even out the applied stain, push it into any gaps or crevices, and remove any sags or drips you might have missed. This extra step greatly enhances the final finish.
Use a high-quality bristle brush for back-brushing. Work behind your spray passes within a few minutes, while the stain is still wet. This helps ensure the stain is fully worked into the wood grain for maximum protection and a rich, even color.
What to Do After Spraying: Drying and Curing
Once the final coat of stain is applied, your work isn't quite done. Proper drying and curing time are essential for the stain to fully protect your cedar fence. This period allows the solvents to evaporate and the protective polymers to harden, creating a durable finish.
Most water-based stains dry to the touch within a few hours, but their full cure can take several days to a week. Oil-based stains typically take longer to dry to the touch, sometimes 24 hours or more, and can take up to 30 days to fully cure. Always refer to the specific manufacturer's instructions for recommended drying and curing times.
Interfering with this process can compromise the stain's performance. Avoid washing the fence, placing heavy objects against it, or allowing pets to rub against it until it's fully cured. This patience ensures the stain achieves its maximum protective capabilities.
Common Mistakes to Avoid When Spraying Cedar Stain
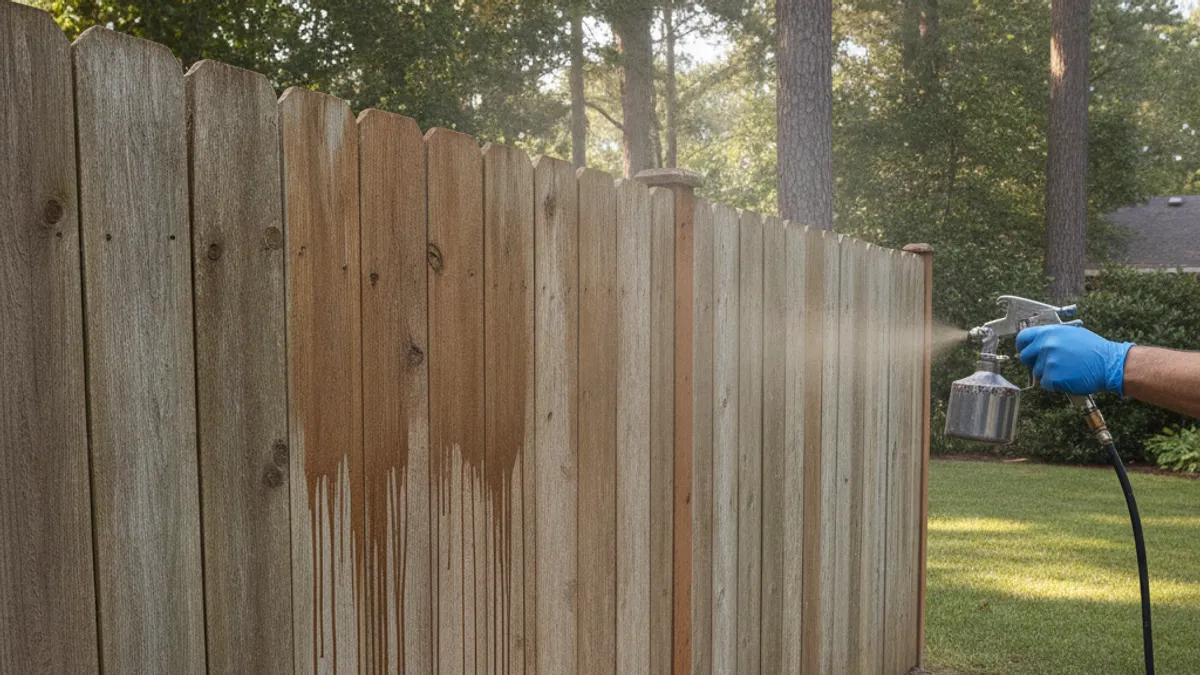
Even with careful planning, certain mistakes can derail your fence staining project. Recognizing these common pitfalls beforehand can help you sidestep them and achieve a professional finish. Many of these errors stem from insufficient preparation or rushing the application process.
Too Much Pressure, Too Close?
One of the biggest mistakes is holding the sprayer too close to the fence or using too much pressure. This can result in uneven application, heavy drips, and stain pooling on the wood surface. It can sometimes even force the stain too deep into the wood, hindering its ability to breathe and potentially causing issues later.
Always maintain a consistent distance and adjust nozzle pressure based on the stain's viscosity and your sprayer's capabilities. Manufacturer specifications for your specific stain product will often provide guidance on optimal spray distance and pressure settings.
Not Enough Prep Work
We've stressed this, but it bears repeating: inadequate preparation is the most frequent cause of stain failure. Skipping cleaning, failing to let the wood dry completely, or not masking surrounding areas are common errors. These oversightsthe stain's adhesion and the overall final appearance.
Think of the prep work as an investment. A few extra hours spent cleaning, drying, and masking can save you days of remedial work and the cost of re-staining down the line. It ensures your hard work pays off with a beautiful, long-lasting finish.
Spraying in the Wrong Weather
The weather plays a crucial role in how your stain performs and dries. Applying stain in direct, hot sunlight can cause it to dry too quickly, leading to lap marks and an uneven finish. On the other hand, high humidity or the threat of rain can prevent proper drying and bonding.
Ideal conditions for staining are typically overcast, mild weather, with temperatures between 50°F and 80°F (10°C to 27°C). Look for a period with at least 24, 48 hours of dry weather forecast after you finish applying the stain, both for drying and curing.
Staining Alternatives for Cedar Fences
While spraying is efficient, it might not be the best or only option for every cedar fence project. Understanding alternatives helps you make the most informed decision based on your fence's condition, your available tools, and your desired aesthetic. Sometimes, a different method offers better control or a specific look.
- Brush Application: Brushes offer the most control, allowing you to work the stain deeply into the wood grain and ensure complete coverage, especially on rough surfaces or in tight spots. This method is slower but excellent for detailed work and achieving a very uniform, rich finish. It’s often recommended for the first coat on new cedar.
- Roller Application: Rollers, especially those with extension handles, can cover large areas relatively quickly. They can be a good middle ground between brushing and spraying, offering decent speed with more control than a sprayer. However, rollers can sometimes leave a slightly different texture than brushing or spraying.
For more information on comparing application methods, see our guide on Spray Or Brush Paint Which One Is Better For Fence.
Keeping Your Cedar Fence Looking Great: Long-Term Care
Your cedar fence's beauty and protective stain won't last forever without a little ongoing maintenance. Regular care ensures the wood remains healthy and the stain continues to perform its protective duties against UV rays, moisture, and temperature fluctuations. A bit of attention each year can significantly extend its lifespan.
Perform annual inspections to check for any signs of wear, mildew, or peeling stain. Clean the fence gently each spring or fall to remove dirt and debris. If you notice the stain starting to fade or wear thin, a light re-coat might be necessary after cleaning and drying.
This proactive care will help prevent the need for more intensive restoration down the road. It’s about preserving the investment you’ve made in your property’s curb appeal and protection.
Frequently Asked Questions About Spraying Cedar Fences
How long does setup take?
Fence staining setup time can vary significantly, but you should budget at least a full day for preparation, especially if you're cleaning an older fence. This includes cleaning, allowing for drying (which can take 1, 2 days), and thoroughly masking surrounding areas. The actual spraying might only take a few hours, depending on fence size and your sprayer type, but the prep is the time-consuming part.
Is cedar fence staining a year-round project?
While you can stain any time the temperature permits, your best bet is to stain during mild weather. As mentioned, ideal conditions are typically between 50°F and 80°F (10°C to 27°C) during daylight hours, with no rain expected for at least 48 hours post-application. Avoid staining in extreme heat, freezing temperatures, or high humidity.
What happens if I don't stir the stain properly?
If you don't stir stain thoroughly, the pigments will likely have settled at the bottom of the can. This means your initial spray coats will be much lighter in color than the later ones. You'll end up with an uneven, mottled appearance on your fence, which is extremely difficult to correct without re-staining the entire structure. Always stir until the color is uniform.
Staining Alternatives for Cedar Fences
While spraying offers efficiency, it's not the only way to give your cedar fence a fresh look and renewed protection. Other methods, like brushing or rolling, provide different advantages and might be a better fit depending on your fence's condition, the type of stain, or your personal preference for control. Understanding these options helps you achieve the best outcome for your specific situation.
For instance, if your fence has a lot of intricate details, deep grooves, or small repairs, a brush might offer superior access and application. If you're working with a very thick stain that doesn't spray well, brushing or rolling might be necessary. Each method has its place, and sometimes a combination is best.
Brush Application: Precision and Control
A good quality paintbrush is your best bet when you need absolute precision and control. Brushes excel at working stain into the wood grain, getting into gaps between boards, and ensuring full saturation. This method is particularly effective for older fences that might have rougher surfaces or require detailed touch-ups.
Manufacturer specifications for many stains recommend brush application, especially for the first coat on new wood. This allows you to thoroughly work the stain into the cedar, maximizing its penetration and adherence. It's a slower process, but the consistent, in-depth coverage is hard to beat for longevity.
Roller Application: Speed with Some Control
Using a roller can be a good compromise between the speed of spraying and the control of brushing. For large, flat fence sections, a roller with an extension handle can cover significant ground quickly. You also have more control over the thickness of the application compared to a sprayer.
However, rollers can sometimes leave a slightly different texture than a brush or sprayer, and they may not get into every nook and cranny between boards as effectively. They are a solid choice for larger projects where you want to speed things up without sacrificing all semblance of control.
How to Clean and Maintain Your Cedar Fence
Proper long-term care is key to ensuring your stained cedar fence stays beautiful and protected for years to come. Regular cleaning and inspections help prevent damage and premature wear, saving you money and effort in the long run. It's about maintaining the investment you've made.
A clean fence resists mold and mildew growth, and it allows the stain to perform at its best. Keeping an eye out for small issues, like early signs of wear or potential pest problems, can help you address them before they become major repairs.
Annual Cleaning Routine
Once a year, typically in the spring or fall, give your fence a good cleaning. Use a mild detergent or a dedicated deck cleaner, diluted according to the product's instructions. You can apply it with a garden sprayer, then scrub with a soft-bristled brush or a pressure washer on a low setting, keeping the nozzle at least 12 inches away from the wood.
Rinse thoroughly with clean water. Ensure the fence is completely dry before applying any touch-up stain or sealant. This basic cleaning removes accumulated dirt, pollen, and environmental pollutants that can break down the stain and compromise the wood's integrity over time.
Inspecting for Wear and Tear
As part of your annual care, walk along your fence line and inspect it closely. Look for any areas where the stain might be peeling, fading, or looks chalky. Check wooden components for signs of rot, insect damage, or splintering.
Pay attention to the base of the fence, where it meets the soil, as this area is more susceptible to moisture and pest issues. Address any minor repairs, like replacing a loose board or re-securing a post, immediately. Early intervention is always more effective and less costly.
Common Questions About Spraying Cedar Fences
What kind of sprayer is best for fence stain?
For most DIY projects, an electric HVLP (High Volume Low Pressure) sprayer is a great choice. It provides a consistent, controllable spray and can handle a range of stain viscosities. While a basic garden pump sprayer is cheaper, it requires constant manual pumping and offers less consistent results for larger fences.
Can I stain my fence on a windy day?
It's not recommended to stain your fence on a windy day. Wind can carry stain particles far beyond your intended application area, creating significant overspray issues that are difficult to clean. It also can cause uneven application by pushing the stain inconsistently. Aim for calm, overcast days.
How do I clean my sprayer after use?
Cleaning your sprayer immediately after use is critical, especially with oil-based stains. For water-based stains, flush the system thoroughly with warm, soapy water, followed by clean water until all residue is gone. For oil-based stains, you'll need to flush with mineral spirits or the manufacturer's recommended solvent.
Ensure you follow the specific cleaning instructions for your sprayer model and type of stain. A dirty sprayer can clog and lead to application problems on your next project. Check your sprayer's manual for detailed cleaning procedures.