
Learning how to stain a fence with a garden sprayer can cut your project time in half compared to brushing by hand. A standard pump-style garden sprayer covers a 6-foot privacy fence roughly three to four times faster than a brush, and it gets between pickets without the awkward wrist angles that make a weekend job feel like a marathon. The trade-off is technique. Spray too heavy and you'll get drips and lap marks.
Spray too thin and you'll be adding a second coat you didn't budget time for. Get the prep and settings right, though, and the finish looks pro-level. In our research across manufacturer specs and verified buyer feedback, most users who switched to sprayer application say they'd never go back to a brush on a fence project. The key variables come down to your sprayer's PSI output, the viscosity of your stain, and how well you prepped the wood.
Let's walk through exactly how to make it work.
Why Using a Garden Sprayer Is Worth Knowing
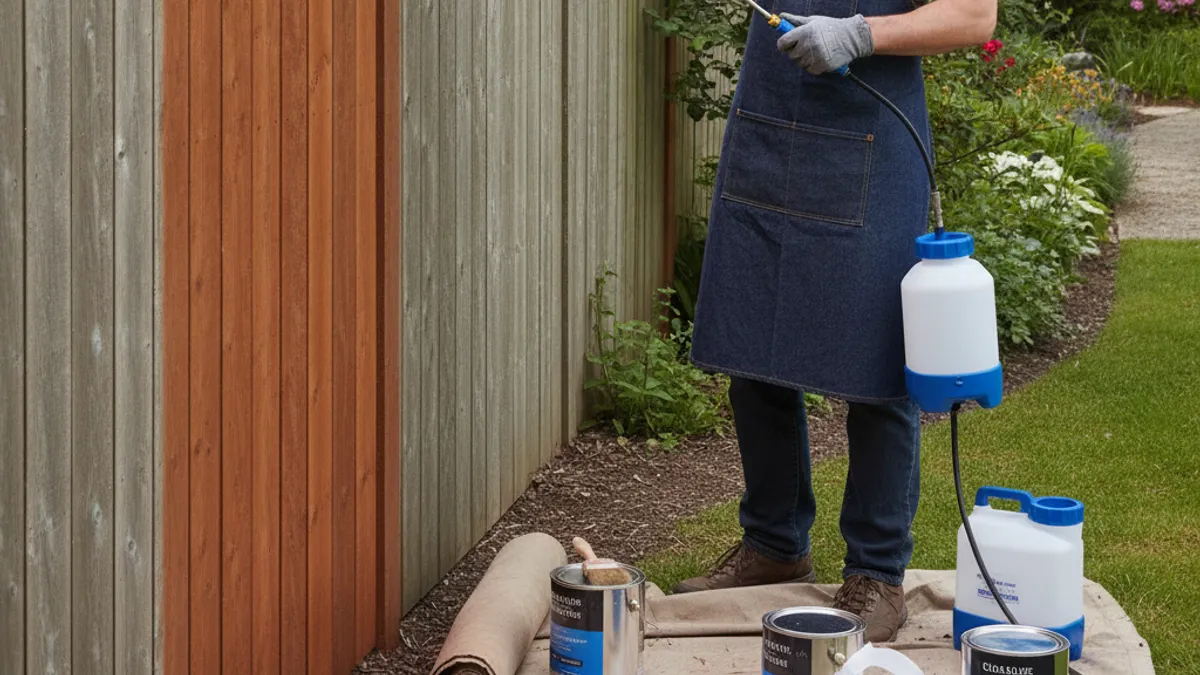
A garden sprayer is a pump-pressurized tank with an adjustable nozzle that produces a fan or cone pattern of fine droplets. That sounds basic, but the range in quality between models is wide. A Solo 416 Backpack Sprayer, rated at up to 60 PSI, pushes thin stains through a flat fan tip cleanly. A cheap big-box pump sprayer that tops out at 20 PSI and has a fixed round nozzle will spit uneven globs across your pickets.
Most consumer garden sprayers fall between those two extremes, and for fence stain you want one that delivers at least 30 PSI consistently and has an adjustable nozzle you can dial to a narrow fan. The real speed advantage kicks in on runs longer than about 40 linear feet. On a small garden fence, a brush is often just as fast once you factor in sprayer setup and cleanup. But on a full backyard perimeter, cutting application time from four hours to ninety minutes is the difference between finishing before dinner and watching the stain dry in the dark.
Our comparison of spray versus brush fence finishing breaks down the speed and finish-quality differences in more detail.
What Type of Stain Works in a Garden Sprayer
Not every exterior stain runs through a garden sprayer. The two things that matter most are viscosity and base.
- Water-based stains are thinner right out of the can. Most pump-style garden sprers handle them without any modification.
- Oil-based stains are thicker. Many can be sprayed straight, but some need a small amount of mineral spirits to thin them to the right consistency. Check the product label. If it says "sprayable" or gives a thinning ratio, you're good to go.
- Solid-color deck stains sit at the thick end of the spectrum. Some are too viscous for a garden sprayer and really need an airless rig. Read the technical data sheet, not just the front of the can.
Semi-transparent and semi-solid stains are the sweet spot for garden-sprayer application. They penetrate the wood without forming a heavy surface film, so they're more forgiving if your coverage isn't perfectly even. Brands like Ready Seal and Cabot Gold are formulated to be sprayer-friendly and are consistently mentioned in verified reviews as low-drip options. One rule that holds across all stain types: strain it before it goes in the tank.
Pour the stain through a mesh filter or even a piece of old pantyhose to catch any dried pigment or debris. A clogged nozzle mid-panel is the fastest way to ruin an otherwise smooth session.
Sprayers That Actually Handle Stain (and Ones That Won't)
A garden sprayer rated for herbicides and pesticides isn't automatically rated for stains. The internal seals and O-rings on some budget models break down when they sit in oil-based finishes for an extended period. Before you commit, look for a sprayer that either specifies chemical resistance to solvents or comes with Viton seals, which hold up far better than standard rubber. Here's a quick comparison of sprayer categories and how they perform with fence stain.
Sprayer Type Comparison
| Sprayer Type | Typical PSI Range | Nozzle Type | Stain Compatibility | Best For |
|---|---|---|---|---|
| Handheld pump (1–2 gal) | 15–40 PSI | Adjustable cone to fan | Water-based stain, thin oil-based | Small fences, touch-ups |
| Backpack pump (3–4 gal) | 30–60 PSI | Adjustable fan | Most water and oil-based stains | Medium to large fences |
| Battery-powered (1–2 gal) | 15–45 PSI | Fixed or adjustable | Water-based stain | Light jobs, convenience |
| Airless electric sprayer | 500–3000+ PSI | Interchangeable tips | All stain types | Large projects, pros |
| HVLP turbine sprayer | 2–10 PSI at tip | Fixed fan | Thin stains, lacquer-type | Finish work, not typical for fences |
For most homeowners, a 2- or 3-gallon pump backpack sprayer hits the sweet spot. It holds enough stain to cover a full section without constant refilling, and the higher pressure gives a finer, more consistent mist. Models from Chapin and Solo consistently show up in aggregate reviews as reliable for stain work, primarily because they offer replaceable seal kits and adjustable brass nozzles rather than molded plastic tips. Avoid the single-setting aerosol-pump garden sprayers that produce a stream rather than a fan pattern.
They'll mark the fence with heavy streaks that take serious effort to even out.
What Surfaces and Fence Styles Spray Best
A garden sprayer doesn't care whether your fence is cedar, redwood, pine, or pressure-treated lumber. What matters is the texture of the surface and the spacing of the boards.
Smooth-planed picket fences spray beautifully. The stain lays down in an even, thin coat with minimal absorption variation. You can usually get away with a single pass and no back-brushing as long as you keep your overlap consistent.
Rough-sawn or weathered boards absorb more stain in the raised grain and less in the valleys. Spraying alone can leave a slightly uneven appearance on heavily textured wood. Back-brushing after spraying pushes stain into the low spots and evens out the coverage. It adds time, but on rough cedar it makes a visible difference.
Privacy fences with tight slats are where a sprayer earns its keep. A brush has to work across each narrow slat individually, and you end up with paint-on-the-edges and drips down the sides. A sprayer passes over the whole face and wraps stain around the edges of each board in one motion.
Shadow-board or board-on-board fences are trickier. The overlapping boards create shadow lines where overspray can drift through to the back side. Move your sprayer slower on these and keep the fan pattern tight.
Pressure-treated wood needs special attention. New lumber from the treatment plant is saturated with preservative solution and won't accept stain until it dries out. Manufacturer guidelines from the American Wood Protection Association (AWPA) recommend waiting until the moisture content drops below 15%. On average, that takes 3 to 6 months of weather exposure in most climates, though in humid coastal areas it can stretch longer.
A cheap pin-type moisture meter costs about twenty dollars and removes all the guessing. Sprinkle water on the wood surface. If it beads up, the wood is still too wet. If it soaks in within a few seconds, it's ready.
That one test prevents the most common finish failure in fencing: stain that peels off in sheets six months after application because it never actually penetrated.
Prepping Your Fence Before You Pull the Trigger
Preparation is where most fence staining projects succeed or fail, and it has nothing to do with the sprayer itself. Raw or dirty wood rejects stain unevenly, and the result shows up as light patches, dark blotches, and premature peeling.
Start with a visual inspection. Walk the full fence line and note any loose boards, popped nails, or sections where the old finish is flaking. Tighten or replace hardware now. Staining over a rust streak just seals it in and creates a brown bleed that lasts for years.
Cleaning
A pressure washer set to 1200 to 1500 PSI on a wide fan tip does the heavy lifting. Hold the nozzle about 8 inches from the wood and work in sections, moving parallel to the grain. Never zero in on one spot. A concentrated jet can raise the grain and leave visible etching that telegraphs through the stain.
If the fence has mildew or algae, a solution of oxygen bleach and water at a 1-to-4 ratio lifts biological growth without damaging the wood fiber the way chlorine bleach can. Apply it with your sprayer, let it dwell for 15 minutes, then rinse thoroughly.
Drying time matters more than most people think. After washing, the wood needs 24 to 48 hours of dry weather before you stain. In humid climates or shaded areas, add another day. That moisture meter mentioned earlier is the most reliable check, but the sprinkle test works in a pinch.
Sanding and Repair
Lightly sand any rough spots or raised grain with 80 to 100 grit paper. Focus on horizontal surfaces where old stain tends to cake. For boards with gray sun-bleaching, sanding exposes fresh wood that absorbs stain at a rate consistent with the rest of the fence.
Fill small cracks or knot holes with exterior wood filler if appearance matters. Stain won't hide deep voids, and filling them takes five minutes versus living with the reminder for the next three years.
Masking
Before you load the sprayer, spend 20 minutes covering what you don't want stained. Plastic sheeting stapled or taped to nearby siding, drought cloth draped over plants, and old bedsheets weighted over concrete flatwork save you hours of cleanup. Overspray from a garden sprayer drifts 3 to 6 feet in a light breeze. On a calm day, 2 feet of clearance is enough.
If wind picks up past about 8 mph, stop and wait. Masking also applies to yourself. Nitrile gloves, safety glasses, and a respirator rated for organic vapor protection are worth the fifteen dollars a box store charges. Skin contact with oil-based stain is a headache to clean off, and inhaling atomized solvent is more irritating than people expect.
Setting Up Your Garden Sprayer for Stain
A sprayer loaded with herbicide residue is the silent killer of fence stain jobs. If your sprayer has been used for anything other than stain before, flush it thoroughly with the appropriate cleaner first. Water-based residue comes out with water. Oil-based residue needs mineral spirits through the full system, including the nozzle and filter screen.
Straining the stain prevents half the clogs that plague garden sprayer projects. Place a paint strainer bag or a clean piece of nylon mesh over the tank opening and pour slowly. Even brand-new cans of stain occasionally contain dried pigment clumps that passed quality control.
Thinning follows manufacturer guidelines, not rules of thumb. Some water-based stains thin with a small amount of water, typically no more than 10 percent by volume. Oil-based stains may call for mineral spirits or paint thinner at a similar ratio. Adding too much thinner reduces color intensity and penetration, and you'll find out about it when the fence looks washed out after the first coat dries.
Nozzle setup is where you control the finish quality. A flat-fan tip angled to spray a vertical pattern gives you the best coverage on standard vertical pickets. Set the fan width to roughly 6 to 8 inches. Narrower than that and you'll need too many passes.
Wider and you lose control at the edges, which leads to overspray on surfaces you masked for exactly this reason.
Pressure should be built up gradually. Pump the handle until you feel firm resistance, then test the spray pattern on a piece of cardboard or scrap wood about 2 feet from the fence. You're looking for a consistent, even fan with no heavy streaks at the center or edges. If the center is heavy, lower the pressure.
If the edges are sputtering, increase it. Most backpack sprayers reach their sweet spot between 25 and 40 PSI, but there's no gauge on most consumer models. The cardboard test tells you everything.
One practical tip that comes up repeatedly in verified buyer reviews: fill the tank only about three-quarters full. The extra air volume maintains pressure longer between pumps. A full tank runs out of usable pressure after just a few passes, and you'll be pumping every thirty seconds.
How to Spray a Fence Without Drips, Runs, or Blotches
The core technique for spraying fence stain is simpler than it sounds once you understand one principle: multiple light passes beat a single heavy one every time.
Starting position. Begin at the top of a panel and work downward. Spraying bottom-to-top sends drips running over areas you haven't stained yet, and catching them after the fact means smearing wet stain with a brush, which leaves a visible texture change.
Stroke rhythm. Hold the nozzle 8 to 12 inches from the board face. Trigger the spray just before the edge of your target area, sweep across in a steady horizontal motion, and release the trigger just past the far edge. The sweep should take about one second per foot of fence width. Faster than that and the coat is too thin.
Slower and the drips start forming before you can trigger off.
Overlap each pass by about 50 percent. This is the single most effective way to prevent lap marks, which show up as darker horizontal bands where two wet passes meet. A 50 percent overlap means the center of each new pass lines up with the bottom edge of the pass above it. It feels like you're using twice as much stain, but on new or dry wood most of it absorbs within seconds.
Watching for drips in real time is a skill that develops fast. A drip starts as a subtle accumulation, usually at a board edge, a knot, or a spot where two pickets overlap. If you catch it within a few seconds, the weight of the stain pulls it into a tiny runners that's barely visible. If you miss it, it dries into a hardened streak that needs sanding before the next coat.
The best technique is to develop a pattern trigger, then glance back at the previous pass before starting the next one. It adds a second or two per stroke and eliminates about 90 percent of drip issues.
Vertical boards, horizontal technique. Always spray horizontal passes on vertical fence pickets, even though your instinct might say otherwise. Horizontal passes let gravity work across the full width of the board. Vertical passes concentrate the bottom of each stroke, and drips are almost guaranteed.
What even coverage looks like. At the right distance and pressure, the wet stain should appear uniformly glossy across the surface, similar to wood that's just been wiped with a damp cloth. If you see a mottled appearance with alternating dark and light spots, your overlap is inconsistent. If you see a uniform dark sheen with no visible texture, the coat is likely too heavy. The finish should look saturated but not dripping.
On rough-sawn wood the surface should appear evenly wet with no dry patches showing through.
The Spray-and-Brush Technique
Spray-and-back-brushing means applying stain with the sprayer and immediately working it into the wood with a wide synthetic-bristle brush. It adds roughly 30 to 40 percent more time to the project, but on certain fence types the difference in finish is significant.
When back-brushing is worth it. On rough-sawn cedar, old fences with uneven absorption, or any surface where you want maximum stain penetration, brushing after spraying evens out the coat and pushes product into grain valleys. It's also the recommended method for oil-based stains, which need physical agitation to work into dense wood fibers.
When you can skip it. On smooth, new lumber with even texture, spraying alone gives a clean finish that looks virtually identical to a brushed application. If you're using a semi-transparent water-based stain on a tight-lot privacy fence, back-brushing is mostly extra labor for minimal visible gain.
How to do it. Spray one full panel or a 4-foot section. Immediately follow with a 4-inch synthetic brush held at about 30 degrees, using long, light strokes in the direction of the grain. You're not painting. You're smoothing.
The goal is to eliminate any heavy spots and push stain into the texture, not to redistribute it from one area to another.
Brush type matters. A natural-bristle brush can leave visible stroke marks in water-based stain because the bristles soften and fan out. A nylon or polyester-bristle brush maintains its shape and leaves a smoother finish. A "stain brush" from brands like Purdy or Wooster in the 3-to-4-inch range handles fence work well.
One detail that trips people up: back-brushing takes no more than 30 to 60 seconds after you spray. If you wait longer than about two minutes, the stain starts to set on the surface, and brushing at that point streaks it instead of smoothing it. Work in manageable sections so the timing stays consistent.
Common Mistakes People Make Spraying Fence Stain
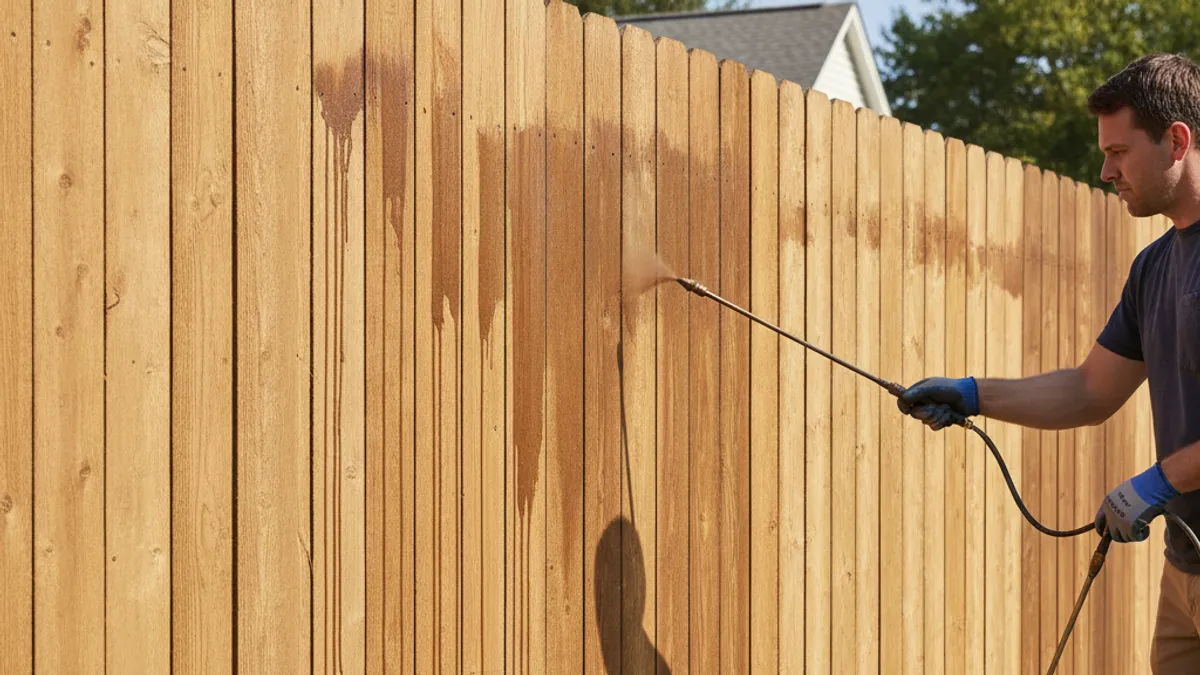
The failures we see in aggregated project reviews and forum reports tend to cluster around the same handful of errors.
Spraying weather-damaged or dirty wood. Stain is a surface finish, not a repair product. It can't bridge cracks, seal over mildew, or bond to loose old finish. If the prep was skipped, the stain fails early and looks worse than doing nothing.
Using the wrong nozzle distance. Holding the sprayer too close concentrates the stain into a heavy center stripe with thin edges. Too far away and the droplets partially dry before hitting the wood, leaving a rough, sandpaper-like texture called "dry spray." Eight to twelve inches is the consistent sweet spot.
Overworking a section. Going back over partially dried stain with either the sprayer or a brush disrupts the film that's forming and creates lap marks or streaks. Apply the coat, check for drips, and move on.
Ignoring wind direction. Even a 5-mph breeze pushes a garden sprayer's mist off target. Always spray with the wind at your back so the drift moves away from you and away from surfaces you've already finished.
Not maintaining pressure. As the tank empties, pressure drops on most pump sprayers. A panel that started with even coverage ends with a streaky, thin finish because you pumped less frequently halfway through. The fix is simple: pump every 30 to 45 seconds regardless, or switch to a backpack model with a larger tank that holds pressure longer.
Applying stain too thick. This is probably the single most common error in exterior stain work. A thick coat looks great when it's wet. Then it dries into a surface film that peels within a year because it never penetrated the wood. Two thin coats, applied hours apart, outperform a single heavy application every time.
Skipping the test spray. Five minutes on a piece of scrap wood or the backside of a fence post reveals problems with pressure, pattern, and stain consistency that you'd otherwise discover on the second panel of your actual fence.
How to Protect Plants, Siding, and Everything Around the Fence
Overspray from a garden sprayer doesn't respect boundaries. In a light mist, stain droplets can travel 4 to 8 feet from the nozzle, and that drift lands on hostas, vinyl siding, window glass, and your neighbor's concrete walkway. Thirty minutes of masking saves half a day of scrubbing.
Plants and landscaping. Drape breathable cloth or old bedsheets over any foliage within 5 feet of the fence line. Plastic sheeting works too, but it traps heat and can scorch leaves fast on a warm afternoon. Secure the covering with landscaping staples or rocks so wind doesn't peel it back mid-job. If you're staining near edible garden beds, the extra distance is worth keeping.
Stain residue on leafy greens near harvest is not something to brush off.
Siding and structures. Vinyl and fiber cement siding wipe clean with solvent if you catch drips within a few minutes, but dried stain on painted surfaces is a different problem. Tape sheet plastic or drop cloths along the bottom edge of siding where it meets the fence line. A strip of painter's tape along the top of a concrete patio or walkway keeps the overspray line sharp.
Neighboring property. If the fence line runs along a shared boundary, a quick conversation before staining day prevents most disputes. Overspray that lands on a neighbor's car, outdoor furniture, or freshly poured walkway is your responsibility. A portable pop-up screen or a few stakes with plastic sheeting stretched between them acts as a windbreak and drift barrier at the same time.
Ground cover. Stain that misses the fence hits the ground. On soil, it soaks in. On concrete or pavers, it stains permanently. Cardboard laid along the fence base catches the drip zone and gets thrown away after the job.
Dealing with Wind, Heat, and Weather
Weather decides more about your stain job than your sprayer does. Manufacturers like Cabot and Behr specify application temperatures between 50 and 90 degrees Fahrenheit as of their 2026 technical sheets. Below 50, stain thickens and won't atomize properly. Above 90, it dries so fast that you get lap marks even with good technique.
Wind is the sneakiest problem. Even 5 to 8 mph of breeze pushes a garden sprayer's fan pattern off-target and creates a fine mist that coats everything within a 10-foot radius. Check wind direction before you start each panel. If it shifts, reposition yourself so the overspray blows away from finished sections and off your face.
Calm mornings or overcast afternoons are the ideal windows.
Humidity above 70 percent slows drying significantly. The stain stays wet longer, which sounds helpful until you realize it also means gravity has more time to pull drips downward. In the Southeast Gulf Coast states, early morning application before humidity spikes is the practical workaround. Verified buyer reviews from that region consistently reference 6 AM starts.
Direct sun accelerates drying on the wood surface, making it harder to maintain a wet edge for overlap. The fix is to work on the shaded side of the fence first, then move to sun-facing sections when cloud cover or afternoon shade arrives. In full-desert sun environments like Arizona or Nevada, staining in sections of 3 to 4 feet rather than full panels keeps you ahead of the dry-down.
Rain within 24 hours of application washes uncured stain off the surface. Check the forecast for a clear 48-hour window. Dew overnight is less of a problem with most water-based stains once they've dried for a couple of hours, but oil-based products need longer cure time before any moisture contact.
How Long It Takes and When to Apply a Second Coat
Here's a realistic timeline for a standard 6-foot by 100-foot privacy fence, assuming two fully dry days of prep work already behind you.
Setup and masking. 20 to 30 minutes for sprayer assembly, stain straining, and covering nearby surfaces. Rushing this step costs you later.
First coat application. With a 2-gallon backpack sprayer on a 100-foot run, expect 60 to 90 minutes. A handheld unit means more refills and closer to two hours.
Dry time between coats. Water-based semi-transparent stains typically dry to touch in 1 to 3 hours. Full cure before recoating is usually 4 to 6 hours. Oil-based products need more. Most manufacturers specify a minimum of 8 hours, and some oils need 24 hours between coats in anything but ideal conditions.
Second coat application. Faster than the first. You're putting down a lighter coat, so material usage drops by roughly 30 percent. Figure 40 to 60 minutes on a 100-foot run.
Cleanup. Cleaning a garden sprayer thorough enough for next use takes 15 to 20 minutes with the right solvent and a full disassembly of the nozzle and filter. Skip this and hardened stain seals will kill the sprayer within a season.
Total active time. For a 100-foot fence, plan on 4 to 5 hours of hands-on work spread across two days if you're doing two coats. That compares to 10 to 12 hours with a brush, according to aggregated homeowner reports from manufacturer Q&A sections.
How to know if you need a second coat. After the first coat dries completely, look for areas where the old wood color still shows through clearly or where absorption was uneven. New, dry, or pressure-treated wood almost always benefits from a second coat because it drinks the first application ruthlessly. Previously stained fences in decent shape may only need one refreshing coat.
Cleaning Your Sprayer After Stain (So It Doesn't Die)
A garden sprayer that gets rinsed and stored empty lasts years. One that sits for a weekend with oil-based stain hardening inside it is a glorified paperweight by Monday.
Immediate rinse. Empty any remaining stain back into the can through a strainer. Fill the tank halfway with the appropriate cleaner. For water-based stain, warm water works. For oil-based, mineral spirits or paint thinner is necessary.
Pump the sprayer and run the cleaner through the nozzle until it sprays clear. Then drain the tank.
Disassemble the nozzle. Most garden sprayer nozzles unscrew for cleaning. Remove the tip, the swirl plate, and any internal filter screen. Soak these parts in cleaner for 10 to 15 minutes, then scrub with an old toothbrush. Clogged nozzle tips are the number one complaint in negative sprayer reviews, and almost all of them come from skipping this step.
Seal inspection. Rubber O-rings and gaskets swell or crack after prolonged contact with oil-based solvents. Pull them out after a few stain projects and check for deformation. Replacement seal kits for Solo and Chapin models run about five dollars and take two minutes to install.
Storage. Store the sprayer with the tank lid loose or removed so moisture can't build up inside. Hang it or store it upright. Laying a sprayer on its side with residual cleaner in the pump mechanism can warp the internal check valve.
How Much Stain You'll Actually Need
Coverage rates printed on the can are based on smooth, clean, moderately porous wood. Real-world numbers run 10 to 20 percent lower, especially on rough-sawn or weathered fencing.
Calculator method. Measure your fence's total square footage. A standard 6-foot by 100-foot privacy fence with pickets on one side is roughly 600 square feet. If both sides are accessible, double it. Divide the square footage by the stain's rated coverage per gallon to get your base number.
Add a 15 percent overage factor for waste, absorption variation, and second-coat touch-ups.
Quick reference table.
| Fence Length | Height | Sides | Approximate Sq Ft | Gallons Needed (Semi-Transparent, 1 Coat) | Gallons Needed (2 Coats) |
|---|---|---|---|---|---|
| 50 ft | 6 ft | 1 | 300 | 1.5 to 2 | 2.5 to 3.5 |
| 75 ft | 6 ft | 1 | 450 | 2 to 3 | 3.5 to 5 |
| 100 ft | 6 ft | 1 | 600 | 2.5 to 4 | 4.5 to 6 |
| 100 ft | 6 ft | 2 | 1200 | 5 to 7 | 9 to 11 |
| 150 ft | 6 ft | 1 | 900 | 4 to 5.5 | 7 to 9 |
Semi-transparent stains typically cover 200 to 300 square feet per gallon on smooth wood and 150 to 200 on rough-sawn. Solid-color stains spread further, often 300 to 400 square feet per gallon, because they contain more pigment and less penetrating oil.
Practical tip. Buy stain in 5-gallon pints rather than individual gallons when the math calls for more than 3 gallons. The per-gallon savings run 15 to 25 percent, and leftover stain from a 5-gallon pail seals tightly for touch-up work a year or two later. Just stir it thoroughly before using. Manufacturer recommendations confirm that most quality exterior stains store well for 2 to 3 years unopened or in a resealed original container kept from freezing temperatures.
Garden Sprayer vs. Brush vs. Roller vs. Airless Sprayer
Not every fence staining method makes sense for every situation. Here's how the four main approaches stack up across the factors that actually matter.
Garden Pump Sprayer
Best for: Homeowners with medium to large fences who want a significant speed upgrade over brushing without investing in professional equipment.
Pros:
- Covers 3 to 5 times faster than a brush on a standard privacy fence
- Reaches between pickets and around edges without repositioning
- Affordable entry point (quality models run $25 to $60)
- Lightweight and portable on a backpack frame
Cons:
- Requires thorough prep and masking to control overspray
- Lower pressure than airless rigs, which means some thicker stains won't atomize well
- Nozzle clogs are common if stain isn't strained
- Build quality varies widely between brands
Brush Application
Best for: Small fences, detailed work around gates and posts, and anybody staining a previously finished fence with just a single maintenance coat.
Pros:
- Zero overspray risk
- Forces stain deep into wood grain through physical pressure
- Maximum control on tricky areas like post caps and lattice infill
- No equipment beyond the brush itself
Cons:
- Painfully slow on large runs. A 100-foot fence can take an entire weekend.
- Brush marks show up on smooth wood if technique isn't consistent
- Physical fatigue on big projects. Your hand and shoulder will tell you about it the next day.
Roller Application
Best for: Solid-color stains on flat, smooth fence surfaces where speed matters but overspray is a dealbreaker.
Pros:
- Faster than brushing, though slower than spraying on most fence types
- No overspray drift
- Good material deposition on smooth-faced lumber
Cons:
- Rollers skip valleys in rough-sawn or weathered wood, leaving visible thin spots
- Loading a roller from a tray while working on a fence is awkward and drippy
- Nap residue can show on the finish if the roller sleeve quality is cheap
- Doesn't reach between tight pickets as cleanly as spray or brush
Airless Paint Sprayer
Best for: Large properties, contractors, or DIYers staining multiple fence sections, decks, and siding in a single project cycle.
Pros:
- Highest speed option. A professional-grade Graco or Wagner airless unit can stain a 200-foot fence in under 2 hours.
- Handles all stain viscosities including thick solids
- Adjustable PSI from 500 to 3000+ allows fine-tuning for any product
- Even coat quality at high speed when technique is dialed in
Cons:
- Rental cost runs $40 to $60 per day for homeowner-grade units, purchase price starts around $300
- Generates significant overspray. Full masking and wind assessment are mandatory.
- Overkill for a single small fence. The setup and cleanup time can exceed the actual staining time on jobs under 100 linear feet.
- Stain waste from the volume left in hoses and the pump housing is higher than with a simple garden sprayer
Quick Comparison
| Factor | Garden Sprayer | Brush | Roller | Airless Sprayer |
|---|---|---|---|---|
| Speed (100 ft fence) | 60 to 90 min | 4 to 6 hrs | 2 to 3 hrs | 30 to 60 min |
| Overspray risk | Moderate | None | None | High |
| Upfront cost | $25 to $60 | $5 to $15 | $10 to $20 | $300+ or $45/day rental |
| Stain viscosity range | Low to medium | All | Low to medium | All |
| Learning curve | Low to moderate | Low | Low | Moderate to high |
| Best fence size | Medium to large | Small | Medium | Large to commercial |
For most homeowners tackling one fence, a garden pump sprayer hits the best balance of speed, cost, and finish quality. Bring out the airless rig when you're staining a full perimeter plus a deck and want everything done in a single Saturday. Otherwise, you're paying for power you'll use for twenty minutes.
Safety Tips Most People Skip
Fence staining involves pressurized solvent, chemical finishes, and working at height near structures. Most of the safety steps are boring. The ones that get skipped cause the actual problems.
Respiratory protection. Garden sprayers atomize stain into fine droplets that hang in the air for several seconds after they pass the fence. A standard dust mask does nothing against these particles. An organic vapor half-face respirator with P100 particulate filters, available at any hardware store for around $25, is the minimum for oil-based stain work. Even with water-based products, the mist in an enclosed yard on a calm day concentrates enough to irritate airways.
Eye protection. Safety glasses with side shields, not just regular glasses. Stain mist drifting back toward your face on a light cross-breeze is the most common exposure route people forget about.
Skin contact. Nitrile gloves are the practical choice. Latex tears too easily when you're handling rough lumber, and the solvent in oil-based stain breaks down latex within minutes. If stain gets on skin, wipe it with a rag dampened with mineral spirits, then wash with soap and water. Don't use gasoline or lacquer thinner on skin.
That swap shows up in emergency room data too often.
Rag disposal. This one sounds like an old wives' tale until someone's garage catches fire. Oil-soaked rags can spontaneously combust because the oxidation process generates heat that builds in a folded or bunched pile. Spread rags flat to dry outdoors, away from structures, or submerge them in a metal container filled with water. Once they're fully dry and stiff, they're safe for regular trash.
Ladder safety. If your fence height or the adjacent grade puts the top section out of reach, a stable ladder or step stool becomes part of the equation. Never lean a ladder directly against a freshly stained fence. Use a ladder standoff or brace it against the unpainted side.
Ventilation on enclosed porches or in narrow side yards. Staining in a tight space between houses concentrates vapors fast. A basic box fan set up to blow air across the work area and out the open end of the yard makes a real difference, particularly with oil-based products.
Keep kids and pets out until the stain is dry to touch. Most exterior stains have low acute toxicity once cured, but the wet solvent phase is genuinely irritating to skin and eyes, especially for animals that run along the base of a fence and then groom themselves.
FAQs About Staining a Fence with a Garden Sprayer
Can you use any garden sprayer for fence stain?
No. Sprayers rated only for water-based herbicides often have rubber seals and O-rings that break down when exposed to oil-based stains. Look for a model with solvent-resistant seals, an adjustable fan nozzle, and a minimum output of 30 PSI. Backpack-style pump sprayers from Solo and Chapin consistently rate well for stain work in verified buyer reviews.
Do you need to thin stain for a garden sprayer?
Most water-based stains spray straight from the can. Some oil-based stains benefit from a small amount of mineral spirits, typically 5 to 10 percent by volume, to reduce viscosity enough for a clean fan pattern. Always check the product's technical data sheet. Over-thinning reduces color depth and penetration.
How far should you hold the sprayer from the fence?
Eight to twelve inches. Closer than that and the stain concentrates into a heavy center band. Farther away and the droplets partially dry before contact, creating a rough finish called "dry spray."
Is it better to spray or roll fence stain for a first-timer?
Spraying is faster but has a slightly steeper learning curve. If you've never used a sprayer before, practice on cardboard or the backside of a fence panel for five minutes before starting the visible sections. Rolling is more forgiving of technique errors but takes significantly longer on most fence types.
How long after pressure washing can you stain a fence?
Wait at least 24 to 48 hours of dry weather. The wood surface may look dry while the interior still holds moisture. A pin-type moisture meter reading below 15 percent is the most reliable confirmation. In humid climates, extend the wait to 72 hours.
Can you spray fence stain on a windy day?
Not effectively. Wind as light as 5 mph shifts the spray pattern and drifts mist onto surfaces you spent time masking. Wait for calms morning or overcast conditions with wind under 3 mph.
How many coats of stain do you need with a sprayer?
On new or heavily weathered wood, plan for two thin coats. On a previously stained fence in decent condition, a single refreshing coat is usually sufficient. After the first coat dries, look for areas where the old wood still shows through clearly. Those spots need the second pass.
What's the best temperature for spraying fence stain?
Between 50 and 90 degrees Fahrenheit, with low wind and no rain in the forecast for at least 24 hours. Early morning starts in summer climates help you stay ahead of the heat. Late fall or early spring in moderate climates is often ideal.
How do you fix drips after they've dried?
Let the drip fully cure, then sand it with 80 to 100 grit paper until the surface is flush. Touch up the sanded area with a light spray pass from the sprayer or a quick brush application, feathering the edges into the surrounding finish.
Can you leave stain in the sprayer between coats?
For breaks under two hours, leaving stain in the sprayer is fine. Cap the tank to prevent debris from falling in and cover the nozzle tip. For overnight breaks or longer, empty and clean the sprayer. Stain left in the pump mechanism overnight can dry just enough to clog the check valve or gasket, and clearing that costs more time than a proper flush would have.