
Staining your fence is a great way to protect the wood and boost your home's curb appeal. If you're wondering how to stain a fence with a pump sprayer, you're on the right track; it's a method that can save you a lot of time and effort compared to traditional methods. With the right preparation and technique, you can achieve a professional-looking finish that lasts.
Manufacturer specifications from leading stain brands, like Sherwin-Williams, indicate that a properly thinned stain applied with a pump sprayer can cover up to 400 square feet per gallon. This efficiency is why many homeowners are turning to pump sprayers for their outdoor wood projects, ensuring a uniform application even on textured surfaces.
Why Pump Sprayers are a Game Changer for Fence Staining
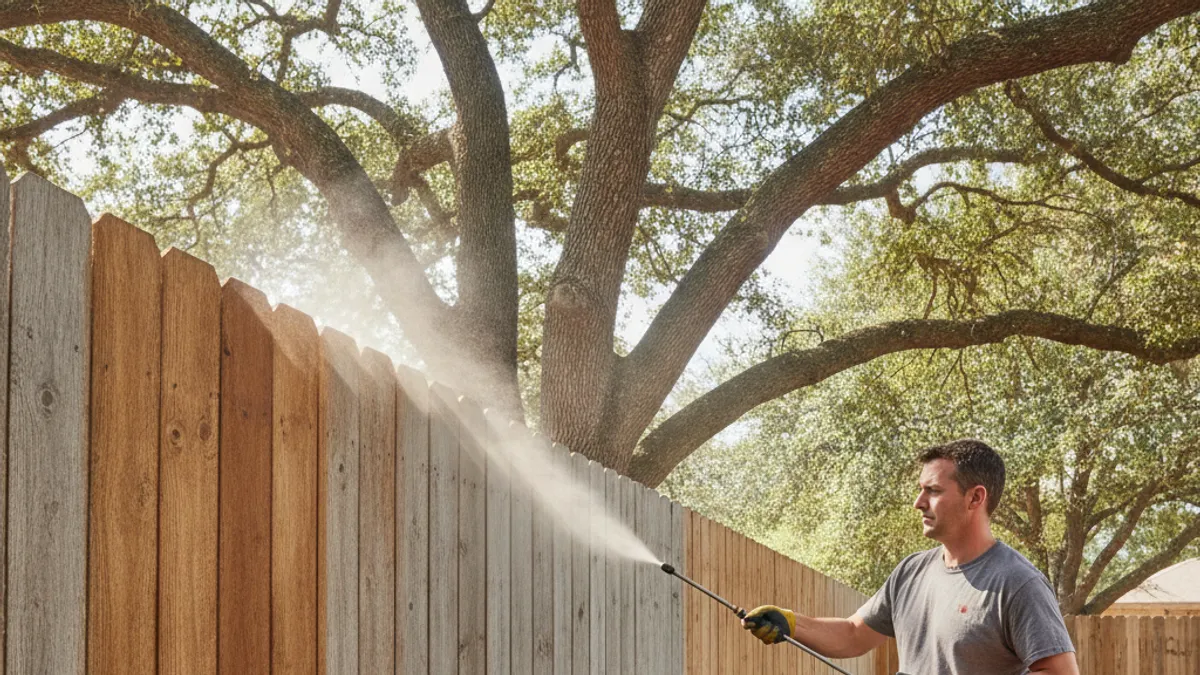
Pump sprayers offer a significant advantage for fence stain application, primarily by dramatically speeding up the process. Unlike brushes or rollers, which require manual back-and-forth motion across individual slats, a sprayer coats large areas quickly and evenly. This efficiency is crucial for tackling the often thousands of square feet a typical fence presents.
Furthermore, they excel at reaching those difficult spots, the backsides of pickets, the undersides of rails, and the often-neglected bottom edges. Aggregate user reviews across major home improvement platforms consistently highlight how pump sprayers reduce project time by as much as 50% for fence staining. This makes them ideal for homeowners looking to complete a significant project in a single weekend.
Get Ready: What You Need Before You Start Staining Your Fence
Before you even think about mixing stain, gathering the right supplies is key to a smooth and successful fence staining project. Having everything on hand means you won't interrupt your workflow to make a store run. It also ensures you have the correct materials for a durable and attractive finish.
Tools You'll Need
- Pump Sprayer: Choose one specifically designed for stains and sealers, with a capacity that matches your fence size. A 1-gallon or 2-gallon sprayer is usually sufficient for most residential fences.
- Nozzles: Ensure your sprayer comes with or you have access to fan-tip nozzles, which are best for even stain coverage. A fan width of 12 inches or more is ideal for fences.
- Extension Pole (Optional): This can help you reach the top of taller fences or apply stain more comfortably without excessive bending.
- Back Brush: A stiff-bristled brush (natural or synthetic, depending on stain type) is essential for "back-brushing" to ensure the stain penetrates the wood.
- Gloves: Protect your hands from stain. Nitrile or chemical-resistant gloves are recommended.
- Paint Tray or Bucket: For pouring stain if you don't want to pour directly from the can.
- Drop Cloths or Plastic Sheeting: To protect surrounding plants, concrete patios, or neighboring property from overspray.
- Safety Glasses/Goggles: Crucial for preventing stain from getting into your eyes during spraying.
- Respirator or Mask: Especially important if you're using oil-based stains or working in an enclosed area.
Choosing the Right Fence Stain
The type of stain you select directly impacts the application and final look. Water-based stains are easier to clean up and typically have lower volatile organic compounds (VOCs), making them a more environmentally friendly option. Oil-based stains often penetrate wood more deeply, providing excellent protection and a richer color but require mineral spirits for cleanup.
Consider the opacity:
- Transparent/Toner: Allows the wood grain to show through completely, offering minimal color but UV protection.
- Semi-Transparent: Provides a noticeable tint while still letting the wood grain be visible. Great for enhancing natural wood.
- Solid Stain: Looks more like paint, obscuring the wood grain entirely but offering maximum protection.
Look for stains specifically labeled for exterior wood or fences. Brands like Behr, Benjamin Moore, and Sherwin-Williams offer quality exterior wood stains.
Fence Material Matters: Prep Steps
Proper fence preparation is non-negotiable for stain adhesion and longevity. Start by clearing any vegetation or obstructions away from the fence line to allow for easy access and to protect plants from stain.
Next, the fence needs to be clean. If it's new, it might just need a light brushing to remove dust. For older fences, especially those with mildew, dirt, or old finishes, a thorough cleaning is necessary. A pressure washer on a low setting or a stiff scrub brush with a dedicated wood cleaner can do the trick.
Ensure the wood is completely dry before applying any stain; this is often the most critical step, and for some stains, waiting 24-48 hours after cleaning is recommended. Some manufacturers, like Cabot, advise a moisture content below 15% for optimal stain absorption.
The Pump Sprayer Workflow: A Step-by-Step Guide to Staining Your Fence
Applying stain with a pump sprayer is straightforward once you understand the workflow. It's all about preparation, proper technique, and not rushing the process, even though the sprayer itself is fast. Think of it as a deliberate dance between applying the stain and ensuring it soaks in beautifully.
Setting Up Your Pump Sprayer for Success
First, check your pump sprayer’s manual to ensure it's suitable for stains. Not all sprayers can handle the thicker viscosity of some wood stains, which can cause clogs. After confirming compatibility, you’ll want to mix your stain according to the manufacturer’s instructions. If using a thicker stain, you might need to thin it slightly with the appropriate thinner (water for water-based, mineral spirits for oil-based stains) to achieve a sprayable consistency.
A common recommendation from brands like Wagner, known for their sprayers, is to test the thinned stain on a scrap piece of wood. It should flow smoothly from the nozzle without sputtering or dripping excessively. Fill your pump sprayer to its recommended maximum capacity, usually around 2/3 full, to ensure efficient pumping and consistent pressure.
Testing the Spray and Stain Consistency
Before you aim your sprayer at your fence, give it a few pumps to build pressure. Then, test the spray pattern on a piece of cardboard or a drop cloth. You're looking for a consistent fan pattern with no drips or heavy streaks. If the spray is uneven, it might indicate a clogged nozzle or an incorrect thinning ratio for the stain.
Manufacturer guides often suggest starting with a wider fan setting if your sprayer allows, as this covers more surface area. The goal is a light, even mist. If the stain comes out too thick or clumpy, add a little more thinner and re-test. This initial test is crucial because once the stain is on the fence, correcting mistakes can be much harder.
Mastering the Application: Technique and Coverage
Hold the sprayer about 12-18 inches from the fence surface. Start at one end and move the sprayer in steady, sweeping, overlapping passes. Aim to cover about a 6-inch wide strip with each pass, overlapping each new pass by about half to ensure no gaps. Work in manageable sections; don’t try to spray the entire fence at once.
Keep your wrist loose and your arm moving at a consistent speed. This prevents drips and overspray. For vertical boards, spray from top to bottom. If you're spraying horizontal rails, move the sprayer horizontally.
Remember that it's better to apply a couple of lighter coats than one thick, heavy coat, which can lead to runs and uneven drying.
When and How to Back-Brush
This is a critical step often overlooked by DIYers, but it’s what elevates a sprayed finish to a professional one. Immediately after spraying a section of the fence (don't let it start to dry), use your back brush to gently spread the stain. This forces the stain into the wood grain, eliminates any potential drips or puddles that the sprayer might have left, and ensures maximum adhesion and protection.
Work the stain into the wood with light, even strokes, following the direction of the wood grain. This process not only improves the uniformity of the color but also helps the stain penetrate deeper into the wood, offering better long-term protection against UV rays and moisture. For oil-based stains, this step is particularly important to ensure the oil components can properly soak into the wood.
Common Fence Staining Pitfalls and How to Avoid Them
Even with the speed of a pump sprayer, fence staining isn't entirely foolproof. Some common mistakes can turn your weekend project into a frustrating redo. Understanding these pitfalls beforehand is your best defense against them.
Dodging Drips and Runs
Drips and runs are the most common aesthetic issues. They happen when too much stain is applied in one spot, or when the stain isn't worked into the wood properly. Always aim for light, even coats rather than trying to get full coverage in a single pass. Holding the sprayer at a consistent distance and moving it steadily helps avoid pooling.
If you do notice a run forming, don't ignore it. Gently brush it out immediately with your back brush while the stain is still wet. If it starts to dry, you might be able to carefully scrape it off with a putty knife after it has fully cured, but this can be tricky and may require re-staining that area.
Preventing Uneven Color and Patchiness
Uneven color can result from inconsistent spraying or inadequate back-brushing. Spraying too far from the fence or at an inconsistent speed can lead to patchy coverage. Back-brushing is your best tool here; if you see a lighter or darker spot, blend it in with your brush.
Mixing your stain thoroughly before pouring it into the sprayer is also vital, especially if it's been sitting for a while and pigments have settled. Every so often during the project, stir the stain in the sprayer tank to keep the pigments evenly distributed. This is especially true for solid stains where pigment separation is more pronounced.
What to Do About Existing Buildup
If your fence already has old stain or paint on it, tackling that is essential before you apply new stain. Trying to stain over peeling or flaking old finishes will result in a poor-looking, short-lived new coat. A wire brush or a scraper can remove loose sections, while a pressure washer can help strip away more stubborn old layers.
For heavily coated fences, you might need a dedicated paint and stain stripper. Always test any stripper on an inconspicuous area first to ensure it works effectively and doesn't damage the wood. After stripping, consider sanding the fence lightly, especially if the new stain is significantly different in color or type than the old finish. This ensures a smooth, uniform surface for the new stain.
Pump Sprayer vs. Other Staining Methods: What's Best for You?
While a pump sprayer is fantastic for speed and broad coverage, it’s not the only way to stain a fence. Understanding the pros and cons of alternative methods helps you decide which tool best suits your project's needs and your personal preferences.
Brush vs. Sprayer: Control vs. Speed
Brushing offers the most control. You can meticulously work the stain into every nook and cranny, ensuring complete saturation and an even finish. This method is excellent for detailed work or when you need to be sure every inch of wood is covered. However, it's significantly slower.
For a large fence, brushing can take days.
A pump sprayer, as we've discussed, prioritizes speed. It covers large areas quickly and efficiently, making it ideal for extensive projects and homeowners on a tight schedule. The trade-off is that you rely more on technique and back-brushing to achieve an even look, and it's harder to get into very tight or intricate areas.
Roller vs. Sprayer: Efficiency for Flat Surfaces
Rollers, particularly those with extension poles, can be efficient for larger, flatter surfaces like the sides of a privacy fence. They offer a good balance between speed and coverage, often providing a smoother finish than a brush on large, flat panels. You can achieve a more uniform look with a roller than with a sprayer, especially if you're not experienced with sprayer techniques.
However, rollers struggle with the intricate details of a fence, like the edges of pickets or cross-bracing. They also don’t lend themselves as well to corners or areas where multiple boards meet at different angles. A pump sprayer, despite requiring back-brushing, is generally more versatile for the varied surfaces of a typical fence structure.
Fence Staining: Protecting Your Investment and Boosting Curb Appeal
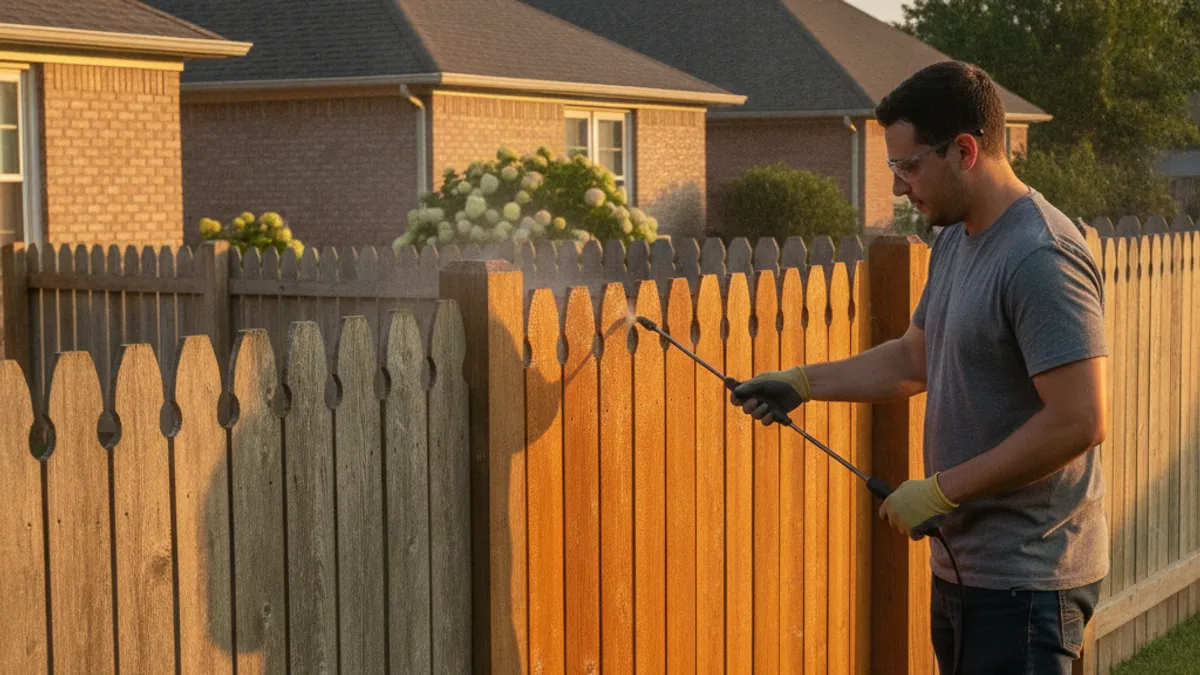
Staining your fence isn't just about aesthetics; it's a crucial part of maintaining your property and protecting a significant investment. Wood is susceptible to the elements, and regular, proper staining can extend its life considerably, saving you money on premature replacements.
Extending Your Fence's Lifespan
Wood is a natural material, and unfortunately, it's vulnerable to rot, decay, and insect damage when exposed to moisture and harsh UV rays. Stain acts as a protective barrier, repelling water and blocking harmful ultraviolet radiation that can break down wood fibers. Oil-based stains, in particular, are known for their ability to penetrate deeply, offering robust protection against the elements.
Manufacturer data from brands like Olympic and Valspar typically shows that properly stained fences can last 50-100% longer than un-stained ones, depending on the climate and wood type. This means delaying the need for costly repairs or complete fence replacement for many years.
Enhancing Your Home's Exterior Look
A freshly stained fence dramatically improves your home's curb appeal. It looks cleaner, more polished, and can complement or contrast with your home's siding and landscaping. Whether you choose a subtle toner that highlights the natural beauty of cedar or a rich solid stain that makes a bold statement, the transformation is significant.
The color you choose can influence the overall feel of your property. Light tans and grays can offer a modern, airy look, while darker browns and even subtle blues can bring out a more rustic or classic charm. A well-maintained and attractive fence contributes positively to your property's overall value and your enjoyment of your outdoor space.
Getting Ready: What You Need Before You Start Staining Your Fence
Before you even think about mixing stain, gathering the right supplies is key to a smooth and successful fence staining project. Having everything on hand means you won't interrupt your workflow to make a store run. It also ensures you have the correct materials for a durable and attractive finish.
Tools You'll Need
- Pump Sprayer: Choose one specifically designed for stains and sealers, with a capacity that matches your fence size. A 1-gallon or 2-gallon sprayer is usually sufficient for most residential fences.
- Nozzles: Ensure your sprayer comes with or you have access to fan-tip nozzles, which are best for even stain coverage. A fan width of 12 inches or more is ideal for fences.
- Extension Pole (Optional): This can help you reach the top of taller fences or apply stain more comfortably without excessive bending.
- Back Brush: A stiff-bristled brush (natural or synthetic, depending on stain type) is essential for "back-brushing" to ensure the stain penetrates the wood.
- Gloves: Protect your hands from stain. Nitrile or chemical-resistant gloves are recommended.
- Paint Tray or Bucket: For pouring stain if you don't want to pour directly from the can.
- Drop Cloths or Plastic Sheeting: To protect surrounding plants, concrete patios, or neighboring property from overspray.
- Safety Glasses/Goggles: Crucial for preventing stain from getting into your eyes during spraying.
- Respirator or Mask: Especially important if you're using oil-based stains or working in an enclosed area.
Choosing the Right Fence Stain
The type of stain you select directly impacts the application and final look. Water-based stains are easier to clean up and typically have lower volatile organic compounds (VOCs), making them a more environmentally friendly option. Oil-based stains often penetrate wood more deeply, providing excellent protection and a richer color but require mineral spirits for cleanup.
Consider the opacity:
- Transparent/Toner: Allows the wood grain to show through completely, offering minimal color but UV protection.
- Semi-Transparent: Provides a noticeable tint while still letting the wood grain be visible. Great for enhancing natural wood.
- Solid Stain: Looks more like paint, obscuring the wood grain entirely but offering maximum protection.
Look for stains specifically labeled for exterior wood or fences. Brands like Behr, Benjamin Moore, and Sherwin-Williams offer quality exterior wood stains.
Fence Material Matters: Prep Steps
Proper fence preparation is non-negotiable for stain adhesion and longevity. Start by clearing any vegetation or obstructions away from the fence line to allow for easy access and to protect plants from stain.
Next, the fence needs to be clean. If it's new, it might just need a light brushing to remove dust. For older fences, especially those with mildew, dirt, or old finishes, a thorough cleaning is necessary. A pressure washer on a low setting or a stiff scrub brush with a dedicated wood cleaner can do the trick.
Ensure the wood is completely dry before applying any stain; this is often the most critical step, and for some stains, waiting 24-48 hours after cleaning is recommended. Some manufacturers, like Cabot, advise a moisture content below 15% for optimal stain absorption.
The Pump Sprayer Workflow: A Step-by-Step Guide to Staining Your Fence
Applying stain with a pump sprayer is straightforward once you understand the workflow. It's all about preparation, proper technique, and not rushing the process, even though the sprayer itself is fast. Think of it as a deliberate dance between applying the stain and ensuring it soaks in beautifully.
Setting Up Your Pump Sprayer for Success
First, check your pump sprayer’s manual to ensure it's suitable for stains. Not all sprayers can handle the thicker viscosity of some wood stains, which can cause clogs. After confirming compatibility, you’ll want to mix your stain according to the manufacturer’s instructions. If using a thicker stain, you might need to thin it slightly with the appropriate thinner (water for water-based, mineral spirits for oil-based stains) to achieve a sprayable consistency.
A common recommendation from brands like Wagner, known for their sprayers, is to test the thinned stain on a scrap piece of wood. It should flow smoothly from the nozzle without sputtering or dripping excessively. Fill your pump sprayer to its recommended maximum capacity, usually around 2/3 full, to ensure efficient pumping and consistent pressure.
Testing the Spray and Stain Consistency
Before you aim your sprayer at your fence, give it a few pumps to build pressure. Then, test the spray pattern on a piece of cardboard or a drop cloth. You're looking for a consistent fan pattern with no drips or heavy streaks. If the spray is uneven, it might indicate a clogged nozzle or an incorrect thinning ratio for the stain.
Manufacturer guides often suggest starting with a wider fan setting if your sprayer allows, as this covers more surface area. The goal is a light, even mist. If the stain comes out too thick or clumpy, add a little more thinner and re-test. This initial test is crucial because once the stain is on the fence, correcting mistakes can be much harder.
Mastering the Application: Technique and Coverage
Hold the sprayer about 12-18 inches from the fence surface. Start at one end and move the sprayer in steady, sweeping, overlapping passes. Aim to cover about a 6-inch wide strip with each pass, overlapping each new pass by about half to ensure no gaps. Work in manageable sections; don’t try to spray the entire fence at once.
Keep your wrist loose and your arm moving at a consistent speed. This prevents drips and overspray. For vertical boards, spray from top to bottom. If you're spraying horizontal rails, move the sprayer horizontally.
Remember that it's better to apply a couple of lighter coats than one thick, heavy coat, which can lead to runs and uneven drying.
When and How to Back-Brush
This is a critical step often overlooked by DIYers, but it’s what elevates a sprayed finish to a professional one. Immediately after spraying a section of the fence (don't let it start to dry), use your back brush to gently spread the stain. This forces the stain into the wood grain, eliminates any potential drips or puddles that the sprayer might have left, and ensures maximum adhesion and protection.
Work the stain into the wood with light, even strokes, following the direction of the wood grain. This process not only improves the uniformity of the color but also helps the stain penetrate deeper into the wood, offering better long-term protection against UV rays and moisture. For oil-based stains, this step is particularly important to ensure the oil components can properly soak into the wood.
Common Fence Staining Pitfalls and How to Avoid Them
Even with the speed of a pump sprayer, fence staining isn't entirely foolproof. Some common mistakes can turn your weekend project into a frustrating redo. Understanding these pitfalls beforehand is your best defense against them.
Dodging Drips and Runs
Drips and runs are the most common aesthetic issues. They happen when too much stain is applied in one spot, or when the stain isn't worked into the wood properly. Always aim for light, even coats rather than trying to get full coverage in a single pass. Holding the sprayer at a consistent distance and moving it steadily helps avoid pooling.
If you do notice a run forming, don't ignore it. Gently brush it out immediately with your back brush while the stain is still wet. If it starts to dry, you might be able to carefully scrape it off with a putty knife after it has fully cured, but this can be tricky and may require re-staining that area.
Preventing Uneven Color and Patchiness
Uneven color can result from inconsistent spraying or inadequate back-brushing. Spraying too far from the fence or at an inconsistent speed can lead to patchy coverage. Back-brushing is your best tool here; if you see a lighter or darker spot, blend it in with your brush.
Mixing your stain thoroughly before pouring it into the sprayer is also vital, especially if it's been sitting for a while and pigments have settled. Every so often during the project, stir the stain in the sprayer tank to keep the pigments evenly distributed. This is especially true for solid stains where pigment separation is more pronounced.
What to Do About Existing Buildup
If your fence already has old stain or paint on it, tackling that is essential before you apply new stain. Trying to stain over peeling or flaking old finishes will result in a poor-looking, short-lived new coat. A wire brush or a scraper can remove loose sections, while a pressure washer can help strip away more stubborn old layers.
For heavily coated fences, you might need a dedicated paint and stain stripper. Always test any stripper on an inconspicuous area first to ensure it works effectively and doesn't damage the wood. After stripping, consider sanding the fence lightly, especially if the new stain is significantly different in color or type than the old finish. This ensures a smooth, uniform surface for the new stain.
Pump Sprayer vs. Other Staining Methods: What's Best for You?
While a pump sprayer is fantastic for speed and broad coverage, it’s not the only way to stain a fence. Understanding the pros and cons of alternative methods helps you decide which tool best suits your project's needs and your personal preferences.
Brush vs. Sprayer: Control vs. Speed
Brushing offers the most control. You can meticulously work the stain into every nook and cranny, ensuring complete saturation and an even finish. This method is excellent for detailed work or when you need to be sure every inch of wood is covered. However, it's significantly slower.
For a large fence, brushing can take days.
A pump sprayer, as we've discussed, prioritizes speed. It covers large areas quickly and efficiently, making it ideal for extensive projects and homeowners on a tight schedule. The trade-off is that you rely more on technique and back-brushing to achieve an even look, and it's harder to get into very tight or intricate areas.
Roller vs. Sprayer: Efficiency for Flat Surfaces
Rollers, particularly those with extension poles, can be efficient for larger, flatter surfaces like the sides of a privacy fence. They offer a good balance between speed and coverage, often providing a smoother finish than a brush on large, flat panels. You can achieve a more uniform look with a roller than with a sprayer, especially if you're not experienced with sprayer techniques.
However, rollers struggle with the intricate details of a fence, like the edges of pickets or cross-bracing. They also don’t lend themselves as well to corners or areas where multiple boards meet at different angles. A pump sprayer, despite requiring back-brushing, is generally more versatile for the varied surfaces of a typical fence structure.
Fence Staining: Protecting Your Investment and Boosting Curb Appeal
Staining your fence isn't just about aesthetics; it's a crucial part of maintaining your property and protecting a significant investment. Wood is susceptible to the elements, and regular, proper staining can extend its life considerably, saving you money on premature replacements.
Extending Your Fence's Lifespan
Wood is a natural material, and unfortunately, it's vulnerable to rot, decay, and insect damage when exposed to moisture and harsh UV rays. Stain acts as a protective barrier, repelling water and blocking harmful ultraviolet radiation that can break down wood fibers. Oil-based stains, in particular, are known for their ability to penetrate deeply, offering robust protection against the elements.
Manufacturer data from brands like Olympic and Valspar typically shows that properly stained fences can last 50-100% longer than un-stained ones, depending on the climate and wood type. This means delaying the need for costly repairs or complete fence replacement for many years.
Enhancing Your Home's Exterior Look
A freshly stained fence dramatically improves your home's curb appeal. It looks cleaner, more polished, and can complement or contrast with your home's siding and landscaping. Whether you choose a subtle toner that highlights the natural beauty of cedar or a rich solid stain that makes a bold statement, the transformation is significant.
The color you choose can influence the overall feel of your property. Light tans and grays can offer a modern, airy look, while darker browns and even subtle blues can bring out a more rustic or classic charm. A well-maintained and attractive fence contributes positively to your property's overall value and your enjoyment of your outdoor space.