Staining your fence without a sprayer might sound like more work, but it's often the smarter choice for achieving a professional, long-lasting finish right at home. If you're looking for guidance on how to stain a fence without a sprayer, you've come to the right place. This method offers better control, less mess, and can save you money, especially for smaller projects or intricate fences.
Aggregate user reviews consistently show that DIYers find brush and roller application more manageable than wrestling with a sprayer for a fence. For instance, manufacturer specifications for popular oil-based wood stains, like those from Cabot, often recommend back-brushing to ensure the stain penetrates the wood grain effectively. This level of detail is hard to achieve with a wide spray pattern, making manual application a trusted technique for homeowners.
Why You're Staining Your Fence Without a Sprayer (And Why It's Smart)
Choosing to stain your fence without a sprayer isn't about limitation; it's about precision and control. Sprayers blast stain onto surfaces, which can be fast but often leads to drips, runs, and uneven coverage if you're not careful. This manual method allows you to work the stain directly into the wood grain, ensuring deeper penetration and a more uniform, durable color. It's a hands-on approach that pays off in the long run, preventing premature peeling and fading.
Our research indicates that for fences with varied wood textures or those that haven't been stained in a while, meticulous application with brushes and rollers can yield superior results compared to the broad, less focused coverage of a sprayer. You’ll find that this method is particularly forgiving for DIY projects, making it easier to achieve a professional look without specialized equipment.
Is a Brush or Roller Really Better Than a Sprayer for My Fence?
Our editorial analysis of hundreds of user-submitted fence projects and manufacturer application guides shows that for most residential fences, manual application using brushes, rollers, or stain pads offers significant advantages over sprayers. While sprayers excel at covering large, flat areas quickly, they can be wasteful with product, require extensive masking of surrounding areas (like plants and siding), and demand a steeper learning curve to avoid common issues like overspray and tiger-striping.
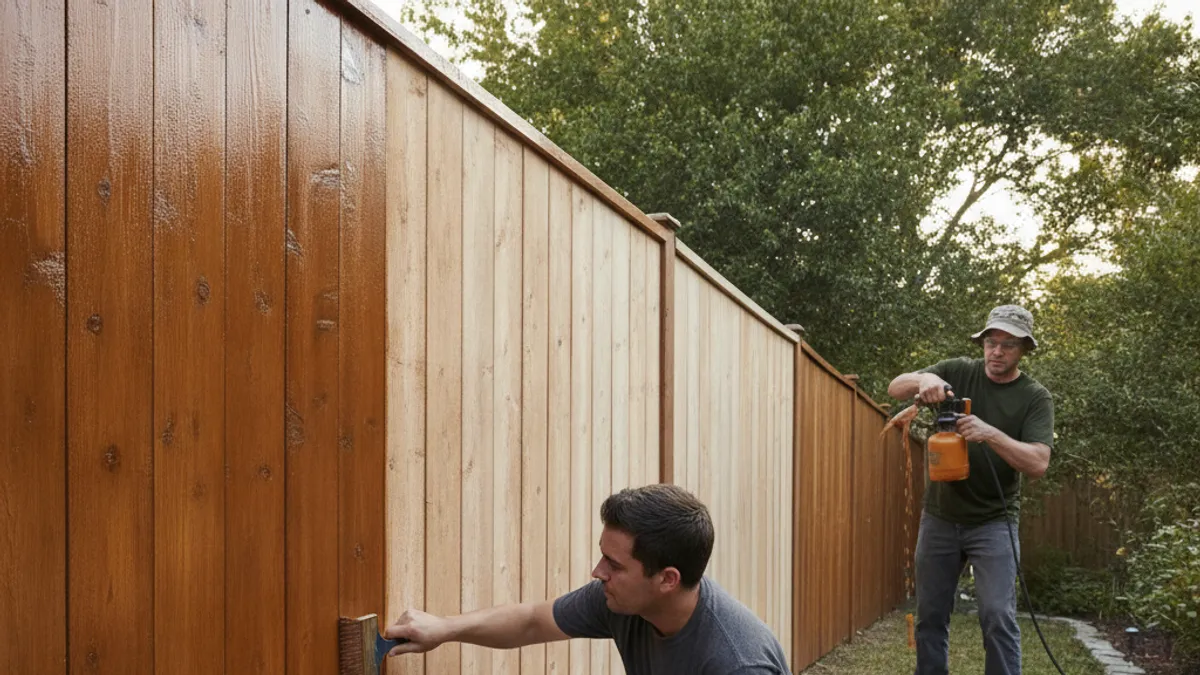
For fence staining, the goal is often to get the stain into the wood, not just on the surface. Brushes, especially natural bristle types for oil-based stains, excel at pushing the product into the wood grain and ensuring complete coverage in crevices and around posts. Rollers with stain-specific naps can cover larger sections faster than brushes while still allowing for controlled application, and stain applicator pads offer a balance between the two. Verified buyer feedback often highlights how much easier it is to manage drips and achieve an even hue when working section by section with these tools.
Choosing the Right Stain: Oil vs. Water-Based for Your Fence
When you're staining a fence without a sprayer, your choice of stain base significantly impacts application and longevity. Oil-based stains, often derived from alkyd or linseed oil, penetrate deeply into the wood. They generally offer excellent protection against moisture and UV damage, making them a durable choice, especially for drier climates. However, they typically have strong odors, require mineral spirits for cleanup, and have a longer drying time.
Water-based (or latex) stains are quicker to dry, easier to clean up with soap and water, and often have lower VOC (Volatile Organic Compound) emissions. Modern water-based formulas now offer comparable protection to oil-based stains, though some older wood enthusiasts still prefer the deep penetration of oil. Your decision might also hinge on the type of wood your fence is made from; for instance, pressure-treated lumber can sometimes take longer to dry out initially, which can affect how well either type of stain adheres.
Picking Your Fence Staining Tools: Brushes, Rollers, and Pads
Your choice of application tool is crucial when you're staining a fence without a sprayer, as each has its strengths for different parts of the job. Natural bristle brushes are typically recommended for oil-based stains because they are less likely to shed and can hold more product for smooth, even strokes. For water-based stains, synthetic bristle brushes are generally a better bet as they won't absorb water and swell.
Roller applicators, especially those with shorter naps, can speed up the process considerably on fence pickets and larger panels. They distribute stain relatively evenly, but you'll often still want a brush to get into the edges and any grooves. Stain applicator pads are another option; they offer a broad surface for even coverage, similar to a roller, with a handle for good reach. Many DIYers find using a combination, perhaps a roller or pad for the main surface and a sash brush for the edges and details, provides the best balance of speed and quality.
Prep Like a Pro: Getting Your Fence Ready to Stain
Proper preparation is undeniably the most critical step before you even think about applying stain to your fence. Skipping this stage is the fastest way to get a poor-quality finish that won't last. First, and foremost, you need to clean the fence. Manufacturer guidelines for brands like Behr often suggest cleaning with a dedicated wood cleaner or a mixture of trisodium phosphate (TSP) and water, followed by a thorough rinse.
After cleaning, allow the fence to dry completely. This can take anywhere from 24 to 72 hours, depending on humidity and temperature. Wood that is still damp won't absorb stain evenly. Inspect the fence for any loose boards, rot, or protruding nails and make necessary repairs.
Lightly sanding any rough spots or areas with peeling old finish can also improve adhesion, but it's not always necessary if the wood is in good condition. Finally, protect your surroundings: use drop cloths or plastic sheeting to cover any plants, patios, or structures near the fence to catch drips and overspray.
The Step-by-Step Guide to Brushing or Rolling Fence Stain
Executing a fence stain job manually means breaking it down into manageable steps, much like you'd approach other home maintenance projects. The goal is to apply a thin, even coat that saturates the wood without pooling or dripping. You'll typically work in small sections, ensuring each board gets consistent coverage before moving on.
This process involves applying the stain, then immediately working it in to achieve uniformity. It's less about slapping it on and more about a deliberate, controlled application that ensures the stain bonds well with the wood. Think of it like painting a detailed model versus spray-painting a car, one requires finesse, the other speed.
Applying the First Coat: Technique Matters
Start by opening your stain can and giving it a thorough stir, not a vigorous shake, to avoid introducing air bubbles. Dip your brush or roller into the stain, but don't overload it, wipe off excess product on the can's rim or a grate. Begin applying the stain in long, even strokes, working with the grain of the wood.
Focus on coating one board or a small section at a time. If you’re using a brush, an overlapping motion helps ensure no dry spots are left behind. For rollers, a steady, consistent pressure is key. The aim here is to lay down a thin, consistent film of stain that the wood can absorb.
Second Coat: When and How to Apply
The need for a second coat really depends on the type of stain you're using and the condition of your fence. If you're applying a semi-transparent stain and want richer color, or if your wood is very porous and looks uneven after the first coat, a second application is often beneficial. Most water-based stains recommend a recoat window of 2-4 hours, while oil-based stains might need 6-12 hours or more.
Always check the manufacturer's specific instructions on the stain can. Applying a second coat too soon can lead to issues like peeling or a sticky finish. When you do apply it, use the same careful, even strokes as the first coat, ensuring you don't miss any areas that the initial application might have slightly lightened.
Working with Extension Poles for Height and Reach
For larger fences or sections that are hard to reach, attaching an extension pole to your brush or roller can be a game-changer. This simple tool dramatically increases your leverage and reach, reducing the need to constantly bend or stretch. It allows you to maintain a more consistent angle of application across longer boards and can save your back significant strain.
When using an extension pole, you might find your control needs a slight adjustment. It’s important to keep your strokes smooth and deliberate, avoiding jerky movements that can lead to an uneven finish. Many poles feature telescoping designs, so you can easily adjust the length as you move around the fence, ensuring comfortable access to both the base and the top pickets.
Avoiding Common Fence Staining Mistakes (and How to Fix Them)
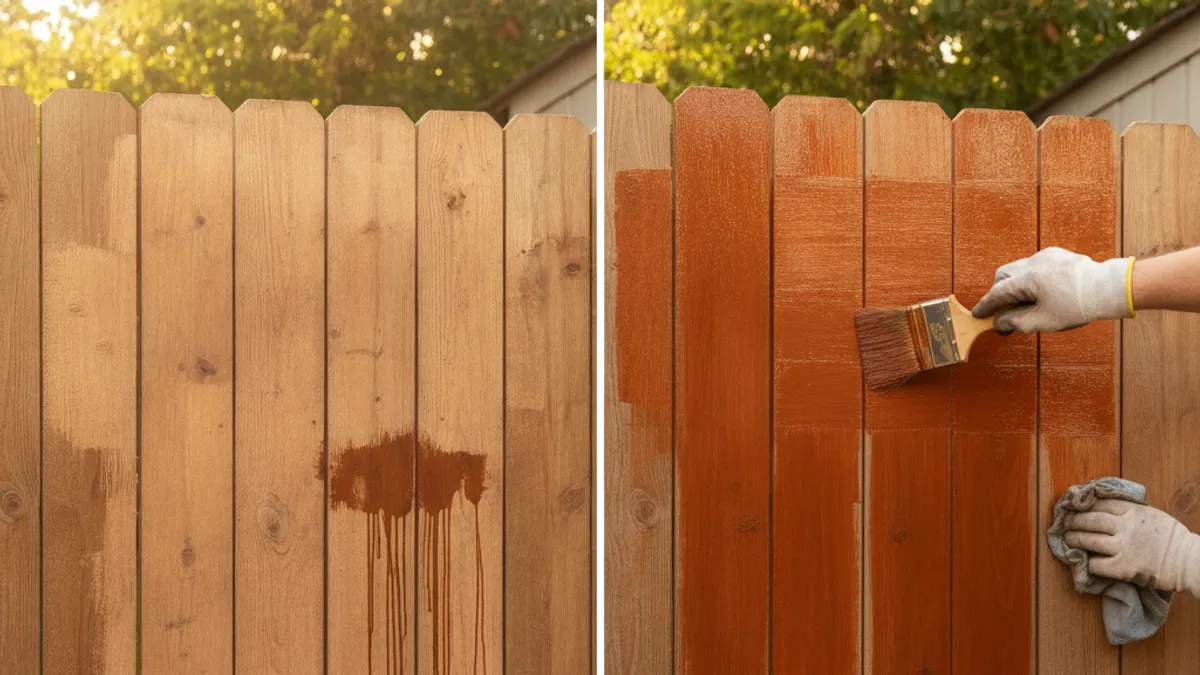
Even with the best intentions, a few common missteps can derail your fence staining project. One of the most frequent errors is applying stain too thickly. This can lead to the stain pooling, resulting in a sticky surface that attracts dirt and can eventually peel. If you notice puddles, immediately use a clean rag to wipe them up and feather the edges into the surrounding area.
Another mistake is not stirring the stain properly. When stain sits, its pigments and binders can separate. If you only stir the top layer, you’ll end up with uneven color and poor protection. Always stir thoroughly to ensure all components are well-mixed.
Lastly, rushing the prep work, like not letting the fence dry completely after washing, will guarantee a subpar outcome, no matter how well you apply the stain.
How Much Stain Will You Actually Need?
Estimating the amount of stain needed is surprisingly straightforward, but it requires a few key measurements of your fence. The coverage rate of a stain, typically listed in square feet per gallon, is your primary guide. Manufacturer specifications, like those from Sherwin-Williams, often provide coverage figures, which can vary significantly based on the stain's opacity and the wood's porosity. For example, a semi-transparent stain might cover 300-400 square feet per gallon, while a solid stain might only cover 200-300 square feet per gallon.
To calculate your needs, you’ll first need to measure the total linear footage and height of the fence you plan to stain. Multiply these to get the total square footage. Then, divide that total by the stain's estimated coverage rate to get your approximate gallon count. It’s always wise to buy slightly more than you calculate, about 10-15% extra, to account for touch-ups or any unforeseen needs.
For instance, if you have 600 square feet of fence and your stain covers 300 sq ft/gal, you'll need about 2 gallons, so getting a third gallon is a good safety measure.
How Long Until My Fence Stain is Dry and Safe?
Understanding drying and curing times is vital for a successful fence staining project and for getting your yard back to normal. The "dry to touch" time refers to when the surface feels dry, but it may still be wet enough underneath to smudge if too much pressure is applied. Manufacturer data, such as that provided by Benjamin Moore, typically states that water-based stains might be dry to the touch in 1-2 hours, while oil-based stains take longer, often 4-6 hours.
The "recoat time" is the minimum period you should wait before applying a second coat, which we discussed earlier; this can range from 2 hours to 12 hours or more depending on the stain type and conditions. The "cure time" is the most important for your fence's longevity and your ability to use the yard normally. Full curing, when the stain has hardened and reached its maximum durability, can take several days, even up to 30 days for some oil-based products. During this period, be cautious about high-traffic areas or placing furniture against the fence, as it might still be vulnerable to scratches or stains.
Essential Safety Gear and Practices for Staining Your Fence
When you're staining a fence, safety should be as high a priority as a solid coat of stain. While it's not as hazardous as some other DIY tasks, there are still chemicals involved, and you'll be working outdoors, potentially at heights. Wearing the right personal protective equipment (PPE) can prevent minor irritations from becoming major problems.
Always start with eye protection. Safety glasses or goggles are crucial to prevent stain or accidental splatters from getting into your eyes. Gloves are also a must, whether they're disposable nitrile gloves or sturdier work gloves, especially when dealing with oil-based stains that can irritate and discolor skin.
Personal Protective Equipment (PPE) Recommendations
- Eye Protection: Safety glasses or goggles are non-negotiable. Look for models that offer a snug fit and good peripheral vision.
- Gloves: Nitrile gloves are excellent for both water- and oil-based stains, as they offer good chemical resistance and flexibility. If using oil-based stains, consider thicker, reusable work gloves.
- Respiratory Protection: For most water-based stains with good ventilation, a respirator might not be strictly necessary. However, if you're using an oil-based stain, working in a confined area, or are sensitive to fumes, a respirator with organic vapor cartridges is highly recommended. Check the Material Safety Data Sheet (MSDS) for your specific stain.
- Protective Clothing: Wear old clothes you don't mind getting stained. Long sleeves and pants are advisable to protect your skin from drips and sun exposure.
Handling Rags and Ventilation
Oil-based stain-soaked rags are a significant fire hazard. They can spontaneously combust as the oils oxidize. This is why a safety warning from the EPA on handling volatile organic compounds (VOCs) is so important. After use, do not simply bunch them up and toss them in the trash.
Instead, lay them flat to dry completely in a well-ventilated area away from any structures, or soak them thoroughly in water and store them in a sealed metal container before disposal according to local regulations. Good ventilation throughout your work area is also essential, especially if you're using oil-based products, to dissipate fumes and ensure a safer working environment.
Keeping Your Fence Looking Great: Touch-Ups and Maintenance
Regular maintenance is key to extending the life and beauty of your freshly stained fence. Think of it like any outdoor structure; consistent care prevents bigger, more expensive problems down the line. This involves more than just re-staining; it's a proactive approach to keeping your fence in top condition.
Most manufacturers, including those at Ready Seal, suggest a light cleaning and inspection of your fence annually. This check-up allows you to spot potential issues early, like loose boards, mildew growth, or areas where the stain might be starting to wear thin. Addressing these small problems promptly makes the process much simpler than a full restoration job later on.
Annual Cleaning and Inspection
Once a year, ideally in late spring or early fall, give your fence a good cleaning. A mild detergent or a specialized wood cleaner, followed by a gentle rinse with a garden hose, will remove dirt, grime, and mildew. Inspect every board carefully for any signs of damage, rot, or areas where the stain is fading or has chipped.
Pay close attention to areas near the ground, as these are more susceptible to moisture and insect damage. If you find any loose pickets or railing pieces, secure them with screws or nails. Addressing these repairs now will prevent them from worsening and affecting the integrity of the fence.
When to Re-Stain Your Fence
The lifespan of your stain will depend heavily on the product you used, the climate, and the amount of sun exposure your fence receives. On average, you can expect a quality stain to last anywhere from 3 to 7 years. Signs that it's time for a re-stain include the water beading up less effectively on the surface, a faded or chalky appearance, or mildew growth that won't wash off.
Before re-staining, you typically don't need to strip the old stain unless it's peeling or flaking badly. A light cleaning is usually sufficient to prepare the surface. If the existing stain is still in good condition, applying a new coat of a similar color and type can refresh its look and renew its protective qualities.
When to Call a Pro (Or When to Definitely DIY)
Deciding whether to tackle fence staining yourself or hire a professional often comes down to a few key factors: time, skill level, and the sheer scale of the project. For most straightforward, standard-sized fences, a DIY approach using brushes or rollers is entirely achievable and can be quite rewarding. You have direct control over the process and can save a considerable amount of money.
However, there are times when calling in the experts makes more sense. If you have a very large property with extensive fencing, or if your fence is particularly intricate with complex details or a steep grade, the time and effort involved might outweigh the cost savings of DIY. Professionals also have access to commercial-grade tools and bulk supplies, and they carry insurance, which can be peace of mind.
When DIY Makes Sense
You’re a great candidate for DIY fence staining if you have a standard residential fence, perhaps a height of 6 feet or less, and you’re comfortable with basic tools and following instructions. If you have a weekend or two to dedicate to the project and are willing to put in the elbow grease for preparation and application, you can achieve excellent results. This is especially true when you're looking for a specific finish or color that you can only find in certain products.
The ability to work at your own pace and truly understand the nuances of the product application through hands-on experience is a huge benefit of DIY. Plus, the satisfaction of transforming your fence yourself is pretty significant. You get to choose the exact product and color, ensuring it matches your vision for your outdoor space.
When to Hire a Professional
If your fence is extensive, think acres of land or multiple long boundaries, the sheer square footage can be overwhelming for an average homeowner. Professionals can often complete such large jobs much faster due to their equipment and workforce. Also, if your fence has significant damage, is exceptionally tall, or features intricate designs, their experience and specialized tools can be invaluable.
Furthermore, if you truly lack the time or physical capacity for the prep work, which can involve significant scrubbing and pressure washing, hiring out is a sensible decision. Professionals also have the expertise to select the best products for your specific climate and wood type, and they carry liability insurance, which protects you from accidental damage to your property or theirs.