Deciding whether to spray or brush fence stain can feel like a big choice, and honestly, there's no single "better" way for everyone. What works best often comes down to your fence, your time, and the final look you’re after. Our research dug into manufacturer specs and aggregate buyer feedback to break down the pros and cons of each method, helping you pick the right tool for your project.
This guide dives deep into the practicalities of each application technique, so you can confidently tackle your fence staining job. We’ll compare speed, control, and finish quality to make sure you get the results you want without unnecessary hassle.
Spraying Fence Stain: The Need for Speed and Coverage
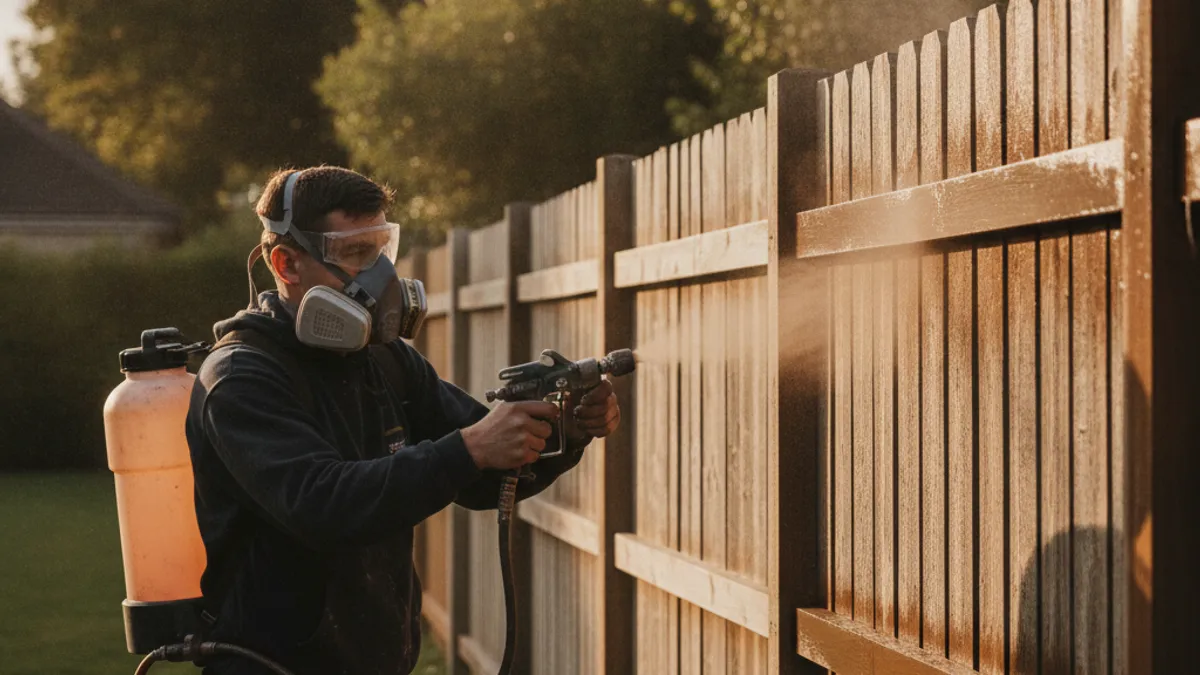
Spray staining is often the go-to when you've got a lot of fence to cover and want to get the job done relatively quickly. It’s about efficiency, especially on larger, more open surfaces. When used correctly, a fence sprayer can lay down a consistent, thin coat of stain that penetrates the wood effectively. This method uses specialized sprayers designed for thicker liquids, like garden sprayers equipped for stain or even airless sprayers for larger commercial jobs.
When Spraying Shines: Best Use Cases
Spray staining really excels in a few key situations. It’s fantastic for long stretches of privacy fence or picket fences where there are a lot of vertical surfaces. If your fence has a lot of intricate details or very rough wood grain, a sprayer can force the stain into nooks and crannies that a brush might miss. Aggregate user reviews often highlight how much time is saved on projects spanning hundreds of linear feet.
For instance, a homeowner tackling a 300-foot fence might find spraying cuts their application time by more than half compared to brushing.
Spraying’s Downsides: What to Watch Out For
The biggest drawback to spraying is the potential for overspray and wasted product. Wind can easily carry the stain onto unintended surfaces like your house siding, nearby plants, or even your neighbor's property. This means you’ll need to do a lot of masking with plastic sheeting or tarps, which adds to prep time. Manufacturer specifications often warn about optimal wind conditions, recommending speeds below 10 mph for efficient application.
You also need to be mindful of the stain's viscosity; too thick, and it can clog your sprayer, leading to inconsistent application and frustrating stops.
Brushing Fence Stain: Control and Precision
Brushing fence stain offers a level of control that spraying just can't match. It’s methodical; you’re manually working the stain into the wood, ensuring it's applied evenly and to the desired thickness. For DIYers, this is often the more approachable method, especially if you're new to staining projects. A good quality stain brush, typically 2, 3 inches wide for fence boards, allows you to really work the product into the wood grain and get a smooth, consistent finish.
When Brushing is Your Go-To: Best Use Cases
Brushing is ideal for smaller projects, fences with a lot of architectural detail or custom work, or when you need to be incredibly precise. If you have delicate landscaping right next to your fence, or if your fence is close to your home’s foundation, brushing provides the necessary control to avoid messy overspray. Verified buyer feedback frequently points to brushing for achieving a rich, saturated look on premium wood types like cedar or redwood where even application is paramount. It's also the preferred method for reapplying stain that needs to blend seamlessly with existing, unweathered sections.
Brushing’s Challenges: What to Expect
The primary challenge with brushing is the time it takes. For a large fence, it can be quite labor-intensive and physically demanding. You need to maintain consistent, even strokes to avoid lap marks, where one section dries before the next is stained, creating visible lines. Working with some stains, especially oil-based ones, requires constant stirring to maintain an even consistency across the entire project.
Some users also find it difficult to get deep into the grain on very rough lumber with a brush alone.
Key Differences: Spraying vs. Brushing Side-by-Side
When you're weighing your options, comparing the core differences between spraying and brushing is crucial. Each method addresses different project needs and user preferences. Understanding these distinctions will directly impact your project's timeline, your effort, and ultimately, the final appearance of your fence. We've analyzed manufacturer guidance and common user experiences to highlight these key trade-offs.
Coverage & Speed
- Spraying: Significantly faster for large, open areas. Can cover hundreds of square feet per hour once equipment is set up and masked.
- Brushing: Much slower, with progress measured in linear feet per hour rather than hundreds of square feet. Offers more deliberate application.
Control & Precision
- Spraying: Lower control, higher risk of overspray and drips. Requires extensive masking.
- Brushing: High control. Allows precise application along edges, around obstacles, and into specific wood grains.
Mess & Overspray
- Spraying: High potential for overspray. Requires significant protection for surrounding areas. Can lead to product waste if wind is a factor.
- Brushing: Minimal overspray. Much cleaner application, especially in tight spaces or windy conditions.
Detail Work
- Spraying: Can be difficult to achieve uniformity on detailed or complex surfaces. May require back-brushing to ensure even penetration.
- Brushing: Excellent for detail work. Allows the user to ensure every surface, corner, and edge is coated thoroughly.
Essential Fence Stain Preparation Before You Start
No matter which application method you choose, proper preparation is non-negotiable for a long-lasting, beautiful fence finish. Skipping these steps is one of the most common mistakes that leads to premature failure of the stain. Aggregate buyer feedback and manufacturer instructions consistently emphasize this crucial stage. As of 2026, industry standards for wood protection still highlight the importance of a clean, ready surface for stain adhesion.
Cleaning and Stripping
Before you even think about applying stain, your fence needs to be clean. Use a dedicated fence cleaner or a solution of oxygen bleach and water to remove dirt, mildew, and algae. For stubborn, old finishes, a wood stripper might be necessary, followed by thorough rinsing and neutralization. According to guidance from organizations like the Forest Products Laboratory, a clean surface ensures the stain can penetrate properly and adhere, rather than just sitting on top of grime.
Sanding for Smoothness
Light sanding can make a huge difference. If your fence wood is already rough, sanding can smooth out splinters and open up the grain slightly, allowing for better stain absorption. For fences with a previous finish that wasn't fully stripped, or for new lumber that might have milling marks, a quick pass with 80-grit sandpaper can prep the surface. The goal isn't to make it like fine furniture, but rather to create a uniform surface that will accept stain evenly.
The Application Process: Spraying Step-by-Step
Applying stain with a sprayer involves a few critical steps to ensure efficiency and a good outcome. First, gather your equipment: the fence sprayer (garden or airless), an extension wand if needed, and plenty of masking materials. Read your sprayer’s manual carefully to understand its specific setup and maintenance requirements. Stir your stain thoroughly before pouring it into the sprayer tank.
Start by testing your spray pattern on a piece of scrap wood or cardboard. Adjust the pressure and nozzle until you achieve a fine, even mist. Work in manageable sections, holding the sprayer about 12, 18 inches from the fence surface. Move in smooth, consistent horizontal or vertical strokes, slightly overlapping each pass to avoid missed spots.
Immediately after spraying a section, use a brush to "back-brush," working the stain into the wood grain to ensure deep penetration and a uniform finish. This step is vital for preventing lap marks and ensuring the stain bonds properly, as noted in guidance from various stain manufacturers.
The Application Process: Brushing Step-by-Step
Brushing stain is more about deliberate technique and patience. You’ll need a quality stain brush, preferably 2, 3 inches wide for fence boards, along with your can of stain and perhaps a roller tray to hold the product. Make sure your fence is properly prepped, clean, and dry. Stir the stain well before starting, and continue to stir periodically throughout the process.
Begin by applying a liberal amount of stain to your brush, but avoid overloading it. Start at the top of a fence board and work downwards in long, even strokes. Always brush with the direction of the wood grain. Where one board ends and the next begins, aim for a seamless transition.
Don’t overwork the stain; apply it evenly and move on. If you notice any drips or globs, use your brush to gently smooth them out before they dry. This methodical approach helps ensure consistent saturation and a professional-looking finish.
Choosing the Right Fence Stain for Your Project
Selecting the right type of fence stain is just as important as how you apply it. Stains generally fall into a few categories, each offering different looks and levels of protection. Oil-based stains tend to penetrate wood deeper, offering excellent water repellency and durability, but they can be trickier to clean up and may emit stronger fumes. Water-based stains are easier to clean with soap and water, dry faster, and typically have lower VOC (Volatile Organic Compound) content, making them a more environmentally friendly choice.
Beyond oil and water-based, stains come in different opacity levels. Transparent stains offer the least color, highlighting the natural wood grain and providing minimal UV protection. Semi-transparent stains add a bit more color while still allowing the wood grain to show through, offering moderate protection. Solid stains, on the other hand, act more like paint, completely obscuring the wood grain and offering maximum UV protection and durability, similar to an exterior paint.
The best choice depends on the wood type, its condition, and how much of the natural grain you want to preserve.
Mistakes to Avoid with Fence Staining
One of the most common mistakes is applying stain on a damp fence. Wood expands when wet, and as it dries after staining, it can cause the stain to crack or peel prematurely. Manufacturer specifications universally advise against staining wood that retains moisture; ensure your fence has had at least 24, 48 hours of dry weather before starting. Another frequent misstep is not stirring the stain frequently enough, leading to inconsistent color as pigments settle.
This is especially true for solid stains, where pigments are more concentrated.
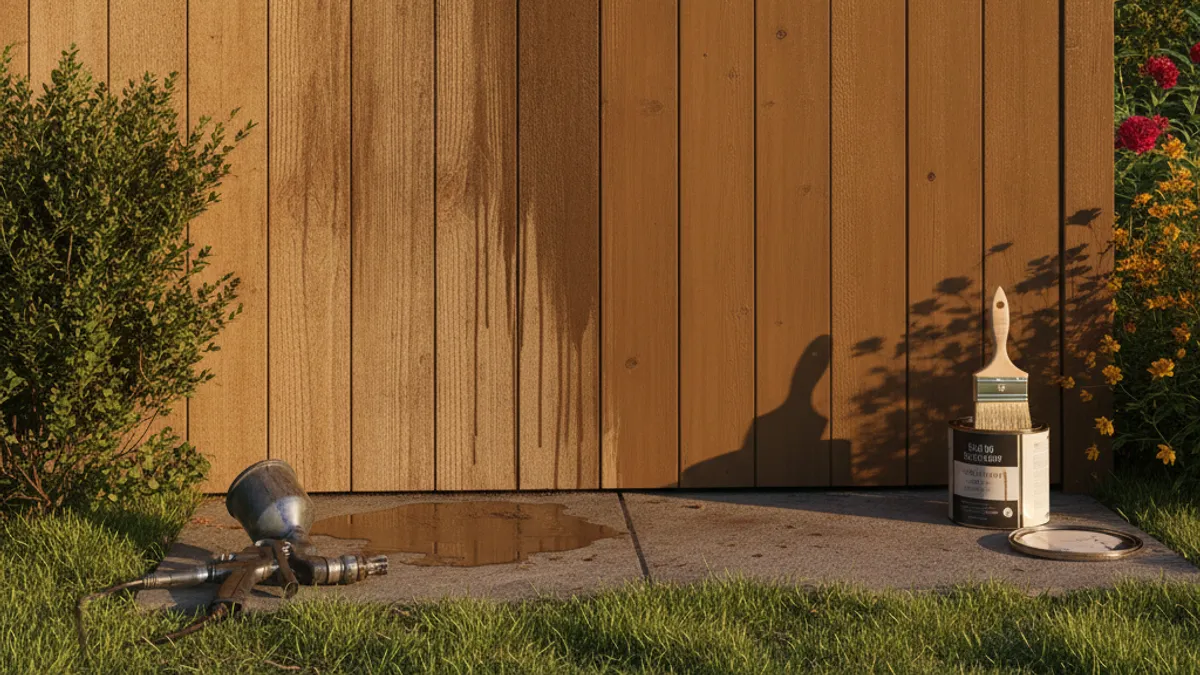
Not protecting surrounding areas is also a major blunder. Overspray from a fence sprayer can easily damage plants, siding, or concrete. Forgetting to mask these areas leads to costly cleanups or permanent discoloration. Finally, skimping on prep work, like skipping the cleaning or not dealing with peeling old stain, means your new finish won’t last.
A study in Forest Products Journal found that surface preparation is a primary factor in the longevity of exterior wood finishes.
Essential Safety Gear for Staining Your Fence
Working with fence stains, especially oil-based ones or when spraying, requires proper personal protective equipment (PPE). It's critical to protect yourself from inhaling fumes and from skin contact. Always wear chemical-resistant gloves, such as nitrile or neoprene, to keep stain from irritating your skin. Safety glasses or goggles are a must to protect your eyes from accidental splashes or overspray.
For more potent stains or when spraying in poorly ventilated areas, a respirator with organic vapor cartridges offers crucial respiratory protection.
When spraying, consider wearing old clothing that covers as much skin as possible and a hat to protect your hair. For any staining project, ensure good ventilation. If you're working with water-based stains, cleanup is easier, but the need for eye protection and gloves remains. Adhering to these safety guidelines, as recommended by most stain manufacturers, ensures a healthier and safer DIY experience.
Choosing the Right Fence Stain for Your Project
Selecting the right type of fence stain is just as important as how you apply it. Stains generally fall into a few categories, each offering different looks and levels of protection. Oil-based stains tend to penetrate wood deeper, offering excellent water repellency and durability, but they can be trickier to clean up and may emit stronger fumes. Water-based stains are easier to clean with soap and water, dry faster, and typically have lower VOC (Volatile Organic Compound) content, making them a more environmentally friendly choice.
Beyond oil and water-based, stains come in different opacity levels. Transparent stains offer the least color, highlighting the natural wood grain and providing minimal UV protection. Semi-transparent stains add a bit more color while still allowing the wood grain to show through, offering moderate protection. Solid stains, on the other hand, act more like paint, completely obscuring the wood grain and offering maximum UV protection and durability, similar to an exterior paint.
The best choice depends on the wood type, its condition, and how much of the natural grain you want to preserve.
Mistakes to Avoid with Fence Staining
One of the most common mistakes is applying stain on a damp fence. Wood expands when wet, and as it dries after staining, it can cause the stain to crack or peel prematurely. Manufacturer specifications universally advise against staining wood that retains moisture; ensure your fence has had at least 24, 48 hours of dry weather before starting. Another frequent misstep is not stirring the stain frequently enough, leading to inconsistent color as pigments settle.
This is especially true for solid stains, where pigments are more concentrated.
Not protecting surrounding areas is also a major blunder. Overspray from a fence sprayer can easily damage plants, siding, or concrete. Forgetting to mask these areas leads to costly cleanups or permanent discoloration. Finally, skimping on prep work, like skipping the cleaning or not dealing with peeling old stain, means your new finish won’t last.
A study in the Forest Products Journal found that surface preparation is a primary factor in the longevity of exterior wood finishes.
Essential Safety Gear for Staining Your Fence
Working with fence stains, especially oil-based ones or when spraying, requires proper personal protective equipment (PPE). It's critical to protect yourself from inhaling fumes and from skin contact. Always wear chemical-resistant gloves, such as nitrile or neoprene, to keep stain from irritating your skin. Safety glasses or goggles are a must to protect your eyes from accidental splashes or overspray.
For more potent stains or when spraying in poorly ventilated areas, a respirator with organic vapor cartridges offers crucial respiratory protection.
When spraying, consider wearing old clothing that covers as much skin as possible and a hat to protect your hair. For any staining project, ensure good ventilation. If you're working with water-based stains, cleanup is easier, but the need for eye protection and gloves remains. Adhering to these safety guidelines, as recommended by most stain manufacturers, ensures a healthier and safer DIY experience.
How Much Stain Do I Actually Need?
Figuring out how much stain to buy can be tricky, but it’s essential for budget and efficiency. Stain coverage is typically listed on the product can, often in square feet per gallon. For example, a semi-transparent stain might cover 250, 400 square feet per gallon, while a solid stain might cover slightly less, say 200, 300 square feet per gallon. These numbers are estimates, and your actual coverage will depend on the wood's porosity, the application method (spraying often uses more), and how heavily you apply it.
Always measure your fence’s surface area. Multiply the length of your fence by its height to get the total square footage of one side. Don't forget to factor in both sides of the fence if you're staining both. It’s generally better to buy a little more stain than you think you’ll need.
Having extra stain ensures you can touch up any spots or reapply it in the future, and it guarantees you won't run out mid-job, which can lead to color inconsistencies.
How to Maintain Your Newly Stained Fence
Keeping your fence looking its best after the initial staining isn't just about aesthetics; it's about protecting your investment. Regular cleaning is key. Most fences benefit from a gentle wash once or twice a year with a mild detergent and water to remove dirt, pollen, and mildew. Avoid high-pressure washing, as it can strip the stain and damage the wood itself.
If you notice any mildew or mold growth, a dedicated wood cleaner or a diluted bleach solution can often take care of it, followed by a thorough rinse.
The lifespan of your stain will dictate reapplication. A quality semi-transparent stain might last 3, 5 years, while a solid stain could hold up for 5, 7 years, depending on your climate and the amount of sun exposure. Inspect your fence annually for signs of fading, peeling, or wear. If you see bare wood or areas where the stain has worn away, it's time for a reapplication.
Typically, you can re-stain over an existing, sound stain coat without stripping, but always check the manufacturer's recommendations for their specific product.