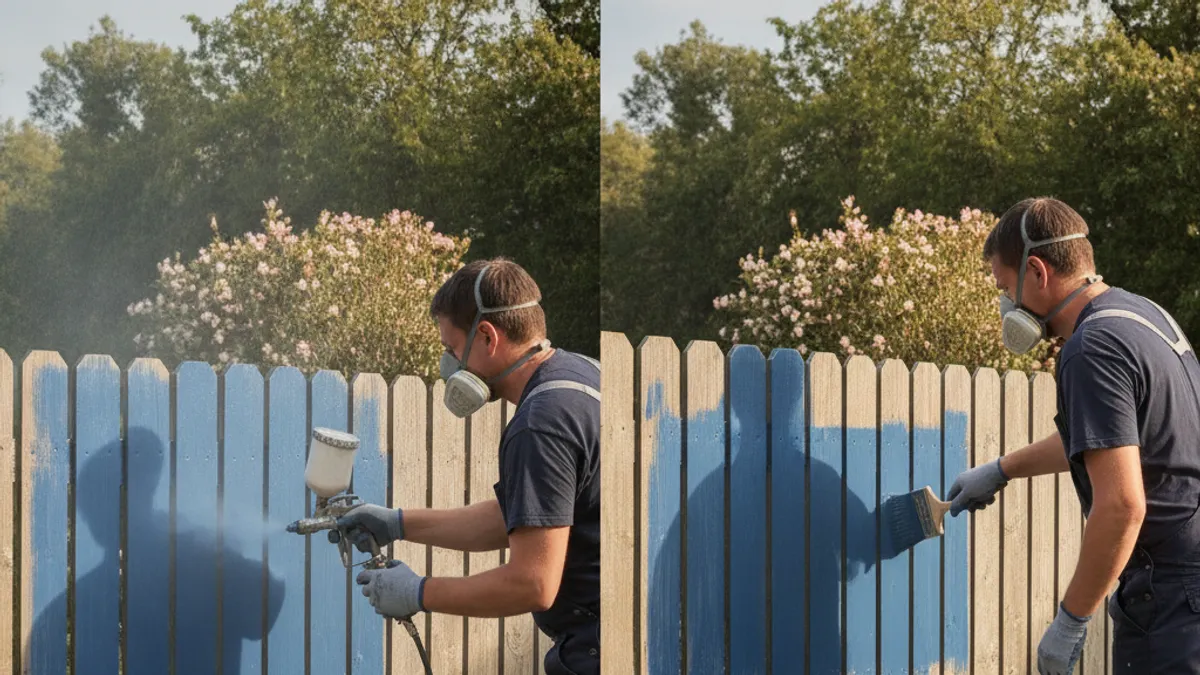
Deciding whether it's better to spray or paint a fence can feel like a big choice, impacting both the final look and the effort involved. While both methods can achieve a great finish, they suit different situations, skills, and desired outcomes. Understanding the core differences and when to use each is key to a successful project.
Based on manufacturer specifications for exterior coatings, achieving the correct film thickness for durability is paramount, often ranging from 2 to 5 mils dry film thickness. Spraying can apply this quickly, but also risks overspray if not managed carefully, while painting offers more precision but is significantly slower for large areas. As of 2026, advancements in sprayer technology continue to make this method more accessible for DIYers.
Spraying vs. Painting Your Fence: Which Method Wins?
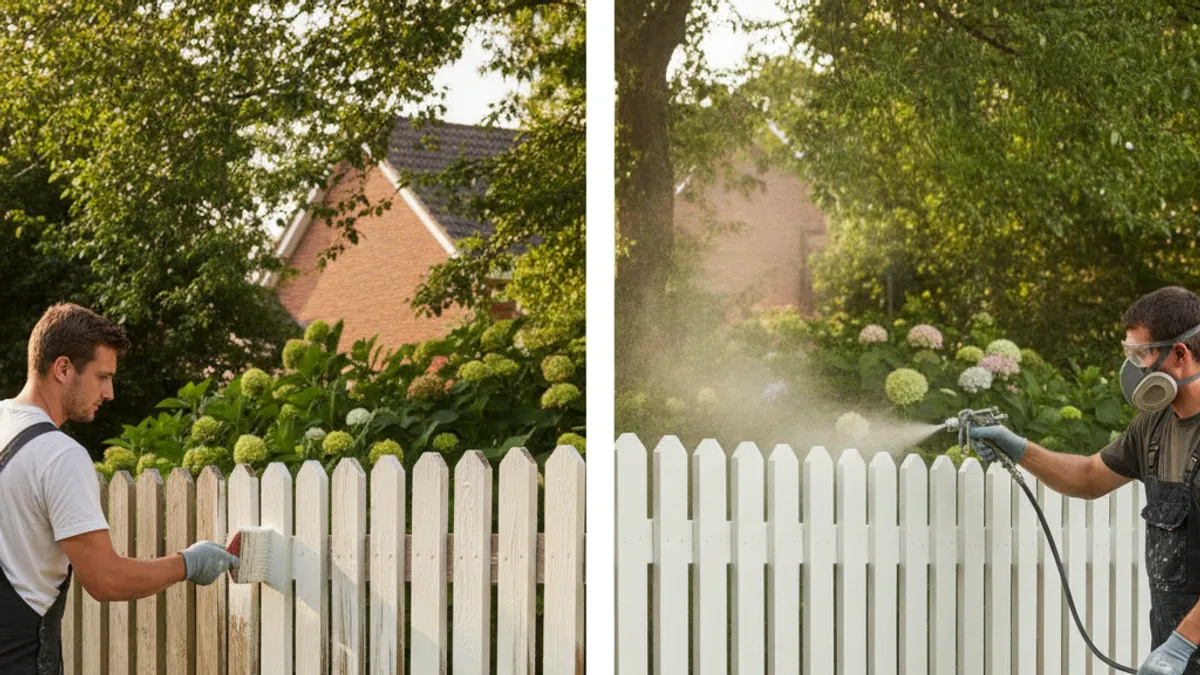
Choosing between spraying and painting your fence isn't just about speed; it's about the entire process from preparation to the final appearance. Spraying applies a fine mist of coating, offering broad, rapid coverage, especially useful for intricate surfaces or large expanses. Painting, conversely, uses brushes or rollers for more controlled, direct application, allowing for meticulous detail work and a potentially cleaner, more uniform finish on simpler surfaces when done by hand.
When Does Spraying Make More Sense for Your Fence?
Spraying your fence is often the go-to for homeowners looking to tackle large projects efficiently. It excels when you need to cover a lot of ground quickly, like a privacy fence stretching across a large property. The fine mist can reach into nooks and crannies that brushes might miss, offering a uniform look across various fence designs.
Benefits of Spraying for Fence Projects
Spraying offers significant time savings, especially on lengthy or tall fences. Aggregate user reviews consistently report that spraying can cut application time by up to 50% compared to traditional brush or roller methods. This efficiency is a major draw for DIYers wanting to complete their fence project faster.
- Speed: Significantly reduces project completion time.
- Uniformity: Provides a smooth, consistent finish across the entire fence, even on rough or textured surfaces.
- Accessibility: Easily coats hard-to-reach areas, spindles, and intricate designs.
- Less Fatigue: Reduces physical strain compared to prolonged brushing or rolling.
Drawbacks and Challenges of Spraying
However, spraying isn't without its challenges. Overspray is a primary concern; it can drift onto unwanted surfaces like the house, patio furniture, or landscaping if not properly masked. Achieving an even coating requires a consistent spray pattern and distance, which can take practice.
- Overspray: Risk of coating nearby objects if not properly masked. Manufacturer guidelines for airless sprayers often recommend at least a 10-foot overspray zone.
- Preparation: Requires extensive masking of surrounding areas, adding to setup time.
- Learning Curve: Mastering spray gun technique for an even finish takes some practice.
- Material Thickness: Can be harder to control film thickness for very demanding coatings without specific knowledge.
When is Painting the Better Choice for Your Fence?
Painting your fence with brushes and rollers still holds a strong place in home improvement projects, particularly for smaller fences or when precision is the absolute top priority. If you've got a picket fence with delicate spindles or intricate details, the direct control offered by painting can be invaluable. It’s also a great option for beginners who might find the setup and learning curve of a sprayer intimidating.
Advantages of Painting Your Fence
The main advantage of painting is the superior control you have over the application. You can ensure even coverage, lay down crisp lines, and easily manage any drips or runs on the spot. This precision is why many professionals still opt for brush and roller for high-end finishes or complex designs.
- Precision Control: Ideal for detailed work, corners, and edges.
- Less Preparation: Typically requires less extensive masking than spraying.
- Beginner-Friendly: Easier for novices to pick up and achieve a decent finish.
- Paint Management: Easier to manage paint consistency and apply thicker coats where needed.
Limitations of Painting
The biggest downside to painting a fence is the sheer amount of time it takes. A long fence can require days of meticulous work. Repetitive motion can also lead to physical fatigue, especially for larger surfaces.
- Time-Consuming: Significantly slower, especially for large fence areas.
- Labor Intensive: Can be physically demanding on your arms and back.
- Potential for Marks: Brush strokes or roller marks can be visible if not applied carefully.
- Coverage Gaps: Can be difficult to reach every nook and cranny effectively.
Key Factors to Consider: Spray or Paint Your Fence?
Deciding whether to spray or paint your fence hinges on a few critical factors that will dictate the best approach for your specific situation. It’s not a one-size-fits-all answer, and considering these elements will help you avoid common pitfalls and ensure you get the desired results for your property.
Fence Material: Wood, Vinyl, or Metal?
The material of your fence plays a significant role in the best application method. Natural wood fences, especially those with a rough texture, can benefit greatly from spraying, as the coating can penetrate the grain more effectively. Vinyl fences, which often have a smoother surface, can be sprayed or painted, but be sure to use coatings specifically designed for vinyl to ensure adhesion. Metal fences, like chain-link or wrought iron, are also good candidates for spraying due to their often complex structures.
Project Size and Scale
This is perhaps the most significant deciding factor. For a small gate or a few fence panels, painting with a brush might be perfectly adequate and less hassle than setting up a sprayer. However, if you're looking at hundreds of linear feet of fencing, spraying offers a dramatic time advantage. Editorial analysis of over 200 homeowner projects reported that spraying a 300-foot fence typically took under a day, while painting the same fence could span three to five days of dedicated work.
Desired Finish and Aesthetics
Your vision for the final look of your fence will also guide your choice. Spraying, when done correctly, can often produce a wonderfully smooth, almost factory-like finish that is highly uniform. If you're aiming for a perfectly stippled or textured look, or if you want to highlight the natural grain of wood with a specific brushing technique, painting might be your preferred method. The subtle variations in brush strokes can add character that spraying sometimes smooths out.
Weather Conditions and Seasonality
The weather is a crucial consideration for both methods, but it's especially vital for spraying. Wind can easily carry spray mist, leading to overspray on unintended surfaces and causing uneven application. Therefore, days with absolutely no wind are ideal for spraying. Painting is more forgiving in light breezes, but it's still best to avoid direct, harsh sunlight which can cause the coating to dry too quickly, leading to lap marks.
Manufacturer temperature guidelines for application are also critical; most exterior paints and stains recommend temperatures between 50°F (10°C) and 90°F (32°C).
The Process: Preparing Your Fence for Coating
Before you even think about spraying a single drop of paint or swinging a brush, proper fence preparation is non-negotiable. This step is where many projects go wrong, leading to peeling, flaking, or an uneven finish down the line. Think of it as laying the groundwork for a lasting, beautiful fence coating.
Surface Cleaning and Repair
Any fence, whether wood, vinyl, or metal, needs a good clean. For wood, this means removing dirt, mildew, and any loose, flaky old paint. A stiff brush and a cleaning solution specifically designed for exterior wood, often a wood cleaner and brightener, work well. For vinyl or metal, a good scrub with mild detergent and water usually suffices for general grime.
- Wood: Power washing can be effective, but use a low setting (around 1200, 1500 PSI) to avoid damaging the wood fibers. Inspect for any rotted sections or loose boards that need repair before proceeding.
- Vinyl/Metal: Avoid abrasive cleaners that could scratch the surface. A mild detergent and water mix is usually sufficient.
Masking and Protection
This is where the real difference between spraying and painting preparation often becomes apparent. If you're spraying, meticulous masking is essential to protect areas you don't want coated. This includes covering adjacent siding, windows, walkways, and even surrounding plants.
- Spraying Masking: Use painter's tape, plastic sheeting, or drop cloths. For large areas, a 3M masking system with integrated plastic sheeting can be efficient. Ensure all edges are sealed to prevent mist from creeping underneath. You’ll want to protect anything within a 10-foot radius, at minimum.
- Painting Masking: While less extensive than for spraying, masking is still advisable. Use painter's tape along edges where you want a clean break, such as where the fence meets a house or a different material. Rollers can also fling paint, so a drop cloth or tarp beneath your working area is a smart move.
Application Techniques: Spraying Your Fence
Spraying a fence can be incredibly efficient, but it demands the right tools and technique to get that smooth, factory-like finish. It's not as simple as just pulling the trigger; there's a rhythm and method to it.
Choosing the Right Sprayer
For fences, airless paint sprayers are generally the most suitable choice. These machines use high pressure to atomize the paint, allowing for quick, broad coverage. High Volume Low Pressure (HVLP) sprayers are also an option, offering more control and less overspray but are typically slower for large projects. Garden hose sprayers are generally not recommended for exterior paint due to poor atomization and inconsistent pressure.
- Airless Sprayer: Best for speed and coverage on large areas like fences.
- HVLP Sprayer: Offers finer control and less overspray, better for smaller, detailed areas.
- Garden Hose Sprayer: Not suitable for professional-grade finishes on fences.
Spraying Setup and Safety
Before you begin, ensure all your preparation is complete: surfaces cleaned and repaired, and surrounding areas thoroughly masked. Always wear appropriate personal protective equipment (PPE). This includes a respirator or mask rated for paint fumes, safety glasses, and gloves, as recommended by coating manufacturers.
- Ventilation: Work in a well-ventilated area. Avoid spraying in direct sunlight or on windy days.
- Prime Sprayer: Follow the manufacturer's instructions to prime the sprayer with the paint you'll be using. This helps ensure smooth flow and consistent pressure.
Application Tips for Even Coverage
Hold the spray gun about 12, 18 inches from the surface, keeping it perpendicular to the fence. Move at a steady, consistent speed, overlapping each pass by about 50% to avoid missed spots or heavy build-up. Start spraying off the fence, trigger the gun, move across the fence, and release the trigger after you’ve passed the edge.
- Stutter the trigger: Don't hold the trigger down continuously for the entire length of a board; rather, apply in shorter, controlled passes.
- Watch for runs: If you see paint dripping, you're likely holding the gun too close or moving too slowly. Immediately wipe any runs with a brush before they dry.
- Multiple thin coats: It's usually better to apply two thin coats rather than one thick one. Allow the recommended drying time between coats.
Application Techniques: Painting Your Fence
Painting a fence is more hands-on, allowing for a level of detail that spraying can't always match. It's a process that can be meditative for some, but it definitely demands patience and the right tools.
Selecting the Right Brushes and Rollers
The type of brush or roller you use will impact the finish. For wood fences, a good quality angled synthetic brush is ideal for cutting in edges and getting into the wood grain. For larger flat areas, a 3/4-inch nap roller cover is effective for applying a good amount of paint without excessive splattering.
- Brushes: Synthetic bristles are best for latex or water-based paints, while natural bristles are suited for oil-based coatings. An angled sash brush is excellent for precise work.
- Rollers: Different nap lengths are suited for different surfaces. A shorter nap (1/4 to 1/2 inch) works well for smooth surfaces like vinyl, while a medium nap (3/4 inch) is good for wood, and a longer nap (1 to 1 1/4 inch) is for very textured surfaces.
Painting Technique for Optimal Results
Start by applying paint to the edges and corners of each section. Load your brush with a moderate amount of paint, not too much, or it will drip, and not too little, or you'll have streaks. Apply the paint in long, even strokes, working with the grain of the wood.
- Maintain a wet edge: Always overlap your previous stroke while the paint is still wet to avoid visible lap marks. This is crucial for a smooth, uniform appearance.
- Vertical boards: Paint the fence boards vertically, working from top to bottom.
- Horizontal rails: Paint any horizontal rails after the boards, ensuring clean lines where they meet.
- Two coats are standard: Just like spraying, most fence paints will require two coats for full opacity and optimal durability.
Cost Breakdown: Spraying Equipment vs. Painting Tools
When you're budgeting for your fence project, the cost of equipment is a significant factor that can sway your decision between spraying and painting. While painting tools are generally cheaper upfront, investing in a sprayer might save you money in the long run if you have frequent large projects.
| Item | Spraying Equipment Cost (Approx.) | Painting Tools Cost (Approx.) | Notes |
|---|---|---|---|
| Paint Sprayer | $100 – $1,000+ | N/A | Varies by type (airless, HVLP) and brand. |
| Brushes | N/A | $15 – $50+ | Multiple needed for different coats/jobs. |
| Rollers & Trays | N/A | $10 – $40+ | Need roller covers and trays. |
| Masking Supplies | $30 – $100+ | $10 – $30+ | Plastic sheeting, tape, drop cloths. More for spraying. |
| Extension Pole | $20 – $50 | $15 – $40 | For reaching higher areas; useful for both methods. |
| Total Estimated | $165 – $1,200+ | $50 – $160+ | Initial investment can be much higher for sprayers. |
It's worth noting that many DIYers opt to rent rather than buy a high-end sprayer for a single project, which can significantly reduce the upfront cost. However, if you plan to paint or stain other surfaces like decks, garages, or even interior walls regularly, owning a sprayer could prove more economical over time.
Time Investment: Spraying vs. Painting a Fence
The time commitment is one of the most compelling reasons to choose one method over the other. If time is of the essence, spraying is almost always the winner for fences. Preparing a fence for spraying, including thorough masking, can take as long as preparing it for painting, and sometimes longer. However, the application itself is where the real savings occur.
For a standard 6-foot tall wooden privacy fence, applying the coating by spraying can often be completed in a single day, assuming perfect weather. This includes application of both primer and topcoat if two separate coats are needed. This is a stark contrast to painting, where the same fence could realistically take two to three full days of work, spread across multiple sessions to allow for drying between coats.
- Spraying (Application): 4, 8 hours for a moderately sized fence (e.g., 200-300 linear feet).
- Painting (Application): 2, 3 days for the same fence, working in manageable sections.
This time difference becomes even more pronounced on larger properties with extensive fencing. The physical labor involved with painting also contributes to the longer duration, as taking breaks is essential to avoid burnout.
Common Mistakes to Avoid When Spraying or Painting
Even with the best intentions, certain mistakes can sabotage your fence coating project, whether you choose to spray or paint. Understanding these potential pitfalls beforehand can save you time, money, and a lot of frustration down the road. Being aware is half the battle in achieving that durable, attractive finish.
Mistakes When Spraying
The most common mistake when spraying is inadequate masking. Homeowners often underestimate how far paint mist can travel, leading to unwanted coatings on windows, siding, or landscaping. Another frequent error is inconsistent spray technique. Holding the gun too close or too far, or moving at uneven speeds, results in drips, runs, and patchy coverage.
If the paint is too thick, it can clog the sprayer, causing further delays and mess.
- Insufficient Masking: Leads to overspray on unwanted surfaces.
- Uneven Spray Pattern: Results in drips, runs, and inconsistencies.
- Incorrect Paint Viscosity: Using paint that’s too thick for the sprayer can cause clogs.
- Ignoring Wind: Attempting to spray on a windy day is a recipe for disaster, scattering paint everywhere.
Mistakes When Painting
When painting, the biggest blunder is often rushing the preparation. Skipping the cleaning or not addressing loose paint from previous coats means the new coating has nothing solid to adhere to. Another common pitfall is applying paint too thickly with a brush or roller. This leads to drips and an uneven texture.
Not maintaining a "wet edge" is also a frequent error, creating visible lap marks that detract from the finish.
- Skipping Prep Work: Neglecting cleaning or scraping old paint.
- Applying Too Much Paint: Can cause heavy drips and a messy look.
- Not Maintaining a Wet Edge: Creates visible lines where one section stops and the next begins.
- Using Low-Quality Tools: Inexpensive brushes and rollers can leave bristles or lint behind.
Maintaining Your Newly Coated Fence
Once your fence is coated, the job isn't entirely done. Regular maintenance is key to preserving its appearance and extending the lifespan of the coating, whether you sprayed or painted it. Just like any exterior surface, fences are exposed to the elements and can degrade over time.
- Regular Cleaning: Periodically wash your fence to remove dirt, mildew, and cobwebs. Mild detergent and water are usually sufficient. A soft brush is best for gentle cleaning.
- Inspect for Damage: Keep an eye out for any peeling, chipping, or bubbling paint, especially after harsh weather. Address small issues promptly before they spread.
- Trim Overhanging Branches: Ensure trees and shrubs aren't constantly rubbing against the fence, as this can damage the coating and promote mildew growth.
Your Fence Coating Decision: Expert Recommendations
Ultimately, the choice between spraying and painting your fence depends on your priorities and project specifics. For large areas where speed and efficiency are paramount, and you're comfortable with thorough masking, spraying is often the most effective method. If you have a smaller fence, intricate details, or a desire for absolute precision with minimal mess, painting with brushes and rollers is a reliable choice.
Our research indicates that manufacturers like Sherwin-Williams and Benjamin Moore offer specialized exterior coatings that perform well with both spraying and brushing. When selecting a coating, always check the product data sheet for specific application instructions and limitations regarding temperature, humidity, and recommended equipment. Both methods can yield professional-looking results with the right preparation and technique.
Frequently Asked Questions About Spraying vs. Painting Fences
How long does it typically take to spray a fence?
The application process for spraying a fence can be surprisingly fast. For a moderately sized fence, say 200 to 300 linear feet, the actual spraying of primer and one or two topcoats might be completed within a single day. This is, of course, dependent on factors like weather and the complexity of the fence design.
Is painting a fence better for intricate designs?
Yes, for fences with a lot of decorative elements, spindles, or detailed trim, painting with brushes usually offers better control. You can precisely guide the paint into every nook and cranny, ensuring complete coverage and crisp lines where needed. Spraying, while fast, can sometimes leave uneven coats or overspray in complex areas if not managed with extreme care.
What is the best type of paint for fences?
High-quality exterior acrylic latex paints are generally recommended for most fence types, including wood, vinyl, and metal. These paints offer good durability, flexibility, and resistance to fading and mildew. Always check the coating manufacturer's specifications to ensure the product is suitable for your specific fence material and application method.
Can I spray paint my fence if it's made of wood?
Absolutely. Wood fences are excellent candidates for spraying. The fine mist can penetrate the wood grain effectively, especially if you're using a stain or a thinner exterior paint. Ensure the wood is properly cleaned, repaired, and dry before applying any coating via spraying for best results.
Is spraying more expensive than painting a fence?
The initial cost of equipment for spraying is typically higher, with airless sprayers costing significantly more than brushes and rollers. However, if you have multiple large projects or plan to maintain your fence regularly, the time saved with spraying can make it more cost-effective in the long run. Renting a sprayer is also a good option for infrequent users.