
Dealing with a fading, weathered fence can make your whole yard look a bit neglected. Staining your fence is the best way to restore its beauty and protect the wood, but facing gallons of stain and a hot day can feel daunting. The good news is, what is the easiest way to stain a fence isn't about brute force; it’s about choosing the right method and products for your fence and your situation.
Aggregate review data shows that many homeowners feel overwhelmed by stain application, with common complaints about drips and uneven coverage. Manufacturer specifications from brands like Behr and Cabot confirm that proper preparation and a considered application technique are crucial. Understanding these factors can dramatically simplify the process and give you professional-looking results without the headache.
What’s Actually the Easiest Way to Stain Your Fence?
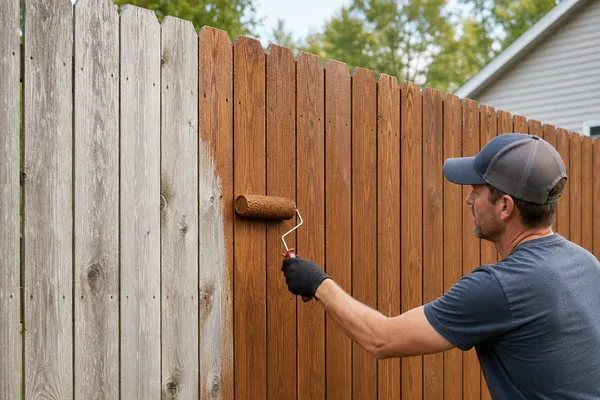
The simplest approach to staining a fence boils down to efficient prep and a straightforward application method. For many, this means using a good quality stain that flows well and choosing tools that cover large areas quickly without sacrificing control. It’s about minimizing steps that add complexity, like extensive sanding or multiple thin coats that add drying time. Our research indicates that for most standard wood fences in decent condition, a semi-transparent or solid stain applied with a sprayer followed by a quick back-brush can be the fastest, most effective method available.
Forget the Struggle: Your Quickest Fence Staining Answer
When you just want the job done with minimal fuss, the easiest way to stain a fence involves using a paint sprayer designed for exterior stains. This tool lays down a consistent, thin coat rapidly over large sections. Follow immediately with a wide brush or a stain pad to "back-brush" the stain, pushing it into the wood grain and evening out any drips before they dry. This two-step process drastically cuts down the application time compared to brushing or rolling alone.
Is Staining Your Fence Even Worth It? The Real Benefits
Staining your fence is more than just a cosmetic upgrade; it's crucial for its longevity and your home's overall appeal. A good stain penetrates the wood, offering protection against punishing UV rays that cause graying and warping. It also acts as a barrier against moisture, preventing rot and mildew growth that can compromise the fence's structural integrity. Ultimately, a well-stained fence can extend its lifespan by several years and significantly boost your property's curb appeal.
Fence Staining vs. Painting vs. Doing Nothing: What’s Best for You?
Choosing to stain your fence offers a different look and protection level than painting. Stains, especially semi-transparent ones, allow the natural wood grain to show through, offering a more natural aesthetic. Painting, on the other hand, offers a solid, opaque color and can hide imperfections better, but it tends to chip and peel over time, requiring more intensive prep for recoating. Leaving a fence unstained allows it to weather naturally, which can look charming initially but leaves the wood vulnerable to rapid deterioration, rot, and insect damage without any protective barrier.
For maximizing both beauty and lifespan with less maintenance down the line, staining is often the sweet spot.
How to Apply Fence Stain Quickly (and Avoid a Mess!)
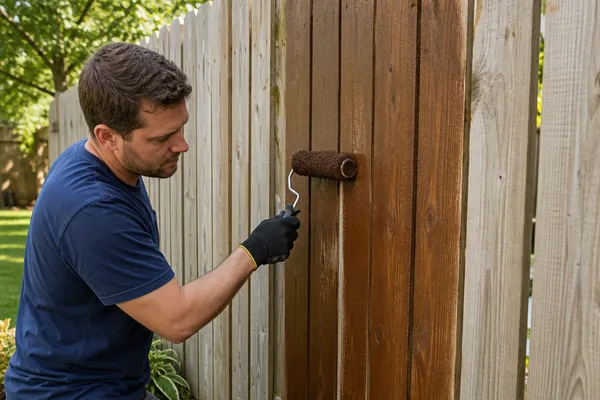
The key to a fast and clean fence stain job lies in preparation and a methodical application. Start by ensuring your fence is clean and completely dry; a damp fence will repel stain. Divide your fence into manageable sections, no larger than you can comfortably stain in about 10, 15 minutes before the stain begins to dry. Always work from the top down, applying the stain evenly and consistently to avoid lap marks, which happen when wet stain meets partially dried stain.
Spraying Your Fence Stain: Pros, Cons, and Tips
Using a paint sprayer for staining offers unparalleled speed. You can cover large areas of fence in a fraction of the time it takes with a brush or roller. This method is particularly effective for fences with intricate details or hard-to-reach areas. However, sprayers can be messy; overspray is a significant concern, meaning you'll need to protect surrounding plants, walkways, and your home’s exterior with drop cloths.
It also requires careful technique to avoid drips and uneven coverage, often necessitating a follow-up "back-brush" step to fully work the stain into the wood. For latex or oil-based stains, ensure your sprayer is rated for the specific product viscosity.
Brushing On That Fence Stain: When It’s Still the Easiest
While spraying is fast, brushing is often the go-to for the easiest stain application, especially for smaller fences or when you want truly meticulous control. A good quality stain brush, typically 3, 4 inches wide with synthetic bristles for water-based stains and natural bristles for oil-based, allows you to work the stain deep into the wood grain. This method minimizes overspray and is ideal for areas near delicate landscaping or structures you can't easily cover. It requires more physical effort and time than spraying but offers precise results with less cleanup.
Fence Stain Coverage & Drying Times: What to Expect
Understanding coverage rates and drying times is crucial for estimating your project and planning your schedule. Most exterior wood stains, whether oil- or water-based, will cover between 200 to 400 square feet per gallon, depending heavily on the wood's porosity and the stain's opacity. For instance, a solid stain typically offers higher coverage than a semi-transparent one because it contains more pigment. Drying times vary significantly; water-based stains usually dry to the touch in 1, 4 hours and can accept a second coat within 4, 6 hours.
Oil-based stains often take longer, typically 6, 12 hours to dry to the touch and 24 hours before a second coat. Always check the manufacturer’s specifications for the exact product you’re using, as these times can be affected by humidity and temperature.
Common Fence Staining Mistakes That Cost You Time
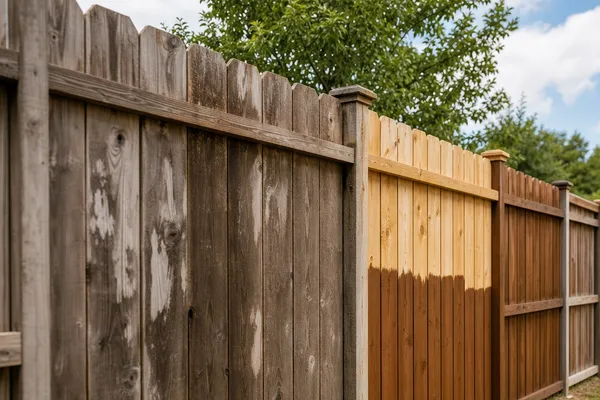
Many homeowners make a few common errors that turn a straightforward staining job into a frustrating ordeal. One of the biggest is skipping essential preparation, like not cleaning the fence thoroughly, which prevents the stain from adhering properly. Another frequent mistake is applying stain when the wood is still damp from rain or cleaning, leading to poor penetration and an uneven finish. Rushing the drying time between coats or not allowing enough stain overlap can also result in noticeable lap marks, which are difficult to correct later.
These missteps often mean more work, extra product, and a less than ideal final look.
Fence Stain Colors: Finding the Right Hue for Your Home
Choosing the right fence stain color can dramatically impact your home's curb appeal. You'll typically find stains categorized by opacity: transparent, which shows the most wood grain and offers minimal color; semi-transparent, which adds color while still revealing grain texture; and solid, which acts more like a paint, obscuring the wood grain but offering maximum color and UV protection. Many brands, like Cabot or Olympic, offer extensive color palettes, from natural cedar and redwood tones to grays and even bolder hues. Consider your home’s exterior colors and landscaping when making your selection.
A color from a respected manufacturer like Sherwin-Williams’ exterior wood stain line can also be a solid starting point.
Fixing a Messy Stain Job: Quick Fixes for Runs and Drips
If you've ended up with unsightly runs or drips after staining, don't panic. The easiest fixes depend on whether the stain is still wet or has already started to dry. If the stain is still wet, grab a clean, dry brush or a rag and gently feather out the offending drip, working it back into the surrounding stained area. For stains that have already begun to cure, you might need a stain stripper, but this can be more involved and may require re-staining the entire board or section afterward.
Prevention is always better; applying thinner coats and working methodically typically avoids these issues entirely.
Fence Stain Coverage & Drying Times: What to Expect
Understanding coverage rates and drying times is crucial for estimating your project and planning your schedule. Most exterior wood stains, whether oil- or water-based, will cover between 200 to 400 square feet per gallon, depending heavily on the wood's porosity and the stain's opacity. For instance, a solid stain typically offers higher coverage than a semi-transparent one because it contains more pigment. Drying times vary significantly; water-based stains usually dry to the touch in 1, 4 hours and can accept a second coat within 4, 6 hours.
Oil-based stains often take longer, typically 6, 12 hours to dry to the touch and 24 hours before a second coat. Always check the manufacturer’s specifications for the exact product you’re using, as these times can be affected by humidity and temperature.
Common Fence Staining Mistakes That Cost You Time
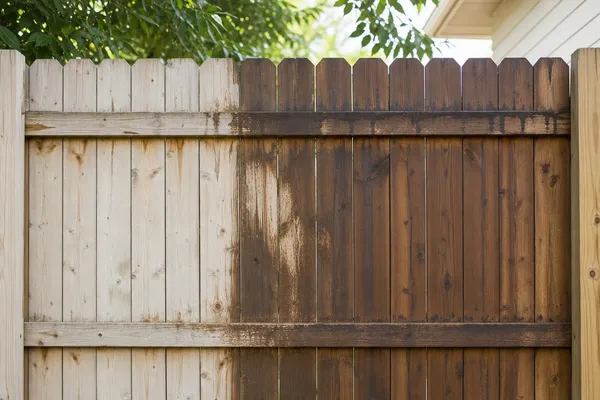
Many homeowners make a few common errors that turn a straightforward staining job into a frustrating ordeal. One of the biggest is skipping essential preparation, like not cleaning the fence thoroughly, which prevents the stain from adhering properly. Another frequent mistake is applying stain when the wood is still damp from rain or cleaning, leading to poor penetration and an uneven finish. Rushing the drying time between coats or not allowing enough stain overlap can also result in noticeable lap marks, which are difficult to correct later.
These missteps often mean more work, extra product, and a less than ideal final look.
Fence Stain Colors: Finding the Right Hue for Your Home
Choosing the right fence stain color can dramatically impact your home's curb appeal. You'll typically find stains categorized by opacity: transparent, which shows the most wood grain and offers minimal color; semi-transparent, which adds color while still revealing grain texture; and solid, which acts more like a paint, obscuring the wood grain but offering maximum color and UV protection. Many brands, like Cabot or Olympic, offer extensive color palettes, from natural cedar and redwood tones to grays and even bolder hues. Consider your home’s exterior colors and landscaping when making your selection.
A color from a respected manufacturer like Sherwin-Williams’ exterior wood stain line can also be a solid starting point.
Fixing a Messy Stain Job: Quick Fixes for Runs and Drips
If you've ended up with unsightly runs or drips after staining, don't panic. The easiest fixes depend on whether the stain is still wet or has already started to dry. If the stain is still wet, grab a clean, dry brush or a rag and gently feather out the offending drip, working it back into the surrounding stained area. For stains that have already begun to cure, you might need a stain stripper, but this can be more involved and may require re-staining the entire board or section afterward.
Prevention is always better; applying thinner coats and working methodically typically avoids these issues entirely.
Fence Stain Cost Breakdown: Budgeting for Your Project
When budgeting for your fence staining project, it's easy to focus just on the stain itself, but remember to factor in all the supplies. The cost of stain can range from $25 to $70 per gallon, with solid stains generally being at the higher end due to more pigment content. You'll also need supplies like a good quality brush or sprayer ($50, $150+), a roller with an extension pole ($20, $40), cleaning solutions ($10, $30), sandpaper or degreasers ($10, $20), and protective gear like gloves and safety glasses ($10, $20). For larger fences, renting a power washer might also be a consideration.
These combined costs can add up, so planning ahead prevents surprises.
Fence Stain vs. Lacquer vs. Sealant: What's the Difference?
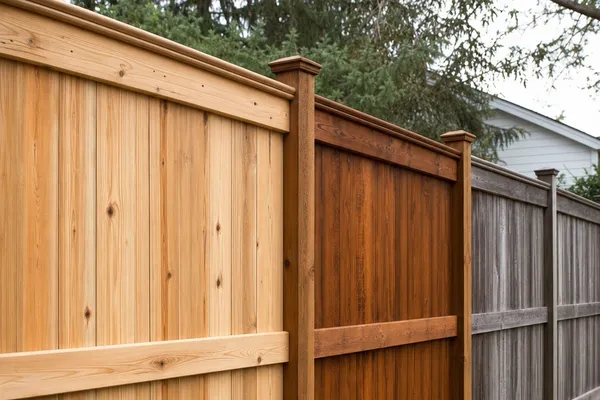
It's easy to confuse different wood finishes, but they serve distinct purposes. A stain, like those from Behr or Rust-Oleum, primarily adds color and penetrates the wood to protect it from UV damage and moisture. Lacquer, on the other hand, forms a hard, protective film on top of the wood, offering excellent durability but can be prone to cracking or peeling over time if not applied perfectly. Sealants, such as those offered by Thompson's WaterSeal, are typically clear and focus solely on repelling water, offering minimal UV protection and no color enhancement.
For a balance of color, protection, and ease of application, stain remains the top choice for most fences.
How to Clean Your Fence Properly Before Staining
Achieving the best results from your fence stain starts with a clean surface. For mild dirt and grime, a good scrub brush with a bucket of soapy water is often enough. If you have mildew, algae, or significant weathering, a dedicated fence cleaner or a solution of one part bleach to three parts water can be effective. Always rinse thoroughly with a garden hose or a pressure washer on a low setting (under 1500 PSI) to remove all cleaning residue.
For an even faster cleaning method, a dedicated fence cleaner diluted according to the manufacturer's official site instructions can work wonders.
Addressing Fence Wood Types: Pine, Cedar, and Pressure-Treated
Different wood types have unique characteristics that affect how they take stain. Pine, a common and affordable choice, is porous and can absorb stain unevenly if not properly prepared. Cedar and redwood are naturally more resistant to rot and insects, and they often stain beautifully, but can sometimes react with iron in certain stains, causing dark splotches. Pressure-treated wood, commonly used for fences, has undergone a chemical process to resist decay and insects; it often requires a waiting period (sometimes up to six months) after installation for the moisture content to drop sufficiently for stain adhesion, as confirmed by lumber industry guidelines.
When to Re-Stain Your Fence: Signs It's Time
The frequency of re-staining depends heavily on the type of stain used, the climate, and sun exposure, but there are clear visual cues. A general rule of thumb is every 2, 5 years for semi-transparent stains, and 3, 7 years for solid stains or if you live in an area with harsh weather. Look for signs like water beading up on the surface; if the water soaks in, it's time to reapply. Another indicator is fading color, visible wear, or patches where the stain is peeling or has worn away completely.
A simple test: scrape a small, inconspicuous area with your fingernail; if the stain easily flakes off, it's definitely time for a refresh.
Fence Staining in Different Weather Conditions
The weather plays a critical role in how well your fence stain will adhere and last. Ideally, aim for mild, dry conditions, with temperatures between 50°F (10°C) and 85°F (29°C). Avoid staining in direct, harsh sunlight, as this can cause the stain to dry too quickly, leading to lap marks and uneven coverage. Rain is also a showstopper; you’ll want at least 24, 48 hours of dry weather after application for the stain to cure properly, especially for oil-based products as recommended by many paint manufacturers.
High humidity can also slow down drying times considerably.