When your fence starts looking like a fuzzy green carpet, you're probably wondering what to spray on fences to stop green mould. This common sight, often a mix of algae, mildew, and moss, can make your property look neglected and even compromise the fence's integrity over time. Thankfully, a few targeted sprays can bring your fence back to life and keep it that way.
Manufacturer specifications often rate effective fence cleaners for mold and mildew to last up to 6, 12 months, depending on environmental conditions. Understanding the right product for your fence material and how to apply it makes all the difference in achieving a clean, long-lasting result without causing damage.
Why Does Green Mold Grow on Fences Anyway?
Green mold, which is typically algae or mildew, thrives in damp, shady conditions where moisture lingers. Fences, especially in areas with poor air circulation or consistent shade from trees and buildings, create an ideal environment. Organic materials on the fence surface, like dirt, pollen, or even remnants of wood fibers, act as food for these microorganisms.
The presence of mold isn't just an aesthetic issue; it can gradually break down certain fence materials. For example, on wooden fences, constant moisture can lead to rot and structural weakening. On vinyl or composite fences, while less damaging, it can still lead to discoloration and a slippery surface that poses a safety hazard.
What to Spray: Choosing the Right Fence Mold Cleaner
Picking the best spray depends on your fence's material and how stubborn the mold is. You'll find options ranging from specialized commercial products to simple, natural solutions you might already have at home. Always check the product label to ensure it's safe for your specific fence type, wood, vinyl, composite, or metal.
Using the wrong cleaner can damage your fence or surrounding plants. For instance, harsh chemicals could discolor or etch vinyl, while strong acidic cleaners might degrade wood fibers if not applied and rinsed correctly.
Commercial Fence Cleaners for Mold and Mildew
Commercial cleaners are formulated to tackle tough mold and mildew efficiently. Many are ready-to-use, making application straightforward. They often contain active ingredients like sodium hypochlorite (bleach) or hydrogen peroxide, which are effective at killing biological growth.
These products are designed for speed and efficacy, often requiring minimal scrubbing. Many offer preventative qualities, too, meaning they not only clean but also help inhibit regrowth for a period. Aggregate user reviews often highlight brands like Wet & Forget or Bio-Advanced as consistent performers for tough jobs.
Natural & DIY Fence Mold Sprays
For those who prefer a greener approach or have sensitive materials, DIY solutions can be surprisingly effective. A common recipe involves mixing equal parts white vinegar and water in a garden sprayer. Vinegar's acidity helps break down mold and algae.
Another simple option is a solution of baking soda and water. While less potent than vinegar or bleach, baking soda is a mild abrasive that can help lift surface mold and also acts as a deodorizer. However, DIY options may require more elbow grease and repeated applications for severe infestations.
When to Consider a Pressure Washer
While this guide focuses on sprays, a pressure washer can be a powerful tool for heavily affected fences. However, it's crucial to use it correctly. Low pressure settings (around 500, 800 PSI) combined with a wide fan tip are generally recommended for most fence materials, especially wood.
Using too high a pressure, or the wrong tip, can easily strip paint, gouge wood, or even crack vinyl. Some fence cleaners are specifically designed to be used in conjunction with a pressure washer, allowing you to soak the fence first, then use the washer to rinse and remove the loosened mold.
Step-by-Step: How to Spray Your Fence for Mold
Getting the best results means following a few key steps. Rushing the process can lead to patchy cleaning or even damage. Taking your time to properly prepare your fence and apply the chosen solution will ensure a much cleaner and longer-lasting finish.
This methodical approach helps ensure the cleaner reaches all the affected areas and has enough time to work. It also minimizes the risk of harming yourself or your property.
1. Identify Your Fence Material
Before you grab any spray bottle, know what your fence is made of. Wood fences (pine, cedar, redwood) require different treatments than vinyl, composite, or metal fences. For instance, bleach-based cleaners can be too harsh for some types of wood, causing discoloration or damage to the natural fibers over time.
Manufacturer specifications for vinyl fences, like those from CertainTeed or other major brands, often list recommended cleaning agents. Always consult these guidelines if available. Wood fences, on the other hand, are more forgiving regarding cleaning solutions but can be sensitive to high-pressure washing.
2. Assess the Mold Situation
Take a good look at your fence. Is it lightly speckled with green, or are there thick, fuzzy patches? The severity of the mold will dictate the strength of the cleaner you need and how much effort is involved. For light algae, a dilute vinegar solution might suffice.
For significant moss or thick mildew, you'll likely need a more potent commercial cleaner. Check for areas where mold has penetrated deeply into the material, as these may require a longer dwell time or more vigorous scrubbing.
3. Test Your Chosen Cleaner
This is a crucial step often overlooked. Before you drench your entire fence, apply your chosen cleaner to a small, inconspicuous area. This could be on the backside of the fence, near the ground, or on a scrap piece if you have one.
Let the cleaner sit for the recommended dwell time, then rinse and let it dry completely. This test ensures the product won't discolor, etch, or damage your fence material. It's especially important for painted fences or those with a special finish.
4. Protect Surrounding Areas
Mold and mildew cleaners, especially those containing bleach, can harm plants, grass, and other surfaces. Before you start spraying, thoroughly wet down any nearby vegetation with plain water. This helps dilute any overspray that might land on them.
Consider covering delicate plants with plastic sheeting or tarps. Also, protect your home’s siding, windows, and outdoor furniture from chemical contact. Wearing old clothes is also a good idea, as stains are likely.
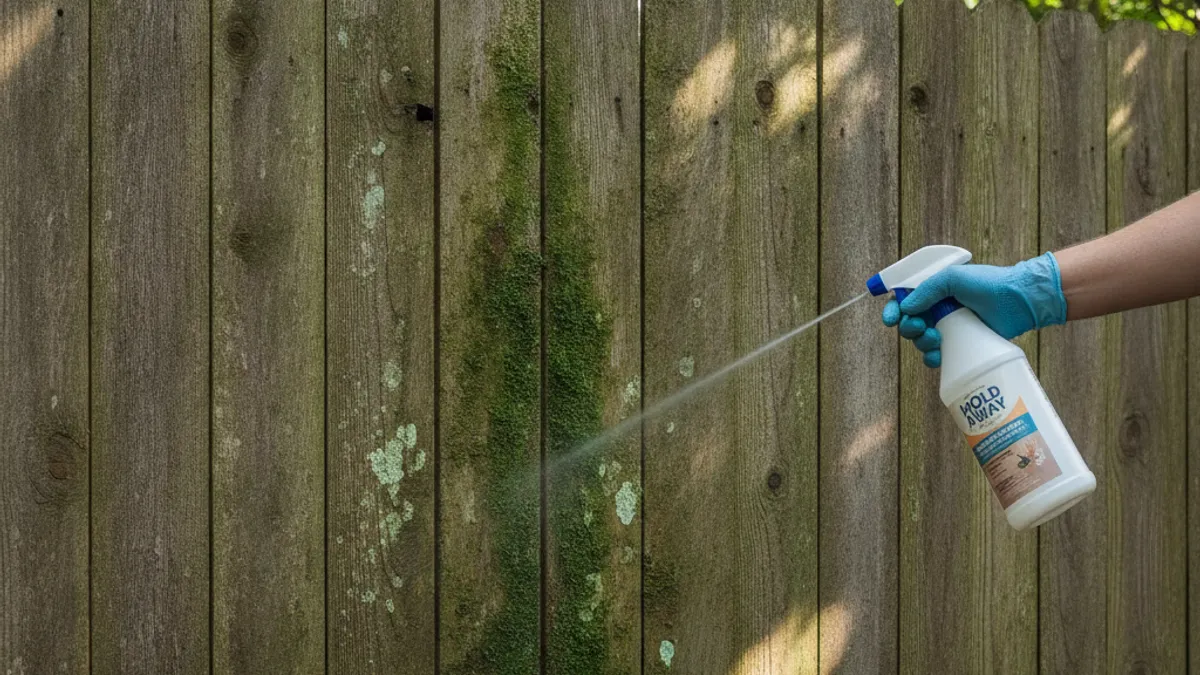
5. Apply the Mold Spray Correctly
Most
Alternatively, you can use a garden sprayer to apply the cleaner. For a spray, ensure you have a fine mist setting that distributes the product evenly without excessive runoff. Work in manageable sections, moving at a consistent pace.
Follow the product’s recommended dwell time. This is how long the cleaner needs to sit on the surface to effectively break down the mold. This can range from 15 minutes for lighter solutions to over an hour for tougher commercial cleaners.
6. Let It Dwell
This is where the magic happens. Once applied, the cleaner needs time to work its way into the mold and kill the surface growth. For most products, this dwell time is crucial for effectiveness. Skipping this step means you'll be doing a lot more scrubbing for less noticeable results.
Read the product label carefully for the recommended dwell time. It might range from 15 minutes to a full hour, or even longer for some organic cleaners. Over-application or leaving strong chemicals on too long can sometimes damage materials, so adhering to the specified time is key.
7. Rinse Thoroughly
After the dwell time, rinsing is essential to remove the loosened mold and any residual cleaner. Use a garden hose with a strong spray nozzle, or a pressure washer on a low setting. Ensure you get into all the nooks and crannies of the fence.
Thorough rinsing prevents cleaner residue from attracting dirt or potentially damaging the fence material over time. It also washes away dead mold spores, reducing the chance of them reactivating. Make sure to rinse from top to bottom, catching all the runoff.
Safety First: Protecting Yourself and Your Yard
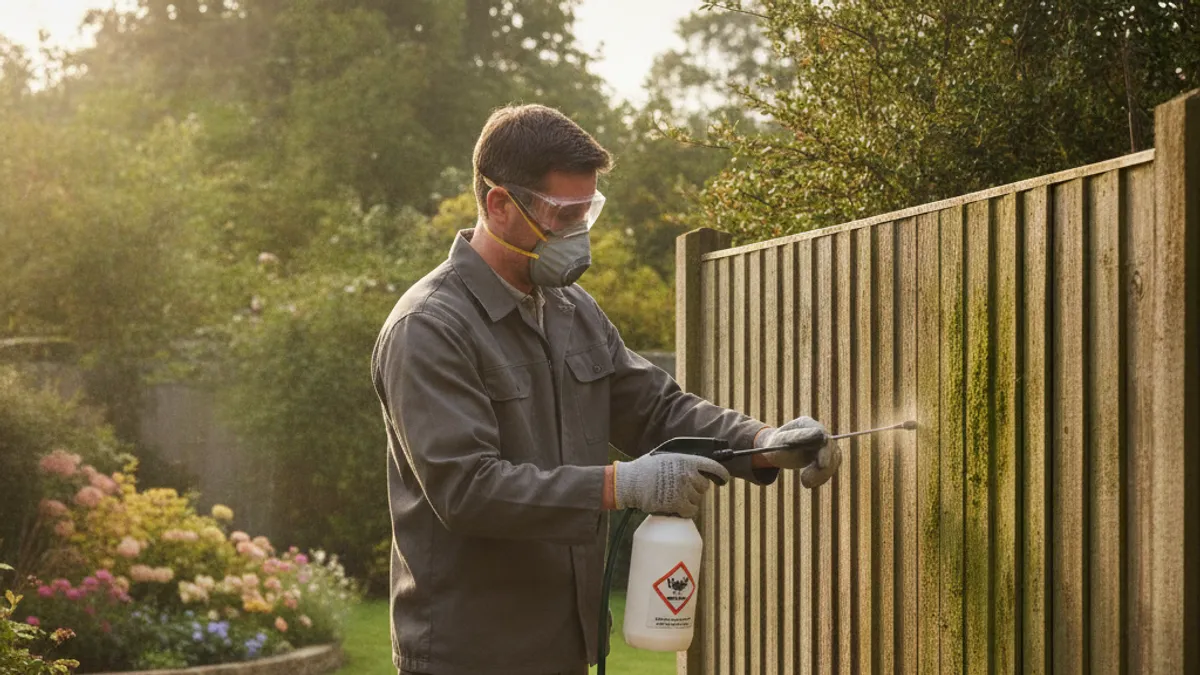
Working with cleaning solutions, even those marketed as mild, requires caution. Your fence is a part of your property, but so are your plants, pets, and yourself. Taking proper safety precautions safeguards everyone and everything involved.
Many cleaning agents can cause skin irritation, eye damage, or respiratory issues if not handled carefully. Equally important is preventing environmental contamination, which can affect beneficial insects, local wildlife, and groundwater.
Essential Protective Gear
Always wear appropriate personal protective equipment (PPE) when applying any fence cleaner. This includes heavy-duty, chemical-resistant gloves, often nitrile or neoprene, to protect your skin from irritation or chemical burns. Safety glasses or goggles are non-negotiable to prevent splashes from reaching your eyes, which can cause serious harm.
For cleaners with strong fumes, particularly bleach-based ones, a respirator mask can provide crucial respiratory protection. Consider covering any exposed skin with long sleeves and pants, especially when dealing with potent chemicals or if you have sensitive skin.
Keeping Plants and Pets Safe
Before you begin spraying, thoroughly wet down any plants bordering the fence with plain water. This helps to dilute any cleaner that splashes or drifts onto them, minimizing the risk of damage. For very delicate plants, cover them with plastic sheeting or tarps.
Keep pets and children away from the treated area during cleaning and until the fence has thoroughly dried. Many cleaning agents are toxic if ingested. If using a chemical cleaner, check the manufacturer's safety data sheet (SDS) for specific instructions on environmental safety and first aid. The Poison Control hotline (1-800-222-1222) can also offer immediate advice in case of accidental exposure.
Beyond Spraying: Long-Term Mold Prevention Tactics
Cleaning the mold is only half the battle. To keep your fence looking its best and to avoid reapplying sprays too often, a proactive approach to prevention is key. This involves addressing the conditions that allow mold to grow in the first place.
Think of it like maintaining a healthy garden; regular care prevents bigger problems down the line. Consistent effort will save you time and money in the long run, keeping your fence in great shape.
Regular Fence Maintenance
A simple hose-down every few months can prevent a lot of mold buildup. Removing accumulated dirt, leaves, and debris stops mold from having food sources. Regularly clearing away overhanging branches or dense foliage around the fence also helps improve air circulation and sunlight exposure.
Inspect your fence regularly for any signs of cracking, peeling paint, or rot, especially on wooden structures. Addressing these issues promptly can prevent moisture from trapping and creating ideal mold breeding grounds. For wooden fences, clearing leaves is important to prevent them from holding moisture against the wood.
Sealing and Staining Your Fence
Applying a good quality sealant or stain is one of the most effective ways to protect your fence from mold and the elements. For wooden fences, sealants create a barrier that repels water, making it much harder for mold and mildew to take hold. Stains often contain mildewcides, adding extra protection.
For vinyl or composite fences, a UV-protective sealant can also help, though their non-porous nature generally makes them less prone to mold than wood. Always follow the manufacturer's application instructions for sealants and stains to ensure proper adhesion and maximum longevity, aiming for an application before the rainy season if possible.
Improving Airflow Around Your Fence
Mold thrives in stagnant, damp air. If your fence is butted up against dense shrubs, a solid wall, or other structures, it might not be getting enough air circulation. Improving airflow is a game-changer for mold prevention.
Consider trimming back any vegetation that is too close to the fence, especially on the shaded side. If your fence is part of a solid barrier, you might look into designs that allow more air to pass through, like spaced pickets or lattice panels. This simple step can significantly reduce the moisture that lingers and feeds mold growth.
Common Fence Mold Problems & How to Fix Them
Sometimes, despite your best efforts, mold can still crop up. Understanding common issues can help you troubleshoot and address them quickly. The key is to identify the root cause and apply the right solution.
For instance, if mold keeps reappearing in the same spot, there's likely an ongoing moisture issue that needs addressing beyond just spraying. Think about drainage, shade, or even sprinkler systems hitting the fence.
- Persistent Mold on Shaded Areas: If mold keeps returning on a specific part of the fence that's always in shade, the primary issue is lack of sunlight and airflow. The solution involves trimming nearby trees or shrubs to allow more light and air movement. Repeat applications of a mold inhibitor might be necessary in the interim.
- Mold Returning Quickly After Cleaning: This usually indicates that the underlying cause of moisture hasn't been fixed. Check for poor drainage near the fence line, leaks from sprinklers, or water runoff from roofs or patios. Addressing the water source is critical for long-term success.
- Mold on Newly Treated Fences: Some cleaners take time to activate fully. Check if you gave the product adequate dwell time and rinsed it completely. If a fresh, strong mildew smell persists, it likely means the mold wasn't fully killed; a second treatment or a stronger product may be needed.
Expert Tips for a Mold-Free Fence
Beyond the standard cleaning and prevention, a few advanced tips can help keep your fence looking pristine. These often come from years of dealing with outdoor maintenance challenges and understanding what truly works. Paying attention to these details can make a big difference.
One often-overlooked tip is to clean your fence in the cooler parts of the day, like early morning or late evening. This prevents the cleaning solution from drying too quickly before it has a chance to work. It also makes the job more comfortable for you.
When using a spray, angle the nozzle slightly downwards. This directs the spray onto the surface and helps gravity carry the loosened mold down and off the fence. It’s a small adjustment that can improve the cleaning efficiency.
Finally, consider the long-term benefits of quality products. While cheaper cleaners might seem appealing, investing in a good, reputable fence cleaner or a high-quality sealant often means fewer applications and better protection over time. Many manufacturers guarantee their products for 12 months or more when applied as directed. For example, products registered with the Environmental Protection Agency (EPA) as mold inhibitors undergo rigorous testing to ensure efficacy and safety.