
You're standing at the grill, tongs in hand, expecting that satisfying roar of flames. Instead, you get a weak, sputtering blue flicker that barely kisses the grates. Dinner's on standby, and those burgers are going to take twice as long.
If you've ever asked yourself "why does my gas grill have low flame," the answer is usually simpler than you think. In most cases, it's not a broken grill or a major mechanical failure. It's almost always one of a handful of easily fixable issues, ranging from a nearly empty tank to a safety mechanism that tripped when you weren't paying attention.
The good news is that you can diagnose and fix the vast majority of low flame problems in under thirty minutes with basic household tools. We've combed through manufacturer service manuals from Weber, Char-Broil, and Napoleon, plus aggregate user reports and industry safety guidelines from the National Fire Protection Association (NFPA). By the time you finish reading, you'll know exactly what to check, in what order, and how to fix it without calling in a professional.
Quick Answer: The Three Most Likely Culprits
A low flame across every burner on your gas grill points to a fuel supply problem, not a burner problem. When the entire grill loses power, you're dealing with one of three issues: a nearly empty tank, a tripped regulator safety device, or a restriction somewhere between the tank and the burners. If only one burner is weak, the issue lives in that specific burner tube or its control valve.
Most common culprit: A tripped regulator safety mechanism. This happens when you open the tank valve too fast or turn on the gas while the grill lid is closed. It limits gas flow to a trickle, producing the exact symptom you're seeing.
The Overfill Prevention Device (OPD) has been mandatory on all propane tanks manufactured after 1998 per U.S. Department of Transportation regulations. It's a reliable safety feature, but it's also the number one cause of sudden flame loss.
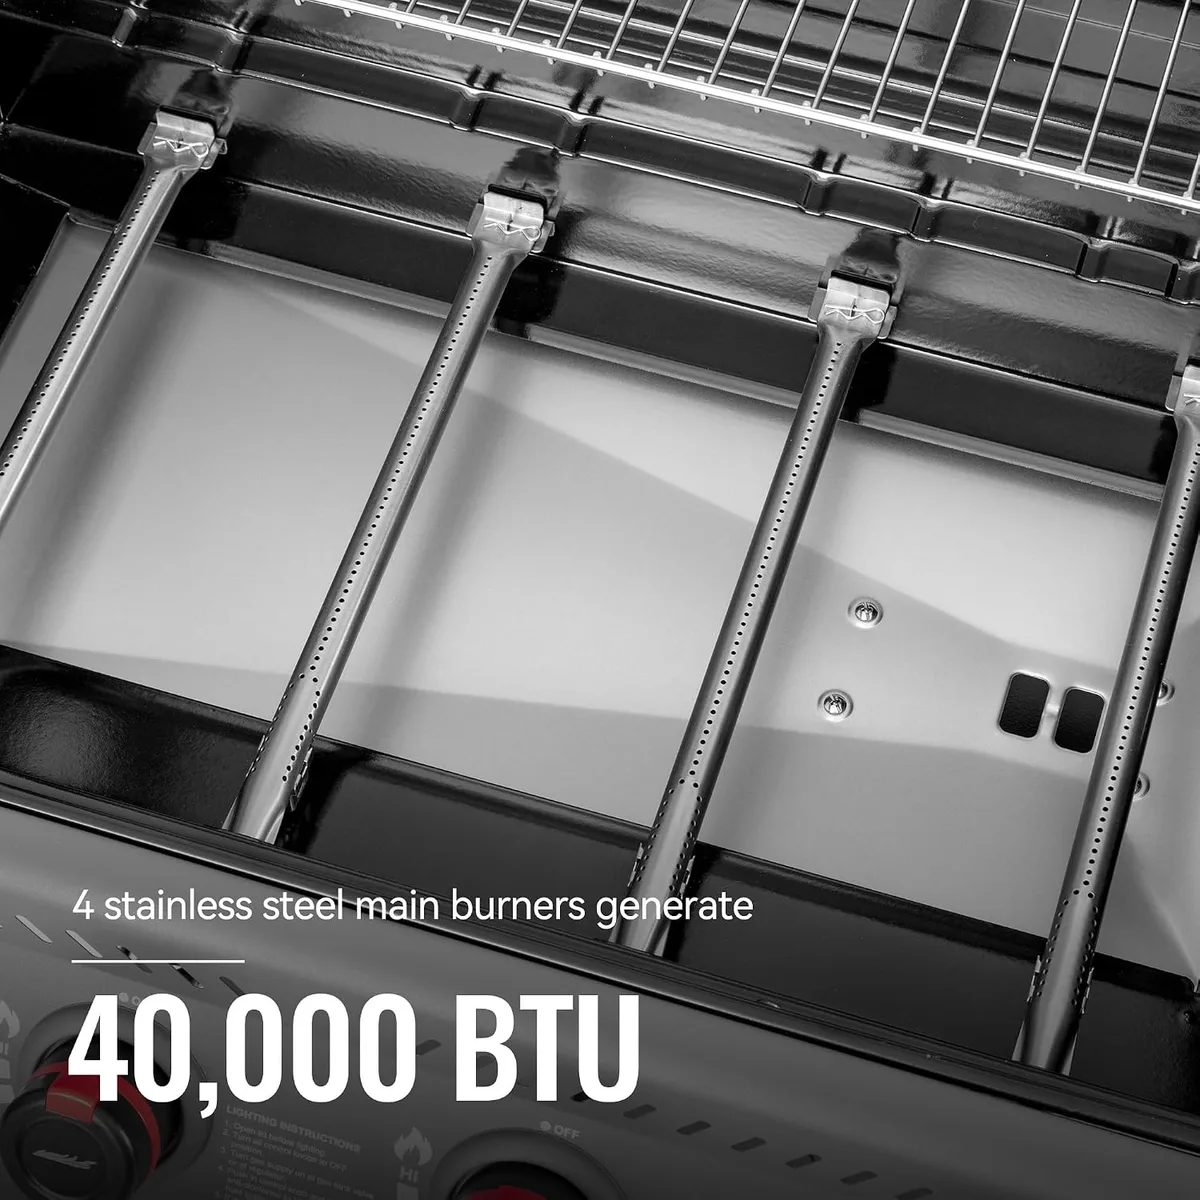
Image source: Web (Bing) / manuals.plus (Web image (fair-use with source credit))
Before You Troubleshoot: Critical Safety Checks
Propane is safe when handled properly, but it deserves respect. Before you stick your hands anywhere near the gas system, take two minutes to run through basic safety checks. This isn't bureaucratic overkill.
It's the difference between a quick fix and a dangerous surprise.
Start by turning everything off. Close the tank valve completely. Turn all burner knobs to the "off" position. If the grill has been running, let it cool down for at least fifteen minutes before you begin.
Next, check for gas leaks. Mix a solution of equal parts water and dish soap in a spray bottle. Spray it generously on the tank valve, the regulator connections, and along the entire length of the hose. Turn the tank valve on without lighting the grill.
Watch for bubbles. If you see any foaming or growing bubbles, you have a leak. Turn the gas off immediately and tighten the offending connection, then re-test.
If bubbles persist, replace the part before attempting any further troubleshooting.

Image source: Web (Bing) / thecrazyoutdoormama.com (Web image (fair-use with source credit))
This step is non-negotiable. A gas leak is a fire hazard and a health risk. The National Fire Protection Association (NFPA) reports that gas grills are involved in an average of 10,200 home fires per year, and leaks are a leading contributing factor. The Propane Education & Research Council (PERC) also recommends performing this soap-and-water test any time you reconnect your tank after storage.
If everything passes the leak test, you're ready to move into active troubleshooting. Work through the next steps in order, from the most likely to the least likely cause. This approach saves time and prevents unnecessary part replacements.
Step 1: Verify Your Propane Tank Actually Has Fuel
This sounds ridiculously obvious, but you'd be shocked how often it gets skipped. Propane tanks don't run out the way a car runs out of gas. There's no sputtering warning, no gradual slowdown.
The pressure stays consistent until the tank is nearly empty, then drops off dramatically all at once.
One minute you're searing steaks at full power. The next, you've got a weak flame and no idea why. Here's how to check your fuel level in about two minutes.
The weight test. A standard empty 20-pound propane tank weighs approximately 17 to 18 pounds. When full, it weighs about 37 to 38 pounds. Pick up your tank.
If it feels suspiciously light, that's your answer. For a more precise check, use a bathroom scale. This is the most reliable method and requires no special equipment.

Image source: Bing (Web (fair-use with source credit))
The warm water trick. This method works even if you don't have a scale. Pour warm, not boiling, water down one side of the tank. Then run your hand along the surface.
The metal will feel cool to the touch where there's still propane inside, because the liquid absorbs heat as it evaporates. The area that feels warm or room temperature is empty.
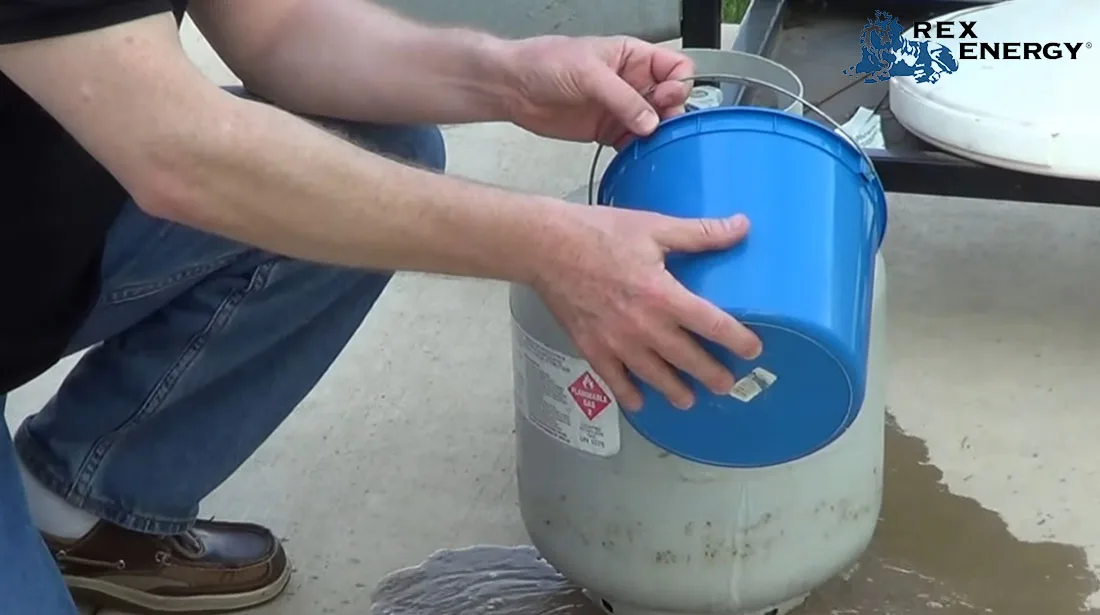
Image source: Bing (Web (fair-use with source credit))
The exchange rule. If you're using a tank from a propane exchange program like Blue Rhino or AmeriGas, the refill level varies by location. Some suppliers fill to 80 percent capacity, others to 75 percent. A tank that passes the weight test but comes from a shady exchange station might still be low.
When in doubt, swap it for a fresh one.
One more tip for cold weather: Propane doesn't vaporize well in freezing temperatures. If you're grilling in winter and the flame is weak, check if the tank is frosting over. A thin layer of ice on the tank surface means the propane can't vaporize fast enough to supply your burners.
A tank heater or simply moving the tank out of direct wind usually solves this within a few minutes.
If your tank checks out full and you still have low flame, move on to Step 2. That's where the real culprit usually lives.
Step 2: Reset the Regulator Safety Trip (Most Common Cause)
If you've confirmed your tank has fuel, the next suspect is the regulator. This small, typically brass or aluminum device sits between the tank valve and the hose. Its job is to reduce the high pressure inside the tank, which can reach 100 to 200 psi on a hot day, down to a safe, consistent level for your grill.
Standard grill regulators output about 11 inches of water column, roughly 0.4 psi.
Most modern gas grills use a regulator with an OPD, or Overfill Prevention Device. This safety feature includes a flow-limiting mechanism that activates when it detects a sudden surge in pressure. Think of it like a circuit breaker for your gas line.
It trips intentionally, and it's doing its job. Here's why it activates:
- You opened the tank valve too fast. The sudden pressure spike triggers the safety mechanism.
- You turned on the gas while the grill lid was closed. This traps gas inside the grill and causes a pressure surge.
- The tank sat in direct sun on a hot day. Heat increases pressure inside the tank. Temperatures above 90°F can raise internal pressure enough to trip the device.
- You just refilled the tank. Fresh propane is colder and at higher pressure. Connecting it right away can trigger the mechanism.
How to reset it: This takes about three minutes and requires no tools.
- Turn the tank valve completely off.
- Disconnect the regulator from the tank by unscrewing the nut counterclockwise.
- Open all burner knobs on the grill to the "high" position. This releases any remaining pressure in the system.
- Wait two to three minutes. Let everything equalize.
- Close all burner knobs.
- Reconnect the regulator to the tank. Hand-tighten only. Do not use a wrench, which can crack the nut.
- Open the tank valve very slowly. Give it four to five seconds to pressurize the line.
- Turn on one burner and light the grill.

Image source: Bing (Web (fair-use with source credit))
If the flame comes back to full strength, you're done. The safety trip was your problem. Going forward, always open the tank valve slowly and keep the lid open while turning on the gas.
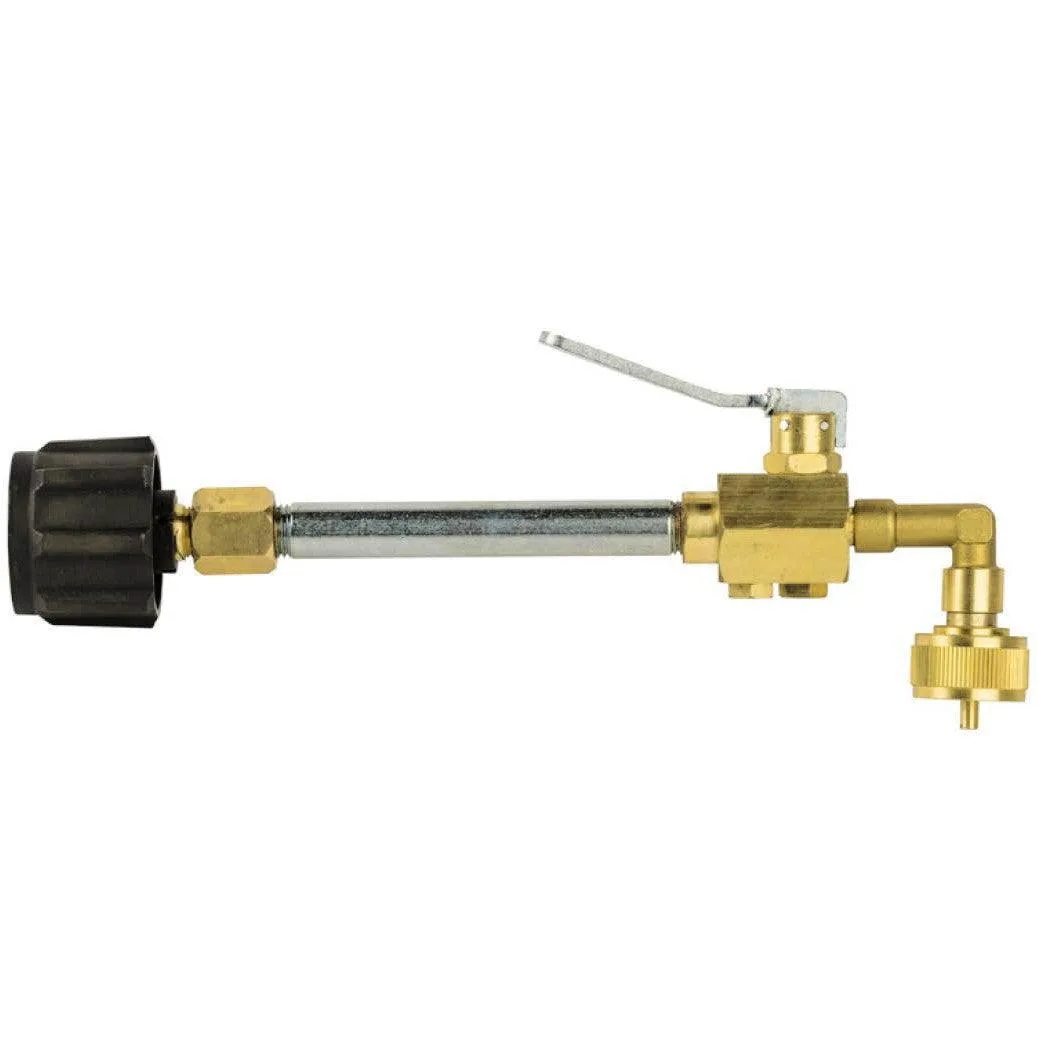
Image source: Web (Bing) / flamekingproducts.com (Web image (fair-use with source credit))
If the flame is still weak after the reset, don't repeat the process. Move on to Step 3 and inspect the regulator and hose for physical damage or blockages.
Step 3: Inspect the Regulator and Hose Assembly
A regulator can fail for reasons beyond a tripped safety mechanism. These are mechanical devices with moving parts, and they wear out over time. The typical lifespan of a grill regulator is five to ten years, depending on climate and how often you grill.
If your regulator is older than that, it may simply be due for replacement.
Signs your regulator is failing:
- Visible rust or corrosion on the housing
- Cracks or bulges in the rubber hose
- A regulator that feels loose or wobbly when connected
- Flame that's weak but consistent across all burners, even after a full reset
- A faint rotten egg smell near the regulator connection, which indicates the odorant in propane is escaping
Spiders and insects are a real problem. The vent opening on a regulator is small, dark, and sheltered, which makes it an ideal nesting spot for spiders, mud daubers, and other small insects. A single web or mud nest can restrict the vent and cause the regulator to malfunction.

Image source: Bing (Web (fair-use with source credit))
How to inspect and clean:
- Disconnect the tank and lay the hose out straight.
- Examine the entire hose length for cracks, kinks, or brittle spots. Pay special attention to areas near the metal fittings.
- Look inside the regulator vent, the small opening on the side of the unit. Use a flashlight to check for webs or debris.
- If you find debris, carefully remove it with a pipe cleaner or compressed air. Never poke anything sharp into the vent, which can damage the internal diaphragm.
- Check the rubber gasket inside the tank connection nut. If it's cracked, missing, or deformed, replace it. These gaskets cost about two dollars and are available at any hardware store.
If the hose is damaged, don't try to patch it. Replace the entire hose assembly. Grill hoses are inexpensive, typically running 15 to 30 dollars, and they're designed to be user-replaceable.
A patched or taped hose is a serious safety hazard that can fail catastrophically at any moment.
If your regulator is frozen or frosted over, that's a different issue. A frosted regulator usually indicates moisture in the propane line. This happens more often with refilled tanks from stations that don't purge their tanks properly.
The fix is simple: disconnect everything, let it thaw completely, and reconnect. If the frosting recurs, have your tank refilled at a different station or exchange it.
After cleaning or replacing the regulator and hose, reconnect everything and perform another leak test before lighting the grill. This confirms your repairs sealed correctly and prevents a dangerous situation from developing later.
Step 4: Check the Burner Tubes and Venturi (For Single-Burner Issues)
If all burners except one are roaring, the fuel supply is fine. The problem lives in that specific burner's path, and it's almost always a blockage or a failing component.
The burner tube is the long metal tube with holes along its length. Food drippings, grease, and rust can clog these ports over time. When enough ports are blocked, the remaining ones can't deliver enough gas to produce a full flame.
The venturi tube is the narrower throat that mixes air with gas before it reaches the burner. This is where spiders love to build nests. A single web can choke off the gas flow completely.
The control valve is the brass assembly connected to your knob. If it's worn out or stuck partially closed, no amount of cleaning will fix the flame.
How to diagnose and fix:
- Turn off the gas and disconnect the tank.
- Remove the cooking grates and heat shields to expose the burners. Each grill is different, but most burners are held in place by a few screws or clips.
- Unscrew the affected burner from the grill body.
- Inspect the burner ports. If they're clogged with grease or rust, clean each one with a pipe cleaner or a stiff wire. A paper clip works in a pinch.
- Check the venturi opening for spider webs or insect nests. Use a bottle brush or compressed air to clear it.
- After cleaning, hold the burner up to the light. You should be able to see through every port. If not, keep cleaning until you can.
- Reassemble everything, reconnect the tank, and test.
If cleaning doesn't restore the flame, the control valve is the likely culprit. Replacing a control valve is a straightforward job that requires removing the valve from the manifold and installing the replacement. Replacement valves typically run 20 to 40 dollars for most grill brands.
Consult your grill's service manual for the exact part number and installation procedure.
A note about burner replacement: If your burner tubes are rusted through, don't try to patch or recondition them. Rusted burners can develop holes that cause uneven heating and dangerous flare-ups. Replacement burners are available from the manufacturer or aftermarket parts suppliers and cost roughly 25 to 60 dollars per burner depending on the brand and model.
What If Only One Burner Has Low Flame?
This is usually a localized blockage, but it can also indicate a manifold issue. The manifold is the metal tube that distributes gas from the regulator to each control valve. If the manifold is rusted internally or has debris lodged inside, it can restrict flow to a single burner while leaving others unaffected.
Start with the obvious: Swap the affected burner with the burner from an adjacent position. If the problem follows the burner, the burner itself is clogged or damaged. If the problem stays in the original position, the issue is in the valve or manifold.
Air shutter adjustment: Each burner has an air shutter, a small metal ring near the venturi that controls how much oxygen mixes with the gas. If the shutter is set too far closed, the flame will appear yellow, weak, and lazy. If it's set too far open, the flame may lift off the burner ports entirely and make a roaring noise.
Here's how to adjust it:
- Loosen the screw on the air shutter slightly.
- Light the burner and observe the flame.
- Slowly rotate the shutter until the flame turns a crisp blue with just a hint of yellow at the tips.
- Tighten the screw and test again.
A healthy gas grill flame should be mostly blue with occasional yellow tips. Pure yellow or orange flames indicate incomplete combustion, which produces more carbon monoxide and less heat. Adjusting the air shutter fixes this in under a minute.
Natural Gas Grills: Special Troubleshooting Considerations
Natural gas grills don't have tanks, so the troubleshooting process is slightly different. Low flame on a natural gas system usually points to supply issues rather than component failures.
Check the house shutoff valve. This is a lever or knob on the gas line near where it enters your grill or the side of your house. It should be fully open, parallel to the pipe. A partially closed valve restricts flow and produces exactly the weak flame you're experiencing.
Check the gas line size. Natural gas grills require a minimum supply line diameter, typically 1/2 inch for runs under 50 feet, or 3/4 inch for longer distances. If your grill was added after your home's original construction, the existing line might be undersized. A licensed plumber can measure your supply line and confirm it meets the grill manufacturer's requirements.
Regulator differences. Natural gas regulators are typically mounted to the grill frame rather than at the tank. They're set to a different pressure range, about 7 inches of water column for residential natural gas versus 11 inches for propane. If your natural gas regulator fails, it usually needs replacement by a professional.
Call a professional if: You suspect the issue is in your home's gas supply. Work on permanent gas lines requires a licensed plumber or gas fitter in most jurisdictions. Trying to modify a gas line yourself is dangerous, illegal in many areas, and can void your home insurance.
Environmental Factors That Affect Flame Strength
Sometimes the grill is fine and the flame is still weak. The environment around your grill can have a surprising impact on flame performance.
Cold weather. Propane stops vaporizing efficiently below about -44°F, but performance starts to degrade well before that. In freezing temperatures, the tank pressure drops, and you'll notice a weaker flame. If your tank is frosting over, the propane can't vaporize fast enough.
A tank heater or simply shielding the tank from wind usually restores normal flow.
Hot weather and direct sun. This is the opposite problem. High temperatures increase pressure inside the tank, which can trip the regulator's safety mechanism. If your grill sits in direct afternoon sun, move the tank to a shaded spot or grill earlier in the day.
High altitude. Gas grills perform differently above roughly 5,000 feet. The lower air density means less oxygen reaches the burner, which can produce a weaker, more yellow flame. You can compensate by opening the air shutter slightly, but don't expect full sea-level performance at altitude.
Wind and drafts. Strong gusts can push flames away from the burner ports and make them look small or uneven. If the flame returns to normal when the wind dies down, weather is the culprit, not the grill. Position your grill in a sheltered spot if this is a recurring problem.
Seasonal factors. A grill that sits unused all winter gathers moisture, dust, and debris. The first cook of spring frequently produces weak flames until the system equalizes. Running the grill unattended on high for ten minutes after the first lighting usually burns off any residual debris and moisture.
When to Call a Professional
Most low flame issues are DIY fixes, but there are situations where you should stop troubleshooting and call a qualified technician.
Call a professional if:
- You smell gas but can't locate the source with the soap-and-water test
- The regulator or hose show visible damage and you're unsure about replacement
- You've completed all the troubleshooting steps and the flame is still weak
- Your natural gas grill needs work on the permanent house line
- The grill is under warranty, and you want to avoid voiding coverage
Red flags that require immediate shutdown:
- A strong gas odor that persists after turning off the tank
- Hissing sounds near any connection or fitting
- Visible flames coming from components other than the burners, such as the hose or regulator
- A regulator that's been in a fire or shows signs of melting
A professional grill service typically costs 75 to 150 dollars for a diagnostic visit. If your grill is still under warranty, contact the manufacturer first. Most warranty claims cover regulators, valves, and burner tubes if the failure isn't caused by neglect or physical damage.
Preventative Maintenance: Stop Low Flame Before It Starts
A clean, well-maintained grill rarely develops low flame issues in the first place. Building a simple maintenance routine into your grilling season takes less than an hour per month and eliminates most of the problems we've covered.
After each use:
- Scrape the grates while they're still warm, but use a grill brush to remove food residue.
- Check the drip tray and empty it when it's about halfway full.
Monthly:
- Inspect the burner tubes for rust or blockages.
- Check the hose for cracks, kinks, or brittleness.
- Perform the soap-and-water leak test.
At the start of each season:
- Remove and clean each burner tube with a wire brush.
- Clean the venturi tubes and check for spider nests.
- Test the regulator with a full reset.
- Check and replace the air shutter settings if needed.
At the end of the season:
- Disconnect the propane tank and store it upright, outdoors, away from heat sources.
- Cover the grill with a breathable cover, not a plastic tarp, which traps moisture.
- If storing the grill indoors, disconnect the tank and leave it outside. Never store propane tanks inside the house or garage.
The Consumer Product Safety Commission (CPSC) also recommends checking the tube that delivers gas to the burners for any blockage from insects or grease at the start of each grilling season. This simple inspection prevents most seasonal flame problems.
Frequently Asked Questions
Why does my grill flame drop after 10 minutes?
This is usually a frozen or failing regulator. As the propane level drops during use, the pressure decreases, and a partially blocked vent can't compensate. Try resetting the regulator using the steps in this guide.
If the problem recurs, inspect the regulator vent for spider webs and clean it out.
Can I adjust the regulator to get more flame?
No. Most grill regulators are factory-set and non-adjustable. Attempting to modify a regulator changes the safety characteristics of the system and can produce dangerously high flames or gas leaks.
If your regulator isn't delivering proper pressure, replace it with the correct part for your grill model.
Is a yellow flame dangerous?
A yellow or orange flame indicates incomplete combustion, which produces more carbon monoxide and less heat. It's a sign that the air-to-fuel ratio is wrong, usually from a dirty air shutter or clogged burner ports. While it's not an immediate fire hazard outdoors, it should be fixed for safety and cooking performance.
Adjust the air shutter or clean the burner ports.
How do I know if my regulator is bad?
If you've completed a full reset, checked the tank, and cleaned the vent but still have weak flames on all burners, the regulator is likely failing. Physical signs include visible cracking, severe corrosion, or a loose connection. Regulators typically last five to ten years.
If yours is older than that, replace it proactively.
Why is my grill flame weak after a tank exchange?
Exchange tanks are often filled to different levels depending on the supplier. You may have received a tank that was only 75 percent full. Also, fresh tanks are colder after filling, which affects vaporization for the first few minutes.
If the flame doesn't improve after ten minutes, reset the regulator and check the tank weight.
Can I use a larger regulator to get faster heating?
Using a non-standard regulator is not recommended. Grill manufacturers design their systems around specific pressure ratings. Installing a higher-pressure regulator can damage your burners and valves, create dangerous flare-ups, and void your warranty.
Always use the exact regulator specified in your grill's service manual.