Many DIYers face a dilemma: spending hours sanding versus a quicker staining process. You might be wondering, "Can I just stain wood without sanding?" The truth is, while skipping sanding can save significant time and effort, it often comes with trade-offs that might not be worth it for your project's longevity and appearance. Success largely hinges on the wood's current condition and the type of stain you plan to use.
In our research, we've found that many manufacturers and wood finishing experts advise against skipping sanding, especially for projects where a flawless, long-lasting finish is crucial. For instance, the United States Environmental Protection Agency (EPA) provides guidelines for safe handling of wood finishes that indirectly emphasize proper surface preparation for optimal adherence and reduced hazardous emissions. Skipping crucial steps like sanding can lead to premature failure of the finish.
The Short Answer: When Skipping Sanding Might Work
In a nutshell, the answer is: it depends. You can often stain wood without sanding if the wood is unfinished, has a very smooth factory surface, or if you're using a specific type of stain designed for minimal prep. Think of a brand-new, raw piece of pine from a lumberyard. If it's free of mill marks, dirt, or wax, you might get away with just cleaning it and applying a stain.
However, this approach is rarely recommended for achieving a professional, durable finish. Skipping sanding is usually a shortcut that could lead to a less-than-ideal result. The key is understanding why sanding is typically so important and knowing when those reasons can be safely bypassed.
Why Sanding Wood Before Staining is Usually Key
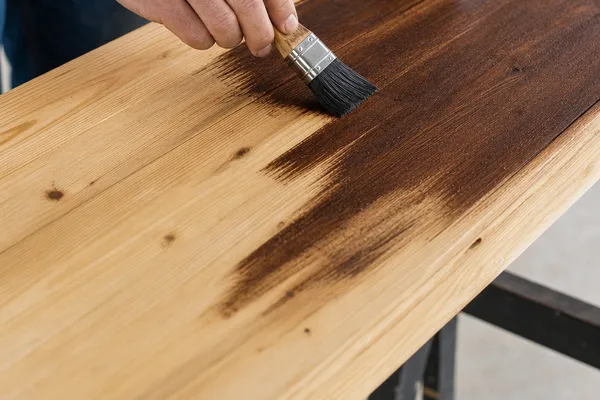
Sanding isn't just about making wood feel smooth; it's a critical step for proper stain adhesion and an even color. It essentially opens up the wood's pores, allowing the stain to penetrate uniformly. Without this preparation, you're essentially asking the stain to cling to a surface that might be too dense or too slick.
Understanding Wood Porosity and Stain Penetration
Wood porosity refers to how absorbent the wood is. Different wood species have varying pore sizes. When you sand wood, you remove any existing sealants or dense surface layers and create a consistent surface for the stain to soak into. This even absorption is what gives you that rich, consistent color you're after.
How Existing Finishes Affect Staining Without Sanding
If the wood already has a finish, like varnish, lacquer, or paint, you absolutely need to remove it before staining. Those existing finishes act as a barrier, preventing the new stain from reaching the wood. Trying to stain over a non-porous finish will almost always result in the stain washing off or looking patchy.
When NOT to Skip Sanding: Red Flags for Your Project
There are several situations where skipping sanding is a recipe for disaster. If any of these apply to your wood, you're going to want to reach for sandpaper. Pushing your luck here can lead to a lot of wasted time and materials down the line.
- Previously Finished Wood: This is the big one. Varnish, polyurethane, paint, or even an old wax finish will prevent stain from penetrating. You must strip these off first, which often involves sanding.
- Hardwood Species: Dense hardwoods like oak, maple, or cherry are less porous than softwoods like pine. They require sanding to create a surface they can absorb stain into.
- Wood with Imperfections: Saw marks, dents, scratches, or rough spots will be highlighted, not hidden, by stain. Sanding smooths these out.
- Projects Requiring Durability: If the piece will see heavy use or needs to withstand the elements, proper surface prep, including sanding, is essential for the finish to last.
Alternative Wood Surface Preparations (If You're in a Rush)
If you're truly pressed for time and can't do a full sanding job, there are a couple of things you can try, but with caution. These methods are best suited for specific scenarios and often won't yield the same professional results as full sanding.
Light Scuff Sanding: A Quicker Prep Option
Sometimes, a light scuff sanding is enough. This involves using a fine-grit sandpaper, generally 180-grit or higher, just to gently rough up the surface. It helps remove minor imperfections and creates a bit more tooth for the stain to grab onto, but it won't remove old finishes or deep scratches.
Cleaning and Degreasing for Better Adhesion
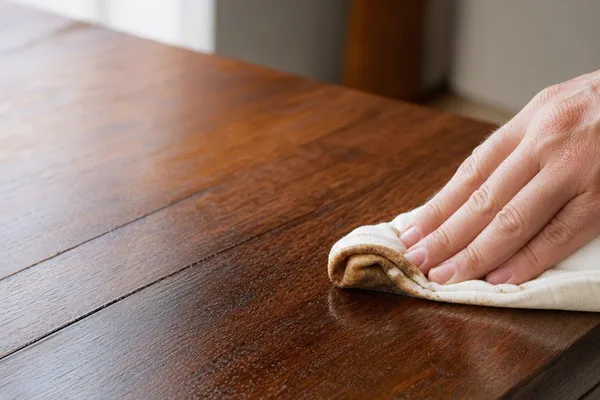
For brand-new, unfinished wood that's already quite smooth, a thorough cleaning can sometimes be sufficient. Use a tack cloth to remove all dust after wiping down the wood with a solvent like mineral spirits (for oil-based stains) or a damp cloth (for water-based stains). This step removes any surface contaminants that could interfere with stain absorption.
Choosing the Right Stain for No-Sand Surfaces
Some types of stains are formulated to work better on prepped surfaces that haven't been sanded. These are often your best bet if you're trying to skip the sanding step. However, "better" is relative; they still perform best with some level of surface prep.
Oil-Based vs. Water-Based Stains: What’s Better?
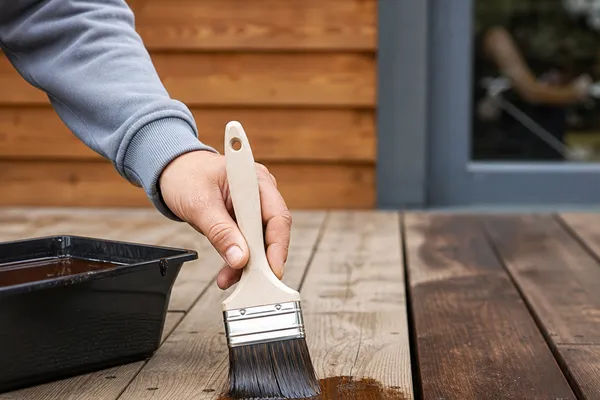
Oil-based stains tend to penetrate wood more deeply, which is why they often require sanding for even absorption, especially on softer woods that can blotch. Water-based stains tend to sit more on the surface and can be more forgiving on less-than-perfectly prepped surfaces, but they can also raise the wood grain if applied without care.
Gel Stains: Your Go-To for Tricky Surfaces?
Gel stains are a popular choice for minimizing sanding. They have a thicker, more jelly-like consistency that adheres well to the surface rather than soaking in deeply. This makes them excellent for covering existing finishes (though stripping is still ideal) and for use on blotch-prone woods like pine or maple. They essentially act more like a stain-and-finish coat in one, providing color and some protection.
Common Problems When You Stain Wood Without Sanding
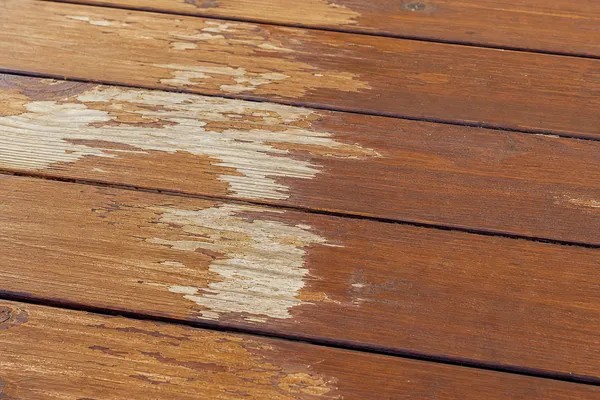
Skipping sanding often leads to blotching, which is when the stain soaks into the wood unevenly, creating dark spots and streaks. This happens because some areas of the wood are more porous than others. On unfinished wood, especially softer species like pine or poplar, these variations naturally occur.
Finishes that are already on the wood can also cause unevenness. If they aren't fully removed, stain might adhere to some areas but not others, resulting in a patchy, unprofessional appearance. It’s a common pitfall for those looking to save time, ultimately costing more in correction.
Dealing with Blotching and Uneven Color
If you've stained without sanding and notice blotching, your options are limited. Usually, the only way to fix it is to remove the stain completely, which might require sanding anyway. Stripping the stain can be a messy and time-consuming process.
Sometimes, a second coat of a darker stain or a solid stain can help mask minor blotchiness. However, this often obscures the natural wood grain, which might be undesirable. For a truly uniform color, starting over with proper sanding is often the best path.
Why Adhesion Might Fail Down the Road
Even if your stain looks okay initially after skipping sanding, the long-term adhesion can be a problem. Without a properly prepared surface, the stain may not bond deeply with the wood fibers. This can lead to peeling, flaking, or wear issues, especially in high-traffic areas or on pieces exposed to moisture.
Manufacturer specifications for stains typically assume a sanded surface for optimal performance and durability. For example, many oil-based stains require a surface that allows them to penetrate at least 0.005 inches to achieve good adhesion, a depth often only possible with proper sanding. This initial bond is critical for the finish to last.
Best-Case Scenarios for Staining Without Sanding
While generally discouraged, there are a few niche situations where skipping sanding might be an acceptable gamble. These usually involve new, unfinished wood where the surface is already very smooth and uniform, or when the primary goal is quick color application rather than a long-lasting, durable finish.
These scenarios demand careful selection of your stain and managing expectations about the final outcome. It’s about finding the least risky path when you absolutely must cut corners.
Quick Furniture Touch-Ups
If you have a small, minor scratch or worn spot on an already stained piece of furniture and you're just trying to blend it in quickly, you might get away with a very light touch-up. Using a stain pen or a rag dipped in a compatible stain to dab the affected area can sometimes work.
However, even here, ensuring the area is clean and free of wax or old finish is vital. A true match is difficult, and the repair may be visible under close inspection.
Certain Engineered Wood Products
Some engineered wood products, like certain types of composite trim or MDF (Medium-Density Fiberboard) paneling with a pre-primed surface, are designed for direct finishing. These surfaces are uniform and may accept stain or paint well without extensive sanding.
Always check the manufacturer's recommendations for these products. They will specify whether sanding is required or if a simple cleaning is sufficient. Often, they are designed for painting, but some can accept gel stains or opaque stains with minimal prep.
When is Sanding Absolutely Necessary?
There are clear cut cases where sanding isn't just recommended, it's non-negotiable. These situations demand a properly prepared surface to ensure the success and longevity of your project, and trying to cut this step will almost certainly lead to disappointment.
If you're aiming for a professional-looking result that will stand the test of time, investing in proper sanding is crucial. Think of it as the foundation for a beautiful finish.
Restoring Damaged or Previously Finished Wood
Any wood that has been previously finished, painted, varnished, or sealed needs to be stripped and sanded. This removes the old coating entirely. Additionally, wood with significant damage, like deep scratches, gouges, or water stains, requires sanding to smooth the surface and remove the compromised wood fibers.
The goal here is to get back to bare wood. Without this, your new stain will either not adhere, or it will highlight the existing imperfections.
Archiving for Longevity and Durability
For projects that you want to last for decades, such as heirloom furniture, structural elements, or outdoor pieces exposed to the elements, proper sanding is paramount. A well-sanded surface ensures the stain and subsequent topcoats adhere as strongly as possible, providing maximum protection against wear, UV rays, and moisture.
This is where investing the time in sanding pays off significantly. It’s the difference between a finish that lasts a few years and one that endures for generations.
Choosing the Right Stain for No-Sand Surfaces

Some types of stains are formulated to work better on prepped surfaces that haven't been sanded. These are often your best bet if you're trying to skip the sanding step. However, "better" is relative; they still perform best with some level of surface prep.
Here's a look at stain types that might offer more forgiveness when prep time is limited.
Oil-Based vs. Water-Based Stains: What’s Better?
Oil-based stains tend to penetrate wood more deeply, which is why they often require sanding for even absorption, especially on softer woods that can blotch. Water-based stains tend to sit more on the surface and can be more forgiving on less-than-perfectly prepped surfaces, but they can also raise the wood grain if applied without care.
Gel Stains: Your Go-To for Tricky Surfaces?
Gel stains are a popular choice for minimizing sanding. They have a thicker, more jelly-like consistency that adheres well to the surface rather than soaking in deeply. This makes them excellent for covering existing finishes (though stripping is still ideal) and for use on blotch-prone woods like pine or maple. They essentially act more like a stain-and-finish coat in one, providing color and some protection.
For example, Minwax Gel Stain builds color in fewer coats than many traditional oil-based stains, offering a good option for quick projects.
Common Problems When You Stain Wood Without Sanding
Skipping sanding often leads to blotching, which is when the stain soaks into the wood unevenly, creating dark spots and streaks. This happens because some areas of the wood are more porous than others. On unfinished wood, especially softer species like pine or poplar, these variations naturally occur.
Finishes that are already on the wood can also cause unevenness. If they aren't fully removed, stain might adhere to some areas but not others, resulting in a patchy, unprofessional appearance. It’s a common pitfall for those looking to save time, ultimately costing more in correction.
Dealing with Blotching and Uneven Color
If you've stained without sanding and notice blotching, your options are limited. Usually, the only way to fix it is to remove the stain completely, which might require sanding anyway. Stripping the stain can be a messy and time-consuming process.
Sometimes, a second coat of a darker stain or a solid stain can help mask minor blotchiness. However, this often obscures the natural wood grain, which might be undesirable. For a truly uniform color, starting over with proper sanding is often the best path.
Why Adhesion Might Fail Down the Road
Even if your stain looks okay initially after skipping sanding, the long-term adhesion can be a problem. Without a properly prepared surface, the stain may not bond deeply with the wood fibers. This can lead to peeling, flaking, or wear issues, especially in high-traffic areas or on pieces exposed to moisture.
Manufacturer specifications for stains typically assume a sanded surface for optimal performance and durability. For example, many oil-based stains require a surface that allows them to penetrate at least 0.005 inches to achieve good adhesion, a depth often only possible with proper sanding. This initial bond is critical for the finish to last.
Best-Case Scenarios for Staining Without Sanding
While generally discouraged, there are a few niche situations where skipping sanding might be an acceptable gamble. These usually involve new, unfinished wood where the surface is already very smooth and uniform, or when the primary goal is quick color application rather than a long-lasting, durable finish.
These scenarios demand careful selection of your stain and managing expectations about the final outcome. It’s about finding the least risky path when you absolutely must cut corners.
Quick Furniture Touch-Ups
If you have a small, minor scratch or worn spot on an already stained piece of furniture and you're just trying to blend it in quickly, you might get away with a very light touch-up. Using a stain pen or a rag dipped in a compatible stain to dab the affected area can sometimes work.
However, even here, ensuring the area is clean and free of wax or old finish is vital. A true match is difficult, and the repair may be visible under close inspection.
Certain Engineered Wood Products
Some engineered wood products, like certain types of composite trim or MDF (Medium-Density Fiberboard) paneling with a pre-primed surface, are designed for direct finishing. These surfaces are uniform and may accept stain or paint well without extensive sanding.
Always check the manufacturer's recommendations for these products. They will specify whether sanding is required or if a simple cleaning is sufficient. Often, they are designed for painting, but some can accept gel stains or opaque stains with minimal prep.