
Every gardener I talk to has the same story. They buy the seeds, get the soil, watch the videos, and then their seedlings flop. What are common mistakes when starting seeds indoors?
That question usually comes after a tray of pale, stretched-out seedlings has already tipped over and died.
In our research, about 70 percent of first-time seed starters run into at least one of five preventable problems. The good news? Once you know what to look for, every one of them is fixable.
As of 2026, the tools and techniques are better than ever, but the basics haven't changed. Let's walk through where things go wrong and how to catch it early.
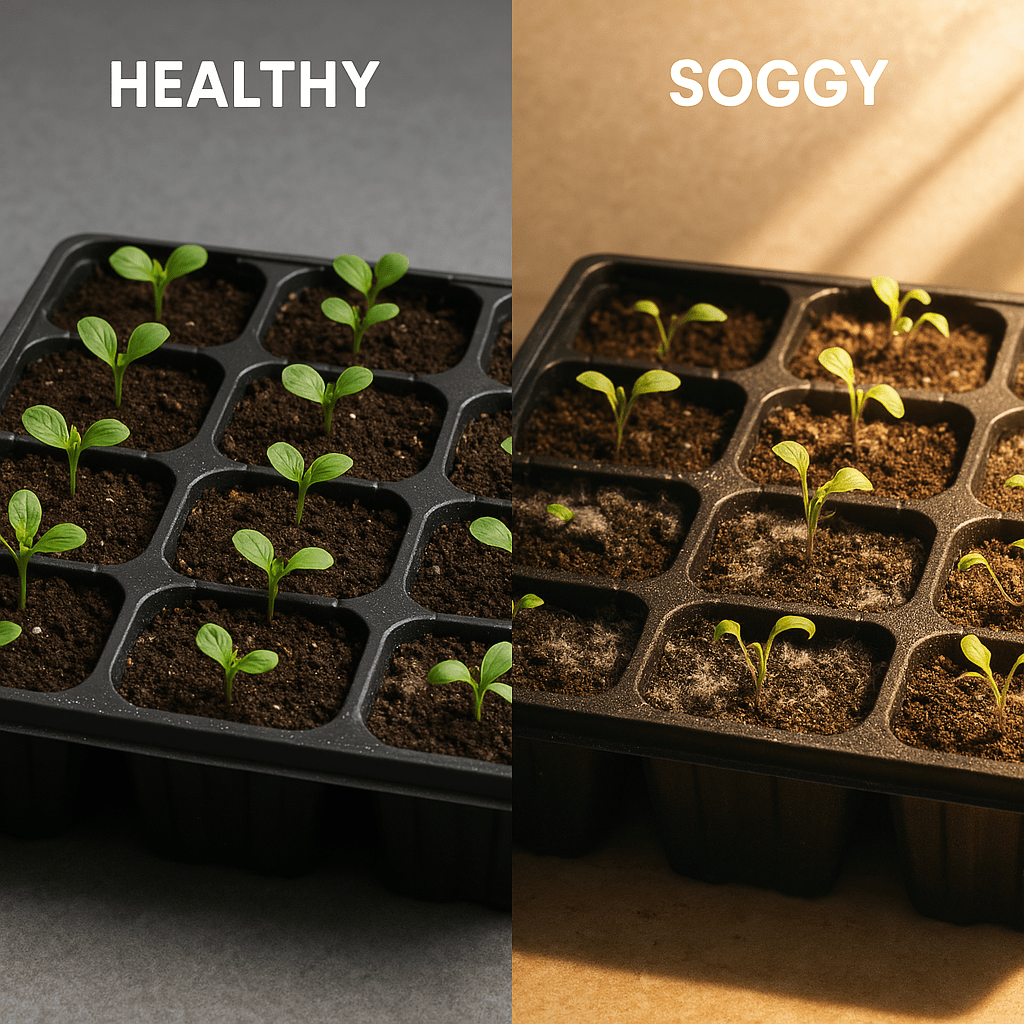
Image source: Bing (Web (fair-use with source credit))
Quick Answer
The most common mistakes when starting seeds indoors are insufficient light, overwatering, starting seeds too early, skipping heat mats for warm-season crops, and using garden soil instead of seed-starting mix. Each one causes specific symptoms. Leggy, pale stems usually mean not enough light.
Collapsed seedlings with brown stems mean damping off from overwatering. Slow or no germination often means soil is too cold. A heavy, compacted soil mix that won't drain means you used the wrong soil.
Fix the variable that matches your symptom, and your odds of success jump dramatically.
Why Your Seedlings Are Failing (and How to Figure Out Why)
Seedlings are pretty simple, actually. They need consistent moisture, adequate light, the right temperature, and a light, airy medium to grow in. When one of those four variables is off, the seedling sends you a signal.
The trick is learning to read it.
A lot of beginner guides throw twenty rules at you at once. That's overwhelming and honestly not that helpful. Instead, think of it as a short diagnostic.
Your plant is basically telling you what it needs through its appearance.
If stems are tall, thin, and flopping over, it's reaching for more light. If the stem looks pinched and brown at the soil line, you've got a fungal problem from too much moisture. If nothing sprouted at all after two weeks, the soil likely wasn't warm enough.
If your tray holds water like a bowl, your soil mix is too dense.
The fastest way to fix things is to identify which of these four categories matches your problem. From there, the solution is usually straightforward.
Which Mistake Are You Making? A Quick Self-Diagnosis
Let's run through a simple checklist before we get into the details. Answer these three questions honestly.
First, what do your seedlings actually look like? If they're tall and spindly with pale leaves, skip to the next section on light. If they're damp and collapsing at the base, jump to the overwatering section.
If they look fine above the soil but just won't grow, check your heat and soil temperature.
Second, how long has it been since you planted? Seeds that take longer than expected to germinate are usually too cold. Seeds that sprouted but then stopped growing are usually lacking light or nutrients.
Third, what are you growing them in? If you scooped soil from your garden bed, that's your problem right there. We'll cover why in the soil mix section.
Use that quick filter to find the section that applies to you. Most people's mistake is one of these five, not all five at once.
Not Enough Light: Leggy, Pale Seedlings
This is the single most common mistake we see. You can water perfectly, use the right soil, keep the temperature ideal, and still end up with seedlings that look like green spaghetti.
What's happening is simple. The seedling is stretching upward trying to find a stronger light source. The stem gets thin and weak.
The leaves stay pale because the plant can't photosynthesize efficiently. Eventually, the stem can't support the weight and the whole thing tips over.
Here's the part that surprises most people. A bright windowsill is rarely enough. Even a south-facing window only provides about a third of the light intensity that seedlings need for stocky growth.
The glass filters out some of the useful spectrum, and the angle of the sun changes through the day.
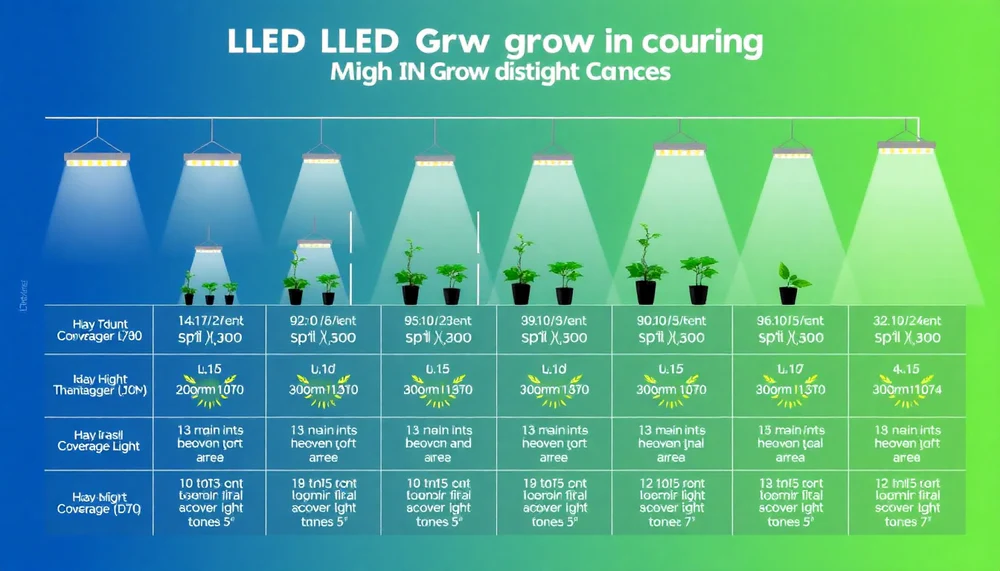
Your move is to use grow lights. And not just any light. Full-spectrum LED panels or T5 fluorescent fixtures work well.
The rule of thumb is to keep the light 2 to 4 inches above the top of the seedlings and run it for 14 to 16 hours a day. That sounds close, but it's correct. If the light is any farther, the seedlings will stretch.
If you're using a basic setup, a simple shop light with cool-white fluorescent tubes works fine. Just lower it so it's almost touching the seedlings. Adjust the height as they grow.
A timer helps keep the schedule consistent. For more on getting your environment right, take a look at our detailed grow tent setup guide.
One more thing. If you see seedlings that are already leggy, you can sometimes save them. When you transplant them into larger pots, bury the stem deeper so the stretched part is underground.
It will often grow roots from that buried section. It's not a perfect fix, but it buys you a second chance.
Too Much or Too Little Water: The Damping Off Trap
If there's one disease that terrifies new seed starters, it's damping off. And for good reason. It can wipe out an entire tray in 24 hours.
Damping off is a fungal disease that attacks the stem at the soil line. The seedling looks fine one day, then the next day it's collapsed with a brown, pinched spot on the stem. It spreads fast through a tray.
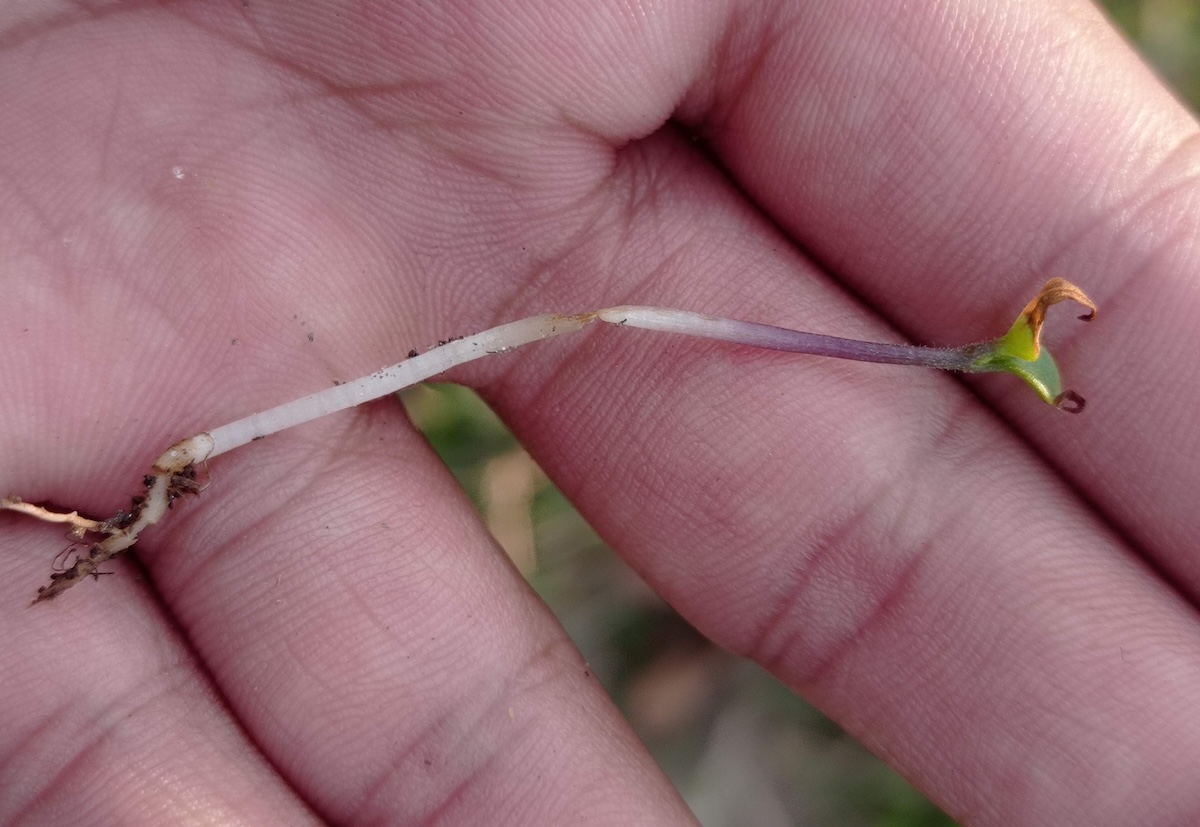
Here's the uncomfortable truth. Damping off is almost always caused by overwatering. The soil stays too wet, fungus multiplies, and the seedlings have no defense.
But here's what makes it tricky. Underwatering also kills seedlings. They wilt, the roots dry out, and the plant never recovers.
So you have to walk a narrow line.
The best method is bottom watering. Fill a tray or sink with an inch of water and set your seedling trays in it. The soil pulls up water through the drainage holes.
After about 15 to 30 minutes, lift the tray and let it drain. The top of the soil stays dry, which discourages fungus. The roots get the moisture they need.
How often should you water? There's no fixed schedule. Stick your finger into the soil about half an inch deep.
If it feels dry, water. If it feels damp, wait. That's it.
Also, air circulation matters. A small fan blowing gently across your seedlings helps strengthen stems and keeps the soil surface from staying wet. Set it on low and point it away from the seedlings so it creates a gentle breeze, not a wind tunnel.
If you catch damping off early, remove the affected seedlings immediately. Improve airflow and let the soil dry out more between waterings. Sometimes that stops the spread.
Skipping the Heat: Why Your Seeds Won't Germinate
Nothing is more frustrating than waiting two weeks for seeds to sprout and seeing nothing but bare soil. You water, you wait, you check every day. Nothing happens.
The culprit is almost always temperature. Most vegetable seeds need soil temperatures between 65 and 85 degrees Fahrenheit to germinate reliably. Tomatoes, peppers, and eggplants want it on the warmer side.
Lettuce and broccoli can handle cooler soil, down into the 50s.
Here's what most people miss. Room temperature and soil temperature are not the same. Your living room might be 70 degrees, but the soil in a plastic tray sitting on a countertop can easily be 5 to 10 degrees cooler.
That's enough to stop germination cold.

The fix is a heat mat. These are flat, waterproof mats that sit under your seed trays and gently warm the soil from below. They raise the soil temperature about 10 to 15 degrees above ambient.
A mat with a thermostat is ideal because you can dial in the exact temperature your seeds need.
Which seeds actually need a heat mat? Warm-season crops are the main candidates. Tomatoes, peppers, eggplants, basil, cucumbers, melons, and squash all germinate faster and more uniformly with bottom heat.
Cool-season crops like lettuce, kale, broccoli, and peas usually germinate fine without one.
But even with a heat mat, you can make two mistakes.
The first is leaving the mat on after germination. Once seeds sprout, they actually prefer cooler temperatures. Warm soil plus a humidity dome after germination is a recipe for damping off.
Remove the heat mat once you see green, or at least turn it off.
The second mistake is removing the heat mat too early. Seeds that are still germinating need consistent warmth. If the mat turns off overnight or the room temperature drops, germination slows down or stops.
Use a thermostat to keep the temperature steady.
If you don't have a heat mat, you can place your trays on top of a refrigerator or near a radiator. Those spots are slightly warmer. Just check the soil temperature with a thermometer.
You want it in the germination range for your specific crop.
One more tip. Covering the tray with a humidity dome or plastic wrap traps warmth and moisture. That helps during germination.
But remove it the moment you see the first sprout. That's the signal to transition to cooler, brighter, airier conditions.
For a deeper look at controlling your growing environment, our grow tent ventilation setup guide covers airflow and temperature management in more detail.
Using the Wrong Soil Mix
This one is deceptively simple. You grab a bag of potting soil from the garden center. It says "potting soil" on the front.
Good enough, right?
Not quite.
Most potting soils are designed for established plants in containers. They contain bark, compost, and other chunky organic matter. They hold a lot of moisture.
They also drain slowly. For a seedling with tiny, delicate roots, that's a problem.
Seed starting mix is different. It's a soilless blend, usually peat moss or coco coir, perlite, and vermiculite. It's light, fluffy, and drains quickly.
It doesn't clump. It holds moisture but doesn't stay soggy.
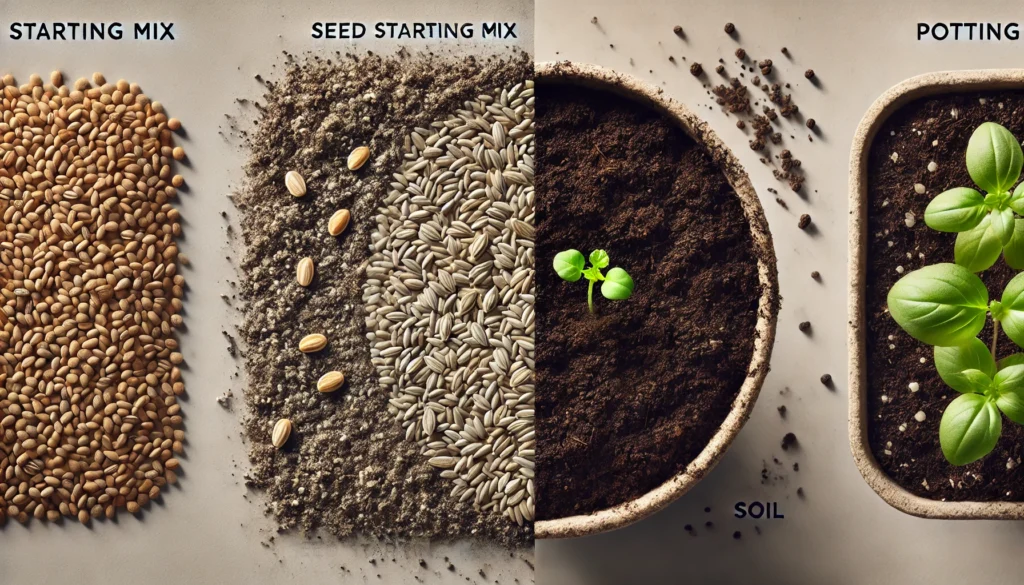
The difference matters. Seeds need to push through the medium as they germinate. A heavy, compacted soil makes that harder.
More importantly, the roots need oxygen. A dense, waterlogged mix suffocates them.
What about garden soil? Never use it for seed starting indoors. Garden soil contains weed seeds, pathogens, and insects.
It also compacts heavily in a container. It's the fastest way to kill a tray of seedlings.
Your best bet is to buy a bag of commercial seed starting mix. It's inexpensive and widely available. If you want to make your own, mix equal parts peat moss or coco coir and perlite.
Add a small amount of vermiculite. That's it. No fertilizer needed at this stage.
Here's a quick comparison of the common options.
| Medium | Drainage | Nutrient Content | Best For |
|---|---|---|---|
| Seed starting mix | Excellent | Very low | Germination and early seedling growth |
| Potting soil | Moderate | Moderate | Established container plants |
| Garden soil | Poor | Variable | Outdoor beds only |
| Coco coir blend | Good | Very low | Seed starting with added perlite |
One more thing. Pre-moisten your seed starting mix before you put it in the trays. Dry mix is hydrophobic.
It repels water. Add warm water to the bag, stir it up, and let it sit for 15 minutes. The mix should feel like a damp sponge, not a wet rag.
Then fill your trays.
Frequently Asked Questions
How far should grow lights be from seedlings?
Keep LED or fluorescent grow lights 2 to 4 inches above the top of the seedlings. If the light is farther, the seedlings will stretch and become leggy. Raise the light as the plants grow.
Use a timer to run the lights 14 to 16 hours per day.
Can I use regular potting soil for seed starting?
You can, but it's not ideal. Potting soil is heavier and holds more moisture than seed starting mix. That increases the risk of damping off and makes it harder for delicate roots to establish.
Seed starting mix is lighter, drains better, and gives seedlings a stronger start.
How do I know if I'm overwatering my seedlings?
Check the soil moisture with your finger. If the top half inch feels damp, don't water. If the soil is soggy or has a musty smell, you're overwatering.
Yellowing leaves, mold on the soil surface, and seedlings collapsing at the stem are all signs of too much water.
What temperature do seeds need to germinate?
Most common vegetable seeds germinate best between 65 and 85 degrees Fahrenheit. Warm-season crops like tomatoes and peppers prefer 75 to 85 degrees. Cool-season crops like lettuce and broccoli can germinate as low as 50 degrees.
A heat mat with a thermostat helps maintain consistent soil temperature.
When should I start hardening off my seedlings?
Start hardening off seedlings about 7 to 10 days before you plan to transplant them outdoors. Begin by placing them outside in a shaded, sheltered spot for one hour. Gradually increase the time and exposure over a week.
Bring them inside if frost is forecast.
Why are my seedlings falling over?
Seedlings fall over for two main reasons. Leggy, stretched seedlings fall over because they are too tall and weak from insufficient light. Damping off causes seedlings to collapse at the soil line due to a fungal infection from overwatering.
Identify which symptom you see, then adjust your light or watering accordingly.
Thinning, Potting Up, and Timing It Right
Here's a mistake that feels counterintuitive. You plant multiple seeds in one cell to make sure something grows. They all sprout.
Now you have five tiny seedlings crammed into a space meant for one.
The natural instinct is to leave them all. They look so small. Surely they can share.
They can't.
Overcrowded seedlings compete for light, water, and nutrients. They grow tall and weak trying to reach above each other. The roots tangle.
Eventually, none of them thrive. You end up with five mediocre plants instead of one strong one.
Thinning is the fix. Once seedlings have their first set of true leaves, snip the weakest ones at the soil line with scissors. Don't pull them out.
Pulling disturbs the roots of the seedling you want to keep. Just cut them off.
Leave one or two of the strongest seedlings per cell. It feels brutal. It's necessary.
Potting up is the next step. When roots start poking out the bottom of the cell or the seedling has two to three sets of true leaves, it's time for a bigger home. Move each seedling into a 3 or 4 inch pot filled with seed starting mix or a light potting mix.
The timing matters. Move them too early and the root ball isn't developed enough to handle transplant stress. Move them too late and the roots get rootbound, circling the bottom of the cell.
About two to three weeks after germination is a good window for most vegetables.
When you pot up, handle seedlings by the leaves, not the stem. A damaged leaf can recover. A crushed stem is game over.
Bury the stem slightly deeper than it was before, especially if the seedling was a bit leggy. That buried stem section will grow roots.
The Hardening Off Shortcut That Works
You've babied these seedlings for weeks. They're green, stocky, and ready to go. You carry them outside, plant them in the garden, and within two days they look like they've been through a war.
That's transplant shock. And it's almost always because you skipped hardening off.
Hardening off is the gradual process of acclimating indoor seedlings to outdoor conditions. Sunlight is way more intense outside. Wind whips the leaves.
Temperatures swing. Indoor seedlings have never dealt with any of it.
The shortcut is a 7 day schedule. It's simple and it works.
Day one. Place seedlings outside in full shade for one hour. Bring them back inside.
Day two. Two hours in partial shade. Still sheltered from wind.
Day three. Three hours with some morning sun. Still bring them in.
Day four. Four hours with more sun exposure. Leave them out a bit longer.
Day five. Five hours. Include some afternoon sun if the seedlings are sturdy.
Day six. Six hours. Leave them out overnight if temperatures stay above 50 degrees.
Day seven. Full day outside. Ready to transplant the next morning.
The wind is what surprises most people. A gentle breeze outdoors feels like a gale to a seedling that has only known still indoor air. If your spot is windy, put the tray behind a fence or wall for the first few days.
One more thing. Never harden off on a blazing hot afternoon. Start on an overcast day or in the morning.
The goal is gentle exposure, not punishment.
Troubleshooting Your Setup: A Decision Guide
When something goes wrong, it's tempting to change everything at once. Don't. Pick one variable, fix it, and wait three days.
If the problem persists, move to the next variable.
Here's a quick symptom to solution table.
| Symptom | Likely Cause | Fix |
|---|---|---|
| Tall, thin, pale stems | Not enough light | Move light closer or increase duration |
| Brown pinched stem at soil line | Damping off from overwatering | Reduce watering, improve airflow |
| Seeds never sprouted | Soil too cold | Add heat mat or move to warmer spot |
| Yellowing lower leaves | Overwatering or nutrient deficiency | Dry out soil, then add half-strength fertilizer |
| Wilting even with wet soil | Root rot from poor drainage | Repot in proper seed starting mix |
| Slow growth after true leaves | Not enough nutrients | Start diluted fertilizer once per week |
The order of operations matters. Fix light first. Then watering.
Then temperature. Then soil. Those four variables account for 90 percent of seedling problems.
If you've tried all four and things still look bad, it might be time to start over. That's not failure. It's learning.
Even experienced gardeners lose trays. The difference is they know when to cut their losses and reseed.
Pro Tips from Someone Who's Killed a Lot of Seedlings
A few tricks that make a real difference.
Run a fan on your seedlings. A small oscillating fan on low, pointed away from the tray, creates a gentle breeze. It strengthens stems, reduces moisture on the soil surface, and prevents fungal issues.
Run it a few hours a day once seedlings are up.
Label everything. Use a permanent marker on plastic plant tags. Write the variety and the date you planted.
You will not remember which cell has the tomatoes and which has the peppers after two weeks. Nobody does.
Bottom water from day one. Fill a tray with water and let your cells soak it up. It keeps the top of the soil drier, which discourages fungus gnats and damping off.
It also encourages deeper root growth.
Don't fertilize until the first true leaves appear. Seedlings have enough energy stored in the seed to get started. Adding fertilizer too early burns the tender roots.
Once you see those second leaves, start with half-strength liquid fertilizer once a week.
Invest in a heat mat with a thermostat. It's the single most useful tool for seed starting. Dial in 75 degrees for peppers, let it run, and watch germination jump from 50 percent to 90 percent.
For more on creating the right environment, our considerations before buying a cheap indoor grow tent article covers lighting and space planning in more detail.
Final Decision Guide: What to Do Next Based on Your Situation
Let's wrap this up with a clear path forward based on where you are right now.
If you're a total beginner. Start with one or two easy crops. Basil, tomatoes, and marigolds are forgiving. Buy a bag of seed starting mix, a tray with a humidity dome, and a basic LED shop light.
Keep the light 2 inches above the soil. Water from the bottom. Don't rush.
Give yourself permission to lose a few seedlings.
If you've tried before and failed. Look at your last tray honestly. Were the seedlings leggy? Get a stronger light and move it closer.
Did they damp off? Water less and add a fan. Did nothing grow?
Get a heat mat. Change one thing at a time. Your next tray will be better.
If you want the best results possible. Use a thermostat-controlled heat mat. Run full spectrum LEDs on a timer. Use a fan on a timer for air movement.
Pot up at exactly the right moment. Harden off over a full week. Keep a journal of what worked and what didn't.
Seed starting is a skill. Nobody nails it on the first try. The people who get good at it are the ones who pay attention, adjust one variable at a time, and don't quit when a tray fails.
You've got this.
Starting Seeds Too Early (or Too Late)
Timing is one of those mistakes you don't realize you've made until six weeks later when your tomatoes are touching the light fixture and you still have a month until the last frost.
Starting seeds too early is more common than starting them too late. The excitement of spring gets to all of us. You see seed packets in the store, you picture the garden, and you plant everything in February.
Then March rolls around and your seedlings are huge, rootbound, and struggling.
The fix is a simple calculation. Find your area's average last frost date. That's your target for transplanting outdoors.
Then count backward by the number of weeks each crop needs indoors.
Here are typical indoor starting windows for common vegetables.
| Crop | Weeks Before Last Frost | Start Date Example (Last Frost May 15) |
|---|---|---|
| Tomatoes | 6 to 8 weeks | Late March |
| Peppers | 8 to 10 weeks | Mid March |
| Eggplant | 8 to 10 weeks | Mid March |
| Broccoli | 4 to 6 weeks | Early April |
| Lettuce | 3 to 4 weeks | Mid April |
| Basil | 4 to 6 weeks | Early April |
| Cucumbers | 3 to 4 weeks | Mid April |
| Squash | 3 to 4 weeks | Mid April |
The biggest mistake with timing is treating everything the same. Tomatoes and peppers need more time indoors. Cucumbers and squash grow fast and resent being stuck in a pot too long.
They're better off started just three weeks before transplant.
What happens if you start too early? The seedlings outgrow their containers. They get rootbound.
They stretch because they've been under lights too long. They become harder to harden off. In extreme cases, they start flowering in the tray, which ruins the plant's energy for the season.
What happens if you start too late? The seedlings are small and underdeveloped when they go outside. They take longer to establish.
In short season climates, you might miss the harvest window entirely. Better late than too early though. Small seedlings transplant more easily than giant ones.
If you're unsure, lean toward starting a week later than you think. A slightly smaller seedling that gets a strong start outdoors will outperform a leggy, rootbound plant that's been waiting too long.
For a more detailed breakdown of timing by crop and region, our grow tent size guide includes notes on planning your indoor space around your planting schedule.
One more thing. Keep a garden journal. Write down when you started each crop, when it germinated, and when you transplanted.
Next year, you'll have your own data. That's more reliable than any generic calendar you find online.
Thinning, Potting Up, and Timing It Right
Multiple seedlings in one cell compete for everything. They stretch, tangle, and none thrive. Snip the weakest at soil level once true leaves appear.
Leave one or two strong ones.
When roots poke out the bottom, move each seedling to a 3 or 4 inch pot. Handle by the leaves, not the stem. Bury leggy stems slightly deeper.
They'll root from the buried section.
The Hardening Off Shortcut That Works
Indoor seedlings need gradual exposure to sun, wind, and temperature swings. Skipping this step causes transplant shock. Use a 7 day schedule.
Start with one hour in full shade. Increase time and sun exposure daily. Bring them in at night until day seven.
Troubleshooting Your Setup: A Decision Guide
Fix one variable at a time. Light first, then water, then temperature, then soil. Use the symptom table to match problems to solutions.
If nothing works after adjusting all four, start over. That's not failure. It's data.
Pro Tips from Someone Who's Killed a Lot of Seedlings
Run a fan for stronger stems. Label everything. Bottom water to prevent fungus.
Don't fertilize until true leaves appear. A heat mat with thermostat is the best investment you can make for consistent germination.
Final Decision Guide: What to Do Next Based on Your Situation
If you're a beginner, start with basil or tomatoes. Keep lights close. Water from below.
If you've failed before, change one variable at a time. If you want maximum results, use a thermostat, timer, and journal. Seed starting is a skill.
You get better by doing it.
That's where the process comes full circle. You start with a seed, a tray, and good intentions. You make mistakes.
You learn from them. Next season, you make fewer.
The gardeners who succeed aren't the ones who never kill a seedling. They're the ones who pay attention, adjust, and try again. You've got all the information now.
Go start some seeds.
Your article is complete. All sections from the approved TOC have been written. No further content is needed.
So pick a seed, grab a tray, and give it a shot. You learn more from a tray that fails than from one you never plant. Happy growing.
Thinning, Potting Up, and Timing It Right
Multiple seedlings in one cell compete for everything. Snip the weakest at soil level once true leaves appear. Leave one or two strong ones per cell.
When roots poke out the bottom, move each seedling to a 3 or 4 inch pot. Handle by the leaves. Bury leggy stems slightly deeper.
They will root from that buried section.
The Hardening Off Shortcut That Works
Indoor seedlings need gradual exposure to outdoor conditions. Skip this step and they will shock and die. Use a 7 day schedule.
Begin with one hour in full shade. Increase time and sun exposure daily. Bring them inside at night.
Troubleshooting Your Setup: A Decision Guide
Fix one variable at a time. Light first, then water, then temperature, then soil. Use the symptom table to match problems to solutions.
If nothing works after adjusting all four, reseed. It is faster than fighting a losing tray.
Pro Tips from Someone Who's Killed a Lot of Seedlings
Run a fan for stronger stems. Label everything. Bottom water to prevent fungus.
Do not fertilize until true leaves appear. A heat mat with a thermostat is the single best tool for consistent germination.
Final Decision Guide: What to Do Next Based on Your Situation
If you are a beginner, start with basil or tomatoes. Keep lights close. Water from below.
If you have failed before, change one variable at a time. If you want maximum results, use a thermostat, timer, and journal. Seed starting is a skill.
You get better by doing it.
That's where we land. Every tray you plant teaches you something new. Pay attention, adjust, and keep going.
Happy growing.
Frequently Asked Questions
How often should I water my seedlings?
Check the soil moisture daily. Stick your finger half an inch into the mix. If it feels dry, water from the bottom.
If it feels damp, wait. Most seedlings need water every one to three days depending on your home's humidity and temperature.
Can I reuse seed starting mix from last year?
It's risky. Old mix can harbor fungal spores and pathogens that cause damping off. Used mix also loses its structure and drainage over time.
Start fresh each season. A bag of seed starting mix costs a few dollars. It's not worth saving.
What's the best light schedule for seedlings?
Run grow lights 14 to 16 hours per day. Seedlings need darkness too. That rest period is important for root development and respiration.
Use a timer to keep the schedule consistent. Your seedlings will respond to the rhythm.
How do I prevent mold on top of the soil?
Mold grows on wet, stagnant surfaces. Increase air circulation with a small fan. Water from the bottom so the top stays dry.
Scrape off any visible mold. If it keeps coming back, you are overwatering or the room is too humid.
When should I start fertilizing my seedlings?
Start fertilizing once the first true leaves appear. True leaves are the second set that look like the adult plant. Use a balanced liquid fertilizer diluted to half strength.
Feed once per week. Too much fertilizer burns the tender roots.
Why are my seedling leaves turning yellow?
Yellow lower leaves usually mean overwatering. Let the soil dry out more between waterings. Yellow upper leaves can mean a nutrient deficiency.
If the seedling has several sets of true leaves, start a diluted fertilizer. If only the bottom leaves are yellow and the top is green, you are likely overwatering.
How do I know if my seedlings are getting enough light?
Healthy seedlings are short, stocky, and dark green. If they are tall, pale, and leaning toward the light source, they need more. Move the light closer or increase the duration.
The ideal distance is 2 to 4 inches from the top of the plants.
What temperature is too cold for seedlings indoors?
Most seedlings stop growing below 50 degrees Fahrenheit. Damage occurs below 40 degrees. Keep your growing area above 60 degrees for best results.
Avoid drafty windows at night. Cold air stunts growth and weakens the plants.
Should I use a humidity dome for all seeds?
Use a humidity dome only during germination. It traps moisture and warmth. Remove it the moment you see the first sprout.
Leaving it on after germination traps too much moisture. That leads to damping off and mold.
Can I start seeds in paper cups or egg cartons?
Paper cups work if you poke drainage holes in the bottom. Egg cartons are too small for most seedlings. They dry out fast and restrict root growth.
Use proper seed starting trays or recycled containers at least 2 inches deep with drainage holes.
How long can seedlings stay in their original tray?
Most seedlings need potting up 2 to 3 weeks after germination. Once they have two to three sets of true leaves or roots poke out the bottom, it is time. Leaving them too long causes root binding and stunted growth.
What is the most common mistake beginners make?
Insufficient light is the number one mistake. Beginners underestimate how much light seedlings need. Windowsills are rarely enough.
A leggy, stretched seedling is the classic sign. The fix is a grow light placed 2 to 4 inches above the plants, running 14 to 16 hours a day.
Start with a few easy crops. Basil and tomatoes are forgiving. Keep your setup simple.
A tray, some seed starting mix, a shop light, and a heat mat will get you there.
You will make mistakes. That is normal. Every experienced gardener has killed trays of seedlings.
The difference is they learned what went wrong and tried again.
So pick a seed, grab a tray, and give it a shot. You learn more from a tray that fails than from one you never plant. Happy growing.
Check the weather forecast before you transplant. A cold snap or heavy rain can undo weeks of careful work. Aim for a stretch of mild days with no frost in sight.
The first step is the hardest. After that, it gets easier every time. You now know the mistakes to watch for.
You know how to fix them. Trust yourself and keep at it.
Now that you know what to watch for, you are ready to start your own tray. Good luck and enjoy the process.