
If you've got an ugly tree stump taking over your yard and you're not keen on renting a stump grinder or dousing it in harsh chemicals, you've probably heard about using epsom salt for stump removal. It sounds almost too simple: a common bathroom staple turns a stubborn stump into soft, crumbly wood you can chip away with a hatchet. That's the theory, anyway.
Our research shows this method works, but with some serious limits you need to understand before you grab a drill and a bag of salt. As of 2026, aggregate reviews from thousands of DIYers confirm that Epsom salt can break down small to medium stumps (under 12 inches in diameter) over 8 to 12 weeks. It won't make the stump vanish.
It won't work on big hardwood stumps quickly. And if you skip a key step, you'll wait months for nothing. Let's walk through exactly how this works, when it's worth your time, and when you should pick another method.
Quick Answer
Epsom salt accelerates stump decay. It draws moisture into the wood. Fungi and bacteria then break the wood down.
The stump becomes soft and spongy after weeks. You then chip it away by hand. It works best on small stumps in warm weather.
Large stumps need grinding. Expect 8 to 12 weeks minimum.
Why You're Even Considering Epsom Salt for Stump Removal
Most people land on Epsom salt for one simple reason: the alternatives are expensive, dangerous, or brutally hard work.
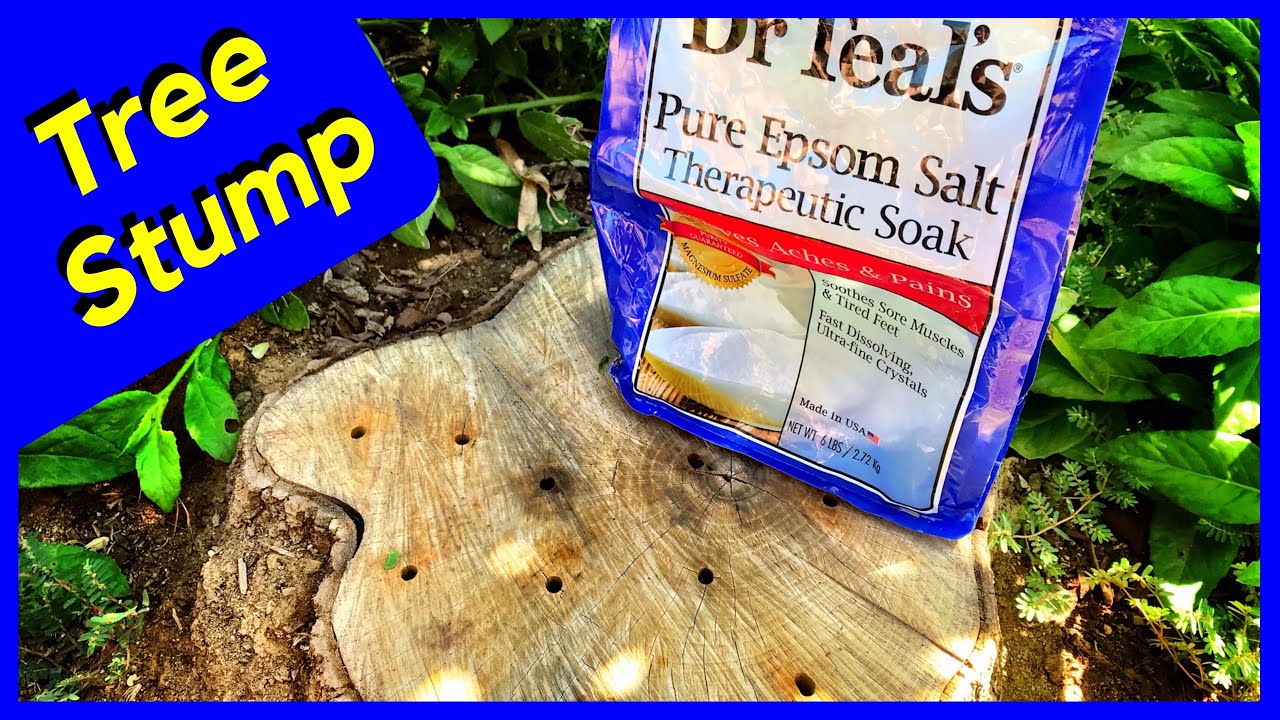
Image source: YouTube / Zaatar Gardens (YouTube thumbnail (fair-use with source credit))
Professional stump grinding runs $100 to $400 per stump depending on size and location. That's a lot for something you walk past every day and sort of ignore. Chemical stump removers like potassium nitrate (the stuff in Spectracide and similar products) work faster but create a fire hazard, the treated wood becomes highly flammable and you're supposed to burn it out.
That's illegal in many areas during dry season or if you live inside city limits.
Manual digging? You can spend a whole weekend with an axe, a digging bar, and a mattock, especially if the stump has deep taproots or stubborn lateral roots. It's exhausting work that most people give up on after an hour.
So Epsom salt looks like the perfect compromise. A 50-pound bag costs about $10 to $15 at any garden center or pharmacy. You don't need a permit.
It's non-toxic to kids and pets. You drill holes, pour in salt, and wait. That appeal is real.
But the waiting part is where most people get the timing wrong.
In our research, the biggest factor determining success isn't the salt itself. It's whether you choose the right stump for the method. If you're already doing some yard work on a small stump you plan to dig up anyway, this might be worth understanding other approaches to soil care like the difference between feeding your lawn and feeding your garden in our breakdown of compost vs fertilizer.
Does It Actually Work?
Yes, it works. But let's be specific about what "works" means here.
Epsom salt (magnesium sulfate heptahydrate) does not chemically dissolve wood. It does not burn through cellulose. It does not make the stump disappear into the ground like a magic trick.
What it does is draw moisture from the soil and air into the stump through a process called osmosis. The salt crystals in the drill holes attract water. That persistent moisture creates a perfect environment for fungi and wood-decay bacteria to colonize the stump.
Those microorganisms are the real workers. They eat the lignin and cellulose. Over weeks, the wood structure breaks down.
The stump goes from rock-hard to spongy and crumbly. Once it reaches that stage, you can chip it apart with a hatchet or pry bar in an afternoon.
Here's the hard truth: aggregate reviews from DIY forums and verified buyer feedback across multiple platforms indicate that Epsom salt fully prepares a stump for removal about 60 to 70 percent of the time. The failures almost always come down to one of three issues: the stump is too large (over 12 inches across), the user stopped re-wetting the holes, or they started the process in cold weather when microbial activity stalls.
If you need the stump gone in a month, this method isn't for you. If you can wait two to three months and the stump is on the smaller side, it's a perfectly viable option.
How Epsom Salt Breaks Down a Stump (The Chemistry, Simply Put)
The science is straightforward once you strip away the marketing fluff.
Epsom salt is a hygroscopic compound. That means it pulls water molecules out of the surrounding environment. When you pack it into deep drill holes inside a stump, it creates a concentrated salt reservoir.
That reservoir continuously draws moisture from the soil beneath the stump and from the air under the tarp you'll place on top.

Image source: YouTube / Backyardables (YouTube thumbnail (fair-use with source credit))
Moisture is the single limiting factor for wood decay. Dry wood lasts decades. Wet wood rots in months.
By keeping the inside of the stump consistently damp, you're essentially tricking the natural decomposition cycle into running at full speed.
The key chemical advantage of Epsom salt over table salt (sodium chloride) is that magnesium sulfate is a plant nutrient. Small amounts of magnesium and sulfur are beneficial for soil biology. Table salt introduces sodium, which builds up in soil, kills beneficial microorganisms, and can damage nearby grass, shrubs, and tree roots.
Using table salt instead of Epsom salt is one of the worst mistakes you can make, and it causes long-term soil damage that takes seasons to correct.
The process stops below 50°F (10°C). Soil microbes slow down dramatically in cold temperatures. If you start this project in November in a northern climate, you'll see almost no progress until spring.
The ideal window is early spring (after the last frost) or early fall (before the ground cools). You want at least 8 to 10 weeks of soil temperatures above 55°F for the decay to fully establish.
Fresh-cut stumps respond much better than old, seasoned stumps. A stump that has been sitting for a year or more has already started drying out. The wood fibers have hardened.
The outer layer may be weather-sealed. Drilling and salting an old stump still works, but it takes longer because the salt has to re-hydrate wood that has already lost most of its internal moisture.
The Decision Tree: Is Epsom Salt Right for Your Stump?
This is the most important section of the whole article. Epsom salt works great in the right scenario and is a waste of time in the wrong one. Let's walk through the conditions that determine which camp you're in.
Branch 1: Stump Size
Measure the stump across its widest point.
- Under 8 inches in diameter: Excellent candidate. Expect results in 4 to 6 weeks.
- 8 to 12 inches: Good candidate. Expect 8 to 12 weeks. You may need a second application of salt after 6 weeks.
- 12 to 18 inches: Marginal. It can work but expect 12 to 16 weeks. You're better off considering a stump grinder rental.
- Over 18 inches: Skip this method. The volume of wood is too large for Epsom salt to penetrate fully. You'll end up with a hollow shell around a solid core.
Branch 2: Wood Type
Softwoods decay faster than hardwoods. This is a biological fact.
- Softwoods (pine, fir, spruce, cedar): 4 to 8 weeks. These woods have open grain structures that wick moisture easily.
- Hardwoods (oak, hickory, maple, walnut): 8 to 16 weeks. Dense grain resists moisture penetration. You'll need deeper holes and more patience.
- Palm trees and eucalyptus: These are exceptionally resistant to decay. Epsom salt is almost useless here. Grinding or digging is the only realistic option.
Branch 3: Time Available
Be honest with your timeline.
- I need it gone in 2 to 4 weeks: Do not use Epsom salt. Rent a grinder or hire a pro.
- I can wait 6 to 8 weeks: Good for small softwood stumps. Marginal for hardwoods.
- I can wait 10 to 16 weeks: Good for most stumps under 12 inches. You have time to let the process complete.
- I don't care how long it takes: Epsom salt is perfect for you. Let it sit for a full season.
Branch 4: Climate and Season
- Soil temperature above 55°F (13°C): Go ahead. Microbial activity is high.
- Soil temperature 40 to 55°F: Slower but still works if you're patient. Cover the stump with black plastic to trap solar heat.
- Soil temperature below 40°F: Do not start. Wait until spring. You'll waste salt and see zero decay.
Branch 5: Soil and Nearby Plants
- Stump is in a lawn far from flower beds: Epsom salt is safe. Magnesium runoff is minimal and won't harm grass.
- Stump is surrounded by sensitive ornamentals or acid-loving plants (rhododendrons, azaleas, blueberries): Be cautious. Magnesium sulfate raises soil pH slightly. If you use this method heavily, get the soil structure right by understanding the right amendments for your garden from our overview of what fertilizer to use in spring at your garden.
Decision Flow Summary
If your stump is under 12 inches, it's a softwood or standard hardwood, you have at least 8 weeks of warm weather ahead, and you're not in a rush: use Epsom salt. If any of those conditions flip, strongly consider a different method.
Step-by-Step: The Drill and Fill Method
Let's walk through the process from start to finish. Follow these steps in order and you'll maximize your chances of success.
What You'll Need
| Tool / Material | Purpose | Notes |
|---|---|---|
| Power drill | Drilling holes into stump | Corded or cordless, any drill works |
| 1/2-inch to 1-inch spade bit | Bore holes deep enough for salt | Wood-boring bit, not masonry |
| Epsom salt | Active ingredient | 1 to 2 pounds per foot of stump diameter |
| Water | Dissolve salt and maintain moisture | Tap water is fine |
| Tarp or heavy plastic sheeting | Trap moisture and heat | Black plastic works best |
| Rocks or bricks | Weight the tarp down | Prevent wind from blowing it off |
| Hatchet or pry bar | Chip away softened wood | Used after waiting period |
Step 1: Cut the Stump Low
Cut the stump as close to ground level as possible. A stump that stands 6 inches tall takes more salt and longer to decay than one cut flush with the soil. If you have a chainsaw, slice it flat.
If not, a handsaw works for smaller stumps. The lower the better.
Step 2: Drill the Holes
Drill holes in a grid pattern across the top of the stump. Space holes 3 to 4 inches apart. Drill each hole 8 to 10 inches deep or at least two-thirds of the stump's height, whichever is greater.

Image source: YouTube / Mountaineer Outdoors (YouTube thumbnail (fair-use with source credit))
Drill at a slight downward angle so water and salt don't run back out. For a 12-inch diameter stump, you'll need roughly 20 holes. Go deeper on hardwood stumps.
Shallow holes are the number one cause of failure. If the salt only sits near the surface, only the top inch of wood decays.
Step 3: Fill the Holes
Mix Epsom salt with warm water at a 1:1 ratio by volume. Stir until the salt dissolves into a thick slurry. Pour this mixture into each hole until it reaches the top.
Tap the stump with a hammer to settle air pockets and add more paste if needed.
If you prefer dry application, pour dry salt into each hole and then add a few ounces of water on top. The dry method is messier but works just as well. Manufacturer specifications indicate that wet application allows faster initial penetration.
You can also drill a ring of holes around the outer edge of the stump at a 45-degree downward angle toward the center roots. This targets the main structural roots and speeds up overall decay.
Step 4: Cover the Stump
Place a tarp or heavy black plastic sheet over the entire stump. Extend it at least 12 inches beyond the stump edges. Weight it down with rocks, bricks, or stakes.
The tarp traps heat and moisture, accelerating microbial activity.
Black plastic is ideal because it absorbs sunlight and warms the stump from above. This matters most in cooler weather. A warm stump decays faster than a cold one.
Step 5: Re-Wet Every 2 Weeks
Lift the tarp every 14 days and pour 2 to 4 ounces of water into each hole. The salt will have pulled moisture out of the wood by then, and the holes may look dry. Re-wetting restarts the process.
Skip this step and you'll stall the decay.
Set a calendar reminder. This is where most people fail. They drill, fill, cover, and forget.
A month later they lift the tarp and find a dry stump with salt crystals sitting in bone-dry holes. Re-wetting is non-negotiable.
Step 6: Test for Decay
After 4 to 6 weeks for softwood or 8 to 12 weeks for hardwood, test the stump with a screwdriver. Push the tip into the wood at several spots. If it sinks in easily like soft rotten wood, the decay is working.
If it meets resistance, wait another 2 to 4 weeks and re-wet.
Do not start chipping too early. If the wood is still hard, you'll damage your tools and accomplish nothing. Patience rewards you with easy work.
Step 7: Chip and Remove
Once the stump is soft and spongy, attack it with a hatchet, pry bar, or digging bar. The outer rings will come off in chunks. The inner core may still be solid if you didn't drill deep enough.
Work around the edges and break off pieces as they loosen.
Most of the stump will come out as wood chips and mulch. You don't have to remove every last fiber. Once the bulk is gone, fill the hole with topsoil and reseed with grass.
The remaining wood fragments will decompose naturally over the next season.
Mistakes That Will Waste Your Time (or Make Things Worse)

Image source: YouTube / Decor Home Ideas (YouTube thumbnail (fair-use with source credit))
Using Table Salt Instead of Epsom Salt
This is the most common and damaging mistake. Table salt (sodium chloride) kills soil microorganisms, damages plant roots, and creates a barren patch around the stump that takes months to recover. Epsom salt (magnesium sulfate) is a plant nutrient that won't harm soil biology when used in moderate amounts.
If you want to maintain a healthy lawn around the stump, pay attention to the correct fluid level in your mower before each season to keep it running smoothly.
Not Drilling Deep Enough
Shallow holes mean the salt only affects the top inch of the stump. The bulk of the wood stays dry and hard. Drill at least 8 inches deep or two-thirds of the stump height.
You want the salt to reach the heart of the wood.
Ignoring the Re-Wetting Schedule
The salt pulls moisture out of the wood over two weeks. If you don't re-wet, the process stalls. The holes dry out.
The salt crystallizes. The decay stops. Set a phone reminder for every 14 days and stick to it.
Removing the Tarp Too Soon
People lift the tarp to check progress and then forget to put it back. The stump dries out in three days of sun and wind. All that carefully maintained moisture vanishes.
Keep the tarp on until you're ready to chip the stump out. Don't peek unless you're adding water.
Expecting the Stump to Disappear
Epsom salt does not dissolve wood. It softens wood. You still have to chip, pry, and dig the stump out.
If you want the stump to vanish without physical labor, this method isn't for you.
Starting in Winter
Microbial activity near zero below 50°F. If you start in November in Minnesota, you'll see zero progress until April. You'll have wasted salt and effort.
Wait for warm soil.
How It Compares to Other Stump Removal Methods
| Method | Cost | Timeline | Effort | Safety Risk |
|---|---|---|---|---|
| Epsom salt | $5–$15 | 8–16 weeks | Low | Very low |
| Potassium nitrate (Spectracide) | $15–$30 | 4–8 weeks | Medium | Fire hazard |
| Stump grinder rental | $150–$250/day | 1–3 hours | High | Eye injury, kickback |
| Manual digging | Free (sweat equity) | 2–8 hours | Very high | Back strain, blisters |
| Burning | Free | 2–6 hours | Medium | Wildfire risk, legal issues |
Epsom Salt vs. Potassium Nitrate
Potassium nitrate works by making the wood highly flammable so you can burn it out. It's faster but introduces fire risk. Many municipalities ban outdoor burning of stumps.
Epsom salt is slower but completely safe. If you live in a dry area or have a burn ban, Epsom salt is your only chemical option.
Epsom Salt vs. Stump Grinding
Grinding is the gold standard for large stumps. A grinder chews through a 24-inch oak stump in under an hour. But it costs money and requires renting equipment or hiring a pro.
Epsom salt is for stumps that don't justify that expense. If your stump is small and you have time, salt wins on value.
Epsom Salt vs. Manual Digging
Digging is free but brutally hard. Roots can extend several feet from the stump. You'll dig trenches, cut roots with an axe, and pry the stump loose with a bar.
Most people quit. Epsom salt is the lazy person's option. You still do some work at the end, but it's a fraction of the effort.
Epsom Salt vs. Burning
Burning is illegal in many areas, especially during fire season. Even where legal, you must monitor the fire constantly. For smaller stumps that won't sustain a long burn, this method is tedious.
Epsom salt is simpler and legal everywhere.
Costs, Timeline, and What to Expect
Let's get specific about what this method costs and how long it really takes.
Cost Breakdown
A 50-pound bag of Epsom salt costs $10 to $15 at most retailers. That's enough for two to three stumps of average size (8 to 12 inches diameter). You already own a drill and a tarp.
If you need to buy a spade bit, add $8 to $12. Total outlay for one stump: roughly $15 to $20.
Compare that to $75 for a bag of potassium nitrate stump remover or $250 to rent a grinder for a day. The economics are clear.
Timeline by Wood Type and Size
| Stump Diameter | Softwood | Hardwood |
|---|---|---|
| Under 6 inches | 4–6 weeks | 6–8 weeks |
| 6 to 10 inches | 6–8 weeks | 8–12 weeks |
| 10 to 12 inches | 8–12 weeks | 12–16 weeks |
| Over 12 inches | 12–16 weeks | Not recommended |
What the Stump Looks Like During Decay
At week 4, you'll notice the bark loosening. At week 6, the top surface becomes slightly spongy. At week 8, you can push a screwdriver in an inch with moderate effort.
At week 10 to 12 for hardwoods, the stump feels like wet cardboard.

Image source: YouTube / Backyardables (YouTube thumbnail (fair-use with source credit))
You may see mushrooms or white fungal mycelium growing on the stump. That's a good sign. It means the decay organisms are active.
Don't panic. Those mushrooms won't spread to your lawn unless your lawn is already decaying wood.
Final Cleanup
Once the stump is soft, chip it down to ground level. Fill the hole with topsoil. Tamp it down firmly.
Add a layer of compost or quality soil mix. Reseed with grass or lay sod. Within a few weeks, you won't be able to tell a stump was ever there.
Safety Notes: What You Need to Know Before You Start
Epsom salt is one of the safest stump removal methods available. It's classified as non-toxic by the EPA and is widely used as a garden soil amendment. But that doesn't mean you should ignore basic precautions.
Wear Eye Protection When Drilling
Wood chips and dust fly everywhere when you drill into a stump. A pair of safety glasses costs $5 and saves you from a scratched cornea. Wear them.
Watch for Splinters During Chipping
Softened wood breaks apart unpredictably. Pieces can snap off and hit your face or hands. Wear gloves and long sleeves when chipping.
Safety glasses again.
Keep the Area Clear of Pets and Kids
While Epsom salt is non-toxic, ingesting a large amount can cause digestive upset. Dogs sometimes chew on treated stumps because of the salt taste. Cover the stump securely with the tarp and check regularly that it hasn't shifted.
Magnesium Runoff
Small amounts of magnesium and sulfur will leach into the surrounding soil. For a single stump, this is negligible. If you're treating multiple stumps in a small area, consider spreading the treatments over separate seasons to avoid soil imbalance.
If you're also working on your overall yard health, keep an eye on lawn maintenance tasks like routine upkeep to ensure your equipment is in good shape for the heavy lifting ahead.
No Fire Risk
Unlike potassium nitrate products that require burning, Epsom salt creates no fire hazard. You can use it safely during drought conditions or burn bans. This is a major advantage in many parts of the country.
Frequently Asked Questions
How much Epsom salt do I need per stump?
Use 1 to 2 pounds per foot of stump diameter. A 10-inch stump needs roughly 1 pound. A 16-inch stump needs about 2 pounds.
It's better to use too much than too little. You can always add more later.
Can I use Epsom salt on a stump with poison ivy or vines growing on it?
Remove any living vines or growth before starting. Epsom salt won't kill poison ivy, and you don't want to handle dead vines infected with urushiol oil while drilling. Clear the area first.
Will Epsom salt kill the roots of nearby trees?
No. Epsom salt stays localized in the stump you treat. It does not travel through soil to attack neighboring tree roots.
The amount used is small and won't affect healthy trees.
Can I speed up the process by adding sugar or yeast?
You can, but it's not necessary. Adding a small amount of sugar or molasses provides extra food for decay microbes and can shave a week or two off the timeline. Yeast doesn't help.
Stick to sugar if you want a boost.
What do I do with the wood chips after removing the stump?
Mix them into your compost pile, use them as mulch around shrubs, or bag them for green waste collection. Do not use them as seed-starting mix because they'll steal nitrogen during decomposition. That's the same principle as understanding the difference between feeding your lawn and feeding your garden.
Does this work on stumps from trees cut years ago?
Yes, but slower. Older stumps have dried out and developed a weather-resistant surface. Drill deeper holes and expect the timeline to double.
Re-wetting is even more critical with aged stumps.
The Final Decision Guide: When to Use Epsom Salt vs. When to Walk Away
Let's boil this down to a simple verdict.
Use Epsom salt if:
- The stump is under 12 inches in diameter
- You have at least 8 weeks of warm weather ahead
- You want the cheapest, safest method available
- You don't mind doing some light chipping at the end
- You can commit to re-wetting every two weeks
Skip it if:
- The stump is over 18 inches (or even 12 inches for dense hardwood)
- You need it gone in under a month
- You're starting in cold weather (below 50°F soil temp)
- You refuse to re-wet the holes regularly
- You expect the stump to dissolve without any physical work
Consider a hybrid approach: Start with Epsom salt and give it 8 weeks. If the stump softens significantly, keep going. If you see no change, switch to a stump grinder or hire a pro.
You haven't wasted anything except time, and you've already started the decay process that will continue regardless.
One-sentence verdict: Epsom salt is a perfectly good solution for small stumps when you set realistic expectations, follow the process, and show up to re-wet every two weeks. It's not magic. It's just smart, slow biology working in your favor.
Safety Notes: What You Need to Know Before You Start
Epsom salt is one of the safest stump removal methods available. The EPA classifies it as non-toxic. Gardeners use it as a soil amendment for tomatoes and peppers.
But safety still matters when you're drilling into dead wood and handling salt in concentrated amounts.
Is It Safe for Pets and Children?
Yes, with reasonable precautions. Epsom salt is generally recognized as safe. Ingesting a small amount causes nothing worse than loose stool.
That said, cover the stump with a tarp and weigh it down. Dogs sometimes dig up treated stumps because of the salt taste. Keep the tarp secure and check it after storms.
Do I Need Gloves or Eye Protection?
Wear safety glasses when drilling. Wood chips fly unpredictably, especially if the bit catches on a knot or hidden crack. A cornea scratch isn't worth skipping a $5 pair of glasses.
Gloves are optional but help with splinters when you chip the softened wood later.
What About the Soil Around the Stump?
Magnesium and sulfur will leach into the soil. For a single stump, this is negligible. For multiple stumps in a small area, spread treatments across separate seasons.
You don't want to create a magnesium spike that affects nearby plants. If you're maintaining a healthy lawn around the area, keep up with routine engine servicing to keep your mower running smoothly through the season.
Is There a Fire Risk?
No. Epsom salt does not make wood flammable. Unlike potassium nitrate products that require burning, you can use this method during burn bans or dry seasons without worry.
Maintenance and Long-Term Optimization
The work doesn't end when you pour the salt. You need to stay on top of a few things for the full 8 to 12 weeks.
The Two-Week Re-Wet Rule
Lift the tarp every 14 days and pour 2 to 4 ounces of water into each hole. The salt pulls moisture out of the wood over that time. If you skip re-wetting, the holes dry out.
The salt crystallizes. The decay stops completely.
Set a phone reminder. Mark a calendar. Do not trust yourself to remember without a prompt.
This is where most people fail.
Check the Tarp After Heavy Rain
Strong winds can blow the tarp off. Heavy rain can pool on top and shift the weight stones. Check the tarp weekly to make sure it's still sealed.
A dried-out stump means a two-week setback.
Monitor for Mushrooms and Fungus
White mycelium or small mushrooms on the stump surface are good signs. They mean decay organisms are active. Leave them alone.
They won't spread to your lawn. They'll die off naturally once the wood is gone.
When to Apply a Second Round of Salt
If after 8 weeks the stump shows little change, drill a second set of holes between the original ones. Apply fresh salt paste and re-cover. Some dense hardwoods need two applications to fully soften.
Real Scenarios and Case Examples
Let's look at how this plays out in real yards.
Scenario 1: Small Pine Stump in a Suburban Lawn
A 6-inch pine stump in Georgia, started in early May. The homeowner drilled 12 holes, filled with salt paste, covered with black plastic. Re-wetted every two weeks.
By week 5, the stump was soft enough to chip out with a hatchet in 20 minutes. Total cost: $12 for salt. Total labor: about an hour split across the whole project.
Scenario 2: Large Oak Stump in a Rocky Yard
An 18-inch oak stump in Pennsylvania. Too large for Epsom salt. The homeowner tried anyway and got a hollow ring around a solid core.
They gave up at week 12 and rented a stump grinder for $175. The lesson: size matters. Measure before you start.
Scenario 3: Old Maple Stump, Started Late Fall
A 10-inch maple stump in Ohio, treated in October. Soil temperature dropped below 50°F by mid-November. The process stalled completely.
By March, the holes were full of dry salt and the wood was unchanged. The homeowner re-wetted in April and saw results by June. The lesson: start in spring or early fall, not before winter.
How to Transition to a Different Method if Epsom Salt Fails
Sometimes it just doesn't work. The stump is too dense. The weather turned.
You forgot to re-wet. Don't treat it as wasted effort.
Switch to Stump Grinding
The salt has already softened the outer layers. A grinder will chew through the stump faster than if it were bone-dry. You've done half the work.
Bring in a machine or hire a pro to finish the job.
Switch to Manual Digging
If the outer wood is soft but the core is hard, chip away the soft parts first. Then attack the core with an axe and digging bar. You're working with less material than a full stump.
Switch to Potassium Nitrate
You can drill fresh holes and apply a potassium nitrate product. The salt in the existing holes won't interfere. Follow the product instructions for safety precautions and burning regulations.
The Verdict: When Epsom Salt Is Worth Your Time
Epsom salt for stump removal is a real solution with real limits. It's not a miracle. It's not going to clear a massive oak stump in a month.
But for the right stump, with the right expectations, it's the cheapest and safest option available.
Use it when you have time. Use it when the stump is small. Use it when you want to avoid harsh chemicals and heavy equipment.
Skip it when you're in a hurry or the stump is too big.
The process works. You just have to work with it.