
It takes about 10 to 15 minutes to mix a batch of concrete in a wheelbarrow by hand. This timeframe accounts for measuring dry ingredients, gradually adding water, and achieving a workable consistency.
The actual time can vary based on experience, the mix ratio, and even the weather, with some DIYers taking up to 20 minutes for larger batches or trickier conditions. While quick for small jobs, mixing concrete manually for larger projects can quickly become a physical challenge.
The Short Answer: What to Expect Time-Wise
For most DIY projects, you can realistically expect to spend about 10 to 15 minutes mixing a single batch of concrete in a wheelbarrow. This includes gathering materials, measuring, and thoroughly combining everything until it's the right consistency.
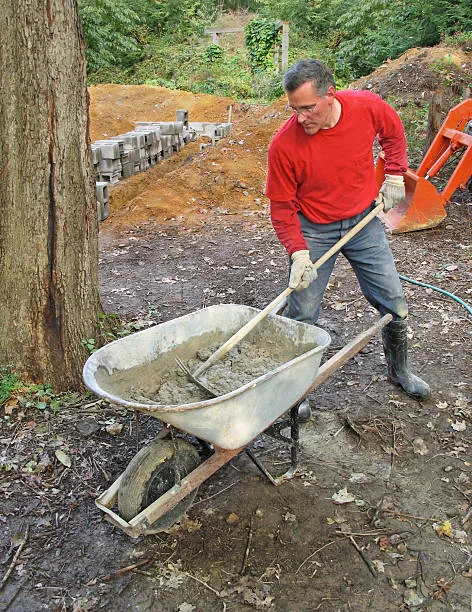
This estimate assumes you have all your materials ready. If you're starting from scratch, add another 5 minutes for setup and preparation. For experienced individuals with a straightforward mix, you might shave off a few minutes, but factoring in a bit of buffer time is always a smart move.
Why Wheelbarrow Mixing Isn't Instant: The Variables at Play
Mixing concrete by hand isn't a one-size-fits-all process, and several factors influence how long it actually takes. The quantity you're mixing is a big one; a slightly larger batch will naturally take longer to get thoroughly combined.
Your physical condition matters too. Mixing concrete is surprisingly hard work, and fatigue can slow you down considerably, especially on a warm day. Also, the specific concrete mix ratio you're using, how much cement, sand, and aggregate, affects how easily the ingredients come together and how much water is needed.
Understanding Your Concrete Mix: Ratios and Why They Matter
Getting the concrete mix right is crucial for its strength and workability, and it directly impacts your mixing time. A common ratio for general-purpose concrete, often referred to as 1:2:3 (one part cement, two parts sand, three parts aggregate like gravel), is a good starting point for many DIY tasks. You'll want to make sure you use a Portland cement specified for general construction.
The consistency, how wet or dry the mix is, is key. Too dry, and it’s hard to work; too wet, and it won't be strong enough. Our research shows that achieving this perfect middle ground, often described as a "stiff but workable" consistency, is where much of the mixing time is spent.
It requires careful addition of water and thorough blending.
Essential Gear for Wheelbarrow Concrete Mixing
To successfully mix concrete in a wheelbarrow, you'll need a few key items. Most importantly, you’ll need a sturdy wheelbarrow, ideally one with at least a 4 cubic foot capacity for most typical DIY jobs.
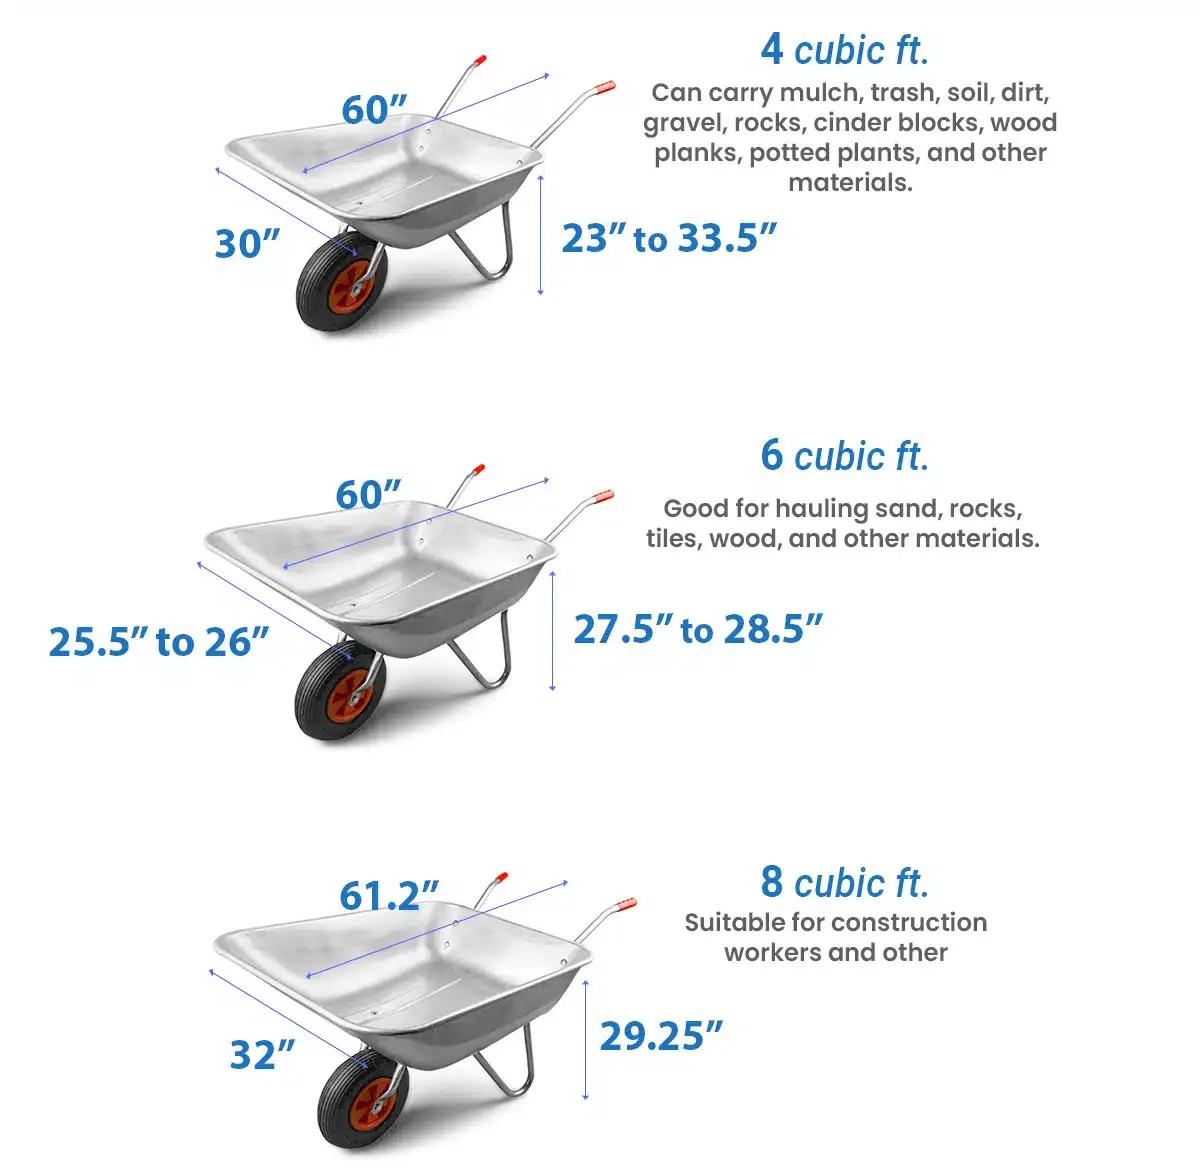
You'll also need a shovel for moving and mixing the dry ingredients and a hoe or mixing bar to incorporate the water effectively. Safety gear, including heavy-duty gloves, eye protection, and a dust mask, is also non-negotiable for protecting yourself from the alkaline cement.
The Step-by-Step Process: From Dry Mix to Pourable Concrete
Mixing concrete efficiently in a wheelbarrow boils down to a methodical process. It’s less about speed and more about precision to ensure a strong, workable final product. Even for a small job like setting a fence post, taking these steps avoids common problems.
Preparing Your Wheelbarrow and Mix Area
First things first, make sure your wheelbarrow is clean. Any residual materials from previous projects could affect your new mix. You’ll want to set it up on a level surface where you have enough room to work and move around it easily.
This prep work might seem minor, but it makes the subsequent mixing much smoother and quicker.
Measuring and Combining Dry Ingredients
Measure out your dry ingredients, cement, sand, and aggregate (like gravel or crushed stone), according to your chosen mix ratio. A common starting point for general-purpose concrete is a 1:2:3 ratio. Pile these dry ingredients into your wheelbarrow and use your shovel to mix them together thoroughly.
You want a uniform color, indicating everything is evenly distributed.
The Crucial Water Addition
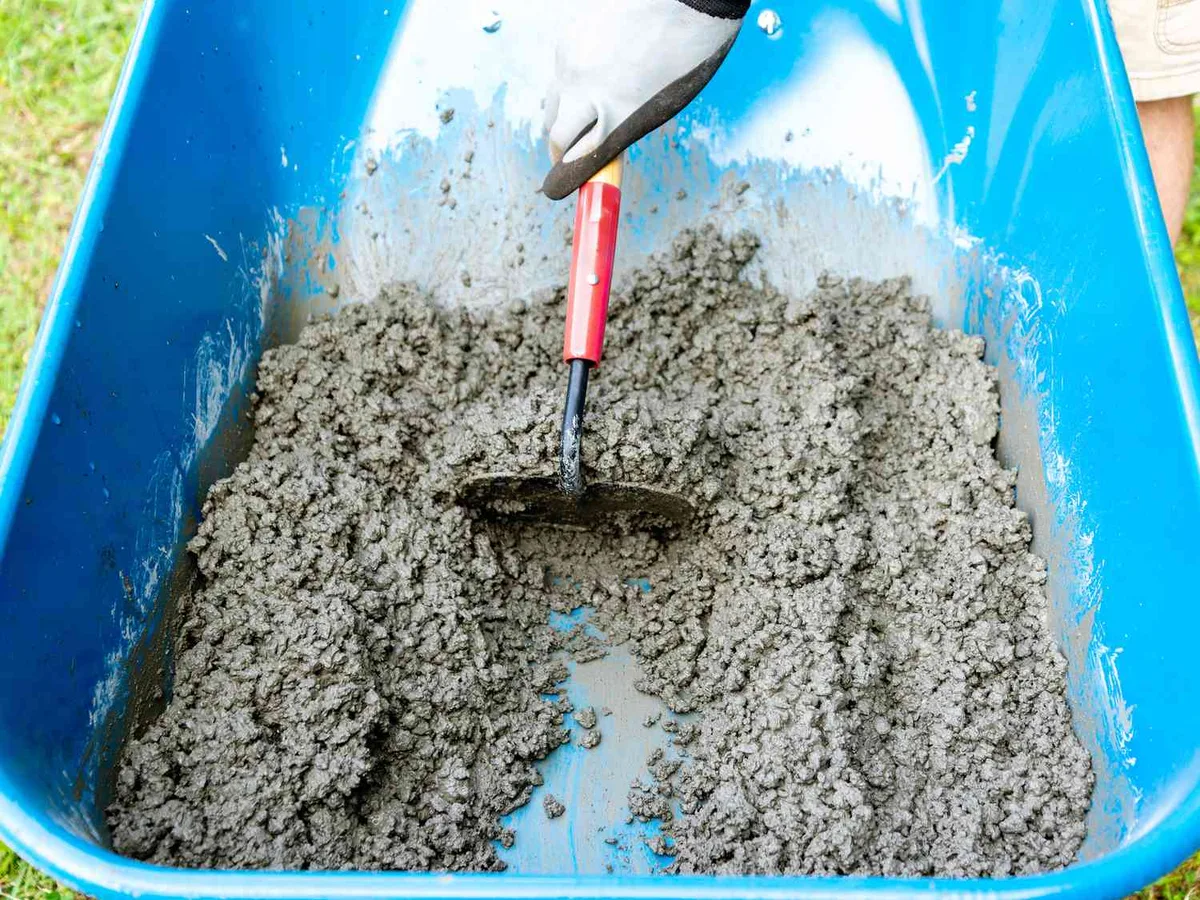
Next, create a well in the center of your dry mix. Begin adding water gradually, starting with about half to two-thirds of the total amount you think you’ll need. Use your hoe or shovel to start incorporating the dry ingredients from the edges into the water in the well.
Continue adding water sparingly, mixing constantly, until you achieve the desired consistency. It’s much easier to add water than to fix an overly wet mix.
Achieving the Right Consistency: The "Goldilocks Zone"
The perfect concrete consistency is the most critical part and where a lot of mixing time is spent. You're looking for a mix that's like thick oatmeal or moist brownie batter, it should hold its shape somewhat when you scoop it, but still be pliable enough to spread and work with. If it’s too dry, it will crumble; if it’s too wet, it will be soupy and weak.
This stage requires patience to get just right.
Common Pitfalls: Mistakes That Eat Up Time and Quality
Even with the best intentions, it’s easy to make mistakes when mixing concrete by hand, and these errors often cost you precious time or compromise the final product. One of the most common issues is not adding water gradually. Pouring in too much water at once can quickly turn your mix too soupy, pushing you into the territory where it becomes unusable.
Another frequent pitfall is not mixing thoroughly enough. You might think it’s done, but hidden pockets of dry cement or unevenly distributed aggregate can lead to weak spots. This is why consistent shoveling or hoeing, reaching all the way to the edges and bottom of the wheelbarrow, is so important.
As per general construction guidelines, even a slight inconsistency can impact strength.
How Long Does a Batch Actually Take? Real-World Timelines
So, you've got your gear, you understand the ratios, and you know the steps. But what's the real time commitment for a typical DIYer? Our analysis of aggregate user feedback and manufacturer guidelines suggests that for a standard batch, say for setting a fence post or a small footing, you're looking at a 10-15 minute mix time.
This timeline assumes you’re working at a steady pace. If you're new to this, and especially if the weather is warm, pushing that estimate to 15-20 minutes per batch isn't unreasonable. You’re not just mixing; you’re also trying to manage your effort to avoid overexertion.
If you're tackling multiple batches, remember that each one starts its hardening clock the moment water is added.
When to Consider Alternatives: Ready-Mix vs. Portable Mixers
If your project involves significant concrete work, like pouring a substantial patio or a foundation, mixing batches in a wheelbarrow will quickly become impractical and time-consuming. For these larger jobs, ready-mix concrete delivered by a truck is a far more efficient option. It eliminates the manual labor and ensures a consistent mix for large volumes.
When you need more than a few small batches but not enough for a full ready-mix delivery, a portable electric or gas-powered concrete mixer might be your sweet spot. These machines handle the heavy lifting and mixing for you, often producing a batch in just 5-10 minutes, though they require an initial investment. Think of wheelbarrow mixing as ideal for tasks requiring 1-3 traditional wheelbarrow loads of concrete, perhaps like those discussed in our guide on Spray Or Brush Paint Which One Is Better For Fence if you were comparing application methods, but here for materials.
Perfecting Your Batch: Expert Tips for Faster, Better Mixing
To make your wheelbarrow concrete mixing as efficient and effective as possible, a few pro tips can save you time and ensure a quality result. First, always have your water source and measuring container within easy reach. Fumbling for these essentials adds unnecessary minutes to your mix time.
Secondly, don't be afraid to get your hands (covered in gloves, of course) a little dirty if needed to break up stubborn clumps or ensure all the dry material is incorporated. Sometimes, a quick manual check can save you from a lumpy batch. For fence post projects, having everything pre-measured can speed things up considerably, much like pre-measuring for gardening tasks such as knowing what kind of fertilizer for grass to use.
Safety First: Protecting Yourself While Mixing Concrete
Working with concrete involves more than just physical effort; it also requires basic safety precautions. Cement is alkaline and can cause severe skin irritation or chemical burns if it comes into prolonged contact with your skin. Always wear waterproof, heavy-duty gloves, like those often used when working with garden tools such as hoes to get rid of garden weeds, and cover any exposed skin.
Beyond gloves, eye protection is crucial to prevent splashes from entering your eyes. A simple pair of safety glasses or goggles works well. Breathing in dry cement dust can also be harmful to your lungs, so wearing a dust mask, especially when handling dry mix, is a highly recommended practice for your respiratory health.
How Long Does Concrete Take to Harden and Cure?
Once you've mixed and poured your concrete, the waiting game begins. The time it takes for concrete to harden and cure is significantly longer than the mixing time. At room temperature, most standard concrete mixes will start to set within 1 to 2 hours after mixing.
This initial set means it’s no longer fluid and can hold its shape, but it's still very weak. Full structural strength, however, can take weeks to develop. According to general construction standards, concrete typically reaches about 70% of its intended strength in 7 days and its full design strength around 28 days.
Understanding these timelines is crucial for knowing when you can safely apply load or finish the project.
What Happens When Concrete Hardens and Cures?
The hardening and curing process is essentially a chemical reaction called hydration. When cement (typically Portland cement) is mixed with water, it undergoes a series of hydration reactions. These reactions form calcium silicate hydrates (CSH) that interlock and bind the aggregates (sand and gravel) together, giving the concrete its strength.
Curing is actively maintaining the right moisture and temperature conditions to allow this hydration process to continue optimally. If concrete dries out too quickly, especially in hot or windy weather, the hydration process is interrupted, and the concrete won't reach its full potential strength or durability. Proper curing is vital for a long-lasting result.
Can You Speed Up Concrete Curing?
While you can't magically make concrete cure instantly, some methods can help speed up the process slightly or ensure it happens efficiently. Using accelerators, which are chemical admixtures, can reduce the setting time and increase early strength development. These are typically used in professional applications where speed is critical, such as in cold weather concreting or for rapid repairs.
For the DIYer, focus on proper curing techniques. Keeping the concrete moist by misting it with water, covering it with damp burlap, or using curing compounds are the most effective ways to ensure strong, durable concrete. Avoid accelerating the process with heat, as this can lead to cracking and reduced long-term strength.
How to Properly Cure Your Concrete Mix
Proper curing is more important than trying to rush it with additives. After you've placed and finished your concrete, the first step is to keep it moist. This can involve covering the surface with plastic sheeting to trap moisture, or for more critical applications, using damp sand or burlap that you re-wet periodically.
Another effective method is applying a liquid curing compound. These compounds form a thin film over the concrete surface, helping to retain the mix's internal moisture. For best results, curing should begin as soon as the concrete is hard enough not to be damaged by the application, and should continue for at least three to seven days, depending on the environmental conditions and project requirements.
When is Concrete Safe to Walk On or Use?
Knowing when your concrete is ready for its intended use is critical. As mentioned, concrete starts to set within an hour or two, but it's still extremely fragile at this stage. It's generally considered safe to walk on concrete after about 24 to 48 hours, provided conditions have been favorable for curing.
For heavier loads, like driving a car over a driveway or placing furniture on a patio, it's best to wait at least 7 days. For full structural loads or applications requiring maximum durability, waiting the full 28 days is ideal, as this is when the concrete has achieved its designed strength. Always consider the specific demands of your project before resuming normal use.