Making a fabric daffodil can be a rewarding project, breathing life into a beloved spring bloom with just a few craft supplies. Whether you're looking to decorate your home, create a unique gift, or simply enjoy a relaxing crafting session, learning how to make a fabric daffodil is an achievable and delightful endeavor. Aggregate user feedback and craft community discussions consistently highlight the joy found in creating these durable, beautiful floral replicas.
This guide breaks down the process into simple, actionable steps, ensuring you can craft a charming fabric daffodil that looks charmingly realistic without needing advanced sewing skills. We'll cover everything from choosing the right materials to assembling the final piece, ensuring your handmade bloom will last for seasons to come.
Quick Answer
You can make a fabric daffodil by cutting fabric shapes for petals and a central cup, then assembling them with glue or stitches. Use felt or silk for vibrant colors. Floral wire helps shape the stem.
Stuffing gives the bloom fullness. This craft is beginner-friendly and yields a beautiful, lasting decoration.

Why Make a Fabric Daffodil?
Crafting a fabric daffodil offers a delightful blend of creativity and practicality. Unlike their real counterparts, fabric daffodils never wilt, fade, or require any care, providing a permanent splash of spring cheer. They're perfect for crafting enthusiasts looking to add a handmade touch to home decor, seasonal displays, or even as unique, lasting gifts.
The process itself is known for being a stress reliever, offering a quiet escape into creativity.
Many crafters choose fabric daffodils because they're a cost-effective way to bring vibrant floral beauty indoors. You can tailor the colors and sizes precisely to your liking, creating a truly custom piece. Manufacturer data on craft supply sales indicates a steady growth in demand for durable, DIY decorative items, showing that handmade floral crafts remain a popular choice.
As of 2026, DIY decor projects continue to trend.
Gathering Your Fabric Daffodil Supplies
To bring your fabric daffodil to life, you'll need a few key components. Think of it like gathering ingredients for a special recipe; each item plays a crucial role in the final outcome. Having everything ready before you start assembling makes the entire process much smoother, preventing the frustration of stopping mid-project to hunt for a missing piece.
This section focuses on the essential items that form the foundation of your handmade bloom. We'll go over the types of materials that work best and what tools will make the job easier.
Choosing the Right Fabric
The fabric you select will significantly impact the final look and feel of your daffodil. For bright, cheerful petals, felt is an excellent choice. It’s readily available, easy to cut, doesn’t fray, and comes in a rainbow of colors, including classic daffodil yellows and whites.
Silk or satin fabrics can offer a more luxurious, glossy finish, mimicking the delicate sheen of real daffodil petals.
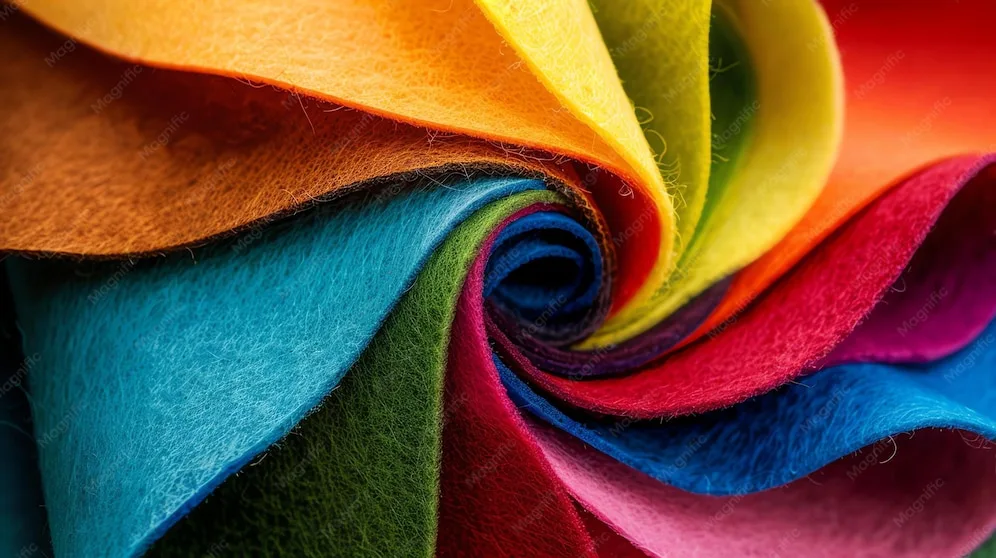
Cotton blends also work well, especially if you prefer a matte texture. When choosing, consider the weight and drape of the fabric. You want something that holds its shape enough to form distinct petals and a cup, but isn't so stiff that it looks unnatural.
For a more realistic daffodil, look for fabrics with a slight stretch or a subtle texture.
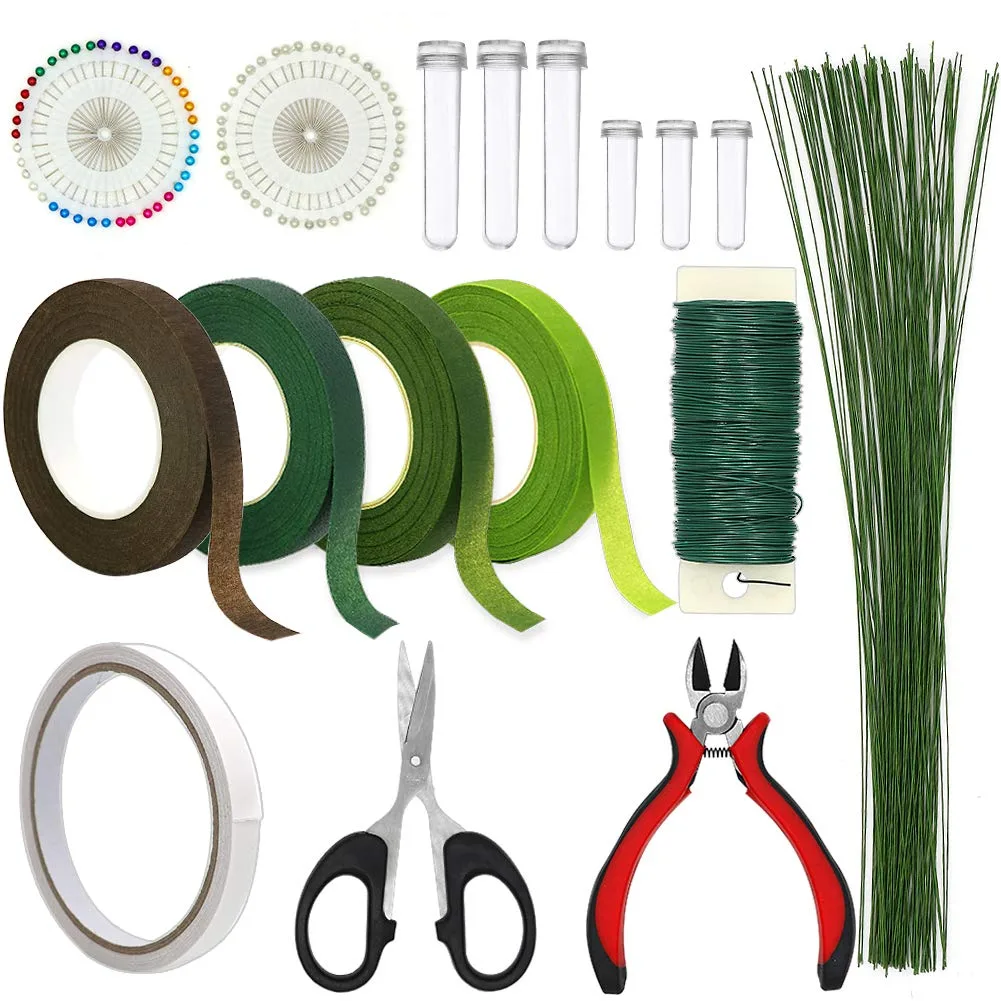
Essential Tools and Adhesives
Beyond the fabric, a few basic crafting tools are indispensable. Sharp fabric scissors are a must for clean cuts; dull scissors can snag and distort your fabric shapes, especially finer materials. You'll likely need a hot glue gun with glue sticks for quick and secure assembly, as it dries fast and creates a strong bond.
Alternatively, a strong fabric glue or needle and thread can be used for a more traditional approach.
Floral wire is key for creating a sturdy stem that can be posed. You’ll want a gauge that’s strong enough to support the fabric bloom but flexible enough to bend. Some crafters also use green floral tape to wrap the wire and give the stem a natural, finished look.
A pencil or fabric marker will be helpful for tracing patterns onto your fabric.
Stuffing and Stem Materials
The center of your daffodil, the corona or cup, will need stuffing to give it that characteristic trumpet shape. Standard polyfill or cotton batting works perfectly for this. Just a small amount is needed to provide shape without making the flower head too heavy.
For the stem, floral wire is the standard choice. It's strong, flexible, and readily available at most craft stores.
Consider the thickness of your floral wire based on the size of the daffodil you're making. A thicker wire (around 18-20 gauge) will provide more stability for larger creations. For a more polished look, you'll also want green floral tape to wrap the wire stem, concealing it and mimicking the natural appearance of a plant stem.
This tape adheres to itself when stretched.
Step-by-Step: Assembling Your Fabric Daffodil
Now that you have your supplies gathered, it’s time to bring your fabric daffodil to life. This process involves cutting out the individual parts and then carefully assembling them. We'll walk through each stage, making it easy to follow.
The beauty of this craft is its flexibility; don't be afraid to adjust techniques slightly to fit your chosen materials and personal style. The goal is to create a charming blossom that reflects your creative effort.
Creating the Daffodil Petals
First, you'll need a petal pattern. Daffodils typically have six petals. You can draw a simple, slightly elongated teardrop shape on paper or use a template.
Ensure the bottom of the "teardrop" is slightly wider where it will attach to the center. Cut out your paper pattern.
Trace around the pattern onto your chosen fabric (felt or silk work wonderfully here) using a fabric marker or pencil. You'll need six petals per daffodil. Carefully cut out each fabric petal using sharp fabric scissors.
Aim for clean, smooth edges; this will make a big difference in the final appearance of your daffodil. Consistency in shape and size is key.
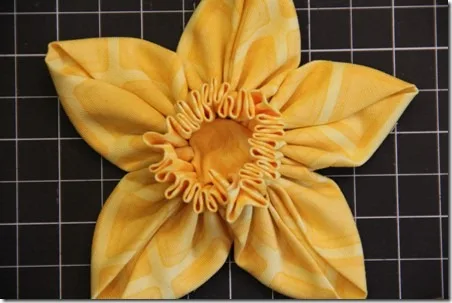
Shaping the Daffodil Cup (Corona)
The daffodil's cup, also called the corona, is its most distinctive feature. For this, you'll cut a circle or a slightly ruffled disc from your fabric. Its size will depend on how prominent you want the cup to be, but it should generally be smaller than the combined width of your petals.
You can cut a simple circle or add a slightly wavy edge for more texture.

To give the cup its characteristic ruffled or cupped look, you can gently pleat the edge or run a gathering stitch around the perimeter before gently pulling the thread taut. This effect can help create the illusion of a natural daffodil’s delicate form. The goal is to give it some dimension rather than having it lie flat.
Attaching Petals to the Cup
Now it's time to join the petals to the cup. Apply a line of hot glue or fabric glue around the bottom edge of the daffodil cup. You can also use needle and thread for this if you prefer.
Press the wider end of each fabric petal firmly into the glue, spacing them evenly around the cup. You should aim to have all six petals radiating outwards from the central cup. Ensure they are securely attached and angled slightly upwards or outwards, as real daffodils tend to do.
This step is crucial for the flower's overall structure.
Building the Daffodil Stem
To create the stem, take your floral wire. If you're using two wires, you can twist them together for added strength, especially for larger daffodils. Apply a bit of glue to one end of the wire where it will attach to the base of the flower's cup.
Carefully press the glued end of the wire into the center of the daffodil's cup, ensuring it's anchored securely. You might need to hold it in place for a moment until the glue sets. Once the main structure is stable, you can begin wrapping the wire with green floral tape.
Start at the base of the cup and wrap downwards, stretching the tape slightly as you go to activate its adhesive properties. This tape both hides the wire and gives a natural stem appearance.
Perfecting Your Fabric Daffodil's Look
Once the basic structure of your fabric daffodil is assembled, it's time to refine its appearance and add those little details that make it truly sing. This stage is about enhancing realism and ensuring your creation pops. A few small adjustments can elevate a charming craft into something strikingly lifelike.
Think of this step as adding the finishing touches to a painting. It’s where subtle elements come together to create a more polished and believable final product, making your fabric daffodil a true standout.
Adding Realistic Details with Wire
Floral wire isn't just for the stem; it can also be used to subtly shape the petals and cup, giving your fabric daffodil a more natural, dynamic form. After the glue has fully dried, gently bend the petals outwards or give them a slight curl. You can also use the wire to gently push and shape the cup to make it stand out more distinctly.
This adds a sense of movement and life to the flower, avoiding a stiff, artificial look. It allows you to mimic the gentle curves and natural variations seen in real daffodils. A light hand is key here; you want to suggest natural form, not force it.
Stuffing for a Lifelike Form
The daffodil's cup (corona) often has a slightly puffed or rounded appearance. For this, you'll use a small amount of stuffing. Gently push your polyfill or cotton batting into the center of the cup, behind where the petals are attached.
Distribute it evenly to create a smooth, rounded shape.
Avoid overstuffing, as this can make the cup look unnatural or distort the petal arrangement. The goal is to give the cup a subtle fullness that mimics the natural structure of a real daffodil. This technique adds dimension and a pleasing tactile quality to your fabric creation.
Finishing Touches for Natural Appeal
To further enhance the natural appeal of your fabric daffodil, consider adding subtle details. If you've used a fabric like felt, you can lightly brush a tiny bit of shading around the edges of the petals or cup with chalk pastels or fabric paints. This can add depth and a sun-kissed look.
Always test any coloring on a scrap piece of fabric first.
Ensure all glued or stitched seams are neat and discreet. Sometimes, a tiny extra dab of glue on a loose edge or a quick stitch can make all the difference. For the stem, ensure the floral tape is wrapped smoothly and evenly.
A neatly finished stem contributes significantly to the overall polished look of your handmade flower.
Common Pitfalls When Making Fabric Daffodils (And How to Avoid Them)
Even with simple crafts, a few common missteps can crop up. Being aware of these can save you frustration and help ensure a beautiful outcome. One frequent issue is using dull scissors, which can lead to frayed or unevenly cut fabric pieces.
Always opt for sharp fabric scissors for clean, precise cuts.
Another pitfall is applying too much glue, which can ooze out and look messy. Use glue judiciously, applying thin, even lines. If using hot glue, work in small sections so it doesn't dry before you can attach the pieces.
Overstuffing the daffodil's cup can also make it look misshapen; use just enough filling to create a subtle curve.
- Dull scissors: Lead to ragged edges and distorted shapes. Solution: Use sharp fabric scissors.
- Excessive glue: Creates messy, visible blobs. Solution: Apply glue sparingly; heat glue in small bursts.
- Overstuffing the cup: Results in an unnatural, ballooned center. Solution: Use only a small amount of stuffing for a subtle curve.
- Uneven petal placement: Makes the flower look lopsided. Solution: Measure and space petals evenly around the cup.
- Skipping stem wrapping: Leaves wire visible and less natural. Solution: Wrap the stem securely with green floral tape.
Beyond the Basics: Customizing Your Fabric Daffodils
Once you've mastered the basic fabric daffodil, the creative possibilities truly open up. You can experiment with different fabric textures and colors to create varied looks. Imagine daffodils in soft pastels, deep jewel tones, or even metallic fabrics for a touch of glamour.
You might also play with the size and shape of your petals and cup. Creating larger blooms for statement pieces or smaller ones for delicate arrangements can add versatility. Some crafters even add tiny beads or sequins to the center of the cup for a bit of sparkle.
Consider creating a whole bouquet of fabric daffodils in varying stages of bloom, from tight buds to fully open flowers. This adds a dynamic, realistic feel to any display. If you're ambitious, you could even try adding small fabric leaves attached to the stem.
This level of customization can really set your handmade flowers apart.
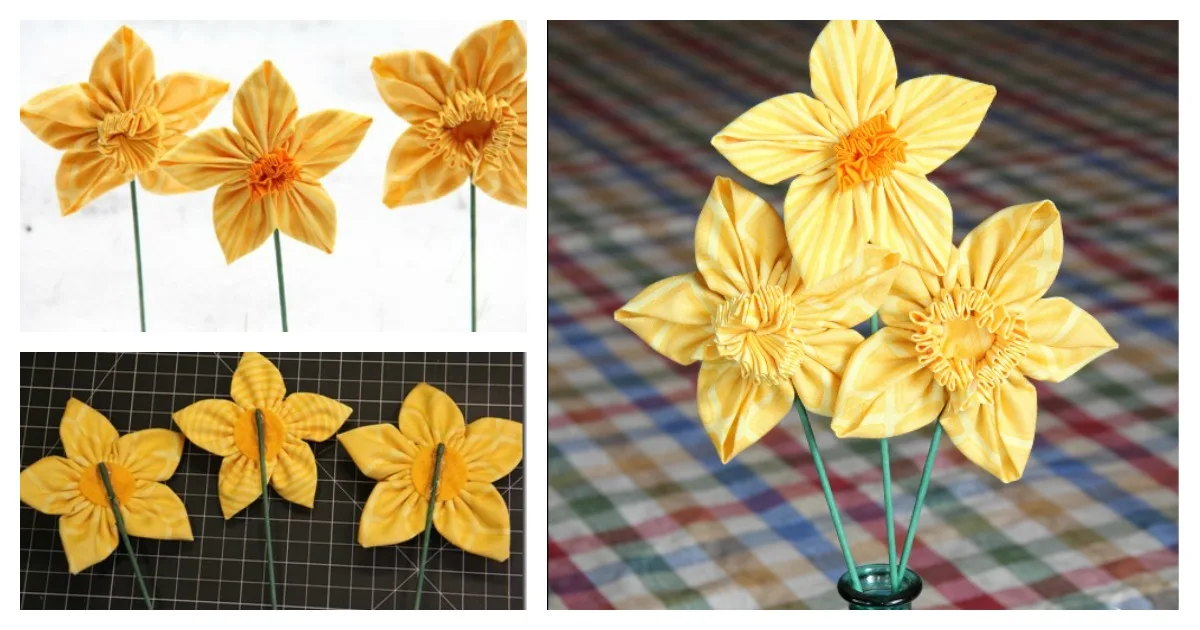
Fabric Daffodil Display Ideas
Your beautifully crafted fabric daffodils deserve a lovely setting where they can be admired. One classic display is to arrange them in a simple vase, much like real flowers. A clear glass vase makes the finished stems visible, adding to the charm.
For a more substantial arrangement, combine your fabric daffodils with other fabric flowers or greenery.
These fabric blooms also make charming additions to craft projects. They can be glued onto headbands, used to embellish gift wrapping, or even attached to wreaths for a festive touch. For a delightful tablescape, place a single daffodil at each setting.
Their permanence means they can also be integrated into DIY home decor items like pillows or wall hangings.