
You've got the vision: fresh herbs in the kitchen window, a living wall in the living room, maybe a few rows of microgreens under a grow light. So how to plan an indoor garden that actually thrives, not just survives for three weeks? That's the question this guide answers.
The truth is, most indoor gardens fail before they even start. The problem isn't your thumb color. It's skipping the planning stage.
According to the 2023 National Gardening Survey, over 30% of U.S. households now grow food indoors, yet the same report shows that nearly half of beginners quit within six months. The difference between a thriving setup and a sad, leggy collection of plants comes down to three decisions you make before you buy anything. Let's walk through them.
Quick Answer
Assess your available light first. Match your plant choices to that light level. Choose containers with drainage holes.
Use indoor potting mix, not garden soil. Water only when the top inch of soil is dry. That's the core process.
Everything else is refinement.
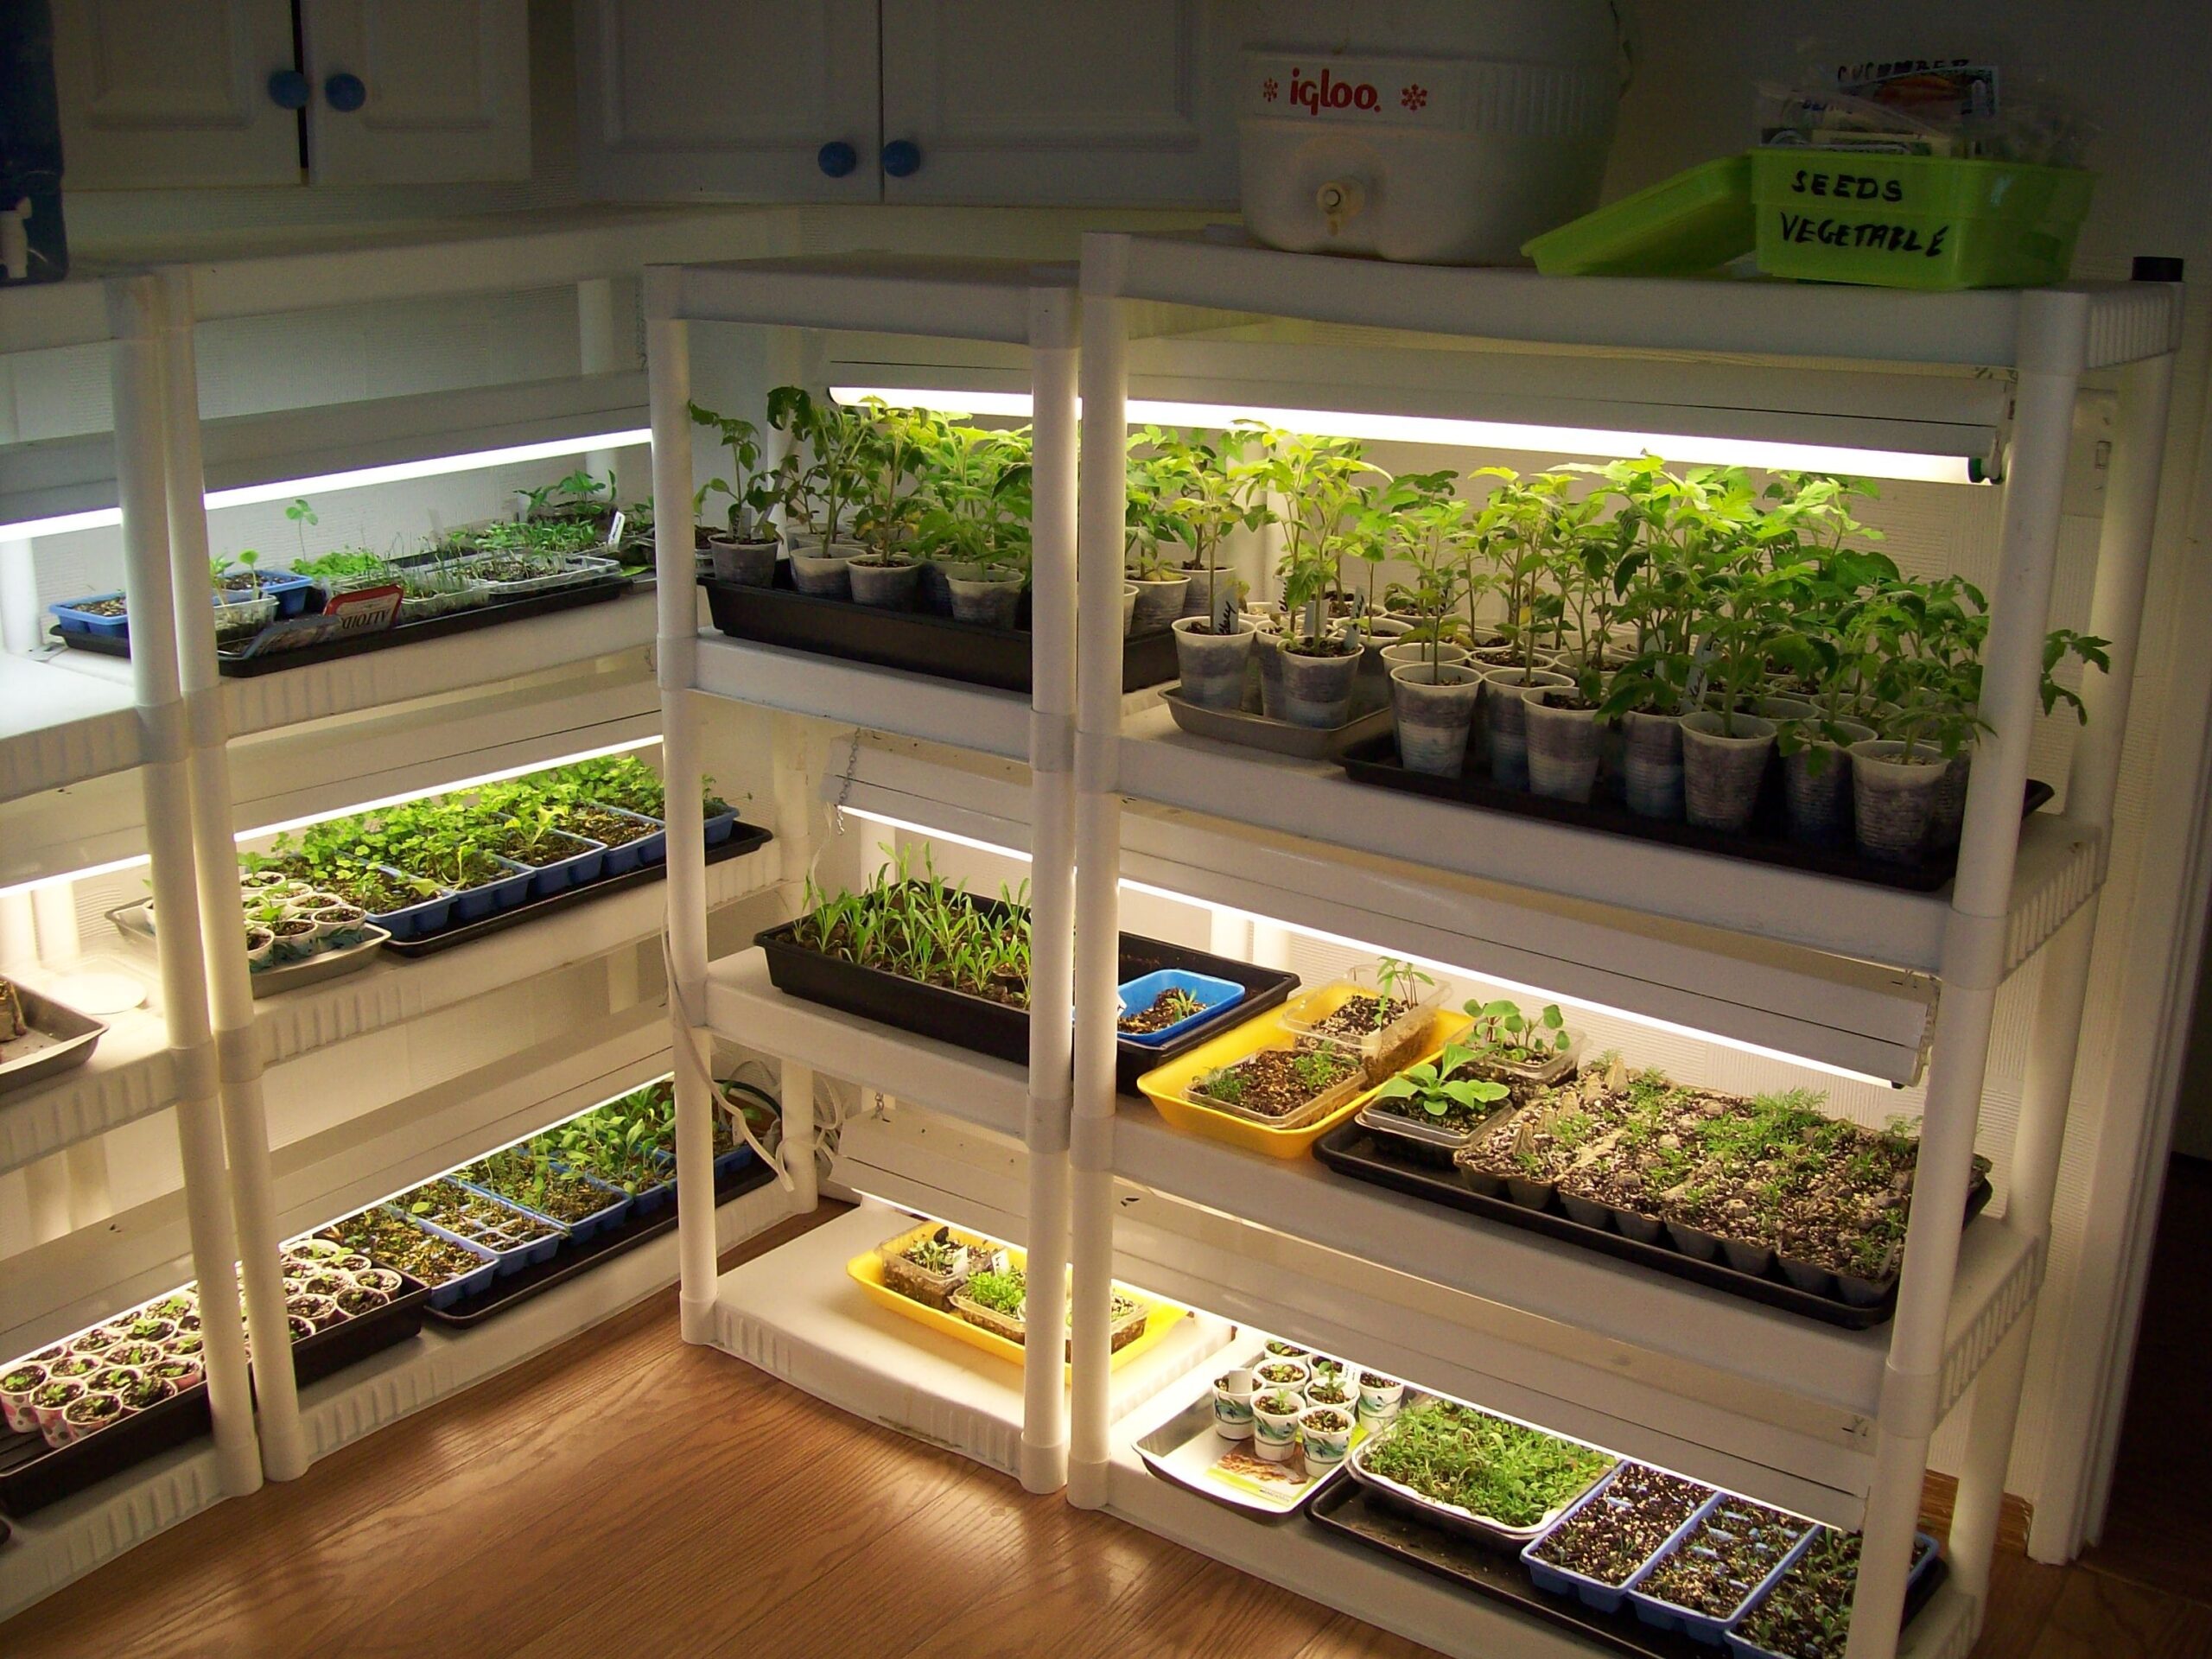
The Real Problem: Why Most Indoor Gardens Fail (Before They Start)
Let's clear up a common belief. You don't have a black thumb. You had a plan that didn't account for your actual conditions.
The biggest mistake people make is buying plants first and figuring out placement later. That's backward. You wouldn't buy a car without knowing if you have a garage or a driveway.
Plants work the same way. They need specific light, moisture, and space to grow well.
Here are the three most common failure points:
- Light mismatch. You buy a succulent for a north-facing bathroom. It stretches, gets pale, and dies within a month.
- Overwatering. You water every Monday because that's what the tag said. But the soil is still wet from last week. Roots rot.
- Using the wrong soil. Garden soil compacts in pots. It holds too much water. Roots suffocate.
Every one of these is avoidable. The fix is a simple decision tree. You start with what you have, not what you want.
The First Fork in the Road: What's Your Light Situation?
Light is the single most important factor. It determines what you can grow, where you can grow it, and whether you need supplemental lighting. Ignore this step, and nothing else matters.
Start by observing your space for a few days. Watch where the sun hits and for how long. Don't guess.
Use a simple rule of thumb:
- South-facing windows. These get direct sun for 6 to 8 hours a day. This is prime real estate. You can grow tomatoes, peppers, basil, and most succulents here.
- East or west-facing windows. These get about 4 to 6 hours of bright indirect light. Great for leafy greens, pothos, philodendrons, and herbs like mint and chives.
- North-facing windows. These get little to no direct sun. You're limited to low-light champions like snake plants, ZZ plants, and pothos. If you want edibles, you'll need a grow light.
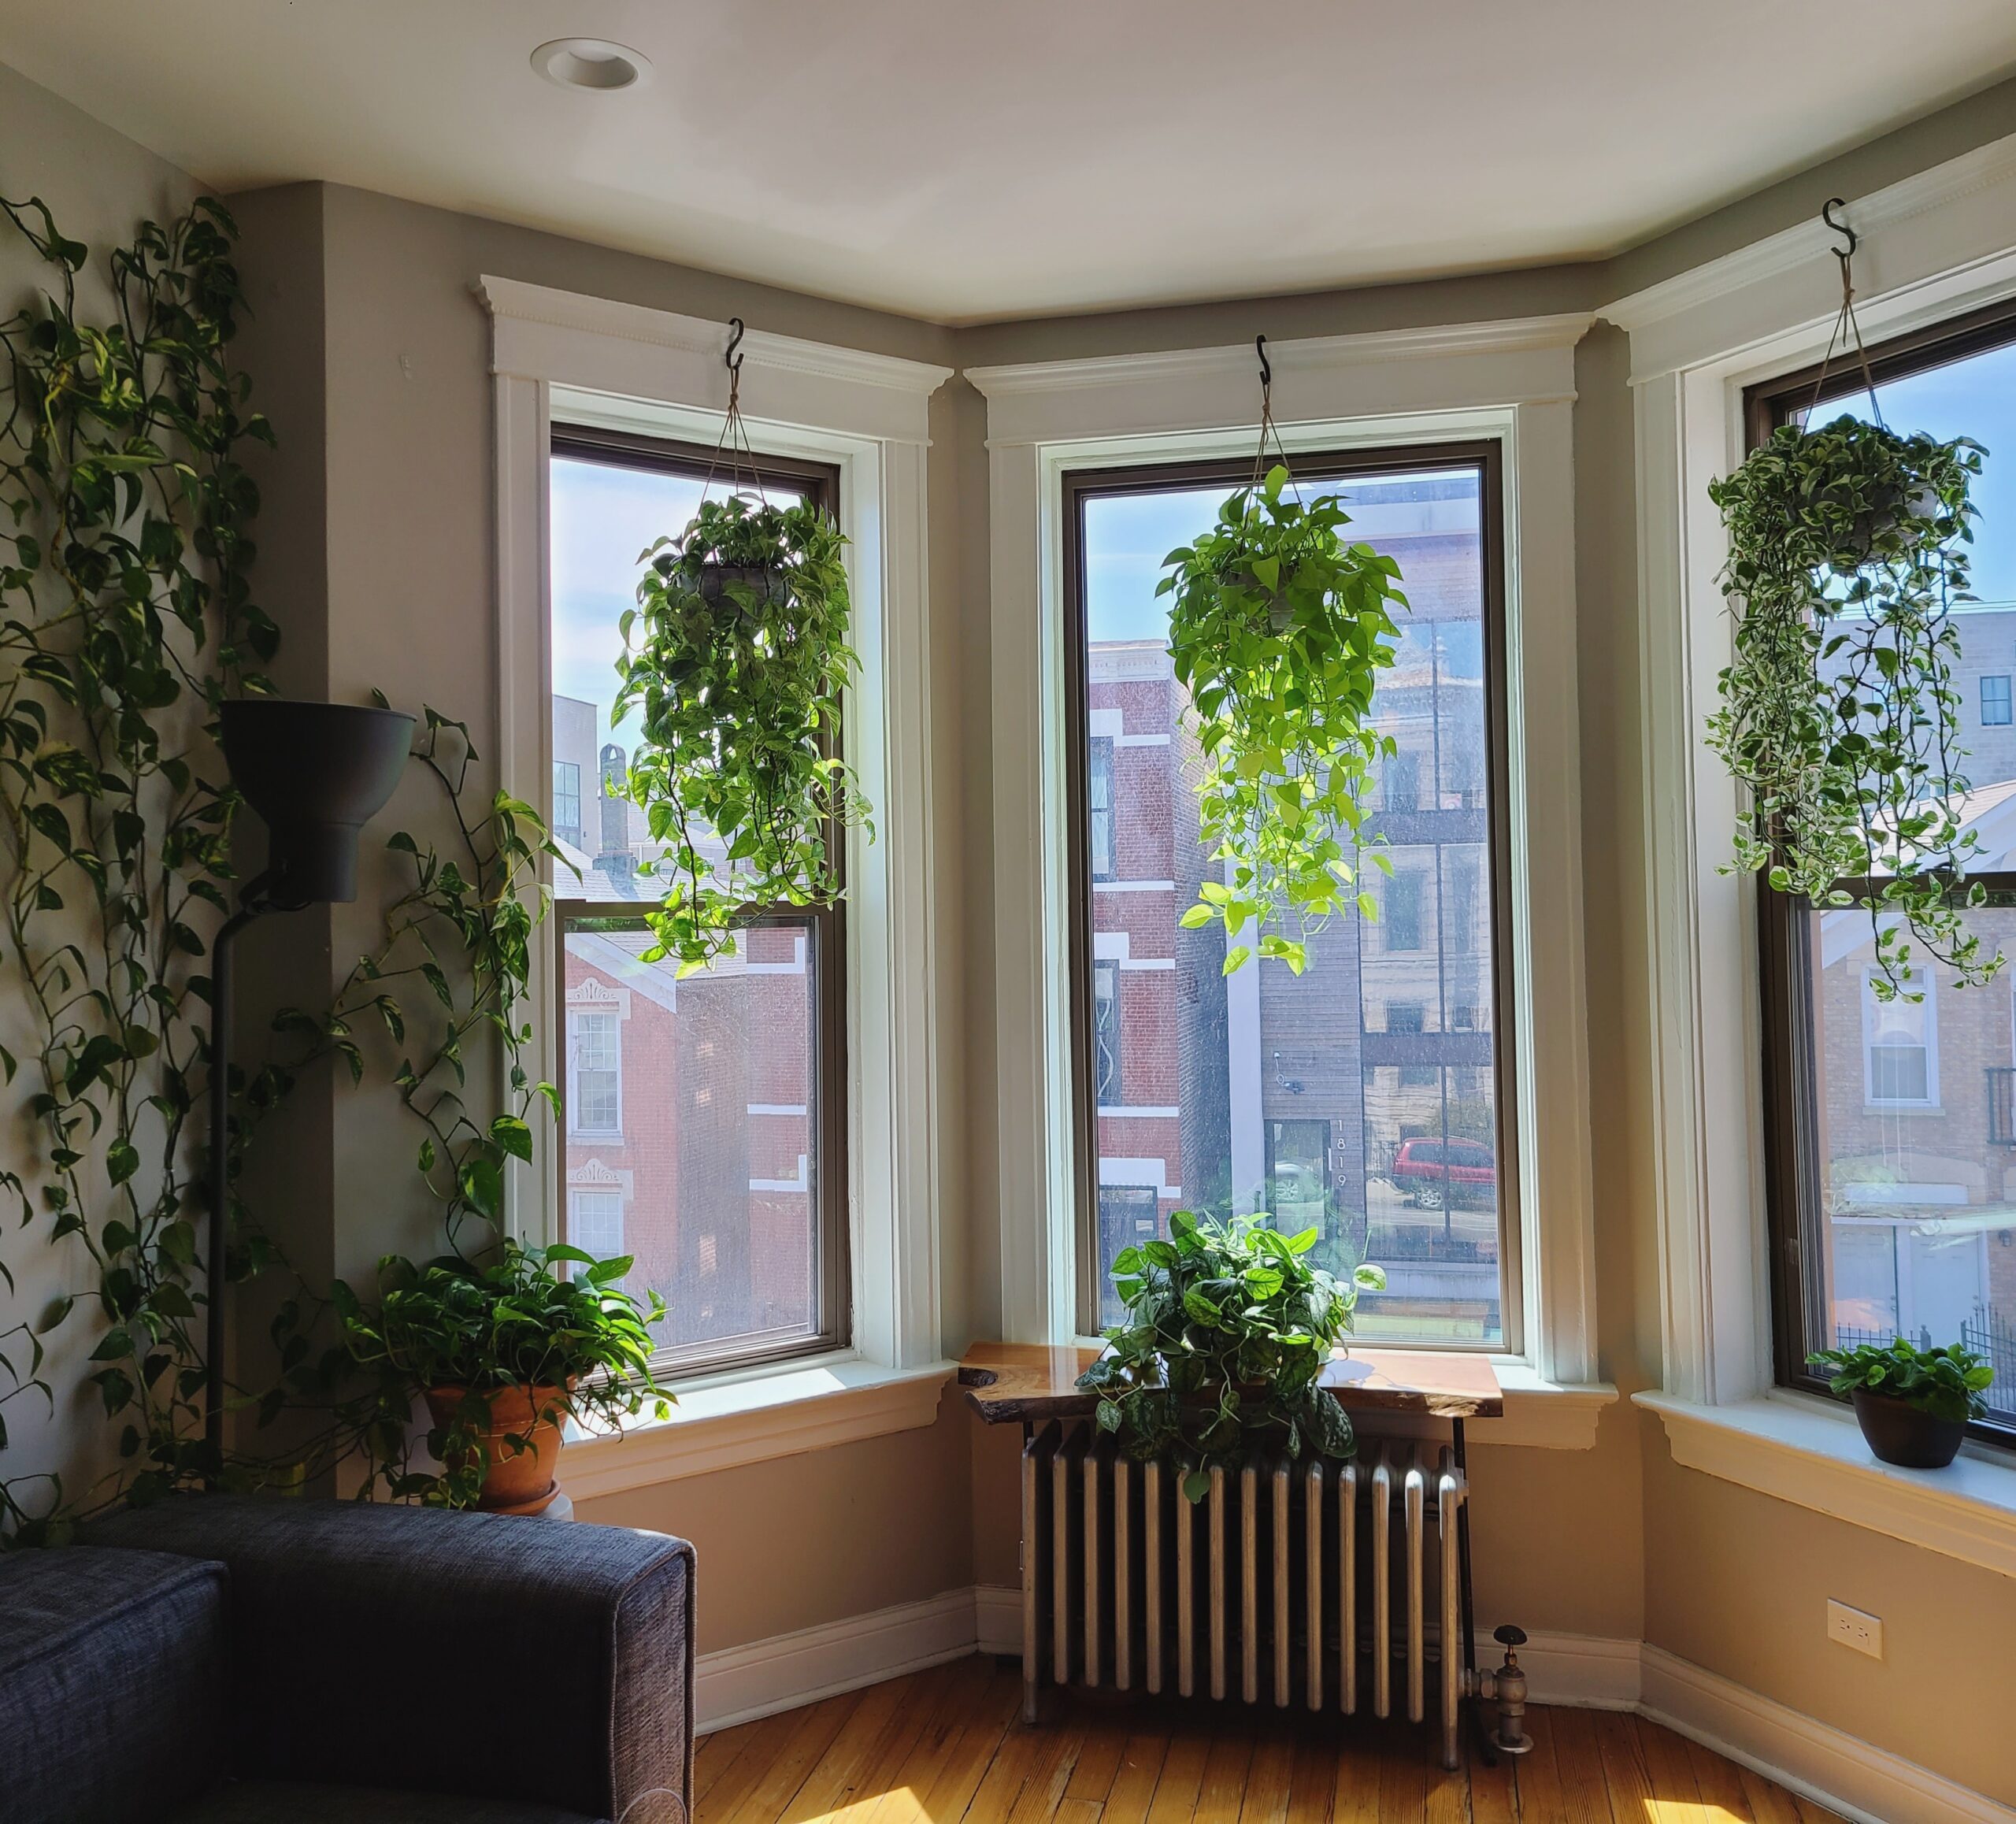
The image above shows a typical bright window setup. South-facing windows give you the most options. North-facing ones need a different strategy entirely.
If you have no natural light at all, don't worry. You can still grow with full-spectrum LEDs. But you'll need to budget for them.
Think of a grow light as a replacement for the sun. You need to run it 12 to 16 hours a day for most edibles.
The Second Fork: What Do You Want to Grow?
Once you know your light situation, you can choose plants that actually fit. This is where the decision tree gets more specific.
Edibles (Herbs, Greens, Microgreens)
If you want food, you need bright light. South or west windows are best. For indoor edibles, focus on fast-growing, compact plants:
- Basil, chives, mint, parsley, oregano
- Leafy greens like lettuce, spinach, kale
- Microgreens (harvest in 7 to 14 days)
- Dwarf pepper and tomato varieties
Edibles need consistent watering and a steady supply of nutrients. Plan to fertilize every two weeks during the growing season.
Ornamentals (Houseplants, Foliage, Flowers)
If you want living decor, you have more flexibility. Many houseplants tolerate lower light. The key is matching the plant to the room:
- Low light: Snake plant, ZZ plant, pothos, philodendron, peace lily
- Medium light: Monstera, fiddle leaf fig, calathea, spider plant
- Bright light: Succulents, cacti, jade plant, rubber plant
Low-Maintenance Survivors (For Beginners or Dark Spaces)
If you're new to this or your space is dim, stick with the low-light champions. They forgive neglect better than most.
| Plant | Light | Watering | Difficulty |
|---|---|---|---|
| Snake plant | Low to bright | Every 2-3 weeks | Very easy |
| ZZ plant | Low to bright | Every 2-3 weeks | Very easy |
| Pothos | Low to bright | Weekly | Easy |
| Peace lily | Low to medium | Weekly | Easy |
| Spider plant | Medium | Weekly | Easy |
The Third Fork: How Much Space and Budget Do You Have?
Now you need to know where it's going and how much you're willing to spend. This determines your setup.
Tabletop Setup (Under $100, Minimal Space)
A single shelf or a windowsill works here. You can fit 3 to 5 small pots. Best for herbs, microgreens, or a few low-light houseplants.
You'll need a small grow light if you're not in a south window.
Shelf or Cart Setup ($100 to $300, Moderate Space)
A wire shelving unit or a rolling cart gives you 2 to 4 tiers. Each tier can hold 4 to 6 pots. You can run LED strip lights on each level.
This is the sweet spot for most apartment dwellers. It's affordable, flexible, and easy to expand.
If you're thinking about a grow tent, our grow tent size guide breaks down the dimensions for different spaces. A 2×2 tent fits a shelf area. A 4×4 tent needs a dedicated corner.
Grow Tent or Dedicated Room ($300 to $1,000+, Serious Commitment)
This is for committed growers. A grow tent gives you total control over light, humidity, temperature, and airflow. You can grow tomatoes, peppers, and even small fruiting plants year-round.
But it requires more gear, more maintenance, and a bigger upfront investment.
For a full walkthrough, check out our grow tent setup guide. It covers ventilation, lighting, and environmental control step by step.
Matching Plants to Pots: Container and Soil Decisions
You've got the light, the plants, and the space. Now you need the right containers and soil. This is where most beginners make expensive mistakes.
Drainage Rules (Non-Negotiable)
Every pot must have drainage holes. Period. No exceptions.
If you love a pot without holes, use it as a decorative cachepot. Plant in a plastic nursery pot and slip that inside the pretty one.
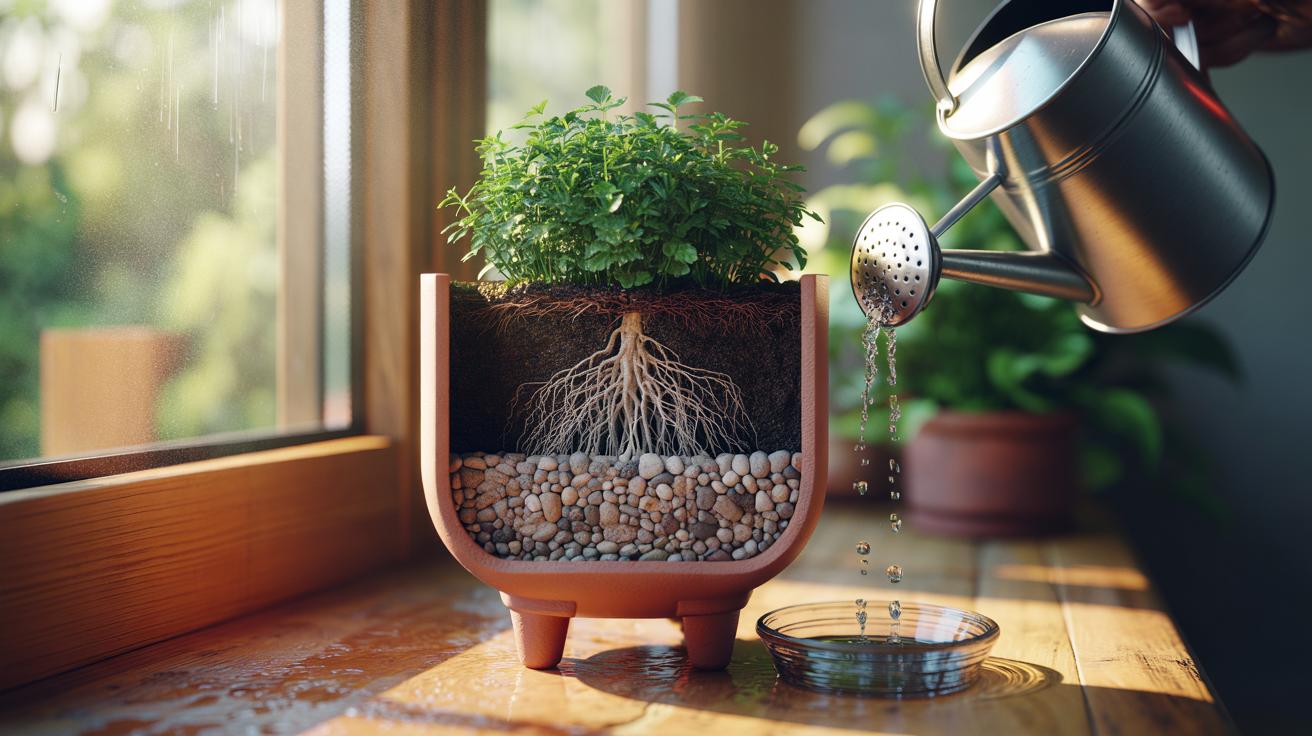
The image below shows a proper drainage layer. Notice the pebbles at the bottom and the well-draining soil above.
Pot Size by Plant Type
Use this simple rule: the pot should be 1 to 2 inches wider in diameter than the root ball. A pot that's too big holds too much moisture and can cause root rot.
| Plant Type | Recommended Pot Size |
|---|---|
| Herbs (basil, mint, chives) | 6 to 8 inches |
| Leafy greens (lettuce, spinach) | 6 to 8 inches |
| Small houseplants (pothos, snake plant) | 4 to 6 inches |
| Medium houseplants (monstera, fiddle leaf) | 8 to 12 inches |
| Succulents and cacti | 3 to 4 inches |
Soil Mixes for Different Plants
Never use garden soil indoors. It's too heavy. It compacts.
It holds water like a sponge. Use a potting mix designed for containers.
- General houseplants: All-purpose indoor potting mix
- Succulents and cacti: Add perlite or sand for drainage
- Orchids: Bark-based mix
- Seed starting: Fine-textured, sterile seed-starting mix
If you're curious about the difference between organic and synthetic feeding, our guide on compost vs fertilizer explains how each affects soil health and plant growth.
Grow Lights: When You Need Them and What to Buy
If your space lacks a bright south window, you need a grow light. Simple as that. Even a sunny east window might not cut it for edibles during winter.
The good news is that modern LED grow lights are affordable, efficient, and easy to set up. They don't produce much heat, so you can put them close to plants without burning leaves.
Light Spectrum and Intensity Basics
Plants use red and blue wavelengths for photosynthesis. Full-spectrum lights mimic natural sunlight. They appear white to our eyes but deliver the right balance for growth.
The key metric is PPFD (photosynthetic photon flux density). It measures how much usable light reaches the plant. Most houseplants need 100 to 200 μmol/m²/s.
Edibles need 300 to 500 μmol/m²/s. Many budget lights don't list PPFD, so check manufacturer specs or independent reviews.
LED vs. Fluorescent for Home Growers
LEDs are the standard now. They last longer, use less electricity, and produce less heat. Fluorescent tubes (T5s) still work and cost less upfront, but they degrade faster and need more frequent replacement.
| Light Type | Best For | Pros | Cons |
|---|---|---|---|
| LED panel | All indoor plants | Energy efficient, long life, low heat | Higher upfront cost |
| LED strip | Shelves and small spaces | Slim, flexible, easy to mount | Lower intensity, limited coverage |
| T5 fluorescent | Seedlings and low-light plants | Cheap, even coverage | Bulky, heat output, bulbs degrade |
Distance and Duration Guidelines
Distance matters. Too far, and the light is weak. Too close, and you risk leaf burn.
- LED panels: 12 to 18 inches from the plant canopy
- LED strips: 6 to 12 inches
- T5 fluorescent: 6 to 12 inches
Run lights 12 to 16 hours a day for most plants. Use a timer to keep the schedule consistent. Plants need darkness too.
That's when they respire and grow.
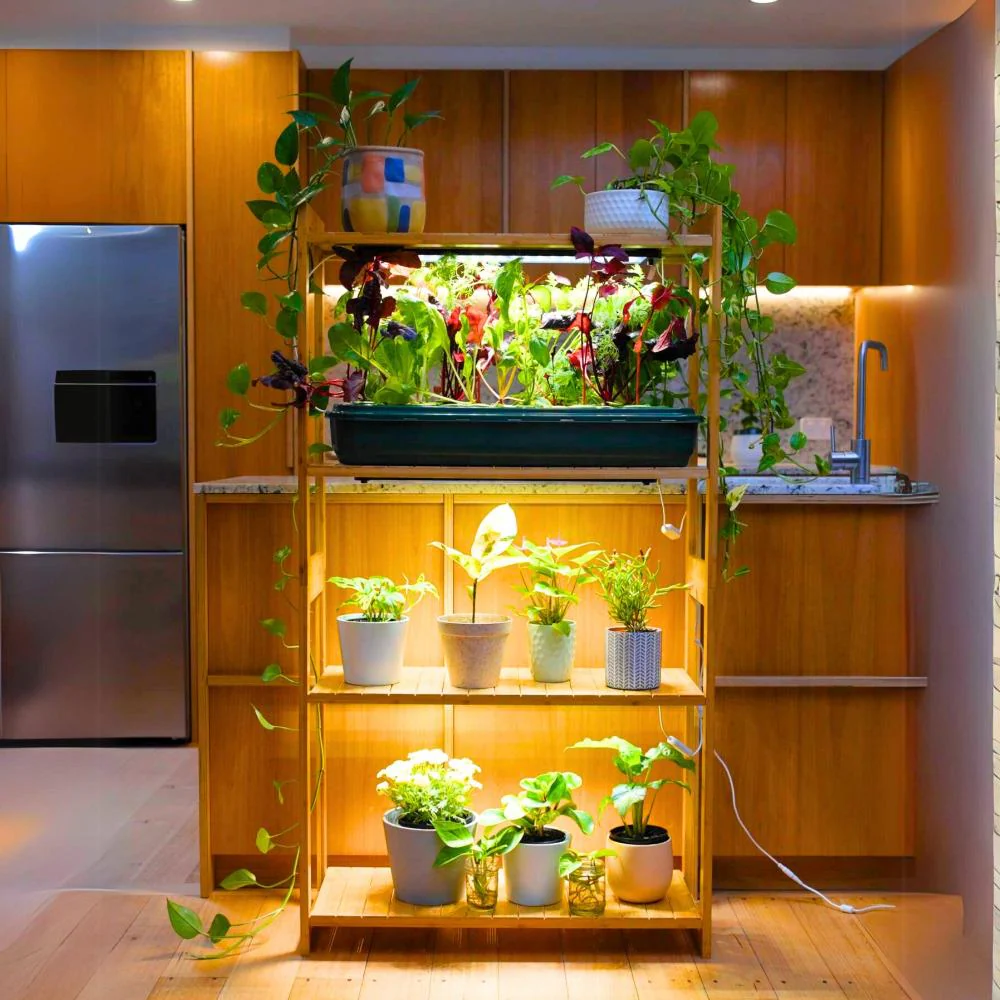
The image below shows a typical LED panel setup on a shelf. Notice the distance from the plants and the even coverage.
If you're considering a grow tent, the performance of budget options varies a lot. Our article on the performance of cheap grow tent kits breaks down what you actually get at different price points.
Watering Without Killing Your Plants
Overwatering is the number one cause of indoor plant death. It's not the water itself. It's the lack of oxygen in the soil.
Roots drown, rot sets in, and the plant wilts even though the soil is wet.
How to Check if Soil Is Actually Dry
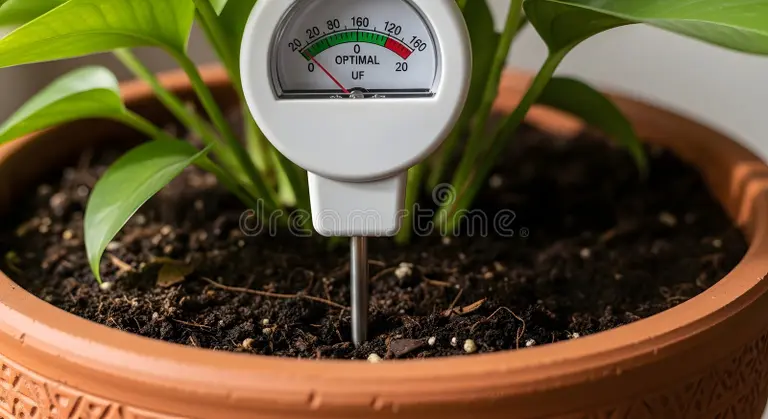
Forget the calendar. Watering on a fixed schedule is a recipe for disaster. Instead, check the soil with your finger.
- Stick your finger about an inch into the soil.
- If it feels dry, water.
- If it feels moist, wait a day or two and check again.
You can also use a soil moisture meter. It gives a numerical reading. The image below shows a typical meter in use.
Bottom-Watering vs. Top-Watering
Both methods work. Each has its place.
- Top-watering. Pour water evenly over the soil surface until it drains from the bottom. This flushes out excess salts and keeps the soil fresh. Best for most houseplants.
- Bottom-watering. Place the pot in a tray of water. The soil absorbs moisture from the bottom up. This prevents overwatering and encourages deep root growth. Best for succulents and plants prone to leaf rot.
Signs You're Overwatering (and How to Fix It)
Look for these warning signs:
- Yellowing lower leaves
- Soft, mushy stems
- Soil that stays wet for more than a week
- Fungus gnats flying around the pot
If you see these, stop watering. Let the soil dry out completely. Remove any rotting roots.
Repot in fresh, dry soil if needed.
Humidity and Airflow: The Overlooked Factors
Most indoor spaces are dry. The average home sits at 30 to 40 percent relative humidity. Many tropical plants need 50 to 60 percent.
That gap causes problems.
Dry air makes leaves turn brown at the tips. It slows growth. It also makes plants more vulnerable to pests like spider mites.
Why Dry Air Kills Tropical Plants
Plants lose water through their leaves. That's transpiration. In dry air, they lose water faster than their roots can absorb it.
The result is crispy leaf edges, drooping, and eventual decline.
Simple Humidity Fixes (No Expensive Gear Required)
You don't need a $300 humidifier. Try these first:
- Group plants together. They create a microclimate with higher humidity through transpiration.
- Use a pebble tray. Fill a shallow tray with pebbles and water. Place the pot on top. The water evaporates around the plant.
- Mist occasionally. Use a spray bottle in the morning. Avoid misting fuzzy leaves like African violets.
- Move plants to a bathroom or kitchen. These rooms naturally have more moisture.
Air Circulation for Mold Prevention
Still air is a breeding ground for mold and fungus. A small fan on low speed helps. Point it away from the plants to create gentle air movement.
This also strengthens stems and discourages pests.
Mistakes First-Time Indoor Gardeners Make
Everyone makes mistakes. The trick is making the cheap ones before the expensive ones. Here are the most common pitfalls.
Buying the Wrong Plant for the Wrong Light
You see a beautiful fiddle leaf fig at the store. You bring it home to a dark corner. It drops leaves within a week.
That's a light mismatch.
Always check the plant's light requirements before buying. Match them to your specific window. A south-facing window is not the same as a north-facing one.
Using Garden Soil Indoors
Garden soil is heavy. It contains weed seeds, pathogens, and pests. In a pot, it compacts and holds too much water.
Always use a proper indoor potting mix.
Skipping the Quarantine Step
New plants can bring pests into your home. Spider mites, mealybugs, and scale are common hitchhikers. Keep new plants separate from your collection for two weeks.
Inspect the leaves and stems every few days. If you see bugs, treat them before introducing the plant to the rest of your garden.
Watering on a Rigid Schedule
"Water every Monday" sounds good in theory. It ignores the reality of your plant's needs. The soil dries faster in summer and slower in winter.
The plant grows faster in bright light and slower in low light.
Check the soil before you water. Every time. That's the only reliable method.
Maintenance That Keeps Things Alive Long-Term
An indoor garden isn't set-and-forget. It needs regular attention. But the maintenance is simple once you know what to do.
Fertilizing Indoor Plants (When and How Much)
Plants in pots use up nutrients quickly. The soil has a limited supply. You need to replenish it.
- Edibles: Fertilize every two weeks during the growing season with a balanced liquid fertilizer.
- Houseplants: Fertilize once a month in spring and summer. Skip winter when growth slows.
- Succulents: Fertilize once a season with a diluted, low-nitrogen formula.
Don't overdo it. More fertilizer is not better. It can burn roots and cause leaf drop.
Cleaning Leaves for Better Light Absorption
Dust blocks light. It reduces photosynthesis. Wipe leaves with a damp cloth every few weeks.
For plants with many small leaves, give them a gentle shower in the sink. Let them dry before putting them back in bright light.
Seasonal Adjustments (Winter vs. Summer Care)
Plants respond to changes in light and temperature. In winter, days are shorter and light is weaker. Reduce watering.
Stop fertilizing. Move plants closer to windows.
In summer, increase watering. Resume fertilizing. Watch for sunburn if you move plants outside.
When to Repot
Roots need room to grow. If you see roots coming out of the drainage holes, it's time to repot. Choose a pot that is 1 to 2 inches wider.
Use fresh potting mix. Water thoroughly after repotting.
Decision Guide: Your Indoor Garden Plan in 10 Minutes
You've covered the light, the plants, the pots, the watering, and the maintenance. Now it's time to pull it all together. Use this guide to make your final decisions before you spend a cent.
Quick Reference Table by Light, Space, and Goal
| Your Light | Your Space | Best Plants | Setup Type | Approx. Cost |
|---|---|---|---|---|
| South window | Any | Edibles, succulents, flowering plants | Windowsill or shelf | $30 to $80 |
| East/west window | Any | Leafy greens, pothos, philodendron | Windowsill or shelf | $30 to $80 |
| North window | Small | Snake plant, ZZ plant, pothos | Tabletop with grow light | $50 to $120 |
| No natural light | Small | Low-light houseplants with LED | Shelf with grow light | $80 to $200 |
| No natural light | Large | Edibles or ornamentals | Grow tent with full LED | $200 to $500+ |
Simple Checklist Before You Buy Anything
- Measure your light. Observe it for three days. Don't guess.
- Pick plants that match your light level. Write down their names.
- Choose containers with drainage holes. Get the right size.
- Buy indoor potting mix. Never use garden soil.
- Get a grow light if needed. Match the PPFD to your plants.
- Set up a watering check. Use your finger or a moisture meter.
- Plan a two-week quarantine for new plants.
Frequently Asked Questions
How much light do indoor plants really need?
Most houseplants need 8 to 12 hours of bright indirect light per day. Edibles need 12 to 16 hours. South windows are best.
East windows work for most. North windows need supplemental lighting.
Can I grow vegetables indoors year-round?
Yes, with the right setup. You need a south window or a grow light running 14 to 16 hours a day. Focus on compact varieties.
Leafy greens, herbs, and microgreens are the easiest. Tomatoes and peppers need more space and light.
How often should I water indoor plants?
There is no universal schedule. Check the soil moisture with your finger. Water when the top inch feels dry.
In winter, most plants need less water. In summer, they need more. Always check first.
What is the easiest indoor plant to grow?
Snake plant and ZZ plant are the most forgiving. They tolerate low light, irregular watering, and dry air. Pothos is also very easy.
These are great choices for beginners.
Do I really need a grow light?
Only if you lack a bright south or east window. North windows and rooms without windows cannot support most plants without supplemental lighting. LEDs are the most efficient option for indoor gardens.
Why are my plant leaves turning yellow?
Yellow leaves usually mean overwatering. Check the soil. If it's wet, let it dry out.
Yellow leaves can also signal too little light, nutrient deficiency, or rootbound pots. Check each factor one at a time.