Deciding whether to stain wood with a brush or a rag often comes down to the look you're aiming for and the type of project you're tackling. Is it better to stain wood with a brush or rag? Our research indicates that neither method is universally superior; each excels in different scenarios, influencing everything from application ease to the final aesthetic appeal.
Manufacturer specifications for popular oil-based stains, like those from Minwax, suggest that proper applicator choice can significantly impact how evenly the color penetrates and how visible the brush strokes or wiped marks are. For instance, aggregate user feedback from online retail platforms points to specific benefits and drawbacks for each method, especially when working with different wood species or existing finishes. Understanding these nuances is key to achieving professional-quality results.
When to Grab a Brush vs. a Rag for Staining Wood
Stain Application: Brush or Rag – The Big Debate
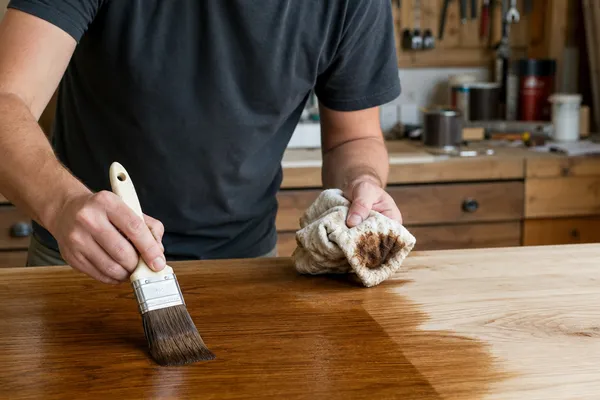
The world of DIY wood finishing can sometimes feel like a choose-your-own-adventure novel, especially when it comes to applying stain. Two of the most common tools in the arsenal are the trusty brush and the readily available rag. Both can get the job done, but they offer distinctly different experiences and outcomes, impacting everything from how quickly you can cover a surface to the final look of your project.
This isn't just about personal preference; it's about understanding the mechanics. A brush, with its bristles, interacts with the wood and stain in a way that a rag simply can't replicate, and vice versa. Making the right choice upfront can save you a lot of time, frustration, and potentially, a failed project.
How to Choose: Brush or Rag? It Depends on Your Goal
Choosing between a brush and a rag for staining boils down to what you want your finished piece to look like and how much control you need. Aggregate user reviews and manufacturer guides consistently highlight that different techniques are better suited for different results. Think about the surface you're working on and the overall aesthetic you're aiming for before you dip a single tool.
If your priority is a consistent, controlled application that pushes stain deep into the grain, a brush often has the edge. For a more natural, "wiped-on" appearance that emphasizes the wood's character with minimal visible application marks, a rag typically performs better. Let's break down exactly when each tool becomes the star.
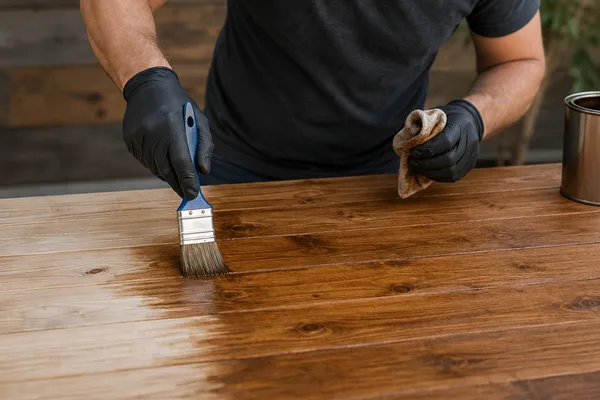
Getting That Smooth, Even Finish: When a Brush Wins
For achieving a consistently smooth and even stain application across larger surfaces or when you want to ensure the stain is thoroughly worked into the wood grain, a brush often proves superior. This method is particularly helpful for preventing blotchiness, a common frustration for many DIYers, especially on porous woods like pine or poplar. Manufacturer guides for stains like those from Varathane often recommend a brush for its ability to spread the product evenly and allow for controlled blending.
A good quality brush can saturate the wood surface effectively, ensuring uniform color absorption. This deliberate spreading helps build the color gradually and provides ample working time before the stain begins to set. It’s this control that makes brushes the go-to for many furniture projects or anything where a flawless, professional finish is the primary goal.
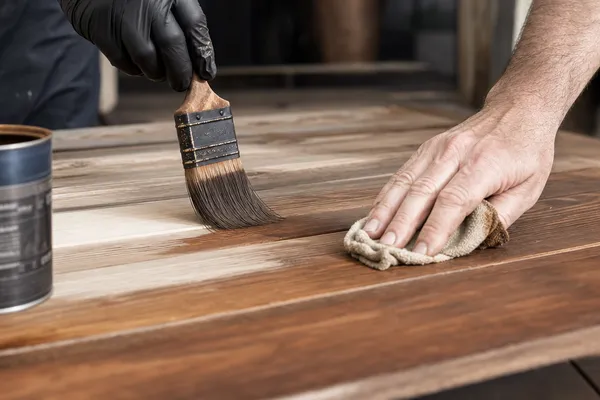
The "Wiped-On" Look: Why a Rag Might Be Your Best Bet
When you’re aiming for a more natural, sometimes slightly distressed or antique look, a rag is your best friend. This method allows you to apply the stain quickly and then wipe away excess, which can prevent the stain from darkening the wood too much on the first pass. It mimics the way early woodworkers applied finishes and can create a beautiful, less "perfect" aesthetic that highlights the natural beauty of the wood's grain patterns.
Many wipe-on stains are specifically formulated for this application, allowing for easy spreading and blending. Using a soft, lint-free cloth, like a good quality cotton rag, lets you control the saturation and build color in thin layers. This technique is also fantastic for intricate details or pieces with a lot of hardware where a brush might be cumbersome.
Brush Staining: Pros, Cons, and When It Shines
Using a brush for wood staining is a classic technique for a reason. It offers a level of control that can be hard to match, especially when you're detailing furniture or working on larger, flat surfaces where even coverage is critical. However, like any tool, it has its downsides. Our research into manufacturer guides and aggregate user feedback reveals a clear picture of when a brush is the right choice and when you might regret grabbing one.
Pros of Using a Brush
- Precise Control: Bristles allow you to spread stain exactly where you want it, with less risk of drips or runs compared to other methods.
- Even Coverage: Brushes excel at pushing stain into the wood grain, leading to a more uniform color, especially on porous woods.
- Less Stain Waste: Brushes typically hold and release stain more efficiently, meaning you might use less product overall.
- Building Color Gradually: You can apply thin coats and build up the desired depth of color with excellent control.
- Detail Work: Angled or smaller brushes are excellent for intricate areas, trim, and tight corners.
Cons of Using a Brush
- Visible Brush Marks: If not used carefully, brushes can leave noticeable streaks or lines in the finish. This is especially true with lower-quality brushes or water-based stains that dry quickly.
- Slower Application: It generally takes longer to stain a large surface area with a brush compared to a rag or spray.
- Can Be Messy: Bristles can hold a lot of stain, leading to drips if you're not careful.
When a Brush is Your Best Tool
A brush is your best bet when you need precision and a smooth, even finish. Projects like furniture restoration, staining interior trim, or applying stain to new, bare wood where you want to control the saturation and prevent blotches are ideal. If you’re using a penetrating oil-based stain or a gel stain that you want to work deeply into the wood fibers, a quality brush is invaluable. The goal is usually a consistent color that highlights the wood's beauty without obvious application marks.
Rag Staining: Weighing the Advantages and Downsides
Staining with a rag offers a wonderfully intuitive and often faster approach, particularly beloved by those who appreciate a more handmade aesthetic. It’s the quintessential method for "wipe-on" stains and can give your project a beautiful depth. However, it’s not without its challenges, and improper technique can lead to less-than-ideal results. Our analysis of wood finishing forums and manufacturer instructions reveals the highs and lows of this popular method.
Pros of Using a Rag
- Natural Look: Wiping on stain creates a more organic, less "perfect" finish that highlights the wood's natural grain and variations.
- Fast Application: For large, flat surfaces like tabletops or decks, wiping is significantly faster than brushing.
- Easy Saturation Control: You can see how much stain is on the surface and easily wipe away excess to prevent over-darkening.
- Minimal Streaks: Properly done, rag application leads to very few visible application marks.
- Great for Wipe-On Stains: These stains are formulated to be wiped on and off, making rags the ideal applicator.
Cons of Using a Rag
- Potential for Blotching: On porous woods, wiping can sometimes lead to uneven absorption and blotchy color if not managed carefully.
- Lint and Fiber Issues: Using the wrong kind of rag can leave behind unwanted lint or fibers embedded in the wet stain.
- Stain Absorption: A rag can soak up a lot of stain, potentially leading to more product usage if you're not economical.
- Safety Hazard: Stain-soaked rags can spontaneously combust if not disposed of properly.
- Less Control in Details: Reaching intricate areas or sharp corners can be more challenging with a rag compared to a brush.
When a Rag is the Right Choice
A rag is an excellent choice for projects where a natural, quick, and somewhat casual finish is desired. This includes staining reclaimed wood, decks, exterior furniture, or tabletops where a slightly imperfect, hand-applied look is part of the charm. If you’re using a commercially available wipe-on stain or a gel stain and you want to build color in thin, controlled layers by wiping away excess, a rag is hard to beat. It’s also a great option for beginners looking for a forgiving application method.
Key Factors to Consider for Your Project
When you're standing there with a can of stain in one hand and your chosen applicator (brush or rag) in the other, a few key factors should really guide your decision. It's not just about which tool feels more comfortable. The type of stain you're using and the nature of the surface you're working on play a huge role. Think of these as the critical variables that help you nail the perfect finish every time.
Our research, drawing from manufacturer technical data sheets and aggregated user feedback, shows that ignoring these elements can lead to less-than-ideal outcomes. For example, a water-based stain behaves differently than an oil-based one, and a large, flat surface needs a different approach than a detailed piece of trim. Let's dive into what really matters.
Stain Type Matters: Oil-Based vs. Water-Based Application
The chemistry of your stain fundamentally dictates how it behaves and, consequently, which applicator works best. Oil-based stains, often favored for their deep penetration and rich color, tend to dry slower. This slower drying time gives you more working room when using a brush, allowing you to spread it evenly without immediate streaking. They also generally offer better durability and protection, as noted in many woodworking technique guides.
Water-based stains, on the other hand, can dry much faster. This rapid drying time makes brushing them out tricky, as they can start to set before you've finished spreading. For water-based products, wiping with a rag allows for quick application and blending before the stain has a chance to become unworkable. Some modern water-based formulas are designed to be wiped on and off, mimicking the process of oil-based wipe-on stains.
Surface Size and Complexity
Larger, flatter surfaces like tabletops, cabinets, or decks greatly benefit from the speed and even coverage a rag can provide. You can quickly coat a large area and then wipe off the excess in a fluid motion, which is much more efficient than meticulous brushing. This also helps ensure consistency across a wide expanse, minimizing the chances of lap marks where one brushed section meets another.
For smaller, more intricate projects, or areas with lots of detail like furniture legs, turnings, or recessed panels, a brush is almost always the preferred tool. You can precisely apply stain exactly where it's needed, getting into corners and crevices that a rag would miss or smear across. If you are working on a project with many small pieces, like a cutting board or intricate molding, a brush offers the control necessary for a clean, professional look.
Desired Finish and Look
Your vision for the final piece is perhaps the most significant factor. If you desire a smooth, almost glass-like finish where the wood grain is beautifully enhanced but the application marks are invisible, brushing is usually the way to go. This method allows for a more deliberate build-up of color and a very uniform sheen across the entire surface. Many professional furniture makers opt for brushes for this reason.
Conversely, if you're after a more rustic, antique, or "lived-in" look, a rag is your best friend. Wiping the stain on and then wiping it off creates a softer, more organic color tone. This method is excellent for highlighting the natural texture and variations in the wood, giving it character. It’s also the go-to for specifically designed "wipe-on" stains, which are formulated to produce this specific aesthetic.
Step-by-Step: Applying Stain with a Brush
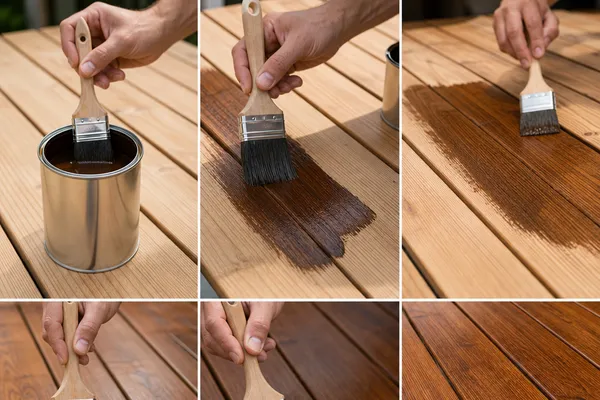
Applying stain with a brush might seem straightforward, but a little technique goes a long way toward avoiding common pitfalls like brush marks. The key is preparation, proper loading of the brush, and consistent application. Our research, including advice from leading paint and stain manufacturers, outlines a process that ensures a smooth, even finish. As of 2026, these principles remain paramount for achieving professional results.
Here’s a breakdown of how to do it right:
Preparation and Loading
- Prepare the Wood: Ensure your wood surface is clean, dry, and sanded smooth. Dust off all particles thoroughly. If you're staining pine or other blotch-prone woods, consider applying a pre-stain wood conditioner.
- Stir, Don't Shake: Open your stain can and stir it thoroughly with a stir stick, scraping the bottom and sides. Avoid shaking, as this introduces air bubbles that can transfer to your wood.
- Load the Brush: Dip a quality natural-bristle brush (for oil-based stains) or a synthetic-bristle brush (for water-based stains) about one-third of the way into the stain. Don't overload it.
Application and Removal
- Apply Evenly: Start by brushing stain onto a small section of the wood. Work in the direction of the wood grain, spreading the stain evenly.
- Maintain a Wet Edge: Always work from a "wet edge" to the next section. This means overlapping slightly with the previously stained area to avoid lap marks.
- Wipe Off Excess: After a few minutes (check your stain's specific instructions, usually 5, 15 minutes), use a clean, lint-free rag to gently wipe off the excess stain, again working with the grain. This step is crucial for controlling the depth of color and preventing a gummy finish.
- Second Coats (Optional): If you desire a darker color, allow the first coat to dry completely according to the manufacturer's instructions, then apply a second coat, repeating the brushing and wiping process.
Step-by-Step: Applying Stain with a Rag
Staining with a rag is a fantastic method for achieving a natural look and is particularly well-suited for certain types of stains and wood. The process is intuitive but requires attention to detail to ensure an even color and avoid blotching. Drawing from aggregate user feedback and guides from woodworking experts, this method emphasizes quick application and controlled wiping.
Here’s how to get a great finish using a rag:
Preparation and Staining
- Prepare the Surface: Just like with brushing, ensure your wood is clean, dry, and properly sanded. A pre-stain conditioner can be helpful for blotch-prone woods.
- Choose Your Rag: Use a clean, lint-free cloth. Old cotton t-shirts are popular, but ensure they're free of detergent residue. Microfiber cloths can also work well, but avoid ones that might be too grabby.
- Apply the Stain: Pour a small amount of stain directly onto the rag, or onto a small section of the wood. Begin wiping the stain onto the wood surface, working in long, even strokes that follow the direction of the grain.
Wiping and Building Color
- Spread and Blend: Work quickly to spread the stain evenly across one section of the wood. If using a wipe-on stain, you’re essentially "painting" it on with the rag.
- Wipe Off Excess: As you work, use a clean, dry portion of your rag (or get a new one) to wipe off any excess stain. This is the critical step for controlling color depth. The longer the stain sits, the darker it will penetrate.
- Build Color Layers: For a deeper color, allow the first coat to dry fully according to package directions. Then, reapply stain with a clean rag, wiping off excess as needed, until you achieve the desired saturation.
Common Mistakes When Staining Wood (and How to Avoid Them)
Many a beautiful piece of wood has been marred by a few common staining mistakes. Whether you're using a brush or a rag, understanding these pitfalls beforehand can save you a lot of headaches. Our analysis of user forums and product reviews highlights that even experienced woodworkers can fall prey to these errors if they aren't careful or informed.
Brush Mistakes to Watch Out For
- Using the Wrong Brush: A synthetic brush with an oil-based stain or a natural bristle brush with a water-based stain can lead to poor application and streaks. Always match your brush type to your stain.
- Overloading the Brush: Dipping the brush too deep into the stain, or not tapping off excess, can result in drips and puddles on your surface. This leads to uneven color and unsightly marks.
- Not Maintaining a Wet Edge: When brushing large areas, failing to overlap your strokes slightly can create visible lines, or "lap marks," where one section dried before the next was applied. Always work from wet to dry.
- Forgetting to Wipe Off Excess: Most stains require wiping off the excess after a short period. Skipping this step can result in a gummy finish, dark splotches, and a sticky surface that attracts dirt.
Rag Mistakes to Avoid
- Using Lint-Producing Rags: Embedding tiny fabric fibers into wet stain is an infuriating problem. Always opt for clean, lint-free cloths for stain application and wiping. Old, well-worn cotton t-shirts are usually safe bets.
- Applying Too Much Stain at Once: Rags can soak up a lot of stain, and if you put too much on the wood without adequate wiping, it can dry unevenly or too dark. It’s better to apply thin coats.
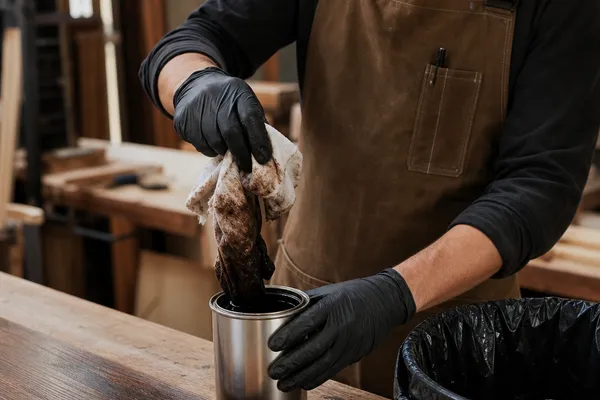
- Not Disposing of Rags Safely: This is a critical safety issue. Rags soaked in oil-based stains can spontaneously combust if crumpled and left in a pile. Always spread them out flat to dry completely or soak them in water in a sealed metal container before disposal.
Safety First: Handling Stain and Rags Properly
Working with wood stains involves more than just achieving a beautiful finish; it requires a commitment to safety. Many stains, especially oil-based varieties, utilize solvents and chemicals that demand careful handling. The risk of fire from stained rags is a significant concern that cannot be overlooked. Adhering to manufacturer safety guidelines, like those found on the Material Safety Data Sheets (MSDS) for specific products, is paramount for any woodworking project.
When applying stains, always ensure you have adequate ventilation. Open windows and doors, or use fans to circulate air, especially when working with oil-based products. This helps dissipate fumes and reduces the risk of respiratory irritation. If working in a confined space, consider a respirator mask designed for organic vapors.
The most critical safety point, however, relates to rags soaked in oil-based stain. These rags can, and do, ignite spontaneously when left bunched up. This is due to a chemical reaction that generates heat. To prevent this, always spread stained rags out flat to dry completely in a safe, well-ventilated area away from ignition sources.
Alternatively, submerge them in a sealed metal container filled with water before disposing of them according to local regulations.
Detailed Comparison: Brush vs. Rag Application (Side-by-Side)
When it comes to stain application, the choice between a brush and a rag isn't just about preference, it's about performance for your specific project. Our research, comparing manufacturer guidelines with thousands of user reviews, highlights distinct advantages and disadvantages for each method. A quick look at how they stack up can clear things up considerably.
Here's a direct comparison to help you decide which tool is best suited for your needs. Remember, the ideal choice often depends on the stain type, wood species, and the desired final look of your project.
| Feature / Scenario | Brush Staining | Rag Staining |
|---|---|---|
| Best For | Smooth, even finishes; deep grain penetration | Natural, "wiped-on" look; quick coverage |
| Application Speed | Slower, more deliberate | Faster, especially on large, flat surfaces |
| Control over Color | Excellent for building color gradually | Good for quick saturation control and wiping excess |
| Preventing Blotching | Often superior, especially with a pre-stain | Can be tricky on porous woods; needs careful wiping |
| Risk of Streaks/Marks | Moderate to high (if used improperly) | Low to moderate (lint can be an issue) |
| Ease of Use (Beginner) | Moderate (requires learning technique) | High (intuitive, but requires practice for perfection) |
| Stain Waste | Generally lower | Can be higher if not careful with saturation |
| Best Stain Types | Oil-based, Gel stains; penetrating stains | Wipe-on stains, Gel stains; some water-based stains |
| Best for Details | Excellent; precise application | Can be challenging for very intricate areas |
| Safety Hazard | Low (except for solvent fumes) | High (spontaneous combustion risk with oil-based rags) |
Choosing the Right Tool for Your Project Type
The project you're working on is a massive clue in deciding whether a brush or a rag will serve you better. A simple-to-understand approach involves looking at the scale and intricacy of the piece. Think about the last time you tackled a large, open surface versus a complex, detailed item. The tools and techniques that worked best for one will likely differ significantly for the other.
For instance, staining a deck requires a different strategy than refinishing an antique dresser. The surfaces are not only different in size but also in their design and accessibility for your chosen applicator. Let's look at some common scenarios.
Projects Where a Brush Excels
- Furniture Restoration: When you’re breathing new life into a cherished piece of furniture, like a dining table or a bookshelf, a brush offers the control needed for a flawless finish. You can meticulously apply stain to tabletops, drawer fronts, and intricate carvings, ensuring evenness and depth without unwanted marks. Brands like Minwax often suggest brushes for furniture projects where a smooth, professional appearance is key.
- Interior Trim and Moldings: Applying stain to baseboards, door frames, or window casings with a brush ensures you get into the corners and along the edges precisely. It allows you to build color without getting stain on adjacent walls or ceilings, a common problem with less controlled application methods.
- New, Bare Wood Projects: When working with virgin wood, especially species prone to blotching like pine or maple, a brush helps you lay down a more consistent initial coat. This even application is crucial for establishing a uniform base color before any subsequent coats are applied. Using a pre-stain conditioner with a brush further enhances this evenness.
Projects Where a Rag Shines
- Deck and Siding Staining: For large outdoor projects like decks, patios, or exterior siding, speed is often essential. A rag allows you to cover significant square footage quickly, spreading the stain effectively and wiping off excess before it dries. This is particularly true with stains formulated for outdoor use, which often have a thinner body for easier wipe-on application.
- Simple Furniture or Shelving: If you're building or refinishing simple pieces of furniture, like basic shelves or a utilitarian workbench, a rag offers a fast and easy way to apply stain. It imparts that classic "wiped-on" look that can be very appealing and doesn't require painstaking attention to avoid brush strokes.
- Creating a Distressed or Aged Look: For projects aiming for a vintage or rustic vibe, a rag is invaluable. You can apply the stain, then selectively wipe it off to create variations in color that mimic natural aging or wear patterns. This method also works exceptionally well with gel stains, allowing you to achieve a layered look.
Common Questions About Brush vs. Rag Staining
Understanding the core differences is vital, but sometimes specific situations bring up unique questions. Our editorial research into common user queries reveals a few recurring themes. Addressing these can make your staining project run much smoother.
Can I use a brush for wipe-on stains?
Yes, you absolutely can use a brush for wipe-on stains, though it changes the process slightly. Instead of wiping off excess, you’d typically brush it on like a regular stain and then, after the recommended waiting period, use a clean rag to wipe away the excess. This can give you more control over the initial application but still requires that crucial final wipe for even color.
What about gel stains, brush or rag?
Gel stains are quite versatile and can be applied effectively with both a brush and a rag. Many manufacturers, including those like General Finishes, recommend using a brush for initial application, especially on intricate pieces. This is because gel stains are thicker and less prone to dripping, allowing you to work them into the grain with precision. You then typically wipe off the excess with a rag to achieve the desired color depth.
Is one method better for preventing blotching?
Generally, a brush, especially when combined with a pre-stain wood conditioner, offers better control for preventing blotching on porous woods like pine or maple. The brush allows for a more deliberate and even application of both the conditioner and the stain, pushing the product into the wood fibers consistently. However, careful wiping to remove excess stain is crucial with either method.
What Kind of Fertilizer for Grass to Use
When it comes to feeding your lawn, understanding what kind of fertilizer to use is as important as knowing when to apply it. The best fertilizers for grass provide a balanced blend of essential nutrients, primarily Nitrogen (N), Phosphorus (P), and Potassium (K). Nitrogen is key for green, leafy growth, phosphorus helps with root development, and potassium boosts overall plant health and stress resistance.
For example, a starter fertilizer with a higher phosphorus content is often recommended for new lawns to encourage strong root establishment. Established lawns typically benefit from a balanced fertilizer, often with an N-P-K ratio like 10-10-10 or 24-0-6, depending on soil test results and the season. Always check local recommendations or conduct a soil test to understand your specific lawn's needs, as over-fertilizing can harm your grass.
When to Fertilize Lawn
Knowing the optimal time to fertilize your lawn is crucial for promoting healthy growth and vibrant color without causing damage. Fertilizing at the wrong time can lead to wasted product, stressed grass, or even increased weed growth. The best timing depends on your grass type and climate. Cool-season grasses, like fescue or bluegrass, generally do best with fertilization in the fall and spring.
For cool-season lawns, the most important feeding is typically in the fall, as this helps the grass store energy for winter and prepare for spring growth. A spring application can also be beneficial. Warm-season grasses, such as Bermuda or Zoysia, thrive with fertilization in late spring and throughout the summer months, when they are actively growing. Avoid fertilizing when the grass is dormant or under severe stress from drought or heat.