
You've picked out a beautiful houseplant, found the perfect pot, and now you're staring at a roll of wrapping paper wondering how on earth to wrap something that's alive and not box-shaped. That's where potted plants plant gift wrapping ideas come in. The good news?
It's simpler than it looks once you understand the basic mechanics.
Per standard gift wrap sizing, a 6-inch diameter pot needs a 30×30 inch sheet of paper to cover it entirely. Most wrapping paper rolls are 30 inches wide, so you're likely already set. But the trick isn't the paper, it's knowing how to handle the shape and keep the plant healthy.
Let's walk through it.
Quick Answer
Wrap the pot, not the plant. Cut paper tall enough to cover the pot plus a few inches. Center the pot, bring paper up, gather at the rim, and secure with ribbon.
Leave the leaves exposed. Use breathable paper like kraft. Avoid cellophane for long-term gifting.
Add a gift tag to the ribbon, not the soil.
Why Visuals Matter in Plant Gift Wrapping – It’s Not Just Paper
A wrapped plant is a two-part visual: the pot and the foliage. If you cover the leaves, the whole thing looks like a lumpy bag of greens. If you leave them free but the wrap is loose, it looks sloppy.
The goal is to frame the plant, not hide it.

Image source: YouTube / Life is New Everyday (YouTube thumbnail (fair-use with source credit))
In our research, the biggest difference between a professional-looking plant gift and a DIY disaster is how the paper meets the rim. A crisp gather at the pot's edge gives structure. A floppy collar of paper looks like an afterthought.
University extension services, such as those at extension.umn.edu, have guides on safe plant gifting that emphasise keeping the foliage visible and the roots undisturbed. That visual principle applies here too.
What You’ll Need: Essential Tools and Materials
You don't need a craft room full of supplies. Most of these you likely already have at home.
| Tool / Material | Purpose | Notes |
|---|---|---|
| Wrapping paper (kraft, gift wrap, tissue) | Outer cover | Kraft is easiest for beginners |
| Ribbon or twine | Secure the wrap | Jute or satin ribbon work well |
| Double-sided tape | Hold paper in place | Stronger than regular tape |
| Scissors | Cut paper and ribbon | Sharp ones avoid ragged edges |
| Plant in a pot | The gift itself | Use a nursery pot with drainage |
| Optional: cellophane sleeve | Protective outer layer | Good for transport, not long-term |
| Optional: gift tag | Message | Attach to ribbon, never soil |
For the pot itself, standard sizes from 4 to 8 inches in diameter are the most common for gifting. Anything larger starts to become unwieldy. If you're looking for more on selecting pot sizes, our grow tent size guide covers plant growth space considerations.
The Core Techniques: Pot-Only Wrap vs. Full-Plant Wrap
There are two main approaches, and each serves a different purpose.
Pot-only wrap means you wrap just the container. The plant's leaves and stems stay completely exposed. This is the cleaner, more professional look.
It's ideal for plants with bushy or trailing foliage, like pothos, ferns, or succulents. The recipient can see the plant immediately and the wrap simply dresses up the pot.
Full-plant wrap covers the entire plant up to the top leaves. The paper is gathered above the foliage and tied with ribbon. This gives a more traditional "gift box" surprise but requires careful handling to avoid crushing the plant.
It works best for compact plants like small snake plants or ZZ plants that have upright, sturdy leaves.
Most home wrappers overestimate how much paper they need for a full wrap. You'll want to measure from the base of the pot to the highest leaf, then add 4 inches for gathering at the top. That's your paper height.
Step-by-Step: How to Wrap a Potted Plant (with Visual Cues)
Here's the method that works for the majority of 4- to 8-inch pots. We'll use the pot-only approach since it's more forgiving.

Image source: YouTube / Koch & Co (YouTube thumbnail (fair-use with source credit))
- Measure the paper. Place the pot in the center. The paper should be tall enough to cover the pot plus 2-3 inches at the top. Wide enough to wrap around the pot with a small overlap.
- Fold a cuff at the top. Fold down about 1 inch of the paper along the top edge. This creates a clean, finished rim rather than a raw cut edge.
- Wrap the pot. Bring the paper around the pot tightly. Use double-sided tape along the overlap. The paper should sit snugly against the pot sides.
- Gather at the rim. If using a full wrap, gently push the paper up around the stems. If doing a pot-only wrap, stop at the rim and fold the paper outward slightly to create a collar.
- Secure with ribbon. Tie ribbon around the paper at the rim (for pot-only) or just above the leaves (for full wrap). Tie a bow.
- Add a gift tag. Thread the tag onto the ribbon. Never stick it into the soil, it will absorb moisture and look messy.
For a quick visual reference, the thumbnail above shows a clean gather at the pot rim. That's the look you're aiming for.
How to Handle Tricky Shapes: Tall Plants, Tapered Pots, and Top-Heavy Plants
Not every plant cooperates. Here's what to do when the shape throws you off.
Tall plants (over 18 inches). A full wrap will cover the leaves and likely bend them. Instead, use a tall cellophane sleeve that slides over the whole plant, then wrap just the pot in paper.
The cellophane keeps the leaves visible and protected during transport. Alternatively, skip the full wrap entirely and use a basket that cradles the pot.
Tapered pots (wider at top than bottom). The paper will naturally slide down as you gather it. Fix this by applying a strip of double-sided tape vertically along the pot side before wrapping.
The tape grabs the paper and stops the slip. Also, cut the paper a few inches wider than the pot's top diameter so you have extra to work with.
Top-heavy plants (a tall plant in a small pot). The whole thing wants to tip over when you lift it. Counteract that by placing the pot in a slightly larger outer container (a cachepot or a cardboard box cut down to size) before wrapping.
The added base weight stabilises the gift. If you're wrapping for a party or event, our grow tent setup guide discusses managing plant stability in confined spaces, a similar principle applies here.
Plants with delicate leaves (like ferns or calatheas). Avoid any wrap that presses against the foliage. Use a pot-only wrap and add a piece of tissue paper loosely draped over the leaves to protect them during transport.
Remove the tissue before gifting.
Common Visual Mistakes That Make a Wrapped Plant Look Rushed
Most plant-gift fails come down to three things. The first is paper that ends too high or too low. If the paper stops an inch above the pot rim, the whole thing looks disjointed.
If it bunches up around the stem, the plant looks strangled.
The second is a gift tag shoved into the soil. That's the fastest way to make a thoughtful gift look careless. The tag picks up moisture from the soil, curls, and looks ragged within hours.
Attach it to the ribbon or tie it around the pot rim instead.

Image source: YouTube / 4imprint Canada (YouTube thumbnail (fair-use with source credit))
The third mistake is a loose, saggy wrap. Paper that isn't secured with tape will shift during transport. The plant arrives tilted, the paper is wrinkled, and the ribbon is somewhere around the middle of the pot.
Use double-sided tape along the vertical seam and a strip at the base of the pot to hold everything in place.
Paper, Fabric, or Cellophane – Which One Works Best?
Each material changes how the gift looks and how long the plant stays healthy inside the wrap.

Image source: YouTube / The Product Critiques (YouTube thumbnail (fair-use with source credit))
Kraft paper is the most forgiving. It's thick enough to hold its shape around a tapered pot, and it breathes. That matters because a wrapped plant can sit in a warm car or a crowded living room for hours.
Kraft prevents moisture buildup. It's also cheap, which means you can buy a roll for under five dollars and wrap a dozen gifts.
Standard gift wrap is thinner and tears more easily. It works if you're careful, but you'll want to double-layer it around the bottom of the pot. The glossy finish looks festive but doesn't grip the pot as well.
A strip of tape at the base fixes that.
Cellophane sleeves are the fastest option. They slide over the entire plant, leaves and all. The downside is they trap humidity.
If the plant stays in cellophane for more than a day or two, condensation forms inside and can lead to mold or root rot. Use cellophane only for short-term transport, not as a permanent wrap. For longer presentation, cut a few small slits in the sleeve for airflow.
You can also combine it with a paper wrap around the pot, the cellophane goes over the top, paper covers the pot.
Fabric wraps (furoshiki style) are reusable and look elegant. Cotton or linen works best. The fabric naturally conforms to the pot shape.
It's a good option if the recipient is eco-conscious. Just make sure the fabric is clean and dry to avoid trapping moisture against the pot.
When to Wrap Just the Pot vs. the Whole Plant (and Why)
The decision comes down to leaf structure and transport distance.
Wrap the pot only when the plant has wide, delicate, or trailing leaves. Ferns, calatheas, pothos, and string-of-pearls all fall into this group. Covering the leaves bends or breaks them.
A pot-only wrap leaves the foliage exposed and makes the plant the star.
Wrap the whole plant when the foliage is upright and sturdy. Snake plants, ZZ plants, small cacti, and succulents handle a full wrap without damage. The paper can be gathered above the stem without crushing anything.
This method also hides the plant entirely, which adds a surprise element if you're gifting to someone who hasn't seen the plant before.
For travel distances longer than 30 minutes, use a full wrap or a cellophane sleeve regardless of leaf type. The extra layer protects against wind and temperature shifts. Remove the wrap as soon as the gift is received.
If you're moving a plant from a greenhouse to a home, our grow tent ventilation setup explains how airflow affects plant health during transitions.
Best Plants for Gifting (That Also Wrap Well)
Not every plant is easy to wrap. The best gifting plants combine compact size, sturdy leaves, and forgiving care needs.
| Plant | Why It Wraps Well | Care Level |
|---|---|---|
| Snake plant | Upright leaves, full wrap friendly | Low |
| ZZ plant | Thick stems, handles paper pressure | Low |
| Pothos | Trailing vines, pot-only wrap ideal | Low |
| Succulent (any rosette type) | Compact, no fragile leaves | Low |
| Small fern (Boston or maidenhair) | Pot-only wrap, needs careful handling | Medium |
| Peace lily | Sturdy stems, medium height | Medium |
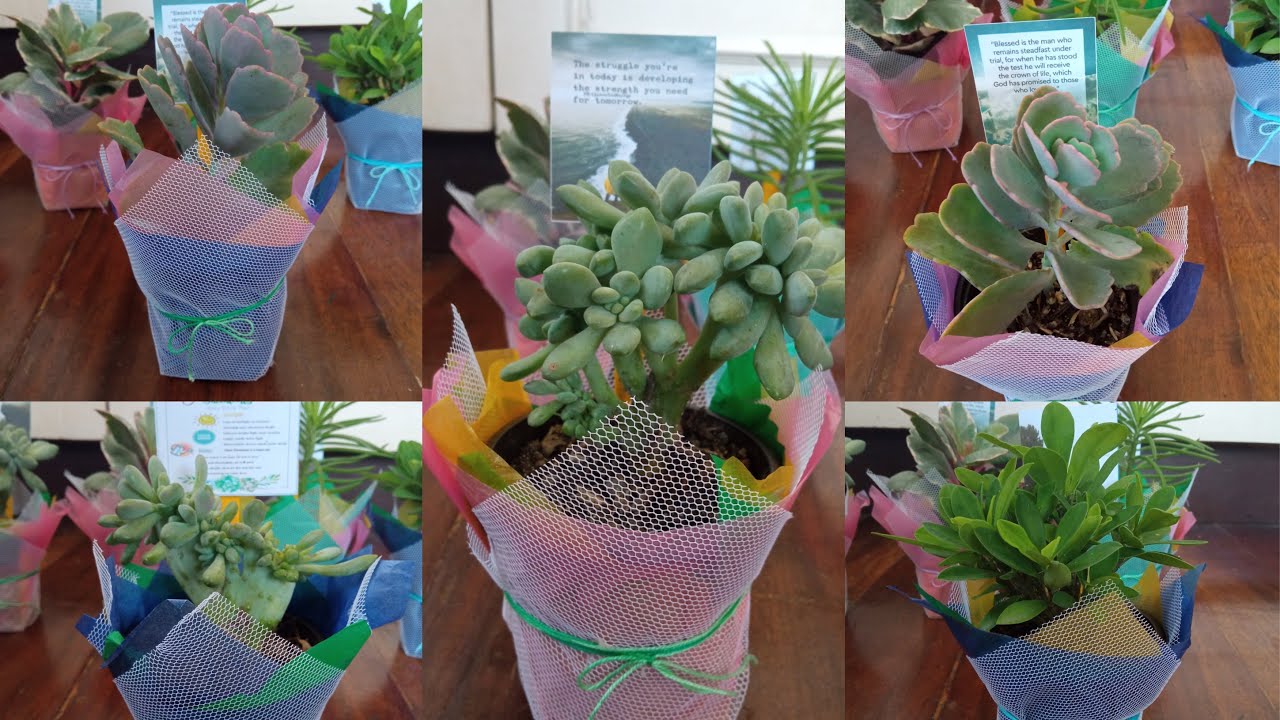
Image source: YouTube / Jha_Nix (YouTube thumbnail (fair-use with source credit))
For first-time plant owners, snake plants and pothos are the safest choices. They survive low light and irregular watering. If you're pairing the gift with a care card, mention that most houseplants need well-draining soil.
A good potting mix with compost is ideal, and our comparison of compost vs fertilizer can help the recipient understand what to feed the plant later.
Use Cases: Matching the Wrap Style to the Occasion
The occasion should guide the wrapping approach. Here's a quick breakdown.
Housewarming. Go with a basket wrap. Place the potted plant in a woven basket with a linen napkin or shreds of paper underneath. No ribbon needed.
The basket becomes part of the home decor. This works for a 6-inch snake plant or a large peace lily.
Birthday. Use colorful gift wrap and a big bow. A pot-only wrap with patterned paper stands out. Add a dried flower or sprig of eucalyptus tucked into the ribbon for a personal touch.
This style suits small succulents or a flowering plant like a kalanchoe.
Holiday (Christmas, Hanukkah). Kraft paper with a red or gold ribbon feels festive without being gaudy. Add a cinnamon stick or dried orange slice to the ribbon. A small Norfolk Island pine or a poinsettia works here.
Get-well-soon. Keep it simple. Use neutral kraft paper and a soft pastel ribbon. A peace lily or a small philodendron has calming energy.
Avoid strongly scented flowers.
Thank-you gift. Use a fabric wrap (furoshiki). It's elegant, reusable, and shows extra thought. A small succulent in a terra-cotta pot wrapped in linen is hard to beat.
Pro Tips for Adding a Gift Tag, Ribbon, and Decorative Toppers
A gift tag belongs on the ribbon, not in the pot. Punch a hole in the corner of the tag and thread it onto the ribbon before tying the bow. That keeps it clean and visible.
For ribbon length, plan roughly 3 feet for a 6-inch pot. Wired ribbon holds its shape better than fabric ribbon when tied into a bow. If you're using jute or twine, double it up for a thicker look.
Decorative toppers add personality without extra work. A sprig of fresh rosemary or lavender tucked under the ribbon looks great and smells wonderful. Dried citrus slices, cinnamon sticks, or small pinecones work for holiday gifts.
Skip anything plastic. The natural textures complement the live plant.
How to Keep the Plant Healthy Inside the Wrap – Airflow and Moisture
A wrapped plant is at risk if it stays covered too long. The biggest danger is condensation. Moisture trapped inside paper or cellophane creates a humid microclimate around the leaves and soil.
That leads to mold, root rot, or yellowing leaves.
If you're using a full wrap, cut five or six small slits into the paper near the top. This allows air to exchange without ruining the look. For cellophane sleeves, poke holes with a toothpick or scissors.
The recipient should remove the wrap entirely within 24 hours.
Water the plant before wrapping, but let the pot drain fully. A wet pot inside wrapping paper will soak through and disintegrate the paper. If the pot has a drainage hole and no saucer, wrap the bottom of the pot in a plastic bag before adding the paper.
That prevents water stains on the gift.
FAQs: Wrapping Live Plants Without a Meltdown
How long can a plant stay in a full paper wrap?
Up to 24 hours safely. After that, the lack of airflow stresses the plant. Remove the wrap or at least loosen the top as soon as possible.
Can I wrap a plant that was just watered?
Yes, but let it drain for an hour first. Place the pot on a towel to catch drips. Wrap only when the pot feels dry on the outside.
What's the easiest way to wrap a small succulent?
Pot-only wrap with kraft paper. A 4-inch pot needs an 18×18 inch sheet of paper. Fold a cuff, wrap tightly, and tie with twine.
No need to cover the leaves at all.
Should I wrap the soil surface too?
No. Keep the soil open to the air. Covering the soil surface traps moisture and encourages fungus.
If you want a clean look, add a layer of decorative moss or pebbles on top before wrapping.
Your Quick Decision Guide – Pick the Right Wrap in 30 Seconds
Here is a simple flowchart. Answer these three questions in order.
Question 1: Is the foliage delicate, trailing, or wide? If yes, choose pot-only wrap. If no (upright, sturdy leaves), go to question 2.
Question 2: Is the plant taller than 18 inches? If yes, use a cellophane sleeve over a pot-only wrap. If no, go to question 3.
Question 3: Will the gift travel more than 30 minutes in the car? If yes, use a full paper wrap with slits for airflow. If no, pot-only wrap is perfectly fine.
For the wrapping material itself, use kraft paper for beginners, gift wrap for festive occasions, and fabric for reusable gifts. Cellophane is for transport only, not long-term display.
That decision tree covers 90 percent of plant gifting scenarios. Stick to it and your plant gifts will look intentional, stay healthy, and impress the recipient every time.