
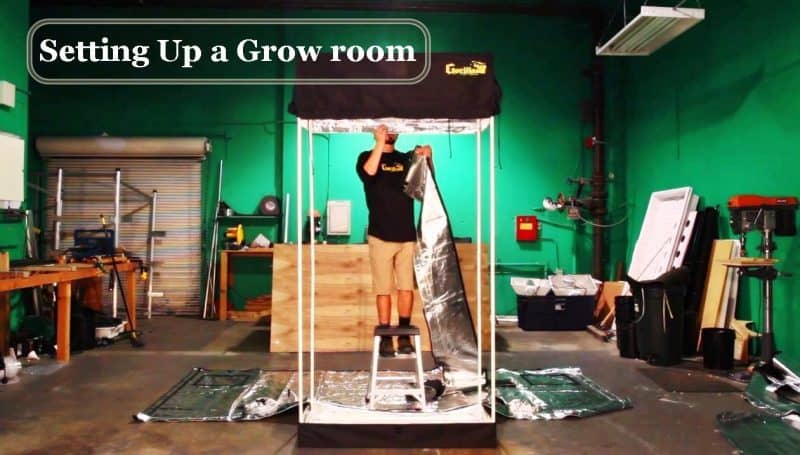
Building your own grow room is one of the most cost-effective ways to take control of your indoor gardening environment. A well-planned DIY grow room can outperform many pre-built setups, but only if you address a handful of critical factors. Without them, your grow room becomes little more than a box — inefficient, difficult to maintain, and unlikely to deliver the harvest you're after.
Below is a practical, step-by-step guide covering every essential consideration. Whether you're converting a closet, a spare room, or building from scratch, these principles apply.
Lightproofing: The Foundation of a Controlled Environment
Plants grown indoors rely on precise light cycles — typically 12 hours on, 12 hours off during the flowering stage. Even a tiny sliver of light during the dark period can stress your plants, reduce yields, or trigger unwanted vegetative re-growth.
To create a truly lightproof space:
- Seal every crack. Walk around your room during the dark cycle with all indoor lights off. Any visible glow is a problem. Use lightproof tape or black silicone caulk to seal gaps around corners, vents, and electrical outlets.
- Check electrical devices. Small indicator lights on power strips, timers, or fans can emit enough light to disturb your plants. Cover them with electrical tape or blackout fabric.
- Inspect ducting and passive vents. Any opening that allows air in or out must be light-trapped. Simple PVC pipe bends (creating a "light labyrinth") work well, or you can buy prefabricated lightproof vent covers.
A common mistake is assuming a room is dark enough without testing. A simple overnight check with all house lights on outside the grow room will reveal leaks you'd otherwise miss.
Sealing for Odor Control and Environmental Stability
An airtight room does two critical things: it keeps odors contained, and it allows you to control temperature and humidity efficiently.
Why airtight matters:
- Odor management. Many indoor plants produce strong smells, especially during flowering. Even small gaps allow scent to escape, which may concern neighbors or household members. Combined with a carbon filter on your exhaust, a sealed room eliminates this issue.
- Climate control. Holes and cracks let unconditioned air bleed in and out, making it harder for your heating, cooling, and dehumidification equipment to maintain stable conditions. This wastes energy and stresses your plants.
- Pest prevention. Insects and other pests can enter through gaps as small as 1/16 inch. Sealing your room reduces the risk of infestations significantly.
The goal is a room where the only controlled air exchange happens through your ventilation system. Use weatherstripping around doors, caulk along baseboards, and seal any conduit or pipe penetrations.
Climate Management: Temperature, Humidity, and Airflow
A stable climate is non-negotiable for healthy growth. The ideal temperature range for most plants is 68–78°F (20–26°C) during lights-on, with humidity between 40–70% depending on growth stage. Without active control, indoor spaces often swing outside these ranges.
Key equipment for climate control:
- Thermostat and hygrometer. You cannot manage what you do not measure. A digital thermostat-hygrometer combo gives you real-time data.
- Exhaust fan with thermostat. Connect your exhaust fan to a thermostat controller. Set it to kick on when temperatures exceed your target (typically around 28°C or 82°F). This pulls hot air out automatically.
- Dimmer switch. A variable-speed controller lets you adjust fan speed to match conditions — slower for cooler days, faster in summer heat.
- Humidifier or dehumidifier. During early vegetative growth, higher humidity (60–70%) encourages faster development. During flowering, lower humidity (40–50%) helps prevent mold and bud rot.
A well-designed ventilation system includes both intake and exhaust paths. Passive intake (using the negative pressure from your exhaust fan) is simple and effective, but ensure the intake opening is lightproof and covered with a filter to keep dust and pests out.
Managing Air Moisture and Odor
Controlling humidity does more than just prevent mold — it directly affects growth speed. Plants transpire faster in humid conditions, which can accelerate nutrient uptake and vegetative growth. However, excessive humidity during flowering invites fungal problems.
Practical moisture management steps:
- Use an air humidifier during the vegetative stage if your ambient humidity is below 40%. A cool-mist ultrasonic humidifier is quiet and energy-efficient.
- Run a dehumidifier during the dark period in flowering, when humidity naturally spikes. Place it inside the grow room and ensure its drain line goes somewhere safe.
- Install a carbon filter on your exhaust. This is the single most effective way to eliminate strong odors. The activated carbon absorbs volatile organic compounds (the source of plant smells). Match the filter size to your fan's CFM rating.
For the intake, a simple nylon stocking or pre-filter sock over the opening blocks dust, pollen, and insects while allowing air to pass freely. Pair this with a PVC light trap to keep the room dark.
Reflective Walls and Light Efficiency
Light is the engine of plant growth, and every wasted photon means slower development or lower yields. Reflective surfaces maximize the usable light from your grow lamp.
Best practices for maximizing light:
- White flat paint is effective, cheap, and easy. It reflects roughly 75–85% of light without creating hot spots.
- Mylar film (polyester reflective sheeting) reflects up to 95% of light. It comes in rolls and can be stapled or taped to walls. Avoid crinkled mylar, which can create uneven light distribution.
- White reflective plastic is another good option, especially for temporary setups. It is less durable than mylar but easier to work with.
Arrange your reflective material so it covers all walls, including the floor if possible. A white tray or reflective mat under your plants recovers light that would otherwise be absorbed by soil or floor surfaces.
One overlooked detail: reflective material should not touch hot lamps. Leave at least 6–12 inches of clearance to prevent fire risk.
Building an Efficient Collection Rack
A proper collection rack (or plant stand) makes daily maintenance far easier. It lifts plants off the floor, improves airflow underneath, and simplifies watering and cleaning.
Design specifications that work well in practice:
- Frame dimensions: Approximately 1.1 meters (3.6 feet) wide by 15 centimeters (6 inches) tall. This height allows air circulation while keeping pots accessible.
- Material: Use treated wood or metal — anything that resists moisture. Avoid untreated particleboard, which warps quickly.
- Open slats or mesh top. This allows water to drain freely into a tray below rather than pooling around pot bases.
Benefits of a collection rack:
| Benefit | Why It Matters |
|---|---|
| Easier cleaning | Sweep or vacuum fallen leaves, spilled soil, and water without moving heavy pots |
| Disease prevention | Airflow under pots reduces root rot and fungus gnat problems |
| Simpler flushing | Excess water drains away cleanly; no muddy puddles to deal with |
| Automatic watering | For drip systems, racks let you catch runoff and reuse it if desired |
Many experienced growers flush their medium every two weeks to prevent nutrient salt buildup. A rack makes this process straightforward — just water until runoff appears, then let it drain away cleanly.
Frequently Asked Questions
What is the most important consideration when building a grow room?
Lightproofing comes first. A single light leak during the dark cycle can ruin your flowering phase and seriously reduce yields. Seal every crack and test your room at night before introducing plants.
Can I build a grow room in a closet?
Yes, a closet is a great starting point. Measure the space carefully, ensure proper ventilation, and lightproof the door. Closets often lack airflow, so plan for an exhaust fan and passive intake.
Do I need a carbon filter if I'm not worried about odor?
Not strictly, but a carbon filter improves air quality inside the room by removing volatile organic compounds and dust. This can benefit plant health regardless of odor concerns.
How much ventilation does a grow room need?
Aim to exchange the entire volume of air in your room every 1–3 minutes. Calculate your room's cubic footage (length × width × height) and choose an exhaust fan with a CFM rating that matches or slightly exceeds that figure.
What size grow lamp should I start with?
A general rule is 30–50 watts per square foot of canopy space using LED lamps. For a 3×3-foot area (9 sq ft), a 300–450 watt LED is adequate. Adjust based on plant count and desired light intensity.
How do I keep my grow room energy-efficient?
Use LED lighting (which produces less heat than HID), seal the room tightly to reduce HVAC load, and run fans on thermostat controllers so they only activate when needed. Insulating walls also helps stabilize temperatures.
Final Thoughts
A DIY grow room is a practical, rewarding project — as long as you address the fundamentals. Lightproofing, airtight sealing, climate control, moisture management, reflective surfaces, and a smart collection rack are all critical pieces of the puzzle.
Take your time during the build phase. Testing and correcting small problems early saves far more effort than fixing them after plants are inside. For more guidance on specific components, explore our indoor gardening resources for deeper dives on ventilation, lighting, and setup.
If you are curious about how pre-built options compare, our detailed look at budget-friendly grow tents can help you decide whether buying or building makes sense for your situation. And before you choose a lamp, make sure you understand the space you are working with to match your light to your room dimensions correctly.
Image source: Unsplash