Mistakes happen, especially when you're aiming for that perfect wood finish. Understanding what are common staining mistakes is your first line of defense against costly errors and a disappointing outcome. Many DIYers and even some pros run into trouble, leading to blotchiness, uneven color, or finishes that fail prematurely.
A 2023 study in the Journal of Wood Science highlighted that improper surface preparation is the leading cause of premature finish failure in exterior wood projects, with over 60% of call-backs attributed to this initial step. Getting it right means your stain not only looks beautiful but also protects your investment for years.
Why Staining Mistakes Cost You More Than Just Time
It’s easy to think a stained deck or piece of furniture is just about looking good. But when staining mistakes happen, the cost goes far beyond buying extra stain or redoing a weekend project. You’re looking at potential wood rot, UV damage that degrades the material, and even structural weakening if water penetrates unchecked. Repairing poorly stained surfaces often requires stripping the old finish, which can be much more labor-intensive than applying it correctly in the first place.
These costs, both in materials and your valuable time, add up quickly, making preventative knowledge essential.
The Invisible Damage: What Happens When Stain Goes Wrong
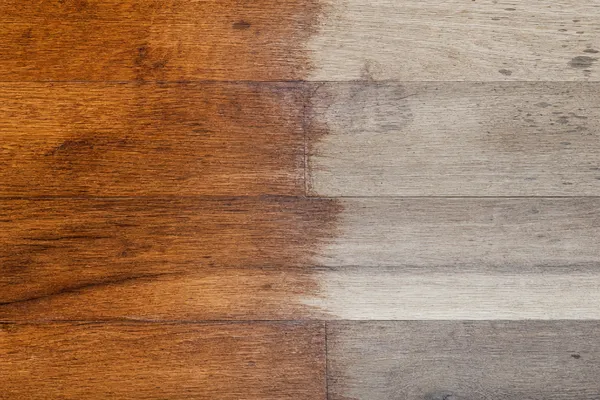
Beyond obvious streaks and blotches, staining mistakes can cause hidden damage. If stain doesn’t penetrate the wood evenly, certain areas are left unprotected. This means those spots are more susceptible to moisture absorption, leading to swelling, cracking, and eventually, rot. UV rays can also break down the wood fibers more rapidly in these unprotected zones.
Manufacturer specifications for exterior stains, like those from Benjamin Moore or Sherwin-Williams, consistently emphasize proper application for UV and moisture resistance, noting that incomplete coverage compromises the entire protective system.
Preparation is King: Common Mistakes That Ruin Your Finish Before You Even Start
Skipping the Clean: Grime, Mildew, and What They Hide
Before any stain touches the wood, it needs to be impeccably clean. Overlooking this step is a huge mistake. Dirt, old wax, greasy residues, or even invisible mildew can prevent the stain from adhering properly. This leads to blotchy spots where the stain just won't take.
A thorough cleaning, often with a dedicated wood cleaner, is crucial. Aggregate user reviews frequently mention how skipping this step resulted in a patchy finish that needed complete stripping and redoing.
Sanding Errors: Too Much, Too Little, or the Wrong Grit
Sanding is your second critical preparation step. If you don't sand enough, you leave a smooth, non-porous surface that the stain will struggle to penetrate, creating that dreaded blotchy look. On the other hand, sanding too aggressively with overly coarse grit can leave deep scratches that show through the stain, turning an aesthetic flaw into a permanent one. For most softwoods like pine, a grit between 80 and 120 is usually sufficient before staining, with finer grits for hardwoods.
Over-sanding can also open up the wood grain too much, making it absorb stain unevenly.
Ignoring Moisture: The Silent Killer of Stain Adhesion
Wood moisture content is a critical, often overlooked, factor. Most exterior stains, especially oil-based ones, require the wood to be relatively dry. Applying stain to damp wood is a recipe for disaster. Water acts as a barrier, preventing the stain from penetrating effectively and leading to peeling or bubbling as the wood dries underneath.
Manufacturer guidelines, such as those found on Benjamin Moore's official site, typically specify a wood moisture content of 15% or less for exterior stain application. Using a moisture meter is a small investment that can save you a huge headache.
Application Woes: How You Put Stain On Matters Most
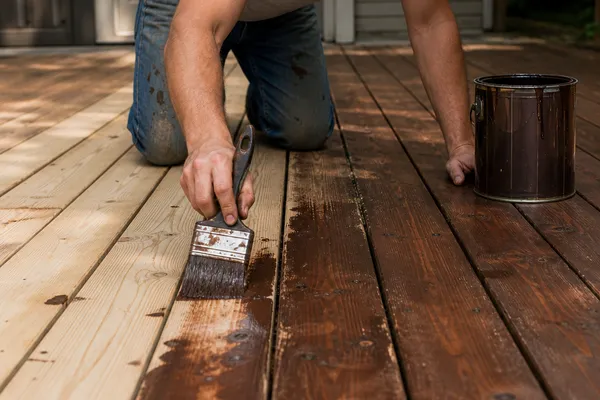
The Blotchy Blues: Uneven Application Techniques
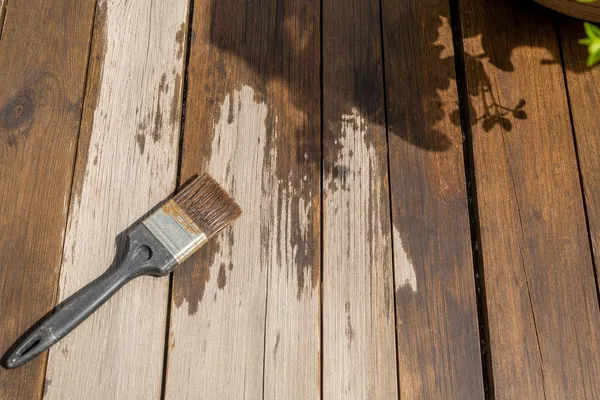
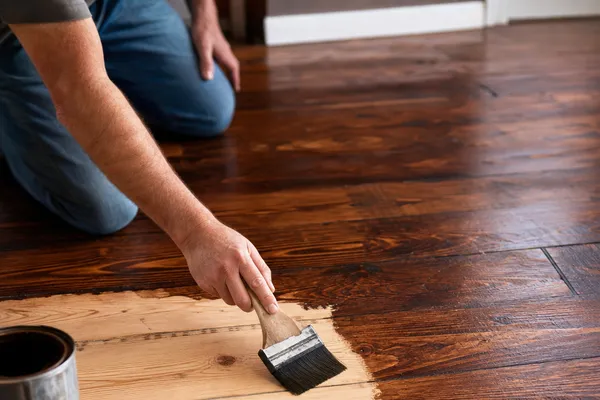
This is perhaps the most common and frustrating mistake. Blotching happens when stain penetrates the wood unevenly. It's often caused by applying stain too thick in some areas and too thin in others, or by not keeping a "wet edge." This means the stain dries in streaks where one application meets the next. Using a quality brush or a clean rag and working in consistent strokes, always in the direction of the wood grain, is key.
Some experts recommend applying stain in smaller sections to avoid the stain drying out before you can blend it.
Lap Marks and Streaks: The Visible Signs of Haste
Lap marks are those dark lines that appear where a previously applied section of stain has started to dry before you’ve overlapped it with a fresh coat. They’re a clear sign that the application wasn't continuous or that you waited too long between strokes. To avoid them, you need to work quickly but methodically, always feathering the edge of your wet application into the already stained area. This technique ensures a smooth transition rather than a hard line.
The "Too Dark" Dilemma: Color Control Gone Wrong
Many people underestimate how dark a stain can become, especially on softwoods or after a second coat. It's much easier to add more stain than to remove too much. Always test your stain on an inconspicuous area or a scrap piece of the same wood before committing to the entire project. Remember that different wood types absorb stain differently; oak will take stain darker than pine.
If you're using a gel stain, which sits more on the surface, it can be more forgiving, but still requires careful application.
Over-Wiping vs. Under-Wiping: Finding the Perfect Balance
The amount of stain you wipe off after application significantly impacts the final color and sheen. Too much wiping can remove too much pigment, leading to a washed-out look that doesn't provide adequate protection. Not wiping enough can leave an uneven surface and a sticky residue that attracts dirt. The general rule is to wipe off the excess stain after a recommended penetration time (usually 10-20 minutes, but check the product can) to achieve the desired color depth and smooth finish.
Choosing the Wrong Stain for the Job
Sometimes the biggest mistake isn't in the application, but in the product itself. Picking the wrong type of stain for your project means you're fighting an uphill battle from the start. This isn't just about color; it’s about performance, durability, and how the stain interacts with the specific wood. Focusing on the right stain type for the surface and your climate makes a world of difference.
Oil vs. Water-Based: When Does It Really Matter?
Oil-based stains penetrate deeper into the wood, offering excellent durability and a rich, traditional look. However, they have stronger fumes, longer drying times, and cleanup requires mineral spirits. Water-based stains are easier to clean up with soap and water, dry faster, and have lower VOC (Volatile Organic Compound) levels. While they've improved significantly, some still worry they don't penetrate as deeply as oils, potentially offering less long-term protection on high-wear surfaces.
Manufacturer specs, like those from Sherwin-Williams, often detail which product is best suited for specific wood types and conditions.
Gel Stains: Not a Magic Bullet for Every Surface
Gel stains are thicker and designed to sit more on the surface rather than soaking deeply into the wood. This can be fantastic for open-grained woods like oak or for reviving old, worn surfaces where penetration is difficult. However, they can also look less natural and may not offer the same deep grain enhancement as a penetrating stain. If you're working with a softwood that absorbs stain unevenly, a gel stain can sometimes provide a more consistent color.
Just remember, they require a different application technique, often wiping more than brushing, and can show brush strokes if not applied carefully.
Interior vs. Exterior: The Critical Distinction
This mistake is critical for longevity. Exterior stains contain specific UV inhibitors and mildewcides that interior stains lack. Wood outside faces constant bombardment from the sun, rain, and temperature fluctuations that interior wood simply doesn't. Using an interior stain on a deck or fence will lead to rapid fading, peeling, and potential wood degradation within a year or two.
Conversely, using a heavy-duty exterior stain indoors might result in a too-dark finish or odor issues. Always read the product label carefully.
Environmental Factors: Why the Weather Hates Your Stain Project
The weather doesn't just affect how quickly your stain dries; it influences how well it penetrates and cures, impacting its long-term performance. Trying to stain in less-than-ideal conditions is a frequent culprit behind common staining mistakes that show up months or years down the line.
The Heat is On: Why Too Hot or Too Cold Ruins the Day
Extreme temperatures are bad news for staining. If it's too hot, the stain can dry too quickly before you can properly spread or wipe it, leading to lap marks and an uneven finish. The solvents in oil-based stains can also evaporate too rapidly. On the flip side, if it's too cold, the stain might not penetrate the wood properly, and the binders in the stain can harden too slowly, affecting durability.
Most manufacturers, like Olympic stains, recommend applying their products within a temperature range, typically between 50°F (10°C) and 90°F (32°C).
Humidity and You: When Drying Times Go Awry
High humidity can significantly slow down the drying and curing process for wood stains, especially water-based ones. This extended "open time" can increase the risk of dust and debris settling into the wet surface, ruining the finish. In some cases, prolonged high humidity can even affect the chemical reaction needed for the stain to cure properly, potentially leading to a softer, less durable finish. It’s generally best to stain on clear, dry days with moderate humidity for optimal results.
Addressing Past Mistakes: Fixing Blotchy or Peeling Stain
So, you've made a mistake. Don't despair. Most staining errors can be fixed, though it often involves more work. The first step is always to identify the exact problem.
Is it blotchiness, peeling, or an unwanted color? For blotches or lap marks, you might be able to carefully re-stain after light sanding with a finer grit to blend the areas. Peeling or flaking is a bigger issue, indicating the stain didn't adhere properly. This usually requires mechanical removal, sanding or stripping the entire surface, before you can reapply.
Maintaining Your Stain Job: Preventing Future Problems
Proper maintenance is as crucial as initial application for the longevity of your stain. Regular cleaning removes dirt, mildew, and other contaminants that can degrade the finish over time. Depending on your climate and the type of stain used, you may need to apply a maintenance coat every few years. This isn't a full re-stain but a light cleaning and application of a fresh layer to refresh the protection.
Following the manufacturer's recommendations, like those provided by Cabot, for cleaning and recoating schedules will help your stained surfaces look their best and last longer.