
Wondering when should i cut my hostas back. It's one of those garden tasks that feels simple until you actually stand there with shears in hand, staring at a clump of half‑dead leaves. Cut too early and you steal the plant's energy reserves.
Cut too late and you're basically rolling out the welcome mat for slugs and rot. The right answer depends on one thing: the frost.
University extension research confirms that the key trigger is the first hard freeze around 28°F or lower. That moment signals the leaves to stop feeding the roots, making it safe to remove them. Here is exactly how to time it for your garden.
Quick Answer
Cut hostas back after the first hard freeze kills the leaves. Wait until the foliage turns yellow or brown and collapses. Trim stems 1 to 2 inches above the crown.
Remove all dead material from the bed. This prevents slugs, snails, and fungal disease.
Image source: YouTube / Ask About Money & Health
Should You Cut Back Hostas at All?
You don't have to cut them. Some gardeners let the leaves rot down in place. But that approach invites problems.
Dead hosta foliage becomes a damp mat that shelters slugs, snails, and fungal spores through winter. Come spring, those pests move straight into your new growth.
Cutting back gives you three clear benefits:
- Removes slug and snail hiding spots
- Reduces the spread of crown rot and leaf spot diseases
- Leaves a clean bed that's easier to mulch and maintain
The only real downside is the ten minutes it takes. If you've ever dealt with a slug infestation, you'll trade that time gladly. For a deeper look at how organic matter affects your soil health, you might find our breakdown of compost versus fertilizer helpful.
The Short Answer: When to Cut (and When to Wait)
Here is the rule: cut back after the first hard freeze, not before. A hard freeze means temperatures at or below 28°F that kill the leaf cells. The leaves will turn translucent, then brown, then collapse.
- If frost has not hit yet, leave the leaves alone. They are still sending energy down to the roots.
- If frost has hit and leaves are mushy, cut them back within a week or two while they are still dry, before they become a slimy mess.
- If you live in a mild climate where frost rarely hits, wait until the leaves naturally yellow and die back, usually by late November.
The window is forgiving. You have about two to three weeks after the freeze to get it done. But the sooner you remove the dead foliage, the less time slugs have to settle in.
How Frost Changes the Timing
Frost is the switch. Before frost, the leaves are green and actively photosynthesizing. Cutting them off then starves the roots of the energy they need to store for next year's growth.
After frost, the leaves are dead tissue that no longer feeds the plant. They become a liability.

Image source: YouTube / Sheffield Made Gardens
Here is what happens inside the plant:
- Before frost, the leaf cells hold water and chlorophyll. The plant pulls sugars down into the crown and roots.
- After a light frost (around 32°F), the top growth may look damaged, but the crown is still alive and may push out a few new leaves.
- After a hard freeze (28°F or below), the entire leaf structure collapses. No more energy transfer. The leaves are dead.
Watch your local forecast. If a hard freeze is predicted, you can plan your cutback for the weekend after. If you're unsure about your climate zone, check the USDA Plant Hardiness Zone Map for your area's average first frost date.
The Two Main Scenarios for Cutting Back
Your timing decision boils down to two situations. Here is how to handle each one.
Scenario 1: Leaves Still Green and Healthy
If your hostas are still green and lush in September or October, do nothing. The leaves are still feeding the roots. Cutting them now reduces next year's leaf size and flower count.
Wait for the first hard freeze.
Scenario 2: Frost Has Hit and Leaves Have Collapsed
Once the leaves are brown, limp, and wet looking, you are clear to cut. This is the ideal moment. Use clean, sharp shears and cut each stem 1 to 2 inches above the crown.
Gather every scrap of foliage and remove it from the garden bed. Do not leave any behind, slugs will find it.
If you are also dealing with a lawn mower that won't start after winter, spring servicing goes smoother when the garden is clean. That kind of routine upkeep matters when the growing season ramps up.
How Low Should You Cut? The 1-to-2 Inch Rule
Cut too high and you leave stubs that can freeze and rot down into the crown. Cut too low and you risk nicking the crown itself, opening the door to disease. The sweet spot is 1 to 2 inches above the crown.
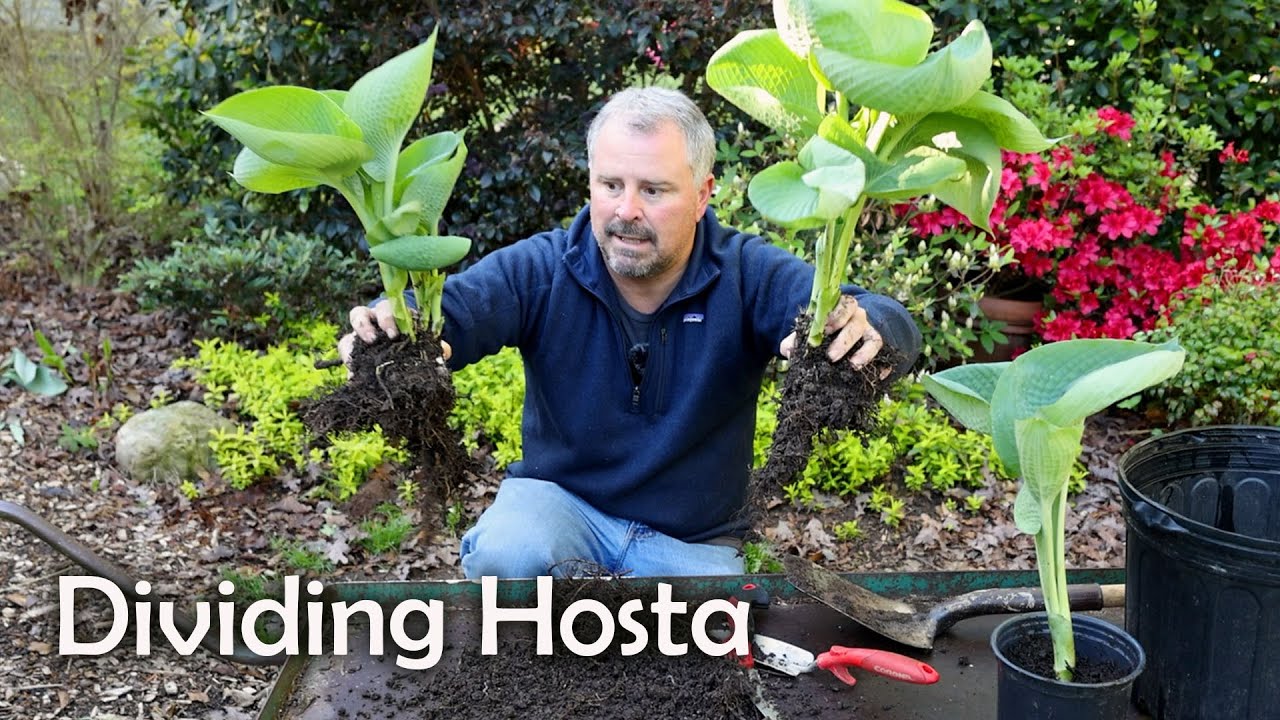
Image source: YouTube / HortTube with Jim Putnam
Here's why that range works:
- Leaves enough stub to mark where the crown is, so you don't accidentally dig into it later
- Stubs are short enough that they won't trap moisture against the crown
- Leaves no long stems that provide a ladder for slugs to climb up
Use bypass pruners or sharp garden scissors. Snip each stem individually. Do not try to whack the whole clump with a string trimmer, that shreds the crown.
After cutting, sweep up the debris and add it to your compost pile (only if the leaves were healthy; diseased leaves go in the trash). If you're building a new compost setup, our guide on building a grow tent from scratch shows how controlled environments can speed up decomposition, but that's a topic for another day.
A final note: the crown will look like a small, woody nub. It's tough. But it's also the heart of the plant.
Treat it gently. Come spring, those tiny buds will push up new leaves. A clean cut now means a stronger start then.
What Happens If You Cut Too Early
Cutting hostas back while the leaves are still green robs the plant of its winter food supply. Those leaves are solar panels. They convert sunlight into energy that gets stored in the roots for next spring.
Snip them off too soon and you force the plant to survive on reserves it hasn't fully banked yet.
The result shows up the following season:
- Leaves come back smaller and fewer
- Flower stalks are shorter or absent
- The clump thins out instead of getting denser
- Recovery takes weeks longer than normal
A single early cutback won't kill a mature hosta. But do it two or three years in a row and the plant weakens noticeably. It becomes more vulnerable to pests and disease.
The fix is simple: wait for the hard freeze. If you're anxious to tidy up, just remove the flower stalks and seed pods. Leave the leafy part alone.
What Happens If You Cut Too Late (or Not at All)
Leave the dead foliage on the ground all winter and you're basically building a five-star hotel for slugs and snails. They crawl under that wet mat, lay eggs, and wait for spring. When new growth emerges, they march right up and eat it.
The same soggy mess encourages fungal diseases like crown rot and anthracnose. Spores splash up from dead leaves onto healthy tissue during rain. Once crown rot sets in, the center of the plant turns mushy and the whole clump can die.
Here is what happens on different timelines:
| Timing | Result |
|---|---|
| Cut within 2 weeks of hard freeze | Clean bed, low pest pressure, strong spring growth |
| Cut 4+ weeks after freeze | Leaves are slimy, harder to remove, more slug eggs present |
| Not cut at all | Highest risk of slug damage and crown rot in spring |
The extra ten minutes of fall cleanup saves you hours of pest management next year. It also makes early spring weeding and mulching much easier. If you need to clear the area quickly, a leaf blower can gather debris before you cut, but that's more useful for lawns than hosta beds.
Your Decision Guide: A Simple Flowchart
Use this three-step logic to decide exactly when to cut. No guesswork.
Step 1: Has a hard freeze happened yet?
- If no: STOP. Leave the leaves alone.
- If yes (28°F or below): Move to Step 2.
Step 2: Are the leaves yellow, brown, and collapsed?
- If no (still greenish or only partly damaged): Wait one more week. Some hosta varieties take longer to fully die back.
- If yes: Move to Step 3.
Step 3: Are the leaves dry enough to handle without creating a mess?
- If yes: Cut them back now. Follow the 1-to-2 inch rule.
- If no (rain or heavy dew has soaked them): Wait for a dry day. Wet leaves are heavier, harder to bag, and more likely to spread fungal spores as you handle them.
That's it. Three questions. Two of them are about the weather, one is about the plant's condition.
Check your local frost dates at the USDA Plant Hardiness Zone Map website to know your average window. For northern zones (3 through 5), the window usually opens in October. For southern zones (7 through 9), it can stretch into December.
Step-by-Step: How to Cut Back Hostas the Right Way
Here is the exact process that gives you the cleanest results with the least effort.
Tools you'll need
- Bypass pruners or sharp garden scissors
- Garden gloves
- A tarp or bucket for collecting debris
- Rubbing alcohol or bleach for cleaning blades
The steps
- Wait for a dry day after the hard freeze. Morning is fine once dew evaporates.
- Sanitize your pruners with rubbing alcohol. This prevents spreading disease between plants.
- Grasp a handful of dead leaves near the base. Snip each stem 1 to 2 inches above the crown. Cut straight across, not at an angle.
- Drop the cut foliage onto the tarp or into the bucket. Do not leave any pieces lying on the soil.
- Repeat for the whole clump. Work from the outside inward.
- Gather the tarp or dump the bucket into your compost pile. But only if the leaves were healthy. If you saw black spots or mushy stems, bag them and put them in the trash. Diseased leaves in compost will contaminate the pile and spread back into the garden.
- Sanitize your pruners again before moving to the next plant.

Image source: YouTube / The Roving Reviewer
That's the whole job. Takes about two minutes per mature clump. If you are doing a whole bed of hostas, budget 15 to 20 minutes for a dozen plants.
It goes faster than you think.
Common Mistakes Even Experienced Gardeners Make
Avoid these slip-ups. They are the most common ones we see in garden forums and extension service Q&A sessions.
Cutting with dull or dirty blades
Dull shears crush the stem instead of making a clean cut. Dirty blades transfer bacteria and fungi from one plant to another. Wipe them down between plants if you notice any mushy or spotted leaves.
Leaving long stubs
Stems cut at 4 inches or taller trap moisture against the crown. They also provide a handhold for slugs climbing up from the soil. Keep those stubs short: 1 to 2 inches.
Raking debris into the bed instead of removing it
Some people cut the leaves and let them fall where they land. That defeats the purpose. Every piece of dead hosta leaf left on the soil becomes slug shelter.
Gather everything and remove it.
Cutting on a wet day
Wet leaves are slippery. Wet soil compacts underfoot. And wet debris spreads fungal spores more easily.
Wait for a dry day. The plant is dead. It's not going anywhere.
Forgetting to mark the spot
Hostas die back completely to the ground. If you don't mark where the clump is, you might dig into the crown while planting spring bulbs or turning the soil. A small garden stake or a ring of mulch around the crown prevents accidents.
It also helps you find the plant when new growth emerges in spring. If you ever need to move a hosta that has been accidentally disturbed, knowing how to handle transplant stress is useful.
Composting diseased leaves
As mentioned above, hosta leaves with black spots, mushy stems, or any signs of rot should go in the trash, not the compost. Home compost piles rarely reach temperatures high enough to kill fungal pathogens. You'll just recycle the disease back into your garden next season.
What to Do With the Dead Leaves
Once you've cut the foliage, you need to get it out of the garden. Leaving it on the soil defeats the whole purpose of cutting back.
Healthy leaves with no black spots or mush can go straight into your compost pile. They break down quickly and add organic matter. If you run a hot compost pile that reaches 130°F or higher, any lurking fungal spores get killed off.
But most home compost piles stay cooler than that. When in doubt, bag them for municipal green waste collection or the trash.
Diseased leaves need a different path. Any foliage showing black spots, mushy brown patches, or slimy texture should never go into your home compost. Fungal pathogens like anthracnose and crown rot can survive winter in a cold pile.
They will reinfect your garden next season. Toss those leaves in the garbage bin or burn them if local regulations permit.
A few people use dead hosta leaves as a winter mulch layer for other beds. That works only if the leaves are completely dry and disease-free. Even then, you risk importing slug eggs.
We recommend just removing them.
A Note on Slugs, Snails, and Disease Prevention
Slugs are the number one pest for hostas. Cutting back at the right time is your best defense.
When you remove the dead foliage, you take away the moist, dark hiding spots where slugs and snails overwinter. Without that cover, many of them die off during cold weather. The ones that survive have a harder time finding your hostas in spring.

Image source: YouTube / ViettesGardeningTips
Fungal diseases follow a similar pattern. Crown rot and leaf spot thrive in wet, decaying plant matter. Clearing the bed lets air circulate around the crown.
The soil surface dries faster between rains. That alone cuts disease pressure significantly.
If you've had persistent slug problems, combine the cutback with a light application of diatomaceous earth around the crown after trimming. Reapply after rain. This granular powder is sharp on a microscopic level and cuts up soft-bodied pests.
It's a physical barrier, not a chemical one, so it's safe around pets and pollinators.
When to Leave the Leaves Alone
There are two situations where you might skip the fall cutback entirely.
First, if you live in a very cold, dry climate like the upper Midwest or the Canadian prairies, the dead leaves can act as a natural winter blanket. They insulate the crown against extreme temperature swings. In these regions, winter is so cold and dry that slugs and fungal spores don't survive well anyway.
You can leave the leaves and clean up in spring.
Second, if your hostas are in a naturalized woodland area where you never rake or tidy up, you can let nature handle it. The leaves break down slowly and return nutrients to the soil. But expect more slugs and slower spring growth.
It's a trade-off.
For most gardeners in temperate climates with regular winter rain, the cutback is worth the small effort. If you're unsure, check your first frost date and your average winter rainfall. Wet winters strongly favor the cutback approach.
Frequently Asked Questions
Can I cut back hostas in spring instead of fall?
Yes, but it's riskier. Spring cutback means you leave the dead foliage on the bed all winter, giving slugs and fungal diseases a head start. You also have to deal with messy, half-rotted leaves when you want to be planting.
Fall is cleaner.
What if frost hits before I get a chance to cut?
No problem. The leaves will turn to mush and eventually flatten. You can still cut them back as long as they haven't rotted into the crown.
Just wait for a dry day and remove the slimy material. Sanitize your pruners after.
Do I need to remove the flower stalks too?
Yes, those die back as well. Snip them at the same level as the leaves, 1 to 2 inches above the crown. Seed stalks left standing can trap moisture and attract pests.
Can I use a lawn mower or string trimmer to cut hostas?
Not recommended. A mower shreds the crown unevenly. A string trimmer can slice into the crown and open it to rot.
Hand pruners give you precise, clean cuts.
How do I know if the leaves are diseased?
Look for black or dark brown spots, mushy stems, or a slimy, foul smell. Healthy dead leaves are uniformly yellow or brown and dry to the touch. If you see spotting, treat the plant as diseased.
Your Takeaway: One Rule to Remember
Cut back after the hard freeze. Not before, not months later. That single rule keeps your hostas healthy, reduces pest pressure, and makes spring gardening easier.
The rest is just detail. Wait for 28°F or lower. Let the leaves collapse.
Trim to 1 or 2 inches. Remove every scrap. Clean your tools.
Do that each fall, and your hostas will reward you with bigger leaves, more flowers, and fewer battles with slugs. It's a small habit with a big payoff.