You’ve meticulously prepped your wood, picked out the perfect stain color, and you’re ready for that rich, even finish. Then, the moment of truth: you apply the stain, and suddenly, it looks like you’ve got dark stripes, splotches, or patchy areas. Why does my wood look blotchy after staining? It’s a frustratingly common problem that can make even the best DIY projects look amateurish.
The good news is that blotchiness isn't usually due to a faulty stain or your lack of skill; it's often a reaction to the wood itself and how it absorbs the stain. Certain wood species, like pine and maple, have an uneven pore structure that makes them prone to absorbing more stain in some areas than others, leading to those dreaded blotches. Understanding these wood characteristics and how to manage them is key to achieving a beautiful, uniform color.
What Blotchy Wood Stain Actually Looks Like
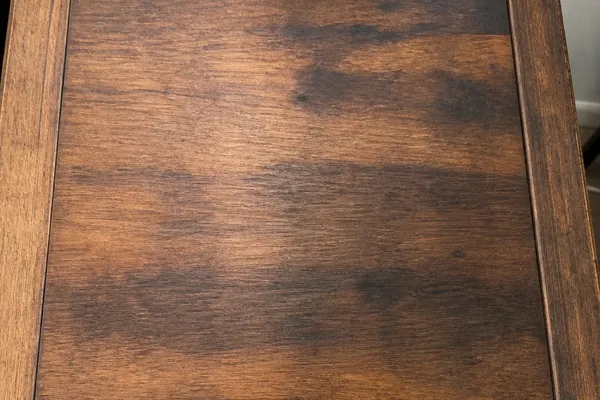
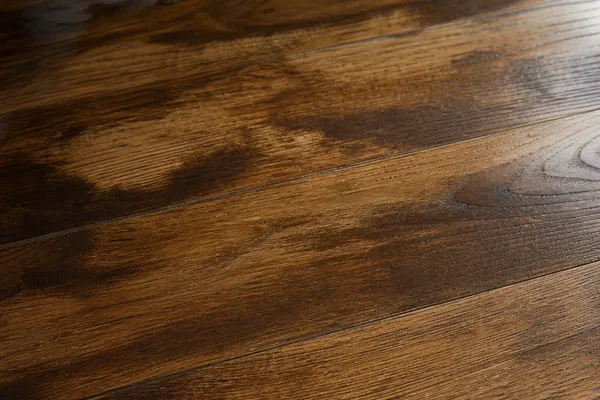
Blotchy stain isn't a single look; it manifests in a few distinct ways that all point to uneven absorption. Most commonly, you'll see dark streaks or patches that follow the natural grain of the wood, sometimes described as "tiger striping" or "racetracking." This happens when the stain penetrates readily into the more absorbent areas, leaving them much darker than the less absorbent sections. You might also notice random splotches where the stain appears to have pooled or penetrated much deeper than intended, creating distinct, darker spots on the surface.
Common Blotching Patterns Explained
We often talk about "blotchy" wood as a general problem, but breaking down the specific visual cues helps diagnose the cause. "Tiger striping," for instance, is characterized by alternating dark and light bands running parallel to the wood grain. This is particularly common in softwoods like pine where the growth rings create variation in pore density. "Racetracking" is similar but refers to the darker lines forming where the wood fibers have been compressed or damaged, like along the edge of a board.
Random splotches are less predictable; they can appear as dark, irregular patches on the surface, often where there's a significant change in wood density or a hidden defect in the wood itself.
The Usual Suspects: Why Blotches Happen in the First Place

The primary reason wood looks blotchy after staining comes down to how different types of wood absorb stain. Think of wood as a sponge, but one with many different-sized holes. Some woods have very uniform pores, so they soak up stain evenly everywhere. Others, however, have a mix of large, open pores and smaller, tighter ones right next to each other.
Wood Species That Cheat on Stain (Pine, Maple, Birch)
Softwoods like pine, poplar, and birch are notorious for blotching because their pores are unevenly distributed. Pine, for example, has distinct bands of earlywood (lighter, more open pores) and latewood (denser, tighter pores). When you apply stain, it floods into the open earlywood, becoming much darker, while barely tinting the dense latewood. This creates that signature dark-and-light banded look.
Maple and birch can also blotch, though their grain patterns might lead to more splotchy or patchy results rather than distinct stripes. This variability in pore size and density is the root cause of many staining issues.
Porosity Woes: How Wood’s Texture Fools the Stain
Wood porosity is essentially a measure of how many little holes (pores) are in the wood and how large they are. If you imagine two different wood surfaces side-by-side, one with tiny, consistent pinpricks, and another with a mix of tiny pinpricks and larger, open craters, you can see how liquid would behave differently. The stain will be sucked up much faster and deeper into those larger pores. This uneven absorption, dictated by the wood’s natural structure, is what creates those visually jarring blotches and streaks after staining.
Moisture Mysteries: Too Wet, Too Dry?
The moisture content of your wood plays a surprisingly big role in how it takes stain. If the wood is too wet, the water in it can actually dilute the stain as it tries to penetrate, leading to lighter, faded areas or even preventing the stain from binding properly. On the flip side, extremely dry wood can sometimes absorb stain too quickly and unevenly, especially if it’s been sanded very finely or has a lot of dust clinging to it. Reputable manufacturers recommend aiming for a specific moisture range, often between 6, 12% for interior projects, to ensure the best possible stain adhesion and evenness.
You can check this with a simple moisture meter.
The Stain Itself: Is It the Culprit?
While wood species are often the main troublemaker, the type of stain you're using can also significantly impact how evenly it applies. Stains are formulated in different ways, and these differences affect their penetration and how they interact with the wood's surface. Some are designed to grab lightly, while others want to soak in deep.
Oil-Based vs. Water-Based: Different Behaviors
Oil-based stains typically contain more pigments and solvents that help them penetrate deeper into the wood grain. This deeper penetration can sometimes exacerbate blotching on more porous woods because it allows for greater variation in how much pigment gets deposited. Water-based stains, on the other hand, tend to sit more on the surface and can be a bit more forgiving on tricky woods, though they might offer a less rich, deeper tone than oil-based options. Both can cause blotching, but they do so through slightly different mechanisms related to drying time and pigment suspension.
Gel Stains: A Smoother Ride?
Gel stains are a bit of a hybrid. They're thicker and have a gel-like consistency compared to traditional liquid stains. This thicker body means they don't penetrate the wood as deeply as liquid stains. Instead, they tend to form more of a colored film on the surface.
Because of this, gel stains are often a go-to for problematic woods like pine, maple, and birch because they are much less likely to cause blotching and can still provide a rich color. They essentially “sit” on top of the wood’s uneven pores, giving a more uniform hue.
Fixing Blotchy Stain: Your Action Plan
So, you’ve got blotches. Don't panic! While sometimes it’s best to start over, many times you can fix blotchy stain without stripping everything. The goal here is to create a more uniform surface so the next coat of stain, or whatever you do next, goes on evenly.
This might involve some light sanding, applying a product that helps the stain absorb uniformly, or a combination of both.
Step-by-Step Guide to Correcting the Oops
Repairing blotchy stain is often about giving the wood a more consistent surface for stain to adhere to. This usually involves a combination of careful sanding and applying a special product designed to equalize stain absorption. You'll want to work methodically to avoid making the problem worse.
Re-Sanding and Starting Fresh (When Necessary)
If the blothces are severe or you're not seeing improvement with other methods, sometimes a full re-sanding is the cleanest way forward. Use a fine-grit sandpaper, like 220-grit, to lightly abrade the entire surface. The goal isn't to remove the original stain completely, but to knock down the high spots where the stain is darkest and create a consistent base. Always sand with the grain, and be sure to thoroughly clean off all dust afterward with a tack cloth or a vacuum.
Applying a Wood Conditioner: Your Best First Defense
This is usually the game-changer for blotchiness. A pre-stain wood conditioner, like those offered by Minwax or Varathane, is designed to penetrate the wood pores and seal them to a degree. This prevents the stain from soaking in too deeply in the highly absorbent areas, allowing for a much more even, uniform color. You typically apply it to the bare wood before staining, much like you would the stain itself.
Let it dry according to the manufacturer's instructions, which is often just 15 minutes to an hour, before applying your stain coat.
How to Prevent Blotchy Wood Stain Next Time (Pro Tips)
Prevention is always better than cure, right? Avoiding blotchy spots starts long before you even open a can of stain. It’s all about understanding the wood you’re working with and prepping it meticulously. A little extra effort upfront can save you a lot of frustration later.
Surface Prep is King: Sanding Like You Mean It
Proper sanding is absolutely crucial for a uniform stain job. Start with a grit appropriate for the wood's condition, usually around 100 or 120 for raw wood, working up to 150 and then 220. Each grit removes the scratches from the previous one, smoothing the surface. Critically, you must remove all dust between grits with a vacuum or tack cloth.
Even fine dust particles can interfere with stain absorption.
The Mighty Wood Conditioner: When and How to Use It
As we’ve touched on, a wood conditioner is your best friend for woods prone to blotching like pine, maple, and birch. Apply it generously to the bare wood and let it soak in according to the product's directions. Don’t let it dry completely on the surface, but give it enough time to penetrate the pores. Many products recommend wiping up excess after 15 minutes or so, and then letting the conditioned wood dry for about an hour before you apply the stain.
This step equalizes the wood’s absorbency, drastically reducing blotching.
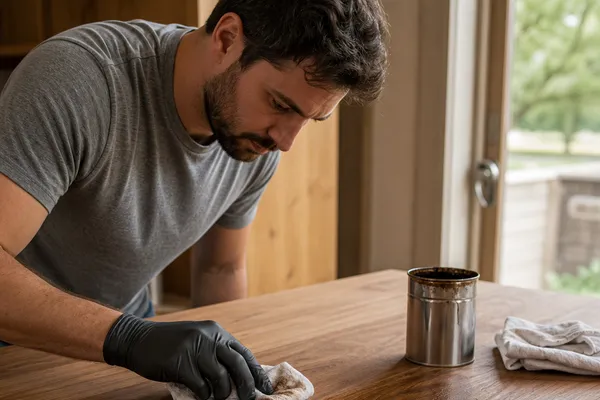
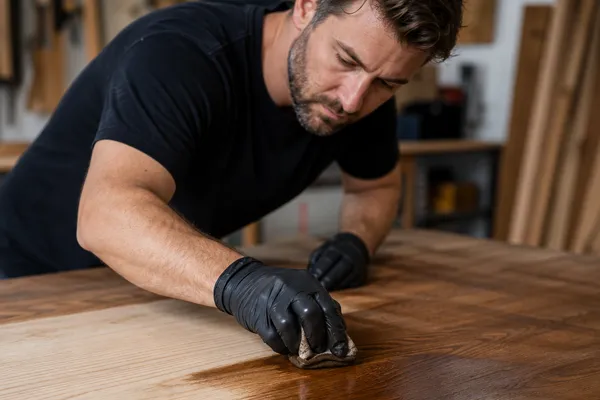
Strategic Stain Application Technique
Even with perfect prep, how you apply the stain matters. For most projects, apply the stain evenly with a brush or a clean rag, working in the direction of the wood grain. Don't try to cover the entire piece at once; work in manageable sections. After letting the stain penetrate for the recommended time (usually 5-15 minutes, check your can), wipe off the excess thoroughly with a clean, lint-free cloth, again, always with the grain.
Over-application or uneven wiping is a surefire way to create splotches.
Stain Alternatives That Bypass Blotching Headaches
If you've tried everything and still dread the thought of blotchy stain, or if you're working with a particularly difficult wood, there are other ways to color and finish your projects. These methods don't rely on the stain penetrating the wood's Pores in the same way, which naturally bypasses the blotching issue.
Tinted Topcoats: Color Without Penetration
Instead of staining the wood itself, you can use a clear topcoat like polyurethane or lacquer that has been tinted. Brands like General Finishes offer tinted topcoats in various colors. These products lay a colored layer over the wood, rather than soaking into it. This means the color is much more uniform, and you won't see blotching from the wood's varying porosity.
You can achieve a range of colors and even some wood-like effects this way, though you won't get the same deep, natural grain coloring you get from a true penetrating stain.
Painting: For a Completely Different Look
If a rich, natural wood tone isn't your ultimate goal, painting wood is a foolproof way to get an even color. Paint, of course, covers the wood grain entirely, so the underlying pore structure has no impact on the final color. With proper surface preparation (cleaning, priming, and light sanding between coats), you can achieve a smooth, professional-looking painted finish every time. This is often the best choice for woods that are notoriously difficult to stain or when you want a bold, opaque color.