
If you're searching "why my boxwood turning yellow" right now, you're probably staring at a shrub that's lost its deep green color. That's frustrating, especially when boxwood is supposed to be the reliable evergreen in your landscape. The good news is that yellowing usually has a clear cause.
You just need to know what to look for.
Boxwood prefers a soil pH between 6.5 and 7.0. Even a small shift outside that range can trigger nutrient lockout and yellowing. As of 2026, university extension research confirms that misdiagnosis is the number one reason treatable boxwood problems turn fatal.
Let's walk through the five main causes and how to tell them apart at a glance.
Quick Answer
Boxwood turns yellow for five main reasons. Blight, winter burn, root rot, nutrient deficiency, or pests. Check the leaf pattern and stem color first.
That tells you which cause it is. Then treat accordingly.

Image source: Wikimedia Commons / Cassy Nancarrow (CC BY-SA)
The 5 Main Causes of Yellow Boxwood (and How to Spot Each One)
Every yellow boxwood tells a story. The trick is reading the visual clues correctly. Here's a quick overview of the five most common causes and what they look like.
| Cause | Visual Sign | Where It Shows | Season | Urgency |
|---|---|---|---|---|
| Boxwood blight | Dark stem lesions, leaf spots, rapid defoliation | Lower leaves first, spreads upward | Spring through fall | High – remove infected plants |
| Winter bronzing | Uniform reddish-brown or orange tint | Outer leaves, wind-exposed side | Late winter to early spring | Low – usually recovers |
| Root rot | Overall yellowing, wilting, stunted growth | Entire plant, leaves stay attached | Any time after wet periods | High – improve drainage fast |
| Nutrient deficiency | Yellow between green veins (iron) or pale all over (nitrogen) | New growth (iron) or older leaves (nitrogen) | Active growing season | Medium – correct with targeted fertilizer |
| Pests (leafminers, mites) | Stippling, curling, tiny spots, blistered leaves | Leaf surface, often scattered | Late spring through summer | Medium – treat with horticultural oil or systemic insecticide |
The key is looking at the pattern. Is the yellowing uniform across the whole leaf? Is it between the veins?
Are the stems turning black? Each question points you toward a different cause.
How to inspect your boxwood
Start at the bottom. Kneel down and look at the lower leaves first. Many boxwood problems start there and work their way up.
Check the stems for dark lesions or cankers. Then look at the overall pattern. Is one side of the plant worse than the other?
That suggests environmental damage like winter burn or salt spray. Is the whole plant fading evenly? That points toward root issues or nutrient problems.
Our main garden resource covers broader plant health strategies, but for boxwood specifically, the visual clues are everything.
Boxwood Blight — The One You Really Need to Worry About
Boxwood blight (caused by the fungus Calonectria pseudonaviculata) is the most serious threat to boxwood in North America and Europe. It spreads fast, kills plants, and can survive in fallen leaves for years. If you catch it early, you can limit the damage.
But you have to act fast.
What does boxwood blight look like?
The first sign is usually dark brown or black lesions on the stems. These look like streaks or spots, not a uniform browning. The leaves develop circular tan spots with dark borders.
Then the leaves drop rapidly. This is the hallmark of blight. Healthy-looking boxwood can lose most of its leaves within two weeks.

Image source: YouTube / Rebekah the UK Plant Doctor (YouTube thumbnail (fair-use with source credit))
Where does blight show up first?
It almost always starts on the lower leaves. The fungus spreads from soil splashing onto the plant during rain or irrigation. That's why the bottom of the plant is the first to show symptoms.
As the disease progresses, it moves upward.
What should you do if you suspect blight?
First, confirm your diagnosis. Look for those black stem lesions. If you see them, the plant is infected.
The USDA Animal and Plant Health Inspection Service (APHIS) tracks boxwood blight outbreaks and provides current identification guidelines for homeowners.
If you confirm blight, remove the infected plant immediately. Bag it in plastic and throw it in the trash. Do not compost it.
The fungus can survive in compost and infect new plants. Remove fallen leaves from the soil surface too. Then sterilize your pruning tools with a 10% bleach solution or 70% alcohol before touching any other boxwood.
Can blight be treated?
Fungicides can protect healthy plants but cannot cure infected ones. Products containing chlorothalonil or tebuconazole are effective as preventatives. Apply them in spring when new growth emerges and again in fall.
But if the plant is already showing symptoms, removal is the only option. The fungus spreads too fast to save infected tissue.
What about resistant cultivars?
Some boxwood varieties show better resistance to blight. 'Green Velvet' and 'Green Mountain' are more resistant than 'Suffruticosa' or 'English Boxwood'. If you're replanting in an area where blight has occurred, choose resistant varieties.
Even resistant cultivars can get infected under heavy pressure, so they're not a guarantee. But they give you a much better chance.
Winter Bronzing — Scary but (Usually) Harmless
Winter bronzing is the most common cause of yellow boxwood that people panic about. And it's usually the least dangerous. It looks alarming but causes no permanent damage in most cases.
What is winter bronzing?
Boxwood leaves can turn reddish-brown or orange during cold weather. This is a natural response to winter stress. The plant's cells change color as a protective mechanism.
It's not a disease. It's not a pest. It's just the plant reacting to cold temperatures, drying winds, and bright winter sun.

Image source: YouTube / The Impatient Gardener (YouTube thumbnail (fair-use with source credit))
How can you tell it apart from blight?
Winter bronzing is uniform. The whole leaf changes color evenly. There are no spots, no lesions, no stem discoloration.
The plant looks like it's turning brown from the outside in, but the tissue is still alive. Blight, by contrast, shows distinct spots and black stems.
Winter bronzing also appears on the exposed side of the plant. The side facing the wind or the sun gets the most color change. The protected side often stays green.
That's a dead giveaway that it's environmental, not a disease.
Will the plant recover?
Yes, in most cases. When spring arrives and temperatures warm up, new growth pushes out. The bronzed leaves drop naturally and the new leaves are green.
The plant looks perfect again by late spring or early summer.
The exception is if the bronzing is severe enough to kill the leaf tissue. That happens in extreme cold, especially if the soil is frozen and the plant can't take up water. In that case, the affected leaves die and fall off.
But the buds and stems usually survive. The plant still recovers, just with a thinner canopy for a while.
How can you prevent winter bronzing?
Water your boxwood well before the ground freezes. Hydrated plants handle winter stress better. Apply a 2 to 3 inch layer of mulch around the base to insulate the roots.
Do not let the mulch touch the stem. For extra protection, use burlap wraps or anti-desiccant sprays on exposed plants before winter hits.
If you have a choice, plant boxwood in a location that's protected from winter winds. A spot near a building or fence reduces bronzing significantly.
Root Rot — When You're Loving Your Plant to Death
Root rot is the second most dangerous cause of yellow boxwood. It happens when the soil stays too wet for too long. The roots suffocate, then rot, and the plant slowly starves.
The irony is that most people respond by watering more, which makes things worse.
What causes root rot in boxwood?
Several fungi cause root rot, including Phytophthora, Pythium, and Rhizoctonia. These fungi thrive in saturated soil. If your boxwood is in heavy clay, a low spot, or an area that gets too much irrigation, the roots are vulnerable.
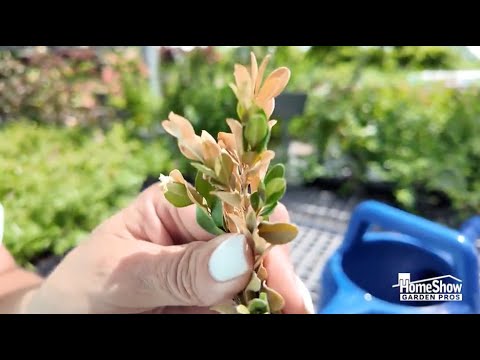
Image source: YouTube / HomeShowGardenPros (YouTube thumbnail (fair-use with source credit))
What does root rot look like?
The plant turns yellow all over. Not just the lower leaves or the tips. The whole plant fades to a pale, sickly yellow-green.
The leaves often stay attached to the plant rather than falling off. The plant looks wilted even when the soil is wet. If you dig down and look at the roots, they will be brown and mushy instead of firm and white.
Healthy roots are pale and crisp.
How is root rot different from blight or winter burn?
Root rot affects the whole plant evenly. Blight starts on the lower leaves and moves up. Winter bronzing affects the outer leaves on the exposed side.
Root rot is a uniform decline. The plant looks like it's fading from the inside out.
What can you do about root rot?
First, stop watering. Let the soil dry out completely. If the plant is in a pot, move it to a covered area where it won't get rain.
If it's in the ground, you may need to dig it up, improve the soil drainage, and replant it in a raised bed.
Improving soil structure is the long-term fix. Adding organic matter like compost helps clay soil drain better. You can find more about improving soil health in our guide to organic soil amendments.
For established plants, you can also try redirecting downspouts or installing French drains to move water away from the root zone.
If the damage is severe, the plant may not recover. University of Minnesota Extension research indicates that boxwood with advanced root rot rarely survives. Replacement is often the best option.
When you replant, choose a location with better drainage.
Can you treat root rot with fungicides?
Fungicides are not very effective once root rot is established. They can prevent the fungus from spreading to healthy roots, but they cannot cure already rotted roots. The best approach is prevention.
Well-drained soil and proper watering are your best defenses.
Nutrient Deficiency — When the Soil Isn't Delivering
Sometimes yellow boxwood is just hungry. The soil has the nutrients, but the plant can't access them. This usually comes down to soil pH or a specific nutrient shortage.
What nutrient deficiencies cause yellowing in boxwood?
The two most common are iron deficiency and nitrogen deficiency. They look different, and knowing which one you're dealing with matters.
Iron deficiency shows up as yellowing between the leaf veins. The veins stay green while the rest of the leaf turns pale yellow or even white. This pattern is called interveinal chlorosis.
It usually appears on new growth first. The most common cause is high soil pH. When the pH is above 7.0, iron becomes chemically unavailable to the plant roots.
The iron is there in the soil. The plant just can't take it up.

Image source: YouTube / Garden Answer (YouTube thumbnail (fair-use with source credit))
Nitrogen deficiency looks different. The whole leaf turns pale yellow, not just the areas between the veins. It usually starts on the older leaves first.
The plant looks weak and growth slows down. This is more common in sandy soils that have poor nutrient retention.
How do you test for nutrient deficiency?
A soil test is the only reliable way to know. Home test kits are available at garden centers. You can also send a sample to your local extension service for a more detailed analysis.
The test will tell you your soil pH and nutrient levels. That takes the guesswork out of treatment.
How do you fix iron deficiency?
Lower the soil pH. Apply sulfur or iron sulfate to acidify the soil. Follow the package rates based on your soil test results.
You can also apply chelated iron directly to the leaves as a foliar spray. This delivers iron to the plant immediately while the soil treatment takes effect. The foliar spray works within days.
The soil treatment takes weeks.
How do you fix nitrogen deficiency?
Apply a balanced slow-release fertilizer with a higher nitrogen content. Look for a formula like 10-10-10 or 12-6-6. Apply it in early spring when new growth begins.
Water it in well. The timing of spring feeding matters. Our guide on early season feeding schedules explains when and how to apply nutrients for the best results.
You can also use compost as a slow-release nitrogen source. Compost improves soil structure and nutrient availability over time. Our comparison of organic versus synthetic options can help you choose the right approach for your garden.
What about magnesium deficiency?
Magnesium deficiency is less common in boxwood but can happen. It looks similar to iron deficiency, but the yellowing appears on older leaves first. If your soil test shows low magnesium, apply Epsom salts (magnesium sulfate) at a rate of 1 tablespoon per gallon of water.
Apply it as a soil drench.
How long does it take for boxwood to recover?
With the right treatment, boxwood starts to green up within 2 to 4 weeks. New growth comes in green. Old leaves may stay yellow but will eventually drop.
The plant looks noticeably better by the next growing season. For severe deficiencies, repeat applications may be needed.
Choosing the right fertilizer for your specific situation matters. Our guide to selecting the appropriate formula explains the differences between common lawn and garden fertilizers and how to match them to your soil's needs.
Pests and Physical Damage — Leafminers, Mites, and Salt Burn
Not every yellow boxwood has a disease or a nutrient problem. Sometimes it's bugs or environment. These causes are easier to fix once you know what you're dealing with.
Boxwood leafminer
This is the most common insect pest for boxwood. The adult is a tiny orange fly that lays eggs inside the leaves. The larvae tunnel through the leaf tissue, creating blisters or mines.
Those damaged areas turn yellow or brown.
Look closely at the leaves. If you see raised, blister-like bumps or winding trails inside the leaf, that's leafminer damage. The yellowing is patchy, not uniform.
You can sometimes see the tiny larvae inside the leaf if you hold it up to the light.
Treatment is straightforward. Prune off affected leaves and dispose of them. Apply a systemic insecticide containing imidacloprid in early spring when the adults emerge.
Timing matters. Our guide to early season pest prevention covers when to apply treatments for the best results.
Boxwood mites
These are microscopic, so you won't see them directly. But you'll see their damage. The leaves develop a stippled or speckled yellow appearance.
The surface looks dusty or dirty. In severe cases, the leaves turn bronze or brown.
The treatment is simple. A strong spray of water from a garden hose knocks mites off the plant. For heavier infestations, apply horticultural oil or insecticidal soap.
Make sure to spray the undersides of the leaves where mites hide.
Salt damage
This is common in urban gardens. Road salt from winter de-icing can splash onto boxwood near sidewalks or driveways. The salt draws moisture out of the leaves, causing yellowing and browning.
The side of the plant facing the road or sidewalk is always worse.
The fix is to flush the soil with plenty of water in spring. This washes the salt out of the root zone. You can also apply gypsum to help leach sodium from the soil.
If the damage is severe, prune off the affected branches. New growth usually comes in green.
Dog urine damage
This one is easy to spot. One or two spots on the plant are yellow or dead, while the rest looks fine. Dog urine is high in nitrogen, which can burn the roots and leaves.
The pattern is irregular, not uniform.
The best solution is to train the dog to go elsewhere. If that's not practical, water the area thoroughly after the dog urinates. This dilutes the nitrogen and reduces the damage.
You can also apply a soil amendment like gypsum to balance the nitrogen levels.
How to Tell Them Apart: A Visual Side-by-Side Comparison
This is the most important part of the article. The whole point is helping you identify the cause at a glance. Here's a quick reference table that covers the key visual differences.
| Cause | Leaf Color Pattern | Stem Condition | Leaf Drop | Location on Plant | Time of Year |
|---|---|---|---|---|---|
| Boxwood blight | Circular spots with dark borders | Black lesions on stems | Rapid, starts at bottom | Lower leaves first | Spring to fall |
| Winter bronzing | Uniform reddish-brown | Normal, green | None or natural | Outer leaves, exposed side | Late winter to early spring |
| Root rot | Pale yellow, uniform | Normal, may be mushy at base | Leaves stay attached | Whole plant | Any time |
| Iron deficiency | Yellow between green veins | Normal | None | New growth first | Active growing season |
| Nitrogen deficiency | Pale yellow, uniform | Normal | Older leaves drop | Old growth first | Active growing season |
| Leafminer | Blisters, winding trails | Normal | Affected leaves drop | Scattered | Late spring to summer |
| Mites | Stippled, speckled | Normal | None | Underside of leaves | Summer |
| Salt damage | Yellowing on one side | Normal | Brown edges | Side facing road or sidewalk | After winter |
Use this table as your first diagnostic step. Look at the pattern on the leaf. Then look at the stem.
Then check where on the plant the damage is. That three-step process covers 90% of cases.
Step-by-Step Visual Diagnosis Flowchart
If you want a systematic approach, follow this flowchart. It's a simple decision tree that leads you to the correct cause.
Step 1: Look at the leaf pattern
- Uniform yellowing across the whole leaf → Go to Step 2.
- Yellow between green veins (interveinal) → Likely iron deficiency. Test soil pH.
- Spots, blisters, or stippling → Likely leafminer or mites. Check for pests.
- Circular tan spots with dark borders → Likely boxwood blight. Check stems.
Step 2: Check the stems
- Black lesions or dark streaks on stems → Boxwood blight. Remove and dispose.
- No stem lesions → Go to Step 3.
Step 3: Look at the overall pattern
- One side of the plant is worse → Likely winter bronzing, salt damage, or sunscald.
- Whole plant is affected evenly → Likely root rot, nutrient deficiency, or overwatering.
Step 4: Check the soil
- Soil is wet and heavy → Root rot. Improve drainage.
- Soil is dry and sandy → Nutrient deficiency. Test soil.
- Soil pH is above 7.0 → Iron deficiency. Lower pH.
Step 5: Check the season
- Late winter to early spring → Winter bronzing is most likely.
- Spring to fall, especially after rain → Blight or root rot.
- Summer → Pests or nutrient deficiency.
This flowchart works for most cases. If you're still unsure after going through it, take a sample to your local extension office. They can help with a positive identification.
Common Visual Mistakes That Lead to Wrong Treatment
These are the mistakes people make most often. Avoid them and you'll save time, money, and your plants.
Mistake 1: Confusing winter bronzing with blight
This is the most common error. Winter bronzing looks alarming, but it's harmless. People panic, prune aggressively, or apply fungicides that do nothing.
The plant recovers on its own in spring. The key difference is the uniform color change versus the spotted pattern of blight.
Mistake 2: Watering more when the plant is yellow
If the plant is yellow from root rot, watering more makes it worse. The roots are already drowning. The plant looks thirsty because the damaged roots can't take up water.
But the problem is too much water, not too little. Let the soil dry out before watering again.
Mistake 3: Fertilizing without testing first
If the soil pH is too high, adding fertilizer won't help. The nutrients are locked up. You need to lower the pH first.
Otherwise, you're wasting money and potentially burning the roots. A $10 soil test kit saves you a lot of frustration.
Mistake 4: Assuming blight is the only serious problem
Root rot kills just as many boxwood as blight. And root rot is easier to prevent. Good drainage solves most root rot problems.
Many people focus on blight and ignore the drainage issue. Then they lose plants to rot.
Mistake 5: Pruning infected plants without sanitizing tools
This spreads disease from plant to plant. Always clean your pruning tools between cuts if you're dealing with a suspected disease. Use a 10% bleach solution or 70% alcohol.
Wipe the blades between each plant.
What to Do Once You Know the Cause
Once you've identified the cause, you can take action. Here's what to do for each scenario.
Quick Fixes for Each Problem
For boxwood blight: Remove the infected plant. Bag it. Dispose in the trash.
Do not compost. Apply fungicide to nearby healthy plants as a preventative. Wait 2 years before replanting boxwood in the same spot.
For winter bronzing: Do nothing. Wait for spring. The plant will recover on its own.
If you want to help, water deeply before the ground freezes and apply mulch around the base.
For root rot: Stop watering. Let the soil dry. Improve drainage with organic matter or raised beds.
If the plant is severely affected, remove it and replant in a better location.
For iron deficiency: Apply chelated iron as a foliar spray. Lower soil pH with sulfur. The plant will green up in 2 to 4 weeks.
For nitrogen deficiency: Apply a balanced slow-release fertilizer. Water it in well. New growth will come in green.
For leafminer: Prune affected leaves. Apply systemic insecticide in spring. Monitor for new damage.
For mites: Spray with water or horticultural oil. Repeat as needed.
For salt damage: Flush soil with water. Apply gypsum. Prune dead branches.
When to Prune, When to Spray, and When to Remove
Prune when: The damage is limited to a few branches. The plant is otherwise healthy. Always prune in dry weather to reduce disease spread.
Spray when: You have a pest problem or need to prevent disease. Apply fungicides early in the season before symptoms appear. Spray insecticides when pests are active.
Remove when: The plant has blight or severe root rot. The damage is too extensive to recover. Remove the plant and the surrounding soil.
Do not replant boxwood in the same spot.
How to Prevent Yellowing in the First Place
Prevention is easier than treatment. Here are the key steps to keep your boxwood green and healthy.
Choose the right location
Plant boxwood in well-drained soil. Avoid low spots where water collects. Choose a spot with some protection from winter winds.
Full sun is fine, but afternoon shade helps in hot climates.
Test your soil
Test your soil pH every 2 to 3 years. Keep it between 6.5 and 7.0. If it's too high, apply sulfur.
If it's too low, apply lime. A balanced pH prevents nutrient deficiencies.
Water properly
Water deeply but infrequently. Let the soil dry out between waterings. Boxwood prefers consistent moisture, not saturated soil.
In summer, water once a week is usually enough. In winter, water only if the soil is dry.
Mulch
Apply a 2 to 3 inch layer of mulch around the base. This keeps the roots cool, retains moisture, and prevents winter bronzing. Keep the mulch away from the stem to prevent rot.
Prune at the right time
Prune boxwood in late winter or early spring before new growth starts. This encourages healthy growth and improves air circulation. Good airflow reduces disease pressure.
Quarantine new plants
If you're adding new boxwood to your garden, keep them separate for 2 weeks. Watch for signs of disease. This prevents introducing blight or other problems to your existing plants.
When to Call a Professional (and When Not to Bother)
Most boxwood problems are DIY. You can diagnose and treat them yourself. But there are times when a professional is worth the cost.
When to call a professional
- You suspect boxwood blight and need confirmation. A professional can send samples to a lab for testing.
- The plant is large and valuable. If your boxwood is mature and expensive, professional treatment may save it.
- The problem is spreading fast. If you're losing multiple plants, call a professional before it gets worse.
- You need help with soil drainage. If your yard has chronic drainage issues, a landscape contractor can install French drains or raised beds.
When not to call a professional
- For winter bronzing. It's harmless. Wait for spring.
- For mild nutrient deficiency. A soil test and targeted fertilizer fix it easily.
- For minor pest damage. Pruning and horticultural oil handle it.
The Quick Visual Reference Guide
Here's the final cheat sheet. Print it out or bookmark it. Use it whenever you see yellow on your boxwood.
| Visual Sign | Likely Cause | First Step | Treatment |
|---|---|---|---|
| Uniform yellow, whole plant | Root rot or nitrogen deficiency | Check soil moisture | Dry out soil or fertilize |
| Yellow between green veins | Iron deficiency | Test soil pH | Lower pH, apply chelated iron |
| Brown spots with black stems | Boxwood blight | Check stems | Remove plant |
| Reddish-brown, outer leaves | Winter bronzing | Check season | Wait for spring |
| Blisters or trails on leaves | Leafminer | Check for pests | Prune, apply insecticide |
| Speckled, dusty look | Mites | Check underside | Spray with water or oil |
| Yellow on one side only | Salt damage or wind | Check exposure | Flush soil, apply gypsum |
Frequently Asked Questions
Can yellow boxwood turn green again?
Yes, in most cases. If the cause is nutrient deficiency or winter bronzing, the plant will green up with treatment or warmer weather. If the cause is blight or root rot, the plant may not recover.
Early diagnosis improves the chances.
How long does it take for boxwood to recover from yellowing?
Most recover within 2 to 4 weeks after the correct treatment. Winter bronzing may take until late spring. Severe cases of blight or root rot may not recover at all.
Should I fertilize yellow boxwood?
Only if you know the cause. If the soil pH is too high, fertilizing won't help. Test your soil first.
If the problem is nitrogen deficiency, fertilize. If it's iron deficiency, lower the pH.
Is boxwood blight contagious?
Yes, highly contagious. The fungus spreads through wind, water, and contaminated tools. Remove infected plants immediately.
Disinfect your tools. Do not compost infected material.
Can I save a boxwood with root rot?
Maybe. If the damage is mild, improve drainage and let the soil dry out. If the plant is severely affected, removal is the best option.
Prevention is the most effective approach.
What is the best fungicide for boxwood blight?
Products containing chlorothalonil or tebuconazole are effective as preventatives. Apply them in spring and fall. They cannot cure infected plants.
Remove infected plants first, then protect the rest.
Why is my boxwood turning yellow after winter?
That's almost certainly winter bronzing. It's a natural response to cold weather. The plant will recover in spring.
No treatment is needed unless you see black stem lesions, which would indicate blight.
How often should I water boxwood?
Water deeply once a week during the growing season. Let the soil dry out between waterings. In winter, water only if the soil is dry.
Overwatering is more common than underwatering.