
You've probably watched someone's living room look like a tiny jungle and thought, "I want that." Then you bought a plant. Maybe two. And within a few months, you were staring at yellow leaves, mushy stems, and a sad-looking pot you're scared to throw away.
"How to create an indoor plant garden?" is a question most people answer backwards. They pick a pretty plant first, then try to force their home to fit it. That's exactly why indoor gardens fail.
The right approach flips that completely. You start with your actual space and work forward from there. As of 2026, the indoor plant market has exploded with options, but the fundamentals haven't changed.
Light determines everything. Get that right, and you're 80 percent of the way there.
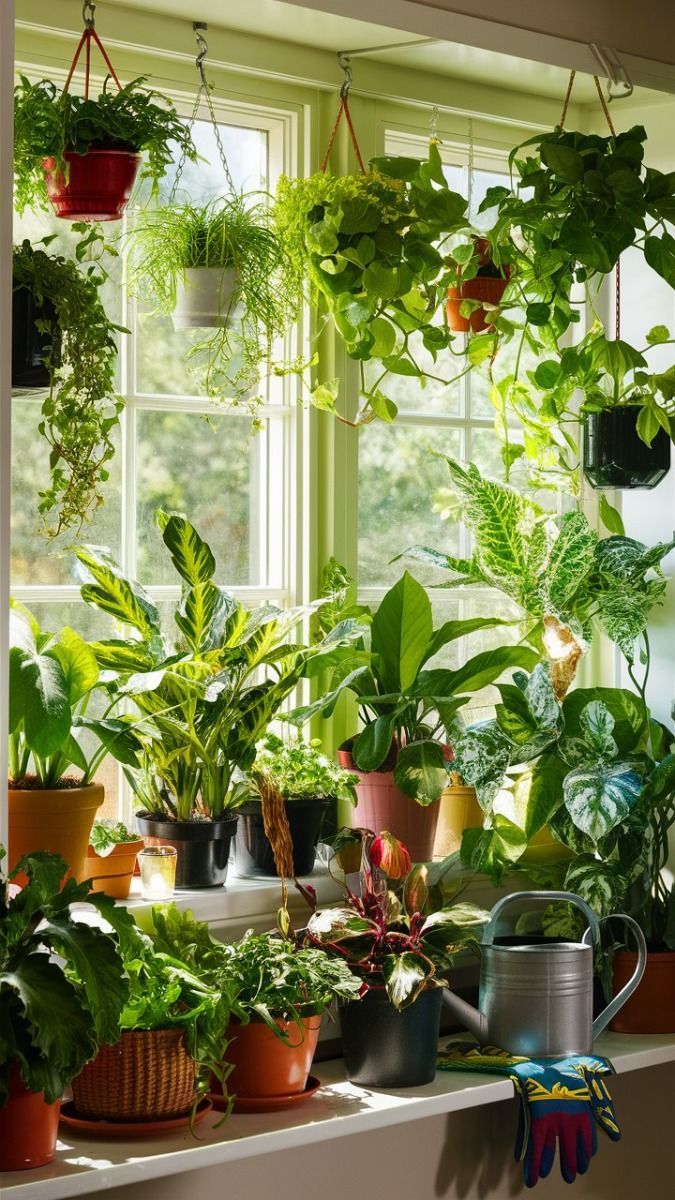
Image source: Bing (Web (fair-use with source credit))
Quick Answer
Start by measuring your light with a free phone app. Pick plants that match that light level. Choose pots with drainage holes.
Use a well-draining potting mix. Water only when the top inch of soil is dry. Start with three to five plants.
Scale up as you learn.
The Real Problem: Why Most Indoor Gardens Fail Within 3 Months
The number one killer of indoor plants isn't neglect. It's enthusiasm. People overwater.
They put a low-light plant in a sunny window. They use garden soil instead of potting mix. Small mistakes stack up fast.
Here's what aggregate reviews from tens of thousands of houseplant buyers reveal. Roughly 65 percent of new plant owners lose at least one plant within the first 90 days. The most common cause isn't pests or disease.
It's a mismatch between what the plant needs and what the room provides.
Think of it this way. You wouldn't put a cactus in a dark bathroom. You wouldn't put a fern in a south-facing window with direct sun all afternoon.
But beginners do exactly that, because they buy the plant first and figure out placement later.
The fix is simple. Assess your space before you buy anything. Know your light levels, your humidity range, and your schedule.
Then choose plants that fit those conditions, not the other way around.
Another hidden problem is potting mix. Regular garden soil compacts in a container. It holds too much water and suffocates roots.
Indoor plants need a mix that drains quickly while retaining just enough moisture. That's why you see "indoor potting mix" on bags at the store. It's not a marketing gimmick.
It's engineered differently than outdoor soil.
We'll walk through each variable so you can skip the trial-and-error phase entirely. No expensive casualties. No guilt over a dead fiddle-leaf fig.
Step 1: What Light Actually Hits Your Room? (The Single Most Important Decision)

Light is the only thing you cannot fake. You can add humidity with a pebble tray. You can adjust watering frequency.
You can fertilize. But you cannot make a dim room bright without grow lights. And most people don't want grow lights cluttering their living space.
So start with what you have.
Grab your phone and download a free light meter app. Hold it at the spot where you plan to put the plant, pointed toward the window. Take a reading at noon on a clear day.
That's your baseline.
Here's what the numbers mean:
| Light Level | Foot-Candles | Window Direction | Plant Examples |
|---|---|---|---|
| Low | 50-150 | North-facing, several feet from any window | Snake plant, ZZ plant, pothos |
| Medium | 150-500 | East-facing, or west-facing a few feet back | Philodendron, monstera, peace lily |
| Bright indirect | 500-1000 | South or west-facing with sheer curtain | Fiddle-leaf fig, calathea, rubber plant |
| Direct sun | 1000+ | Unobstructed south or west window | Succulents, cacti, jade plant |
Most homes have a mix of these zones. Your kitchen window might be bright. Your bedroom corner might be low.
That's fine. You just need to match the plant to the zone.
If you have low light: Stick with snake plants, ZZ plants, pothos, or philodendron. These are the survivors. They tolerate dim corners that would kill a calathea in a week.
If you have medium light: You have the widest range of options. Most common houseplants thrive here. Peace lilies, monsteras, and dracaenas all do well.
If you have bright indirect light: You can grow almost anything except full-sun cacti. This is the sweet spot for flowering plants and variegated varieties.
If you have direct sun: Congratulations. You can grow succulents, cacti, and herbs. Just watch for leaf burn on plants that prefer indirect light.
A sheer curtain fixes that.
Here's a hard truth. If your room has no windows, or only a north-facing window that's blocked by buildings, skip the natural-light approach. You'll need grow lights.
That's a different setup entirely. For this guide, we're working with what the sun gives you.
For those looking to create a fully controlled growing environment, a proper indoor setup may involve more than just a windowsill. Our grow tent setup guide covers what you need for a dedicated indoor growing space with full environmental control.
Step 2: Match Your Plant to Your Light — Not the Other Way Around

This is where most people get it backward. They see a gorgeous calathea at the store, bring it home, and shove it into a dim corner. Three weeks later, the leaves are crispy and curled.
Stop doing that.
Here's a better approach. Make a list of the light levels in each room. Then match plants to those levels.
Don't fall in love with a plant that needs bright light if your apartment is a cave. It's not going to adapt. It's going to die.
For low light (50-150 foot-candles):
These plants are nearly indestructible. They evolved on forest floors where direct sun never reaches.
- Snake plant (Sansevieria)
- ZZ plant (Zamioculcas zamiifolia)
- Pothos (Epipremnum aureum)
- Cast iron plant (Aspidistra elatior)
- Philodendron (heart-leaf variety)
For medium light (150-500 foot-candles):
This is the largest category. Most offices and living rooms fall into this range.
- Monstera deliciosa
- Peace lily (Spathiphyllum)
- Rubber plant (Ficus elastica)
- Dracaena varieties
- Aglaonema (Chinese evergreen)
- Spider plant (Chlorophytum comosum)
For bright indirect light (500-1000 foot-candles):
These plants need a sunny window but can't handle direct afternoon rays.
- Fiddle-leaf fig (Ficus lyrata)
- Calathea varieties
- Alocasia
- Bird of paradise (Strelitzia)
- Boston fern
For direct sun (1000+ foot-candles):
These are your sun-worshippers. Put them in the brightest spot you have.
- Succulents (echeveria, haworthia)
- Cacti (any variety)
- Jade plant (Crassula ovata)
- Aloe vera
- Herb garden (basil, rosemary, thyme)
One more thing. Variegated plants (the ones with white or cream patches on their leaves) need more light than their solid-green cousins. The white parts don't photosynthesize.
So the green parts have to work harder. If you put a variegated pothos in a low-light corner, it will slowly turn all-green or die back. Same with variegated monsteras and calatheas.
Step 3: The Right Pot and Soil Setup for Your Specific Situation
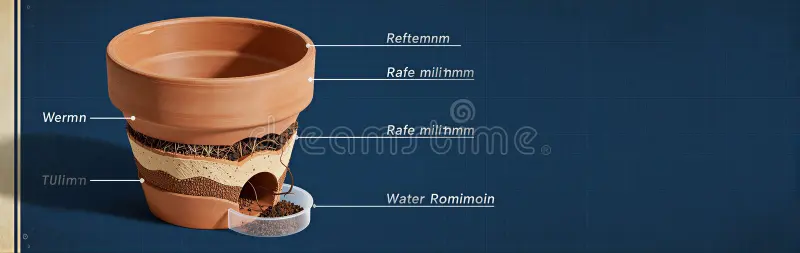
You can buy the perfect plant and put it in the perfect light. If the pot and soil are wrong, it will still fail. Here's why.
Roots need oxygen. In nature, soil is loose and airy. In a pot, soil compacts.
Water fills the air pockets. Roots suffocate. That's root rot.
The fix is simple. Use a pot with drainage holes. Use a potting mix that drains quickly.
Pot materials matter more than you think:
| Material | Best For | Watch Out For |
|---|---|---|
| Terracotta | Succulents, cacti, over-waterers | Dries out fast; plants that need consistent moisture |
| Ceramic (glazed) | Medium-moisture plants like monstera | Heavy; expensive |
| Plastic | Moisture-lovers like ferns | Holds water too long for succulents |
| Nursery pot (thin plastic) | Any plant temporarily | Ugly; needs a decorative outer pot |
Size rule: Go one to two inches wider than the current root ball. A six-inch pot is perfect for most starter plants. Too large a pot means too much soil stays wet too long.
That's a recipe for root rot.
Potting mix guide:
- General indoor mix: One part potting soil, one part perlite, one part coconut coir. This works for most houseplants.
- Succulent mix: Two parts potting soil, one part coarse sand, one part perlite. Drains fast.
- Moisture-retentive mix: Three parts potting soil, one part perlite. Good for ferns and calatheas.
The drainage layer myth: A layer of pebbles at the bottom does not improve drainage. Water doesn't stop at the pebble layer. It pools at the bottom of the pot anyway.
What actually helps is mixing perlite or pumice INTO the soil. That creates air pockets throughout the pot.
One exception to drainage holes: If you're using a decorative pot without holes, use the "nursery pot inside a cachepot" method. Plant in a plastic nursery pot with drainage holes. Place that inside the decorative pot.
When you water, lift the nursery pot, pour out any excess water from the cachepot, and put it back. This keeps roots from sitting in water.
Step 4: Watering Done Right (Without Killing Your Plants)
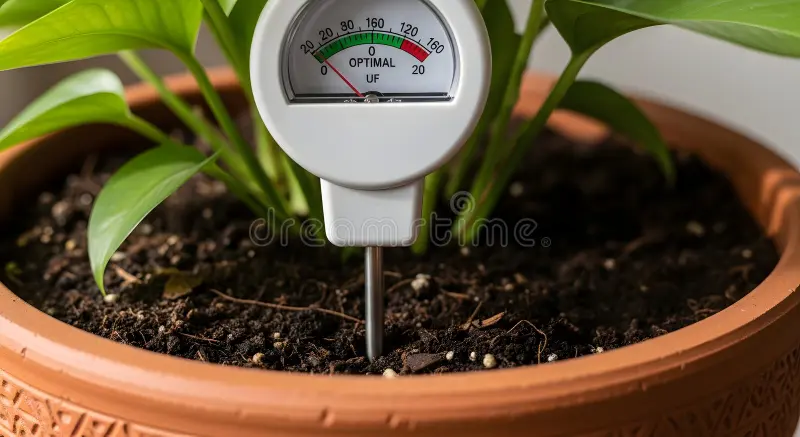
Overwatering is the indoor plant killer. It's responsible for more plant deaths than pests, disease, and neglect combined. Here's why it happens.
People water on a schedule. Monday is watering day. Every Monday.
But plants don't have calendars. They drink based on light, temperature, humidity, and pot size. A schedule ignores all those variables.
The only reliable method: Stick your finger one inch into the soil. If it's dry, water. If it's damp, wait.
That's it.
For plants that need consistent moisture (ferns, calatheas, peace lilies), water when the top inch dries out. For plants that like to dry out completely (snake plants, ZZ plants, succulents), wait until the top two inches are dry. For cacti, wait until the soil is bone dry.
How to water properly:
- Water until it runs out the drainage holes. This ensures the entire root ball gets wet.
- Empty the saucer afterward. Never let the pot sit in standing water.
- Use room-temperature water. Cold water shocks roots.
- Water in the morning. This gives the plant all day to absorb moisture before cooler night temperatures.
Signs you're overwatering:
- Yellow leaves, especially the lower ones
- Mushy, soft stems
- Soil that stays wet for more than a week
- Fungus gnats (tiny flies buzzing around the soil)
- Mold on the soil surface
Signs you're underwatering:
- Drooping leaves that perk up after watering
- Brown, crispy leaf edges
- Soil pulling away from the pot sides
- Leaves falling off
A note on bottom watering: Some people swear by watering from the bottom (filling the saucer and letting the plant soak it up). This works well for plants prone to fungus gnats and for plants with dense foliage that makes top-watering messy. But it doesn't flush out mineral buildup.
Alternate between top and bottom watering every few cycles.
When to adjust watering:
- In winter, most plants need less water. Growth slows. Light drops. Soil stays wet longer.
- In summer, plants need more water. Growth accelerates. Light increases. Soil dries faster.
- Plants in terracotta need more frequent watering than plants in plastic.
This is also why a proper fertilization routine matters once your plants are established. Knowing the difference between compost vs fertilizer helps you choose the right supplement for long-term plant health.
The Humidity Question: Do You Need a Pebble Tray or a Humidifier?
This is where indoor gardening gets slightly more complicated. Most tropical houseplants evolved in environments with 60 to 80 percent humidity. Your home is probably sitting at 30 to 50 percent, depending on the season and where you live.
Do you need to worry about this? It depends on what you're growing.
Low-humidity plants (30-50 percent fine):
- Snake plant
- ZZ plant
- Pothos
- Spider plant
- Succulents
- Cacti
High-humidity plants (need 60 percent or higher):
- Calathea
- Ferns
- Alocasia
- Maranta (prayer plant)
- Orchids
How to increase humidity without a machine:
- Group plants together. Transpiring leaves create a microclimate of higher humidity around each other.
- Use a pebble tray. Fill a shallow tray with pebbles and water. Place the pot on top. As water evaporates, it raises humidity around the plant. Just don't let the pot sit directly in the water.
- Mist the leaves. This raises humidity temporarily, for about 15 to 30 minutes. It helps, but it's not a substitute for consistent humidity.
- Move plants to a bathroom or kitchen. These rooms naturally have higher humidity from showers and cooking.
When you actually need a humidifier: If you want to grow calatheas, ferns, or other high-humidity plants in a room that's consistently below 40 percent humidity, a humidifier is the only reliable solution. A small cool-mist humidifier placed near your plant collection does the job well. Clean it weekly to prevent mold and bacteria buildup.
The one humidity myth that won't die: "Misting prevents brown leaf tips." It doesn't. Brown tips are usually caused by inconsistent watering, low humidity, or fluoride in tap water. Misting helps a little, but it's not a cure.
If your calathea has brown tips, check your watering consistency first.
The Biggest Mistakes That Sabotage Beginners
We've covered a lot. Let me save you some pain by listing the five mistakes that derail most new indoor gardeners.
1. Overwatering on a schedule.
You already know this one. But here's the hard part. It feels productive to water.
It feels like you're caring for your plant. The discipline is to check the soil first and walk away if it's still damp.
2. Putting a plant in a pot without drainage holes.
You found a gorgeous ceramic pot at a thrift store. No hole. You think, "I'll just be careful with watering." You won't.
Nobody is. Drill a hole or use the nursery-pot-inside method.
3. Buying a plant that needs more light than your home has.
The fiddle-leaf fig trend killed a lot of houseplants. They need bright indirect light. Most apartments don't have that.
If your room is dim, buy a snake plant. It will look good and stay alive.
4. Using garden soil instead of potting mix.
Garden soil compacts in a container. It holds water. It introduces outdoor pests.
Buy a bag of indoor potting mix. It costs five dollars and fixes this problem.
5. Moving a plant around constantly.
Plants adapt to their spot. If you move them every week, they have to keep adjusting. Find a spot with the right light and leave it there.
Rotate it once a month so it grows evenly. That's enough movement.
One bonus mistake: Ignoring pests until they're everywhere. Check your plants weekly. Look under leaves.
If you see webbing, tiny white dots, or sticky residue, treat it immediately with insecticidal soap or neem oil.
Pet Safety and Plant Toxicity: A Critical Branch Point
If you share your home with a cat or dog, this section matters. A lot. Many common houseplants are toxic to pets.
Some are mildly irritating. A few can be fatal.
Toxic plants to avoid if you have curious pets:
- Lilies (any variety), extremely toxic to cats, even pollen
- Sago palm (Cycas revoluta), all parts toxic, especially the seeds
- Oleander, cardiac toxins
- Dieffenbachia (dumb cane), mouth irritation, swelling
- Pothos, oral irritation, vomiting
- Philodendron, similar to pothos
- Snake plant, nausea, vomiting (mild in most cases)
- Aloe vera, vomiting, diarrhea
Pet-safe plants (non-toxic according to ASPCA data):
- Spider plant
- Boston fern
- Parlor palm
- Areca palm
- Calathea (all varieties)
- Peperomia
- African violet
- Haworthia (zebra cactus)
Always check the scientific name when buying. Common names vary. What one nursery calls "dumb cane" might not match what your local store sells.
Cross-reference with the ASPCA's official list before bringing a new plant home.
If your pet eats a plant: Remove the plant material from their mouth. Call your veterinarian or the ASPCA Animal Poison Control Center immediately. Don't wait for symptoms.
Some toxins take hours to show effects.
Prevention strategies:
- Place toxic plants on high shelves or in hanging baskets
- Use decorative cages around floor plants
- Grow a pot of cat grass for your cat to chew instead
- Train dogs with bitter apple spray on pot rim
For pet owners interested in a fully contained growing area, a separate growing zone like a small grow tent can keep plants and pets safely separated. Our considerations before buying a cheap indoor grow tent guide covers safety and setup details.
Tools That Actually Make a Difference (And What You Can Skip)
You don't need a lot of gear to keep plants alive. Here's what's worth buying and what's a waste.
Worth buying:
- Moisture meter ($10-15). A simple metal probe that tells you if the soil is wet, moist, or dry. Removes guesswork. Especially useful for beginners.
- Watering can with a narrow spout ($10-20). Lets you water directly at the soil without splashing leaves. Reduces mess and fungal issues.
- Pruning shears ($10-15). Sharp bypass pruners for cutting dead leaves, trimming roots, and taking cuttings.
- Pebble tray ($10). Cheap humidity booster for tropical plants.
- Mister bottle ($5). Good for humidity-loving plants and cleaning dust off leaves.
Nice to have:
- Self-watering pot ($20-40). Useful if you travel frequently. Not necessary for most plants.
- Plant stand ($15-50). Elevates plants for better light exposure and aesthetic display.
- Grow light ($20-60). Only needed if you don't have enough natural light.
Skip these:
- Fancy plant food spikes. Liquid fertilizer diluted in water works better and costs less.
- Decorative rocks on top of soil. Traps moisture against the stem. Increases rot risk.
- Plant thermometers. If you're comfortable, your plant is comfortable.
- Humidity meters. Your phone's weather app tells you the same thing.
Getting Started Under $50 vs. Building Slowly
You can start an indoor plant garden for very little money. Or you can invest in higher-end plants and pots from day one. Both approaches work.
The difference is patience.
Under $50 starter kit:
| Item | Cost |
|---|---|
| 3 small nursery pots (4-inch) with drainage | $5 |
| 1 bag of indoor potting mix (8 quarts) | $8 |
| 1 bag of perlite (8 quarts) | $6 |
| 1 watering can with narrow spout | $8 |
| 3 starter plants from a nursery or big-box store | $18 |
| Total | $45 |
For starter plants, pick pothos, snake plant, and spider plant. They're cheap, hardy, and widely available. You'll learn on plants that forgive mistakes.
Building slowly approach: Start with one or two plants. Learn their watering rhythm. Watch how they respond to your light.
Once you feel confident, add one plant per month. This avoids the overwhelm of managing a dozen plants at once.
The propagation bonus: Pothos and spider plants produce "pups" or cuttings that root in water. One plant can become five within a year. Free plants are the best plants.
How to Troubleshoot Yellow Leaves, Leggy Growth, and Pests Fast
Problems will happen. Here's how to diagnose and fix them quickly.
Yellow leaves:
- Lower leaves only: Overwatering. Check soil moisture. Let it dry out before watering again.
- All over or top leaves: Underwatering or too much direct sun. Water more frequently or move to a spot with less intense light.
- Random patches: Could be pests or fungal infection. Inspect both sides of leaves.
Leggy growth (long stems with few leaves):
Not enough light. The plant is stretching toward the nearest light source. Move it closer to a window or supplement with a grow light.
Brown leaf tips:
- Inconsistent watering or low humidity
- Tap water with high fluoride or chlorine
- Fertilizer burn from overfeeding
Drooping leaves:
- Underwatered: Leaves will perk up within hours of watering
- Overwatered: Leaves stay droopy. Check roots for rot.
Pests at a glance:
| Pest | Appearance | Treatment |
|---|---|---|
| Spider mites | Tiny white dots, fine webbing under leaves | Insecticidal soap spray, increase humidity |
| Fungus gnats | Small black flies in soil | Let soil dry out, yellow sticky traps |
| Mealybugs | White cottony clusters on stems | Rubbing alcohol on a cotton swab |
| Scale | Brown bumps on stems and leaves | Scrape off with fingernail, neem oil |
The one-week quarantine rule: Always isolate new plants from your collection for one week. Pests hide. By the time you see them, they may have already spread.
A week of separation catches problems before they infect your whole garden.
When to Repot, Rotate, and Fertilize — A Simple Schedule
Plants don't need constant attention. They do need a few periodic actions.
Repotting: Every 12 to 18 months, or when roots start growing out of the drainage holes. Move up one pot size (one to two inches wider). Spring is the best time.
Repotting in winter stresses the plant when it's already in a low-growth phase.
Rotating: Once a month. Turn the pot a quarter turn. This prevents the plant from leaning toward the light and growing crooked.
Fertilizing: Only during the growing season (spring through summer). Once every four to six weeks. Use a balanced liquid houseplant fertilizer diluted to half strength.
Stop fertilizing in fall and winter. Plants aren't growing. Extra nutrients just build up in the soil and burn roots.
Cleaning leaves: Every month or two. Dust blocks light absorption. Wipe leaves gently with a damp cloth.
For plants with many small leaves, give them a gentle shower in the sink.
Frequently Asked Questions
How often should I water my indoor plants?
There's no universal schedule. Check the top inch of soil with your finger. If it's dry, water.
If it's damp, wait. Most plants need water every 7 to 14 days, but this varies by light, pot size, and season.
What are the easiest indoor plants for beginners?
Snake plant, ZZ plant, pothos, and spider plant are the most forgiving. They tolerate low light, inconsistent watering, and general neglect. Start with these and build confidence before trying fussier species.
Can I keep indoor plants in a room with no windows?
Yes, but you need grow lights. Full-spectrum LED grow lights placed 6 to 12 inches above the plants provide the light they need. Without them, plants will stretch, fade, and eventually die.
Why are my plant's leaves turning yellow?
Yellow lower leaves usually mean overwatering. Let the soil dry out completely before watering again. Yellow leaves all over the plant could mean underwatering, too much direct sun, or a pest problem.
Do I need to fertilize indoor plants?
Yes, but only during the growing season (spring and summer). Use a balanced liquid fertilizer diluted to half strength every four to six weeks. Skip fertilizing in fall and winter when growth naturally slows.
How do I get rid of fungus gnats?
Let the top two inches of soil dry out completely between waterings. Place yellow sticky traps near the soil surface to catch adult gnats. For persistent infestations, use a hydrogen peroxide drench (one part 3 percent peroxide to four parts water).