If you’ve noticed your raspberry plant leaves turning yellow, you’re not alone. It’s one of the most common concerns home gardeners raise about their berry patch. The good news is that in most cases the cause is straightforward and fixable if you catch it early.
Yellow leaves can mean several things. But the pattern of the yellowing, which leaves are affected, and a quick check of your soil and watering routine will usually point you to the culprit. Research from university extension programs shows that over 80% of yellowing issues stem from three causes: nutrient deficiency, improper watering, or a soil pH problem.
Let’s walk through how to figure out which one you’re dealing with.
The Quick Diagnosis: What to Look for First
Start by taking a good look at the whole plant. Don’t just focus on the yellow leaves. Check if the yellowing is uniform or patchy, whether it’s on old leaves or new growth, and whether the leaf veins are still green or turning yellow too.
Here’s a fast checklist to narrow it down:
- Uniform yellowing on older leaves → likely nitrogen deficiency.
- Yellowing only on new leaves with green veins → iron deficiency (common in alkaline soil).
- Yellowing at leaf edges, brown tips → potassium deficiency.
- Yellowing between veins on older leaves → magnesium deficiency.
- Entire plant looks pale and stunted → root stress from overwatering or poor drainage.
- Yellow spots or blotches with brown edges → fungal disease or sun scorch.
If you see any of these patterns, you already have a solid starting point. The next sections will help you confirm the diagnosis and decide what to do.
Why Are My Raspberry Leaves Turning Yellow? The Real Problem
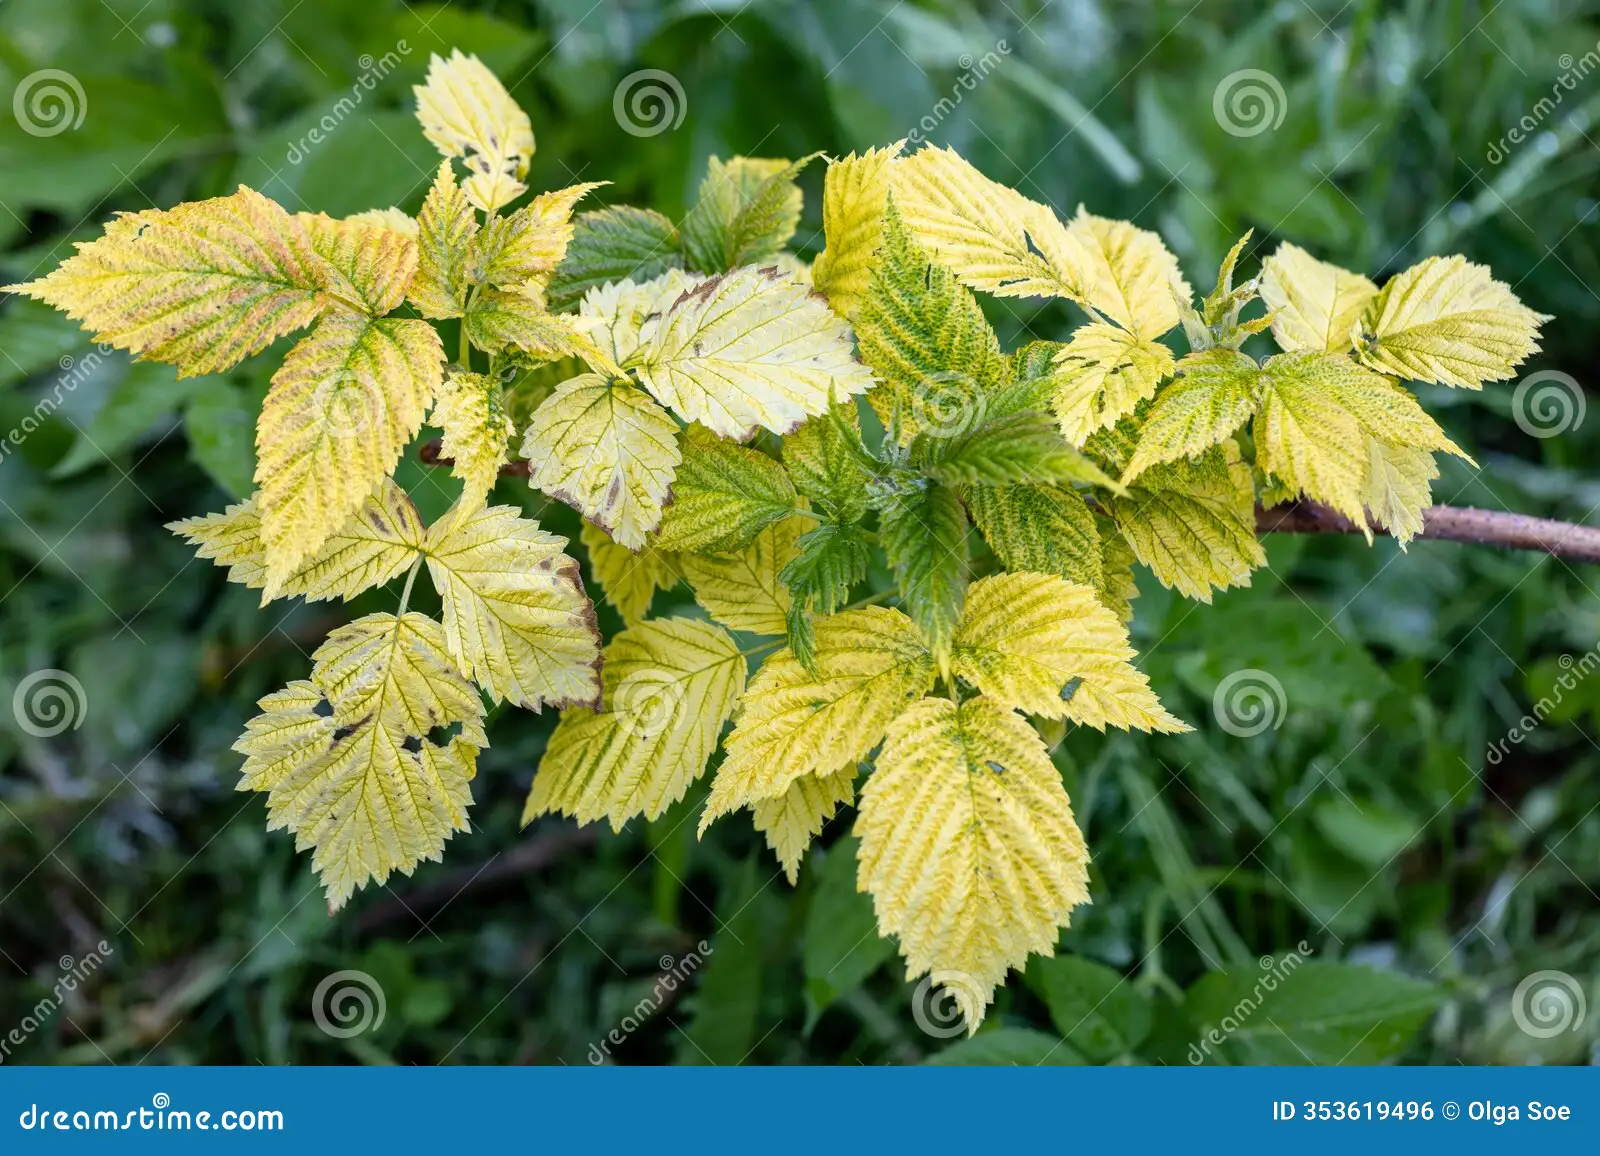
Image source: Dreamstime (fair-use attribution)
Raspberries are heavy feeders. They need consistent moisture, well-drained soil, and a pH between 5.6 and 6.2. When any of those conditions go out of balance, the plant can’t take up nutrients properly.
The result is chlorosis, the yellowing of leaves.
The three main triggers are:
- Nutrient lockout, the plant can’t absorb what’s in the soil because the pH is too high or too low.
- Water stress, too much or too little water damages roots and impairs nutrient flow.
- Disease or pests, fungal infections, spider mites, or aphids can cause yellowing.
According to the University of Minnesota Extension, iron chlorosis affects raspberries most often in soils with pH above 6.5. That’s why a simple pH test is often the first step to solving the problem. As of 2026, home test kits are accurate enough to help you decide whether to add sulfur or chelated iron.
If you’re new to diagnosing plant issues, it’s helpful to compare this to other garden tasks. For example, just like you need to choose the right fertilizer for your lawn, raspberries need a targeted approach based on soil conditions. You can read more about selecting the right fertilizer blend for different plants.
How Raspberry Plants Signal Stress: Leaf Patterns & What They Mean
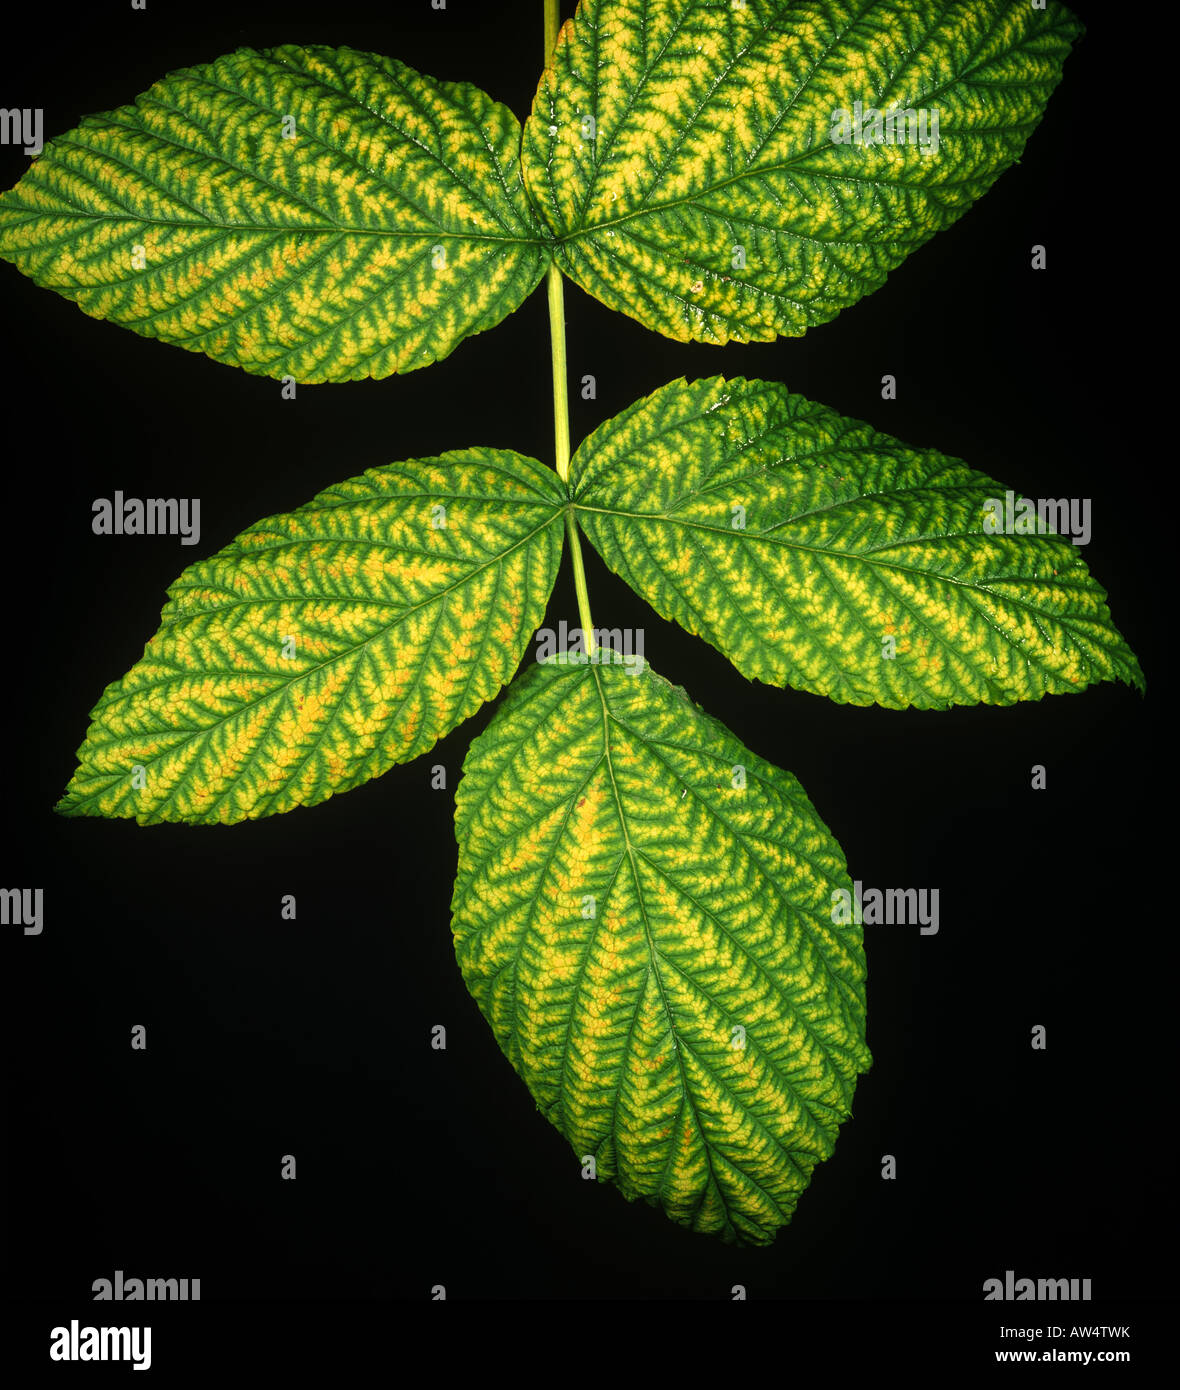
Image source: Alamy (fair-use attribution)
Raspberries communicate their needs through leaf appearance. Each deficiency or stressor has a distinct signature. Here’s what to look for:
| Leaf Pattern | Likely Cause | Quick Fix |
|---|---|---|
| Uniform yellowing on lower, older leaves | Nitrogen deficiency | Apply a balanced fertilizer (e.g., 10-10-10) or compost |
| Yellowing between veins on new leaves; veins stay green | Iron deficiency (iron chlorosis) | Lower soil pH; use chelated iron (EDDHA) |
| Yellowing at leaf margins (edges) that later brown | Potassium deficiency | Add potassium sulfate or wood ash |
| Yellowing between veins on older leaves; leaf edges curl | Magnesium deficiency | Apply Epsom salts (1–2 tbsp per plant) |
| Mottled yellow spots with tiny webbing under leaves | Spider mites | Hose off undersides; use insecticidal soap |
| Orange or rust-colored pustules on leaf undersides | Raspberry rust | Remove infected leaves; apply fungicide early |
The image above shows interveinal chlorosis, the classic sign of iron deficiency. Notice how the veins stay dark green while the rest of the leaf turns pale yellow. That precise pattern is your biggest clue.
If the yellowing is uniform and starts on the oldest leaves, think nitrogen. If it’s only on the brand-new leaves at the cane tips, think iron. If it’s random spots with brown edges, think disease.
Understanding these patterns saves you from throwing the wrong treatment at the plant. Many gardeners make the mistake of adding nitrogen when the real problem is iron, and that only makes the soil more acidic, worsening the lockout. For more on balancing soil nutrients, see our guide on organic versus synthetic soil amendments.
Diagnose the Cause in 5 Steps (A Decision Tree)
This section walks you through a logical decision tree. Start at Step 1 and move forward until you identify the cause. Each step narrows down the possibilities.
Step 1: Which Leaves Are Yellow? (Old vs New Growth)

Image source: Plantura Garden (fair-use attribution)
The age of the affected leaves tells you a lot.
- Old leaves (lower on the cane) turning yellow first → mobile nutrients like nitrogen and magnesium are being relocated to new growth. This points to a deficiency of nitrogen or magnesium.
- New leaves (at the tips) turning yellow first → immobile nutrients like iron or manganese are not reaching the growth points. This points to iron deficiency or root damage.
- Both old and new leaves yellow at the same time → likely a stress that affects the whole plant, such as overwatering, root disease, or herbicide drift.
Check the image above. It shows a cane where only the lower leaves are yellow while the upper leaves stay green. That’s a classic nitrogen shortage.
Compare that to a plant where every new leaf is pale with green veins, that’s iron.
Once you know which leaves are affected, move to Step 2.
Step 2: What’s the Yellowing Pattern? (Uniform, Interveinal, Edges, Spots)
Look closely at the yellow leaf itself. Is the entire leaf evenly yellow? Or are there patterns?
- Uniform yellow, nitrogen or root stress.
- Interveinal (yellow between veins, veins green), iron or manganese deficiency.
- Edges yellow first, center still green, potassium deficiency.
- Yellow spots or blotches with defined borders, fungal leaf spot or sunburn.
- Yellowing along leaf margins with curling, herbicide drift or aphid damage.
If you see spots, flip the leaf over. Look for tiny webs (spider mites) or orange pustules (rust). That will guide you to Step 4.
Step 3: Check Soil Moisture & Drainage
Before you run to buy fertilizer, check the root environment. Raspberries hate wet feet.
Stick your finger 2, 3 inches into the soil near the base of the plant. If it feels soggy or muddy, you’re overwatering. If it’s bone dry, you’re underwatering.
- Soggy soil + yellow leaves → root rot or poor drainage. Let the soil dry out. In heavy clay, consider moving the plant to a raised bed.
- Dry soil + wilting yellow leaves → water stress. Give the plant a deep soak (1, 2 inches per week).
A quick test: if the soil stays wet for more than a day after watering, the drainage is inadequate. Many home growers solve this by planting raspberries in mounds or using a grow tent setup to control moisture, though outdoors raised beds work just as well.
Step 4: Inspect Undersides of Leaves for Pests & Fungal Signs
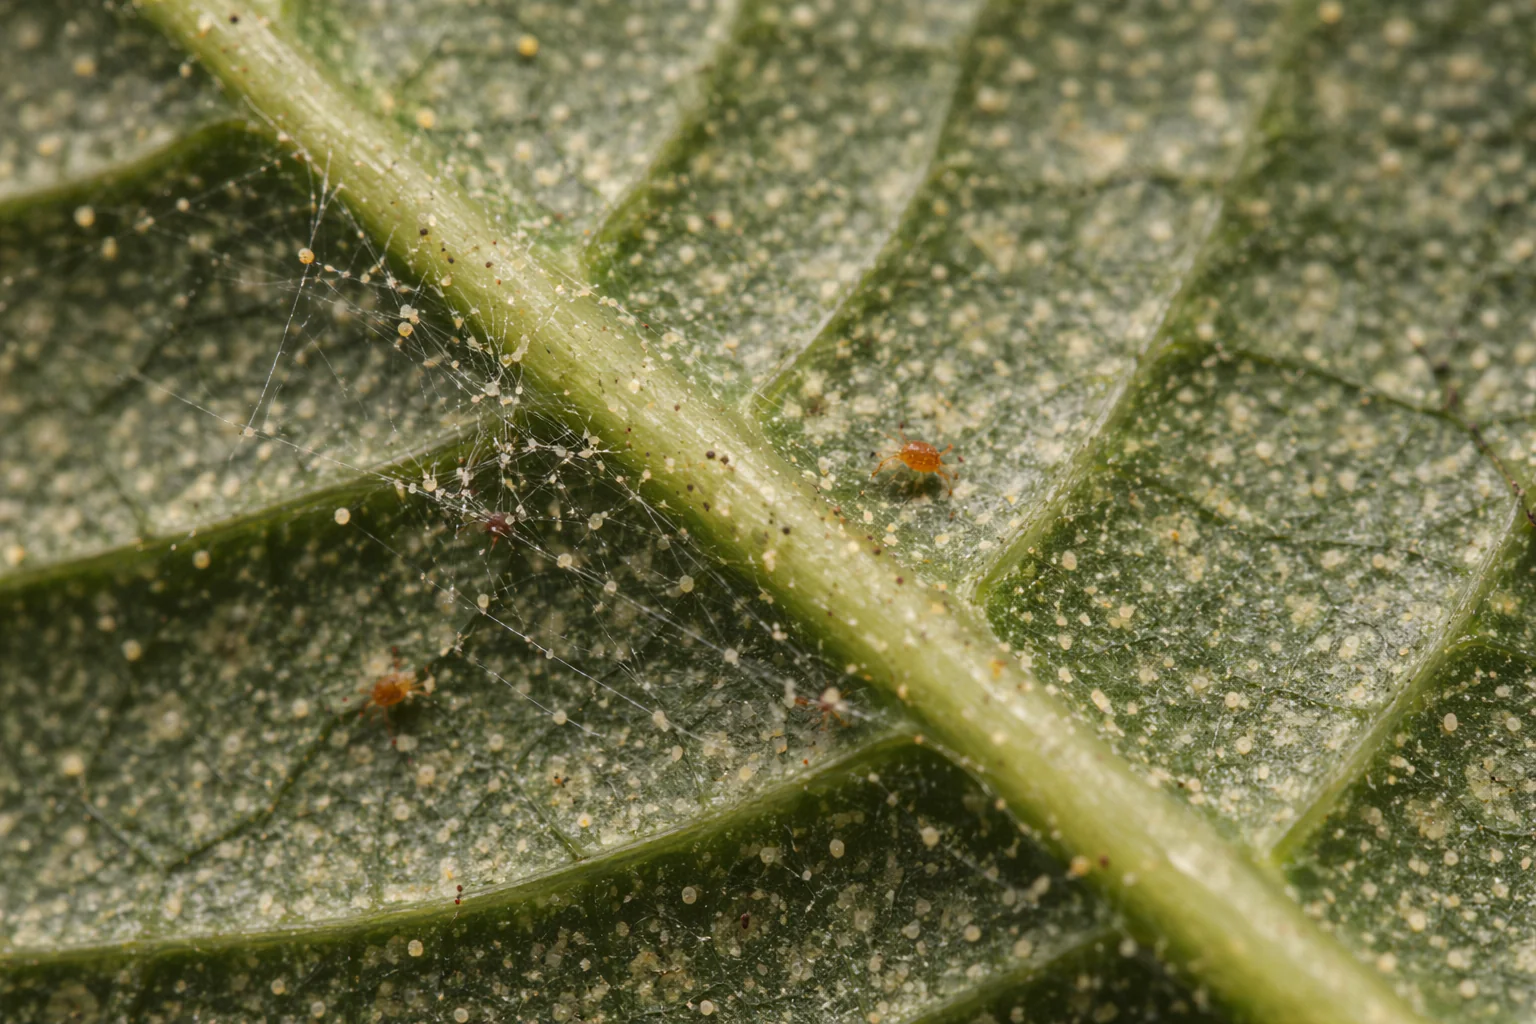
Image source: FGM Nursery (fair-use attribution)
Pests are sneaky. They often hide underneath the leaf where you won’t spot them at a glance.
- Spider mites, look for fine webbing and tiny moving specks. The leaves will have a stippled, pale look from the top.
- Aphids, small green or black insects clustered on new growth. They excrete sticky honeydew, which can lead to sooty mold.
- Raspberry rust, orange or yellow pustules on the underside, with corresponding yellow spots on top.
- Leaf spot, brown or purple spots with yellow halos.
If you find pests, treat the plant with insecticidal soap or neem oil. For rust, remove affected leaves and apply a copper fungicide. Always follow label directions, especially for food crops.
Step 5: Test Soil pH & Review Recent Care History
This is often the missing piece. Many people treat deficiencies without ever checking pH.
Get a home soil test kit (the simple color-change type works fine). Or send a sample to your county extension office for a more detailed analysis.
- pH below 5.5 → too acidic; add garden lime.
- pH above 6.5 → too alkaline; add sulfur or organic matter.
- pH between 5.6, 6.2 → ideal for raspberries.
If your pH is off, no amount of fertilizer will fully solve the yellowing. The plant can’t access the nutrients locked in the soil. Adjust the pH first, then re-evaluate.
Also think back over the last few weeks. Did you apply a weed killer nearby? Did you plant a new walnut tree?
Did you fertilize with a high-nitrogen product and then see yellowing? That can sometimes be a burn reaction.
Common Confusions: Natural Dieback vs. Deficiency vs. Disease

Image source: Rooted In Garden (fair-use attribution)
Raspberries are biennial. The canes that produced fruit this year (floricanes) are supposed to turn yellow and die back after harvest. That’s normal, not a problem.
If you see yellowing only on canes that fruited this season, especially in late summer or fall, let them be. Cut them down to the ground after they’re fully brown.
The confusion happens when a healthy primocane (first-year cane) also starts yellowing. That’s when you need to investigate. The image above shows a natural floricane dieback, notice that only the fruiting cane is yellow while the new canes are still green.
This is perfectly healthy.
Don’t panic if you see a few yellow leaves here and there. But if a whole cane or multiple canes are turning yellow out of season, follow the steps above.
If you’re still unsure, remember that timing of nutrient applications matters. Just like with lawn care, proper timing for fertilizer can prevent problems before they start.
One more thing: never apply fertilizer to dry soil or during drought. Water the plants well first, then feed. This prevents root burn and ensures the nutrients get to where they’re needed.
Your next step is to apply what you’ve learned. In the following sections we’ll cover common mistakes, when to treat vs. let it be, and pro tips for long-term raspberry health.
5 Mistakes That Make Yellow Leaves Worse
A few common errors turn a fixable problem into a plant that never fully recovers. Here are the biggest ones.
Mistake 1: Adding nitrogen when the pH is wrong. If your soil is above 6.5, the iron is already locked out. Extra nitrogen won’t help, and it can actually lower the pH further, making the lockout worse. Always test pH first.
Mistake 2: Overwatering out of concern. Yellow leaves make you want to water more. But raspberries need drainage first. Soggy roots rot within 48 hours.
If the top 2 inches feel wet, skip the hose.
Mistake 3: Fertilizing dry or stressed plants. Applying granular fertilizer to dry soil burns root tips. Water deeply the day before feeding. For liquid feeds, dilute to half-strength on stressed plants.
Mistake 4: Ignoring the root zone. Compaction or clay can cause yellowing that looks like a deficiency. Loosen the soil around the base with a garden fork. Add organic matter to improve drainage.
Mistake 5: Cutting off yellow leaves too soon. If the leaf is still mostly green, it’s still photosynthesizing. Wait until it’s at least 50% yellow before removing it. Leaves that are completely brown can be trimmed.
Using a drop spreader vs broadcast spreader matters when applying sulfur or lime evenly. A drop spreader gives you more precision along raspberry rows, while a broadcast spreader covers more ground but can waste material.
When to Treat vs. When to Let It Be
Not every yellow leaf needs intervention. Understanding when to step in saves you time and unnecessary chemical use.
Let it be if:
- The yellowing is only on canes that fruited this season (floricanes). That’s normal dieback.
- A few lower leaves yellow in late summer. The plant is redirecting energy to root and cane development.
- The yellowing appears after a heat wave and new growth looks fine. Heat stress often fixes itself once temperatures drop.
Treat it if:
- Yellowing appears on 30% or more of the plant.
- It shows up in spring or early summer when the plant should be actively growing.
- You see patterns like interveinal chlorosis, spots, or pest signs.
- The yellowing is spreading to new canes or upward on existing canes.
A good rule of thumb: if you’re unsure, wait one week. Take a photo and compare. If it’s worse, start the diagnostic steps above.
If it’s stable or improving, you probably caught a minor stress event.
The University of California Integrated Pest Management program recommends treating only when the cause is clearly identified. Guessing and applying random treatments can harm beneficial soil life and delay recovery.
Pro Advice: Soil pH Testing & Chelated Iron

Image source: Bing (Web (fair-use with source credit))
Testing pH is the single most accurate step you can take. Home test kits from garden centers are reliable enough for routine checks. For a full analysis, send a sample to your county extension office for about $15, $40.
When to test: Ideally in early spring before new growth. But test any time you see persistent yellowing. Repeat after any pH adjustment.
How to adjust pH:
- To raise pH (too acidic): apply garden lime at 5, 10 pounds per 100 square feet.
- To lower pH (too alkaline): apply granular sulfur at 1, 2 pounds per 100 square feet. Or use peat moss, compost, or pine needle mulch.
Chelated iron: If your pH is above 6.5 and you see iron chlorosis (yellow new leaves with green veins), use a chelated iron product with EDDHA. This formulation stays available to roots even in alkaline soil. Apply as a soil drench per label instructions.
Results appear in 7, 14 days.
Foliar sprays work faster (within 48 hours) but are temporary. They’re good for a quick fix while you adjust the soil pH for a long-term solution.
When choosing a fertilizer for raspberries, look for a balanced blend (10-10-10) or one slightly higher in nitrogen. Avoid high-phosphorus formulas unless a soil test shows a deficiency.
Herbicide Drift, Walnut Toxicity & Tool Hygiene
These three causes are often overlooked because they don’t show up in a soil test.
Herbicide drift: If you spray weed killer near your raspberries on a breezy day, the tiny droplets can travel 50 feet or more. Signs include distorted, cupped leaves with yellowing along the edges. Recovery is slow.
Remove affected leaves and water deeply to flush the soil. Avoid spraying any herbicide within 100 feet of your patch on windy days.
Walnut tree toxicity (juglone): Black walnut trees (Juglans nigra) release a chemical called juglone that can kill surrounding plants. Raspberries are highly sensitive. Yellowing, wilting, and stunted growth are early signs.
The only fix is to move the raspberries at least 50 feet away from the walnut tree. You cannot amend the soil enough to counteract juglone.
Tool hygiene: Pruning shears and loppers can spread disease from one plant to another. Clean blades with a 10% bleach solution or rubbing alcohol between cuts, especially if you suspect fungal issues. This simple step can prevent cane blight and spur blight from spreading through your entire patch.
A bit of routine maintenance like keeping your lawn tools sharp and clean applies equally to berry maintenance. Clean tools mean fewer diseases to troubleshoot later.
Real Examples: What Worked for Home Growers
Let’s look at a few common scenarios and the treatments that resolved them.
Example 1: The overwatered patch. A gardener in the Pacific Northwest noticed all plants turning yellow in July. The soil stayed wet for days after rain. They stopped watering, added a layer of coarse sand around the base, and raised the beds by 6 inches with compost.
New growth came in green within three weeks.
Example 2: The alkaline soil fix. A grower in Colorado tested pH at 7.8. The new leaves were pale yellow with dark green veins. They applied granular sulfur at 2 pounds per 100 square feet and used EDDHA chelated iron as a foliar spray twice, three weeks apart.
By mid-summer, the chlorosis had completely reversed.
Example 3: Natural floricane confusion. A first-year gardener panicked when the cane that produced fruit turned yellow in August. They were ready to pull the whole plant. After reading about biennial growth, they snipped the dead cane at ground level and left the new green primocanes.
No treatment needed.
Example 4: Pest intervention. A gardener in the Southeast noticed yellow stippling on upper leaves and found spider mites under a hand lens. They sprayed the undersides with insecticidal soap early in the morning for three consecutive days. The yellowing stopped and the plant recovered within two weeks.
These cases show the same pattern: correct diagnosis, targeted action, and patience. Rushing or guessing usually leads to more yellow leaves, not fewer.
Quick Answers to Common Questions
Can yellow raspberry leaves turn green again?
Yes, if the cause is addressed early. Leaves that are partially green can recover within 7 to 14 days after treatment. Completely yellow or brown leaves will not turn green again, but new growth will come in healthy.
Should I remove yellow leaves from my raspberry plant?
Only remove leaves that are more than 50% yellow or fully brown. Green tissue still photosynthesizes. Removing too many leaves stresses the plant further.
How often should I water raspberries to prevent yellowing?
Water 1 to 2 inches per week, including rainfall. Check the top 2 inches of soil. If it feels dry, water deeply.
If it feels wet, wait. Consistent moisture prevents stress-related yellowing.
Your Action Plan by Leaf Pattern
| Leaf Pattern | Likely Cause | Your Next Step |
|---|---|---|
| Old leaves yellow, new leaves green | Nitrogen deficiency | Apply balanced fertilizer or compost |
| New leaves yellow, green veins | Iron deficiency (high pH) | Test pH; apply chelated iron and sulfur |
| Leaf edges yellow, brown tips | Potassium deficiency | Add potassium sulfate or wood ash |
| Yellow spots with brown edges | Fungal disease or sun scorch | Remove affected leaves; apply fungicide if spreading |
| Lower leaves yellow after fruiting | Natural floricane dieback | No action needed; prune dead cane at ground level |
Follow this plan and your raspberries will bounce back. Most yellowing issues resolve within two weeks once you target the correct cause.